Kali linux and Parallels-Tools
Для решение, некоторых задач, на своем старом (2011г) маке поставил kali, но по каким-то неведомым причинам на kali не ставилась «приблуда» от Parallels desktop. Она нужна для синхронизации буфера обмена ну и ряд приятных удобных плюшек (пост не об этом, перечислять не буду)
Для того что бы на кали заработала тулза, нужно сделать следующее:
Обновляем систему:
После рестарта ставим
sudo apt-get install linux-headers-$(uname -r) build-essential dkms
Parallels-Tools
Монтируем Parallels-Tools (если не знаете как, значит вы не в теме, что в этой статье происходит))
sudo mkdir ~/Parallels-Tools
Копируем все с образа в home
*примечание: тут «cdrom0» может быть cdrom1, cdrom2, cdrom3 и тд, что бы выяснить где у вас замонтировался образ выполните команду df -h
sudo cp -r /media/cdrom0/* ~/Parallels-Tools
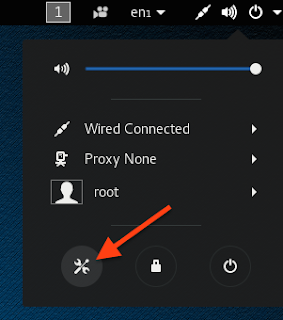
*Примечание: Все ниже выполняю не через терминал, а использую стандартные графический интерфейс kali.
- Заходим в папку /home/Parallels-Tools/kmods видим файл prl_mod.tar.gz разархивируем его.
- Открываем файл prl_fs/SharedFolders/Guest/Linux/prl_fs/inode.c и добавляем в самом верху #define segment_eq(a, b) ((a).seg == (b).seg)
- Открываем файл prl_fs_freeze/Snapshot/Guest/Linux/prl_freeze/prl_fs_freeze.c
добавляем в самом верху #include - Открываем файлы prl_fs/SharedFolders/Guest/Linux/prl_fs/Makefile и prl_vid/Video/Guest/Linux/kmod/Makefile добавляем в самом верху
После рестарта тулза подцепится и все функции у вас будут работать.
Kali linux on parallels desktop
This guide is about virtualizing Kali Linux inside of Parallels, allowing you to have a Kali VM. This is a great way to use Kali, as it is completely separate from the host, allows you to interact with other VMs (as well as the host, and other machines on the network), and allows you to revert to snapshots.
Wizard
Upon starting up Parallels, select the Plus symbol.

This will launch the Installation Assistant
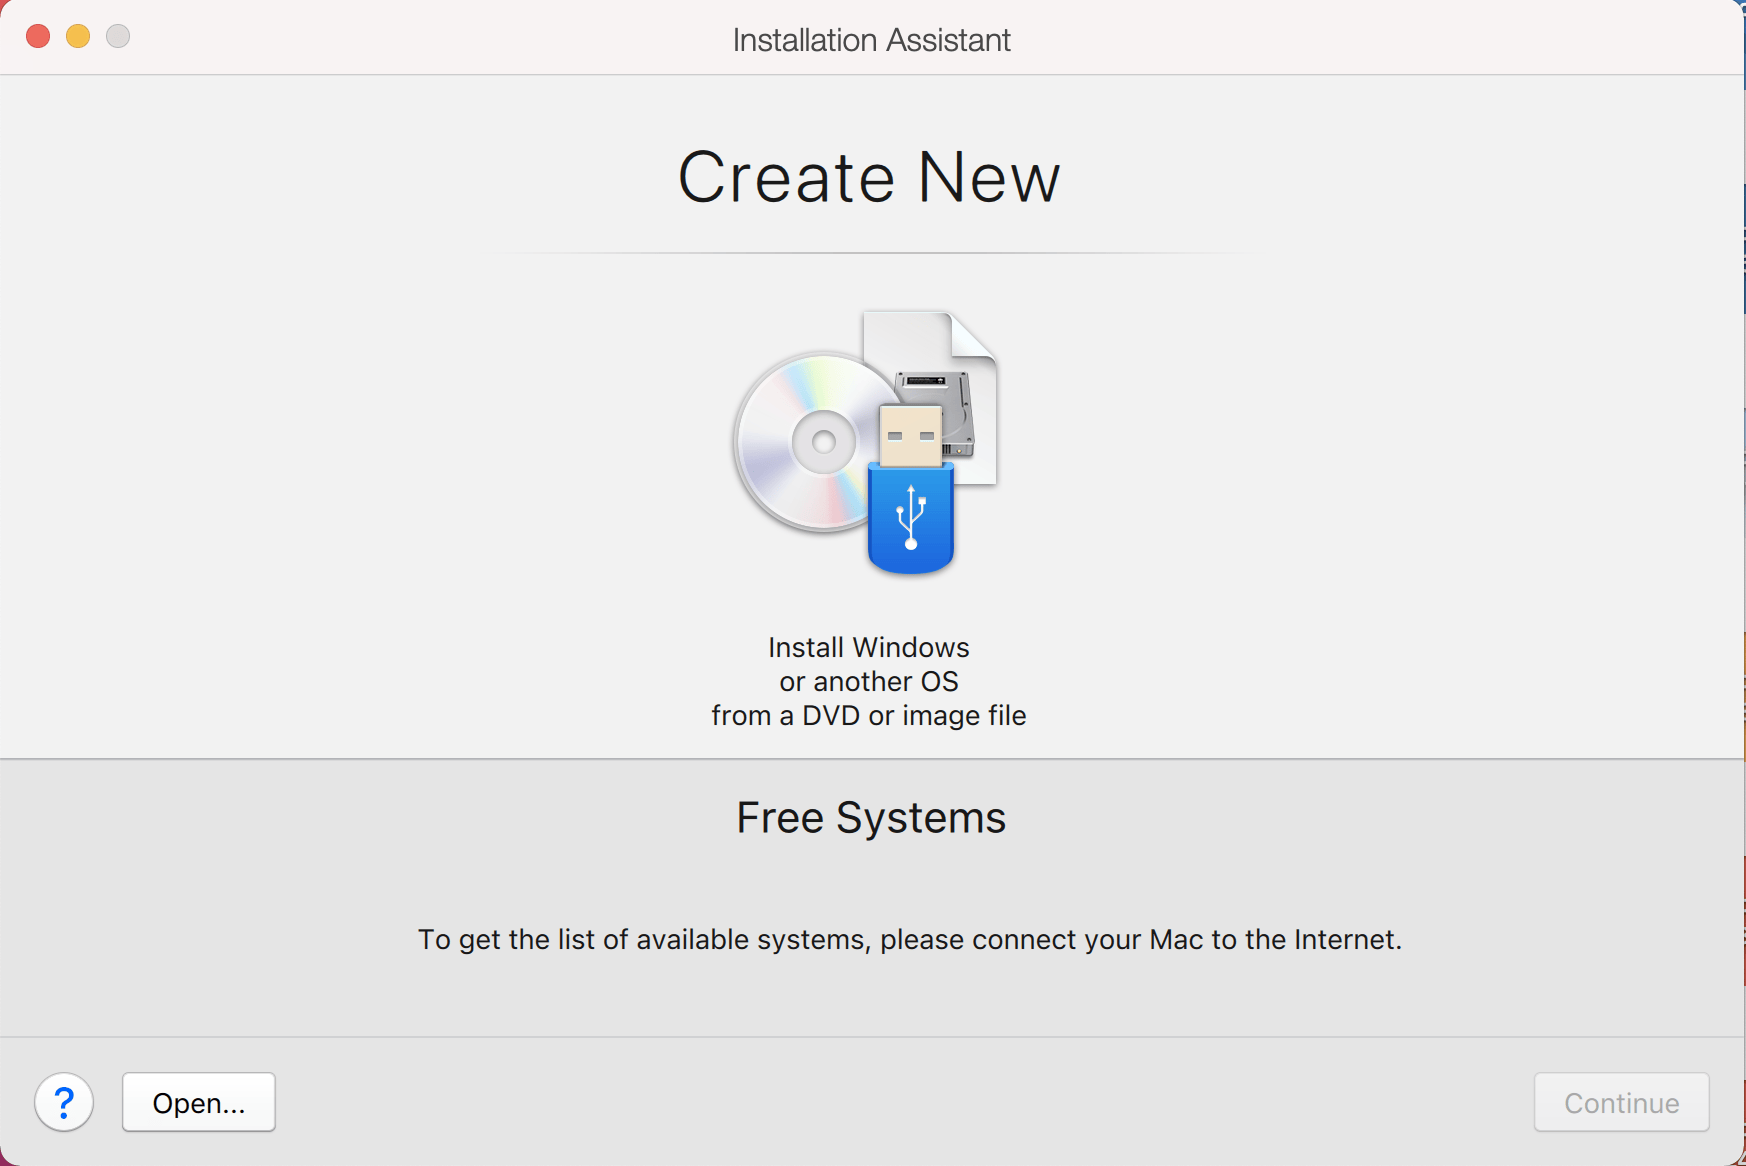
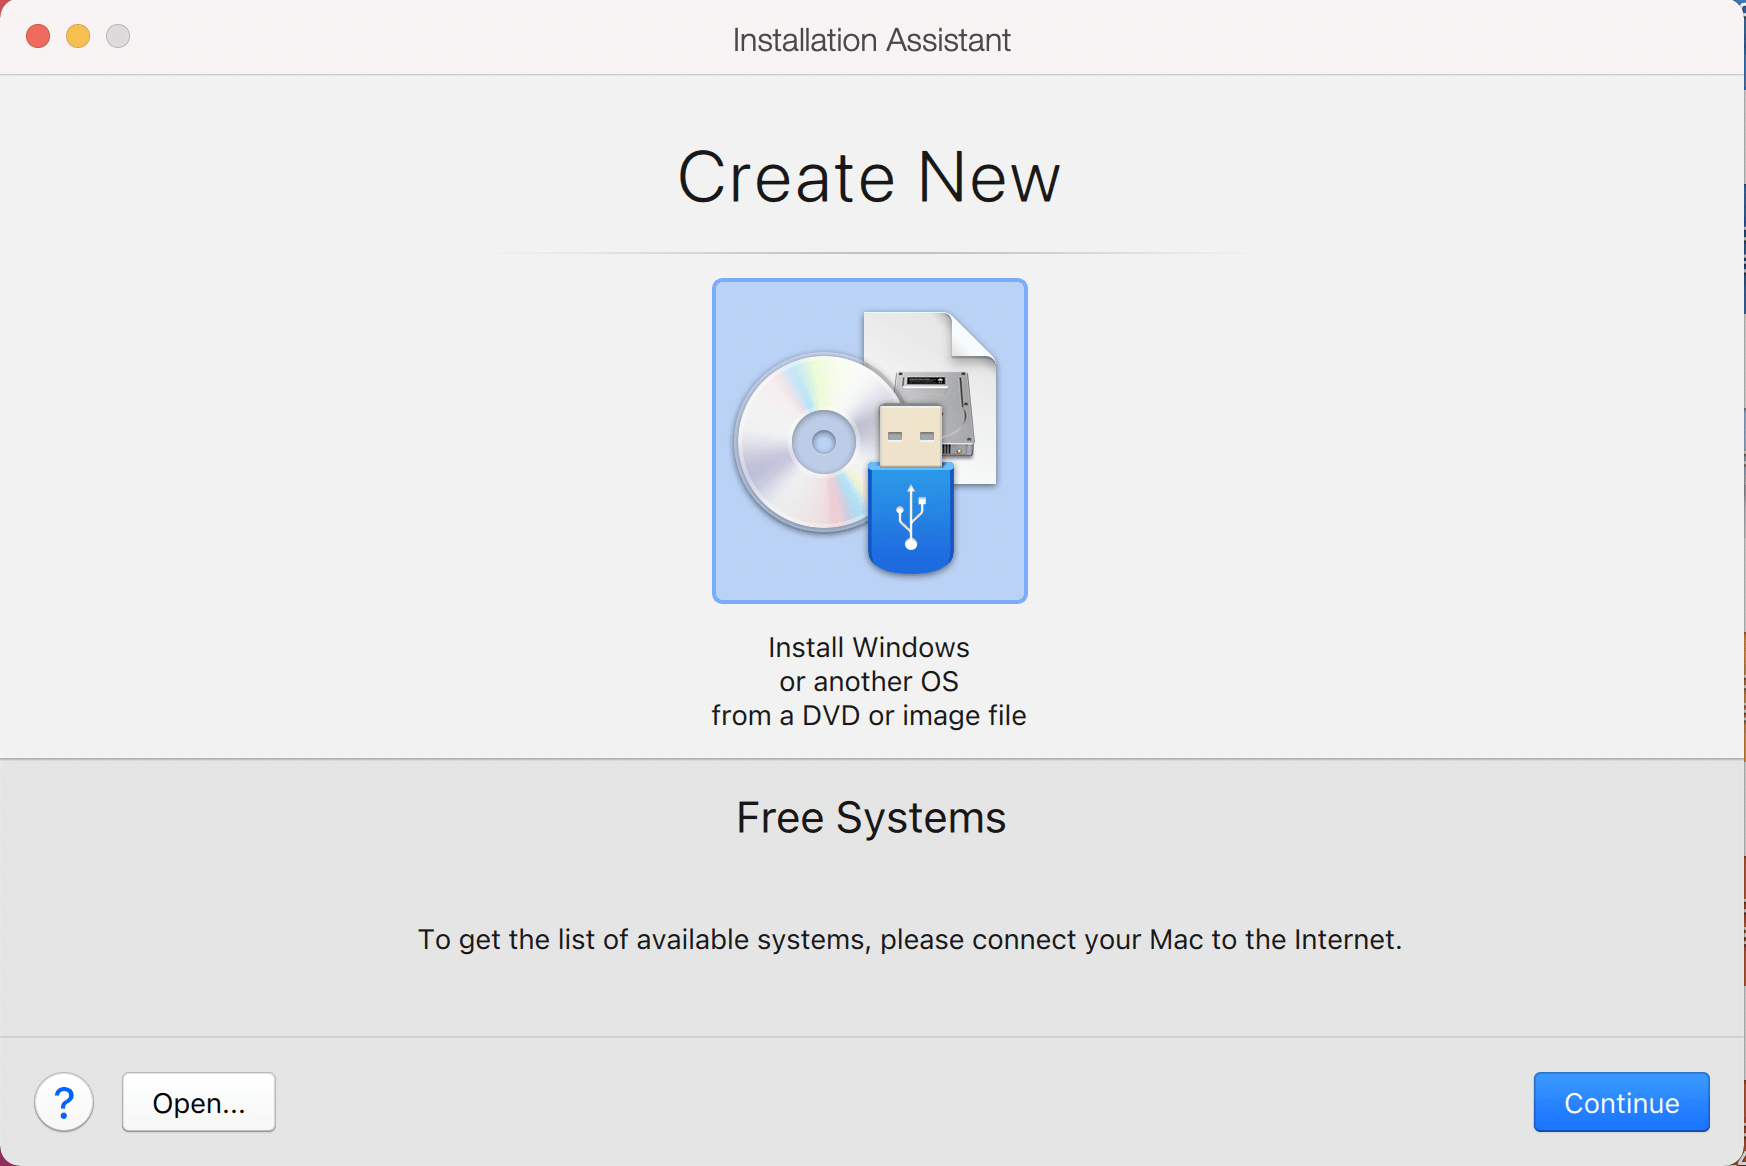
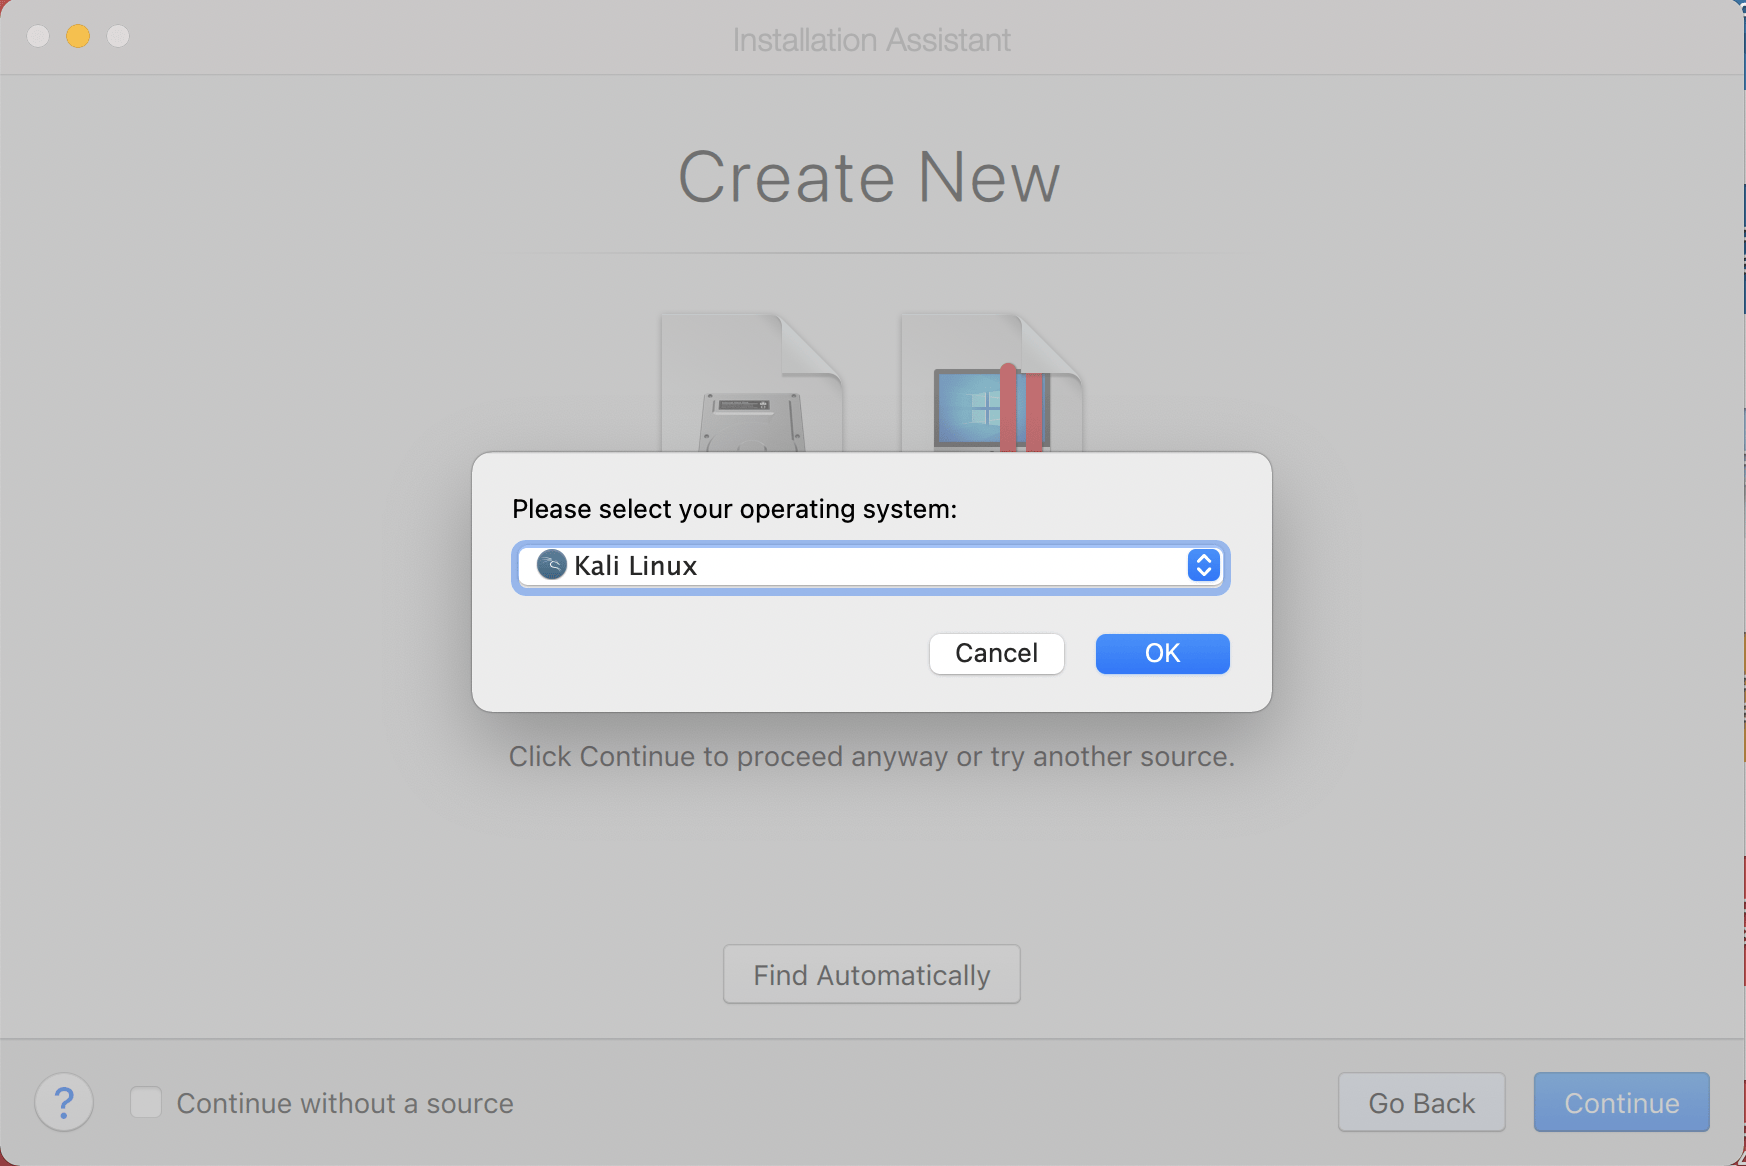
Now we choose Install Windows or another OS from a DVD or image file
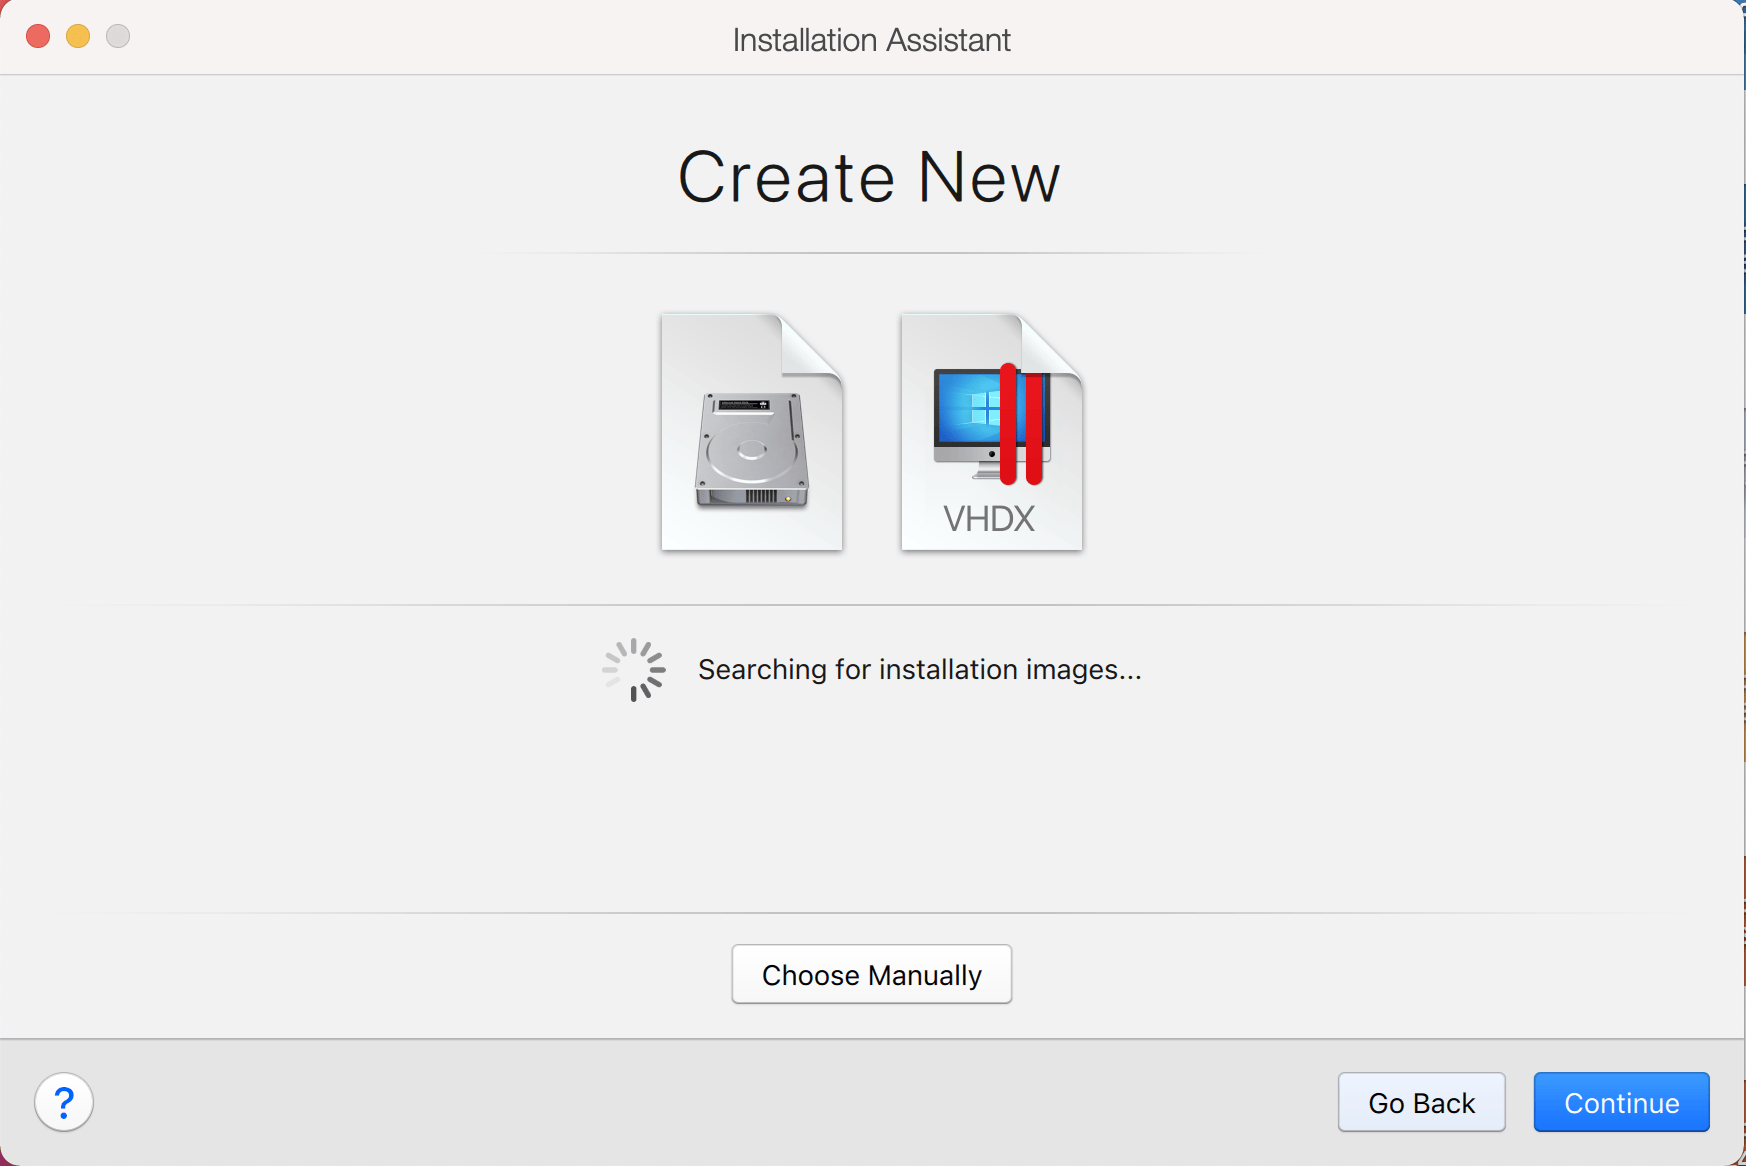
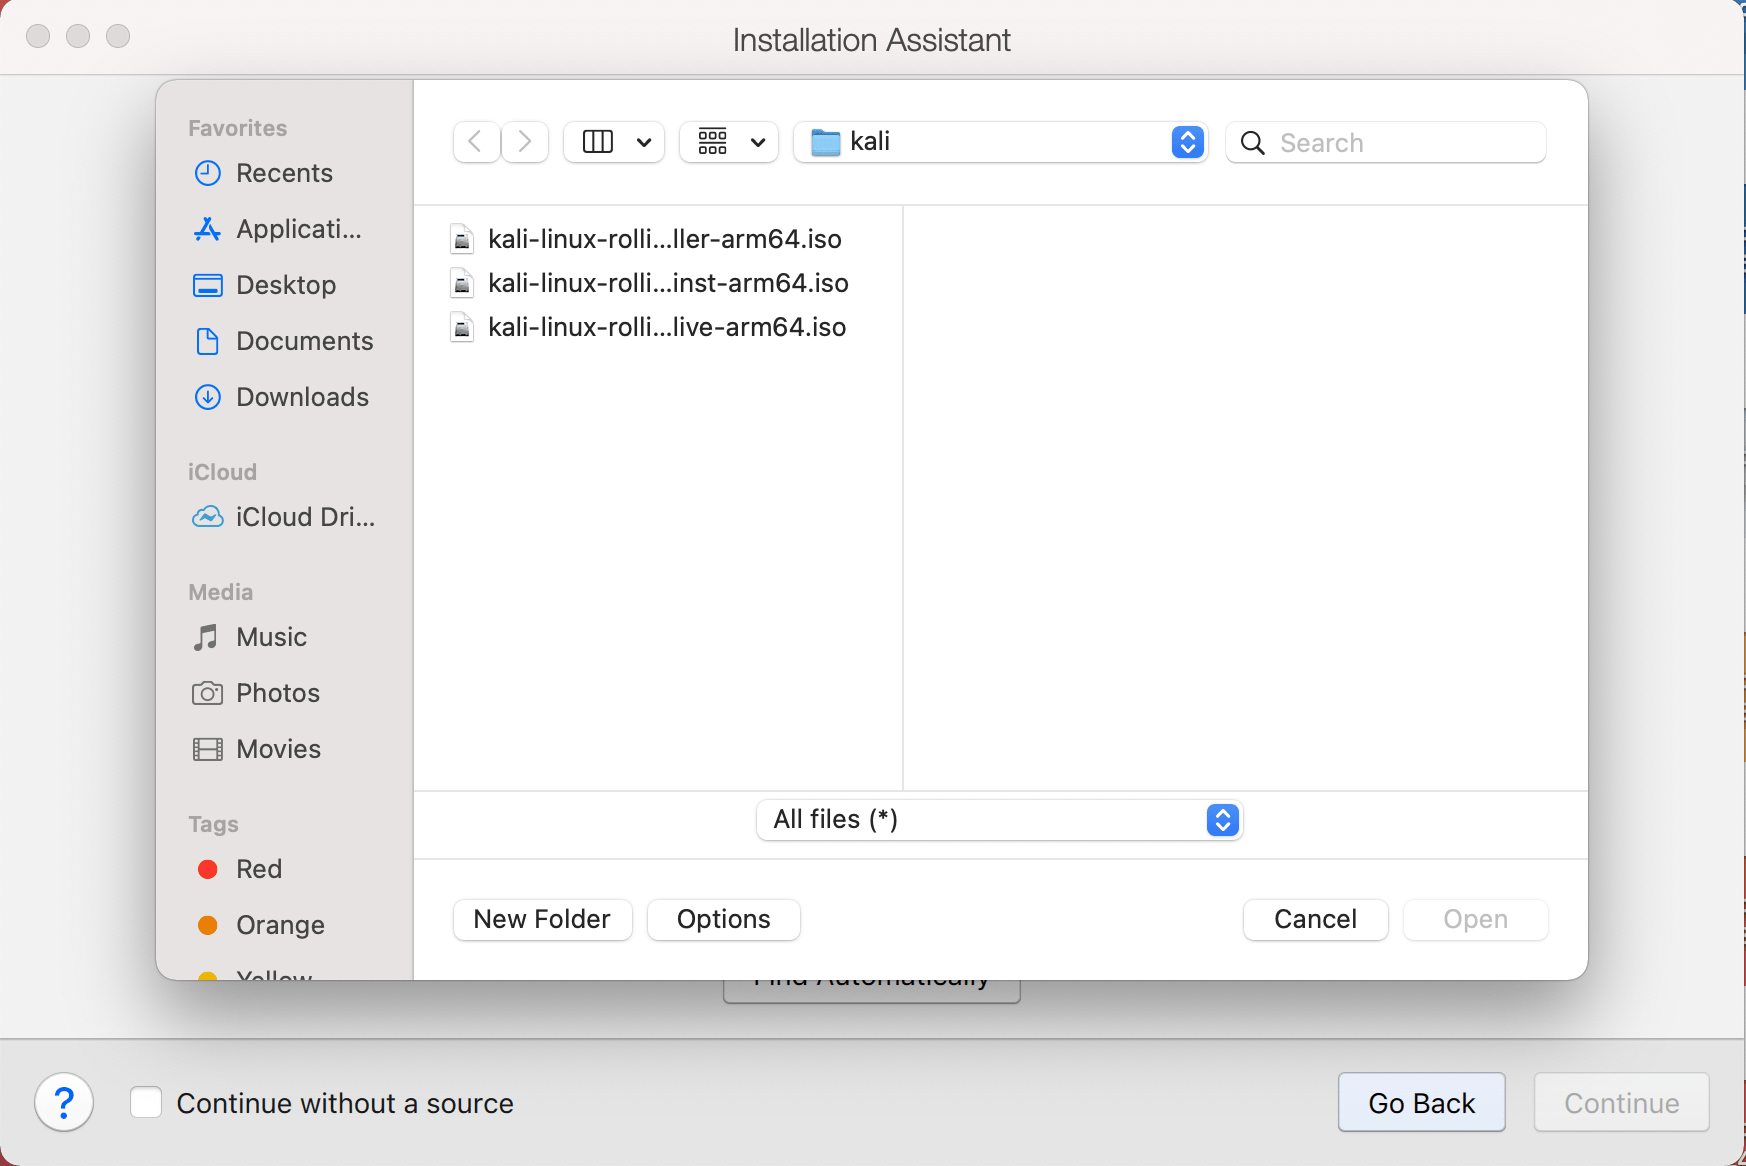
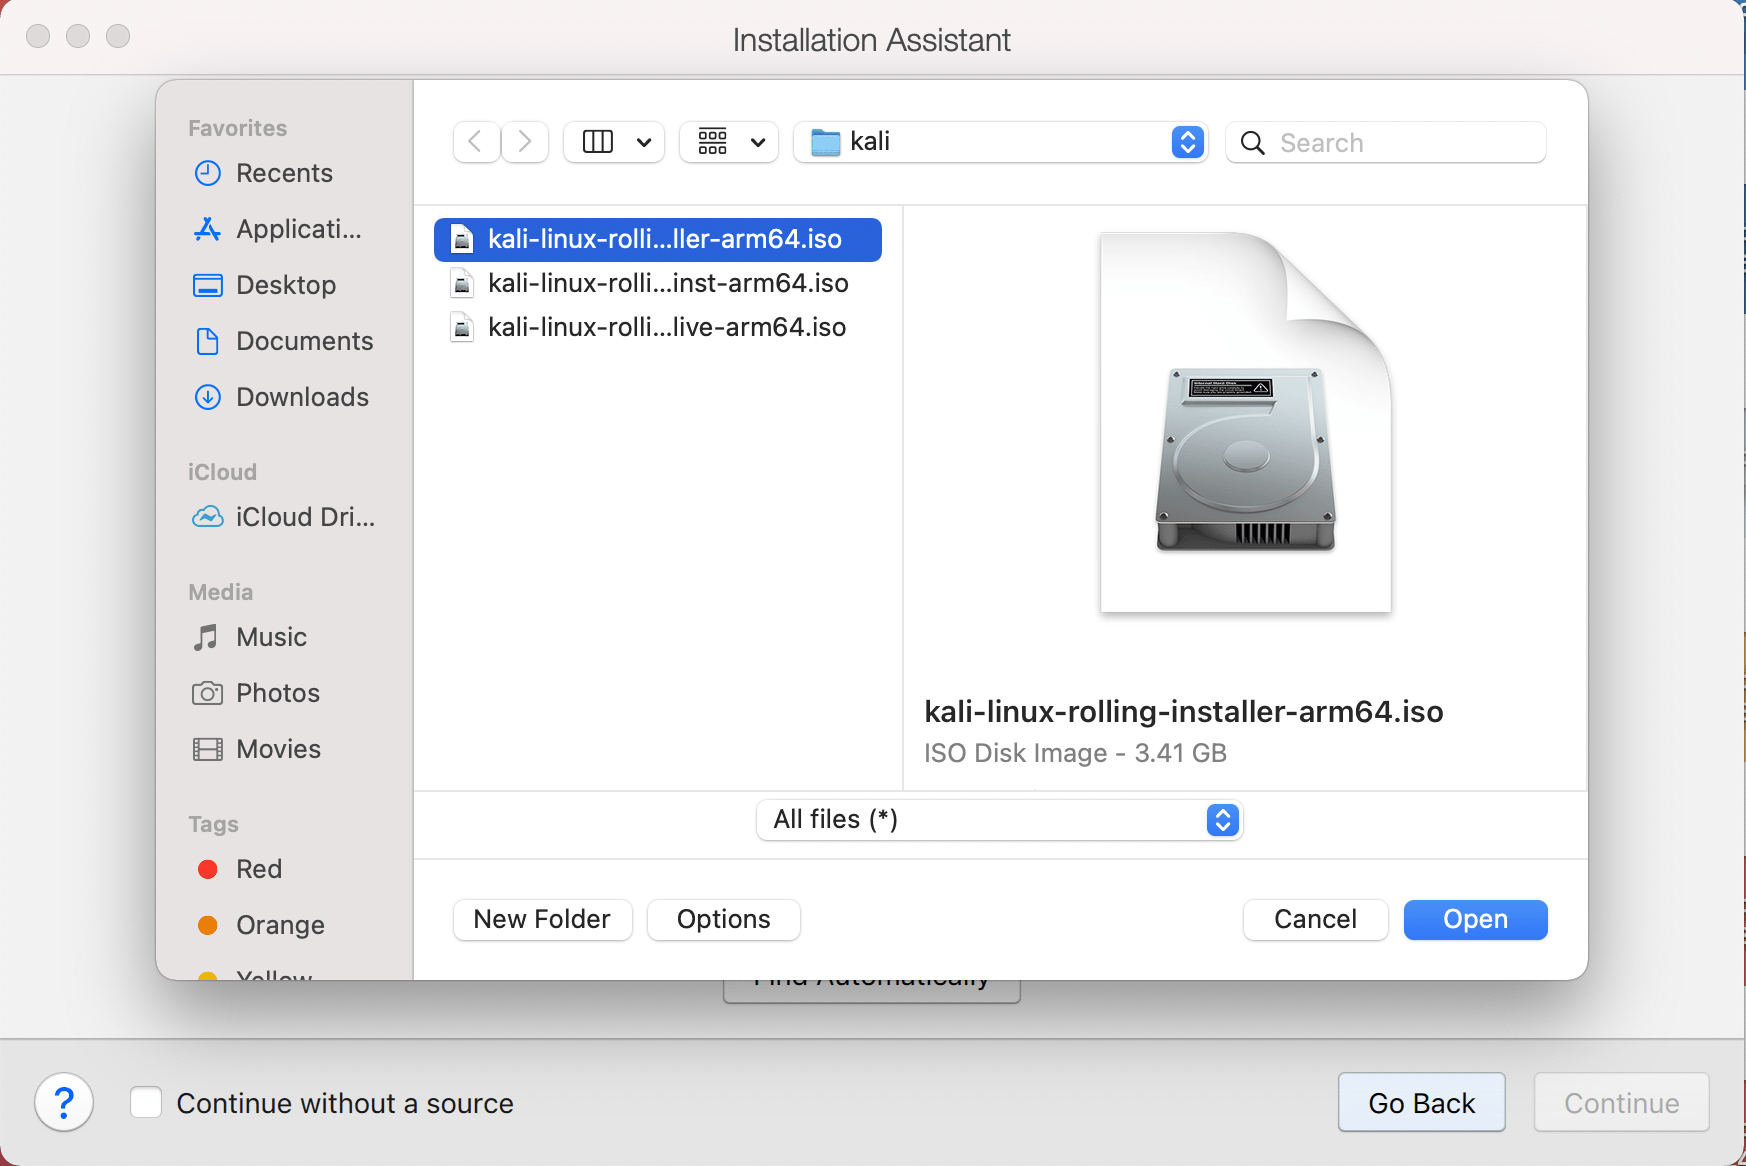
On this screen, we select the Kali Linux image to use to install from. We select “Choose Manually”, and navigate to the location of the ISO that we downloaded. For more information on what image to download, we have written up a guide.
Either drag the ISO file or choose Select a file… to navigate to the downloaded ISO.
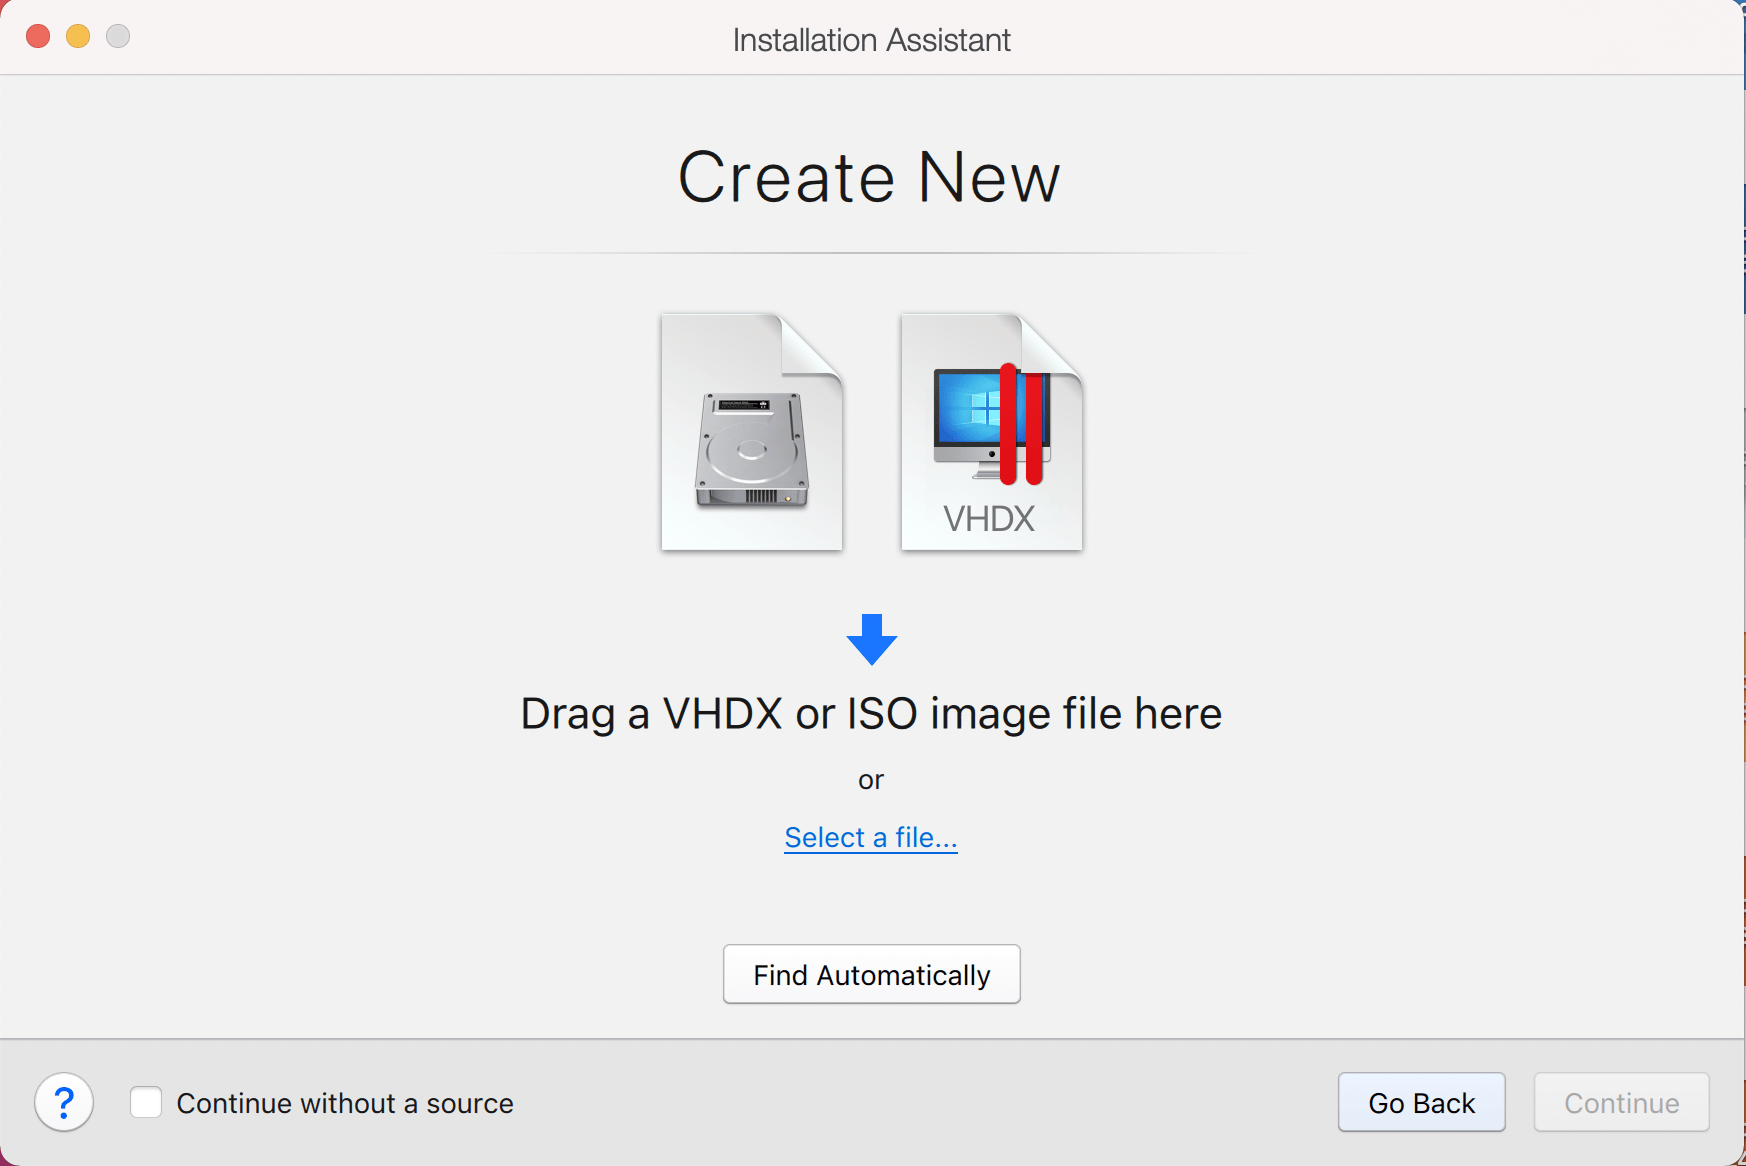
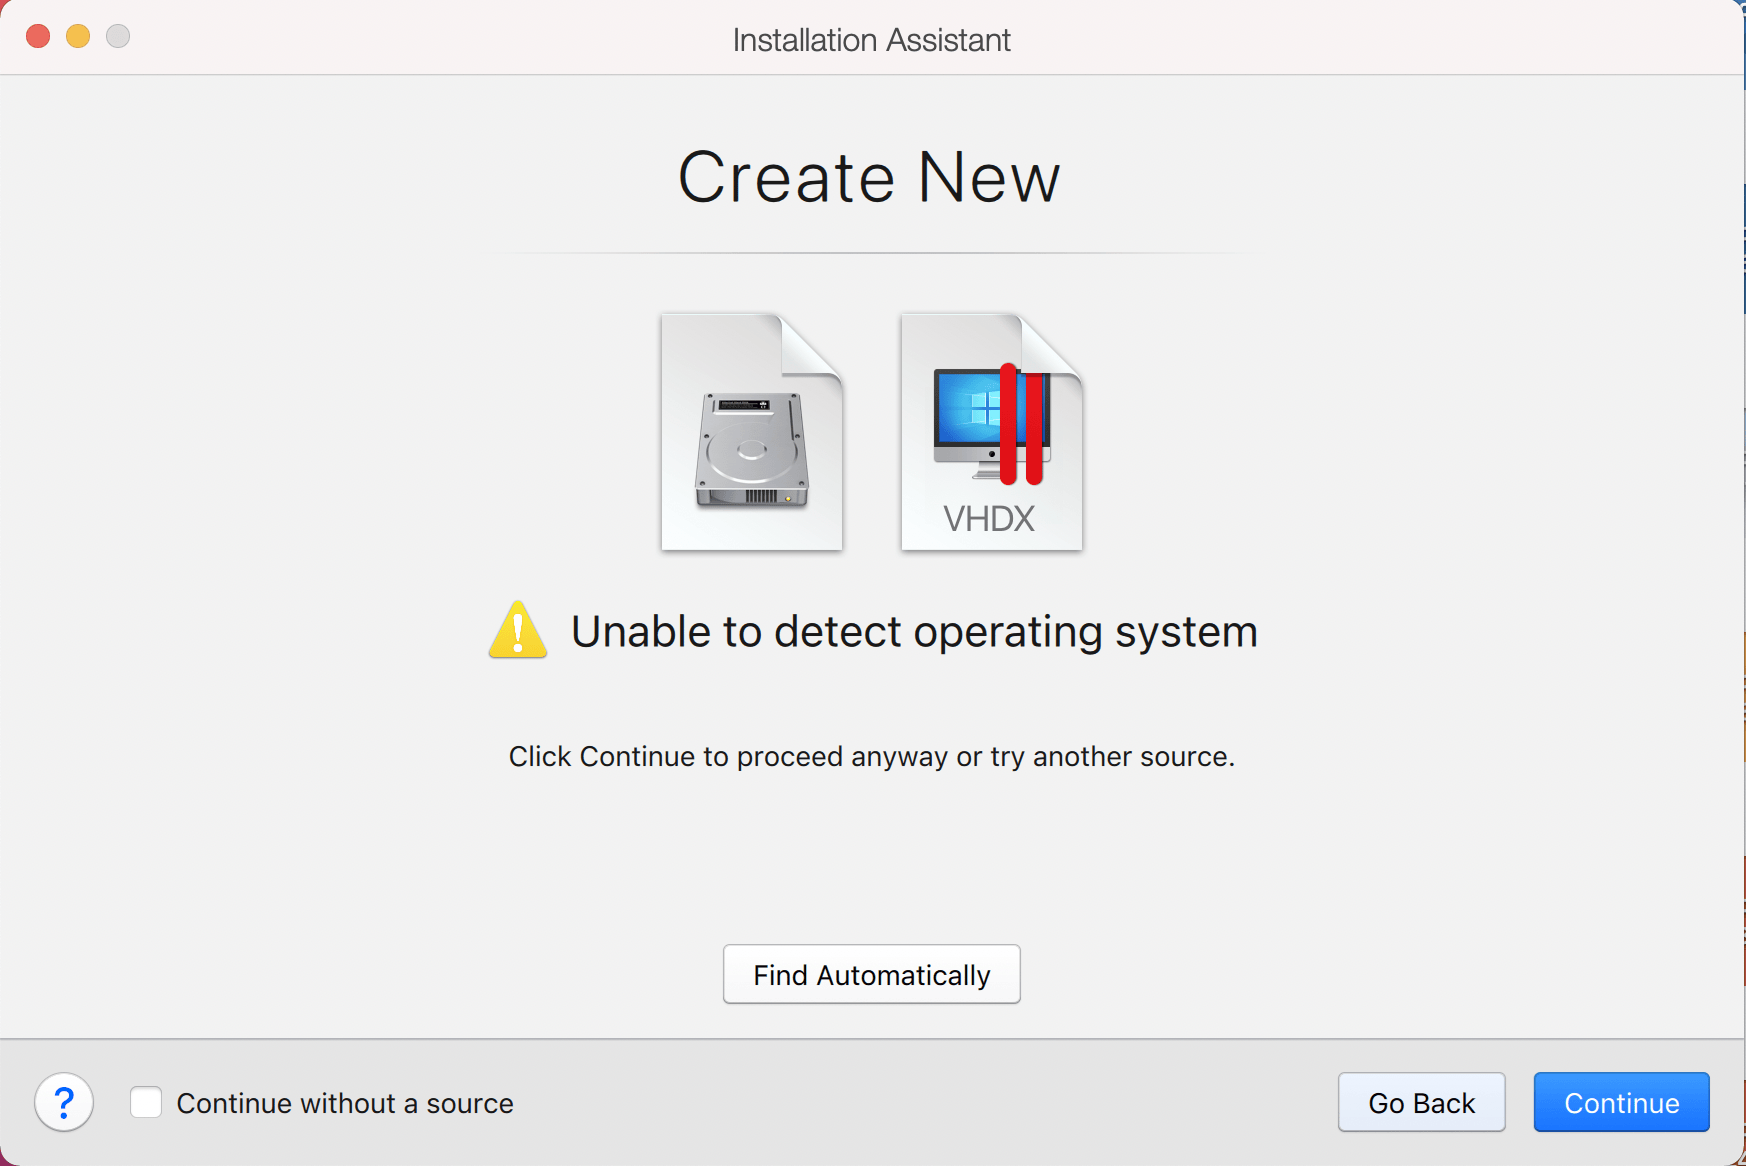
Parallels does not recognize the OS on the ISO, so we will choose Continue to proceed anyway.
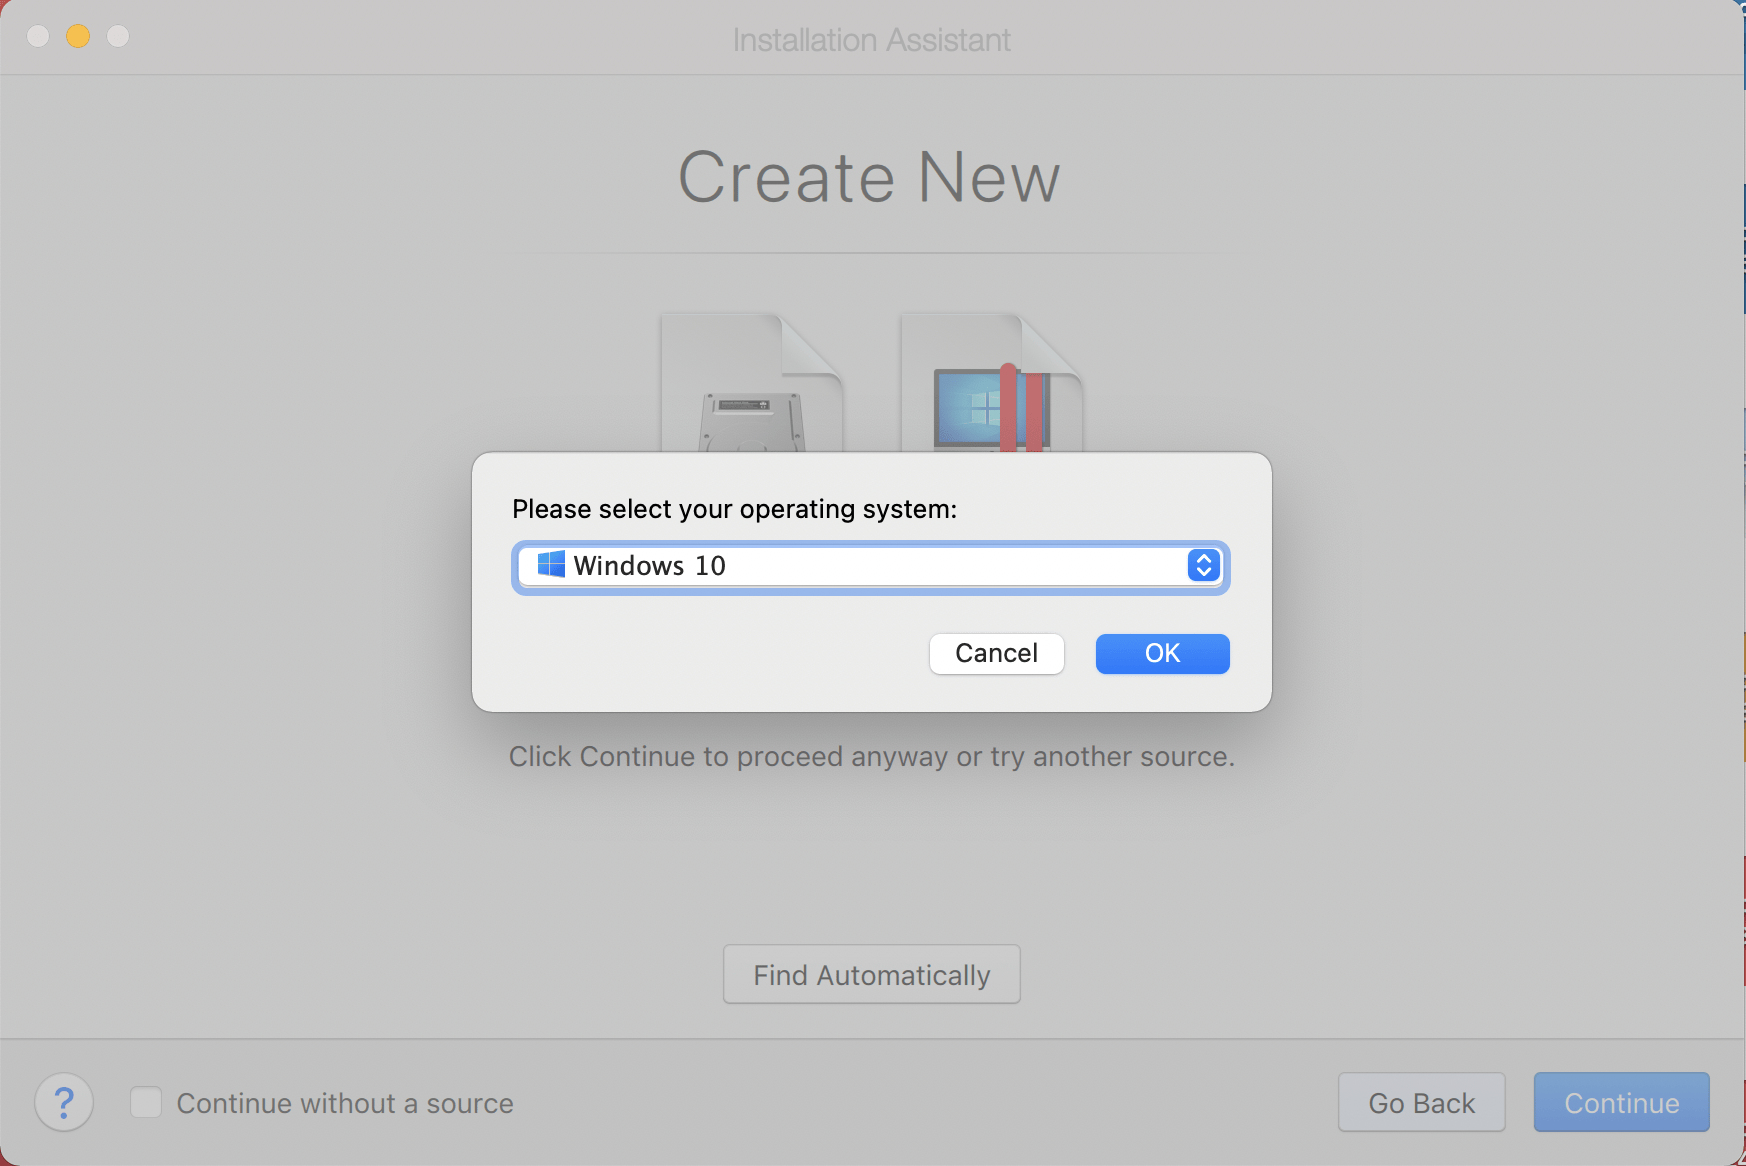
Once we have clicked Continue, we want to choose Ubuntu from the drop down list. Normally we would choose Debian however, there is a bug with the Parallels Tools, that does not occur when using Ubuntu.
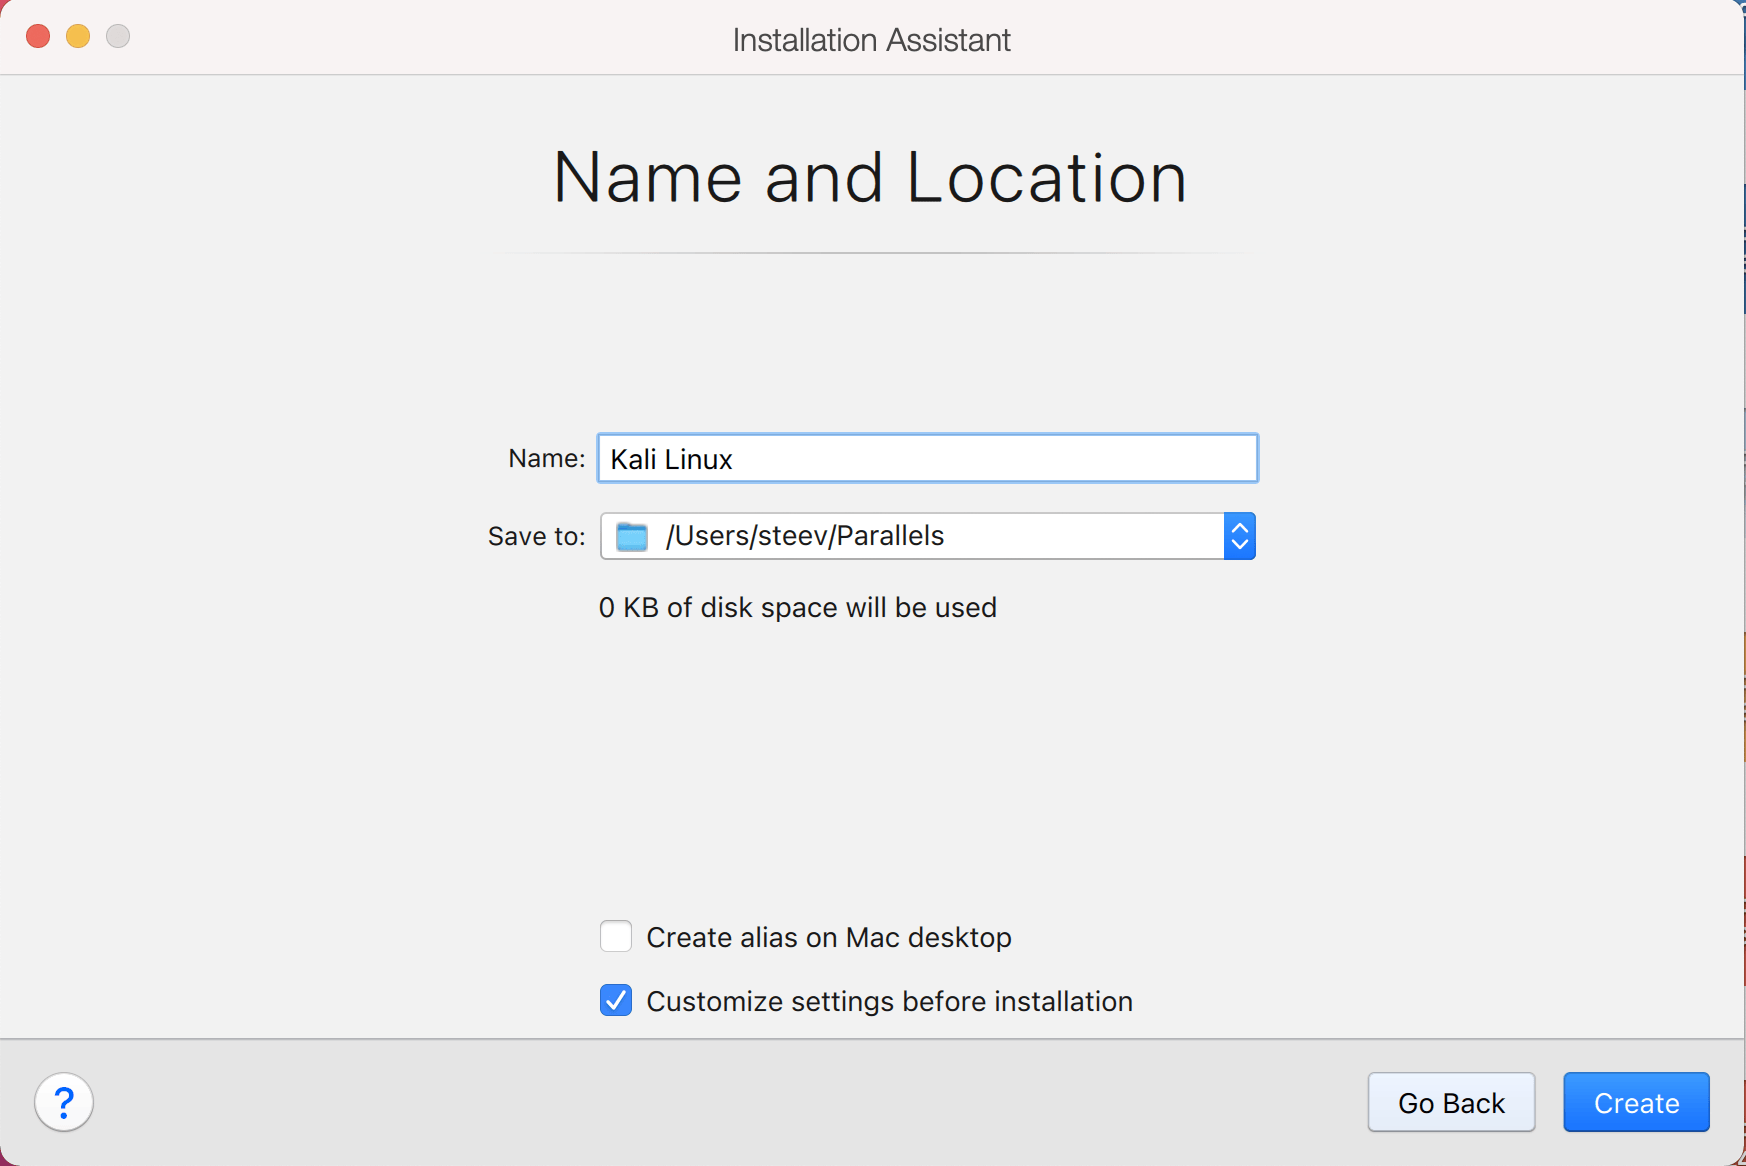
The next screen is “Name and Location”, which is where you name the VM. This name is also used as the filename (such as the configuration, hard disk and snapshot — which is not changed from this point).
We also want to mark the check box for Customize settings before installation
We are keeping it generic in this guide, by using “Kali Linux” (as Kali Linux is a rolling distribution, and we update Kali Linux).
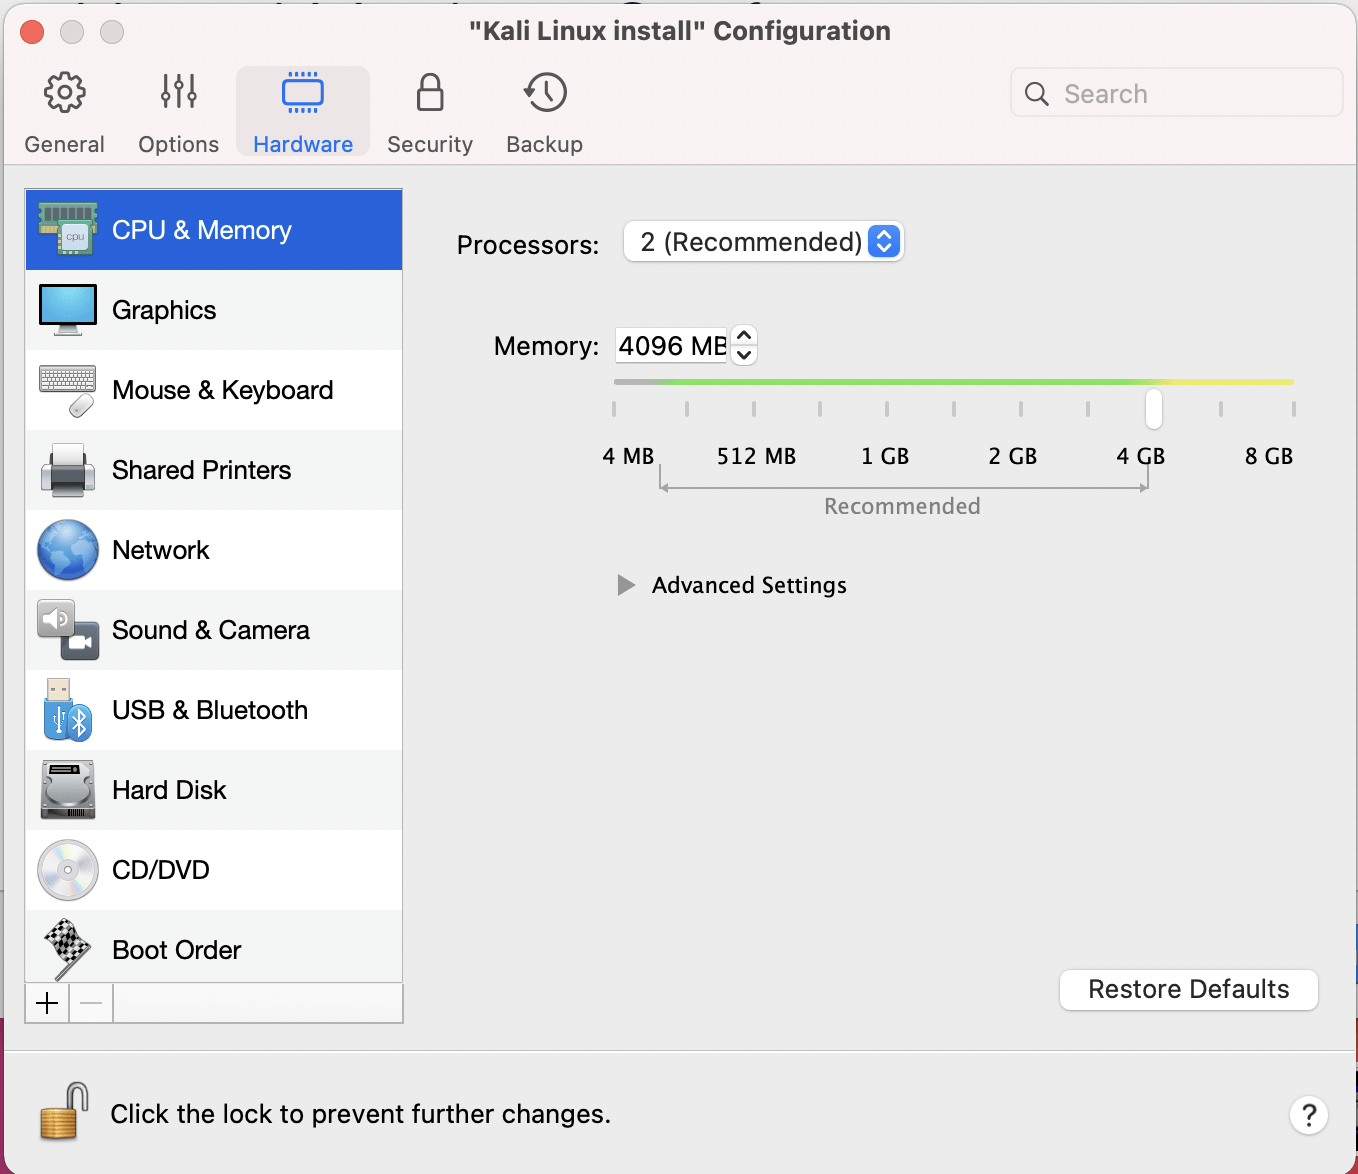
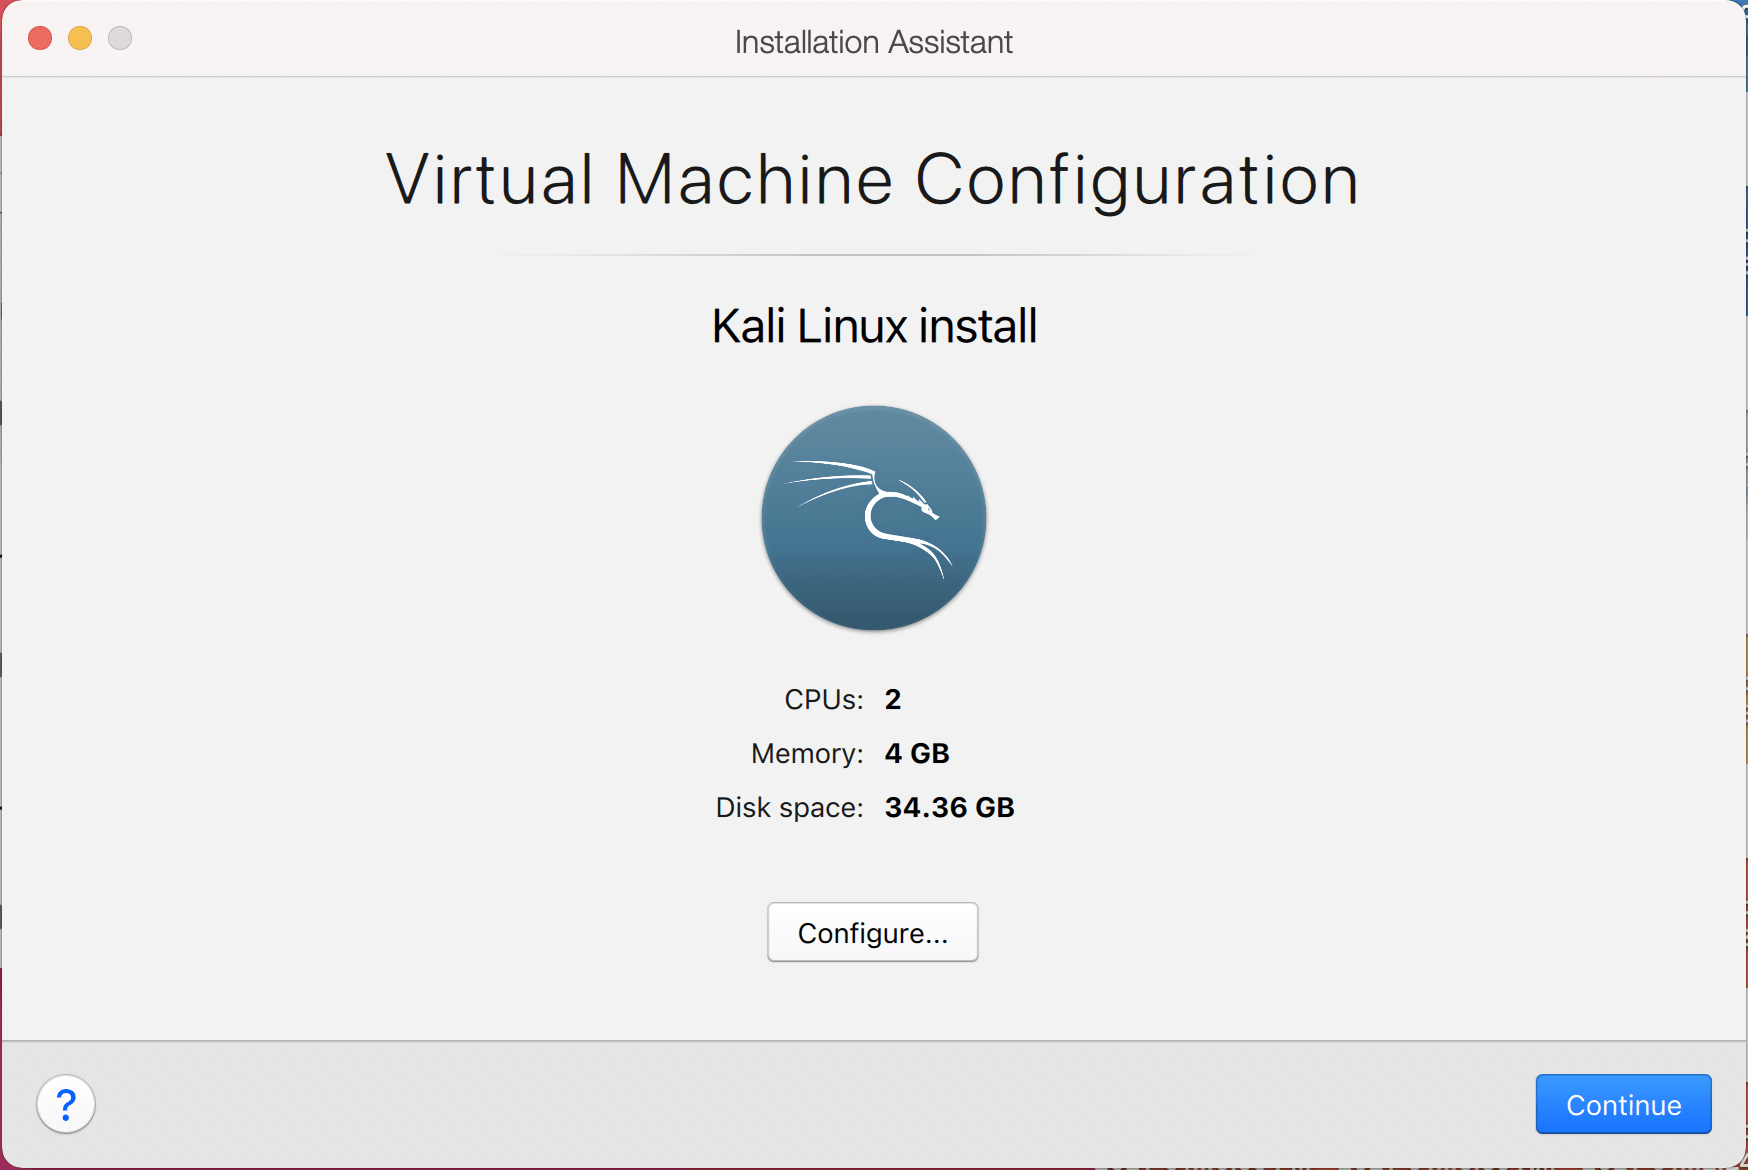
This will bring up the Configuration screen for the Virtual Machine.
The next screen is “Processors”. Here we can start to define how many resources we give the VM. Kali will be able to perform more tasks simultaneously and quicker if it is allocated more resources. We select “2 processors” and “** 2048 MB ** “, giving a total of 2 cores and 2GB of RAM. You may wish to use more or less depending on your system requirements.

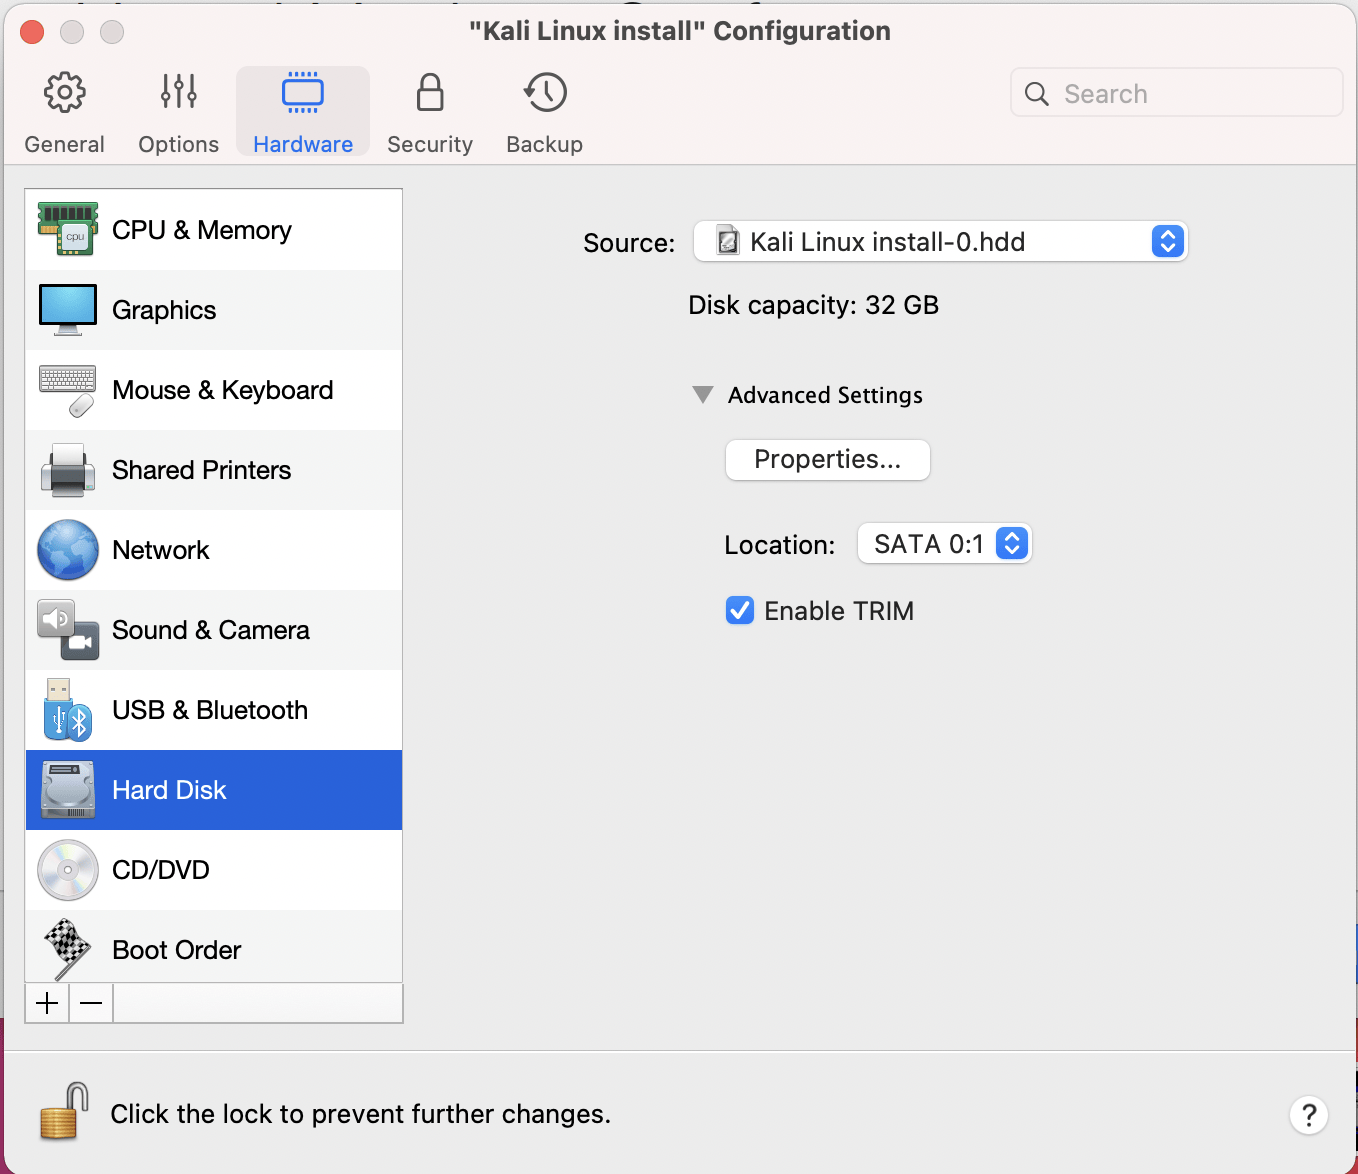
Now we want to choose Hard Disk so we can resize the hard disk.
Select the Properties button

And reduce the size to 32GB. You may wish to leave it at 64GB, or increase it, depending on your system requirements.
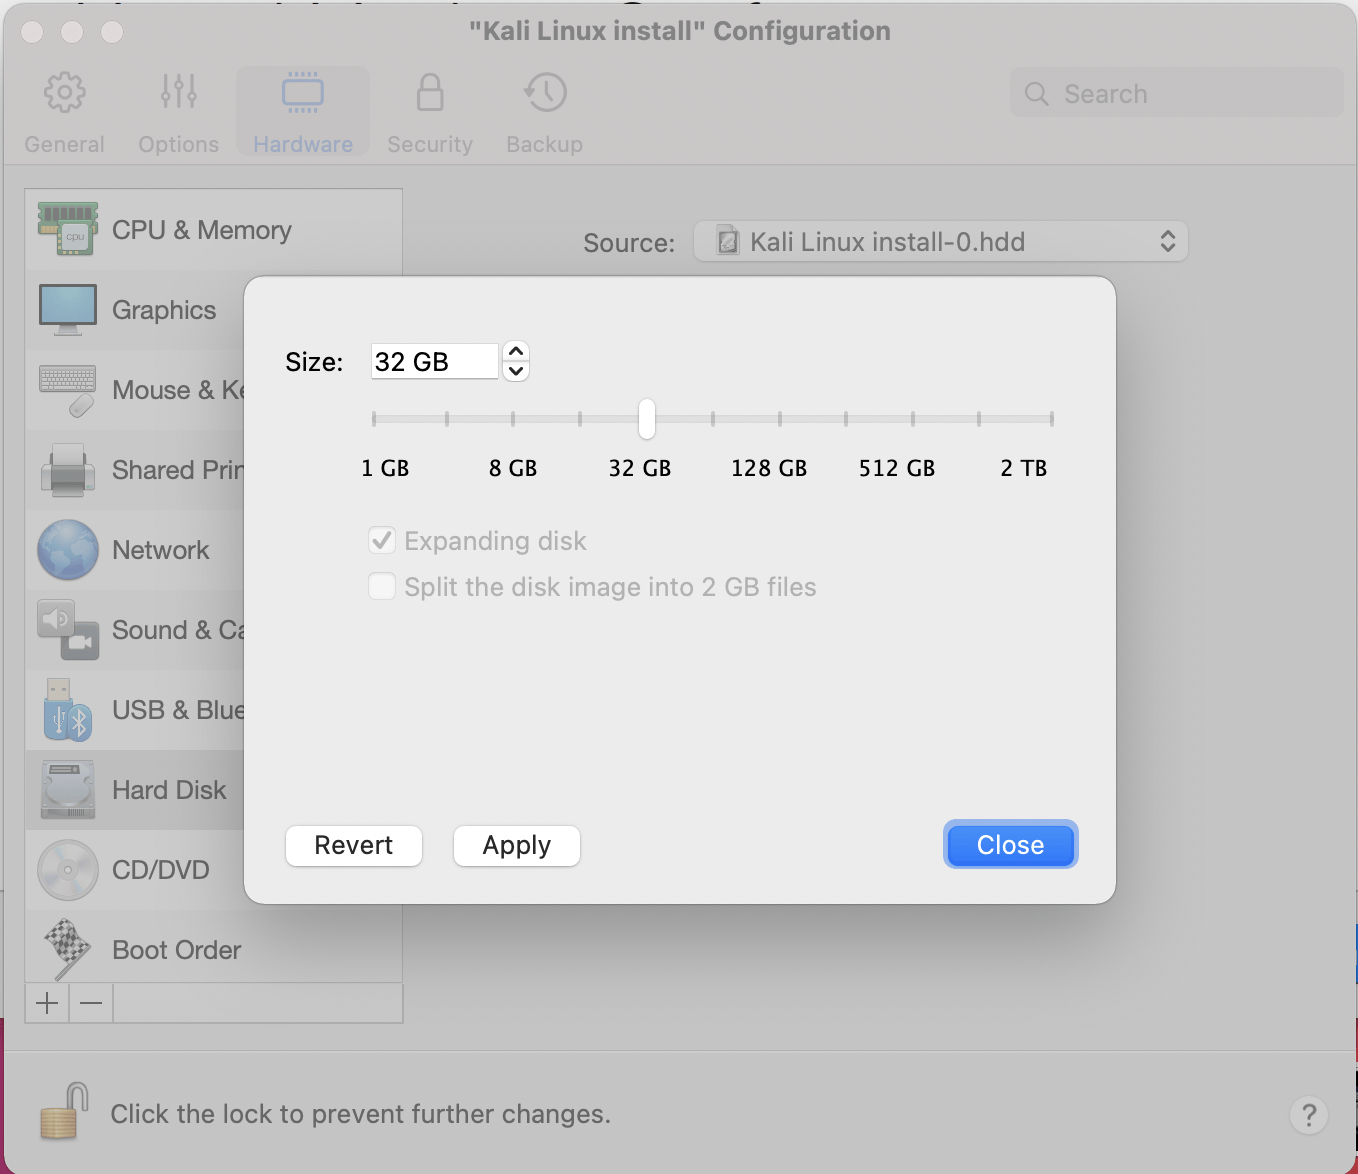
Click Apply and you will be prompted to Continue
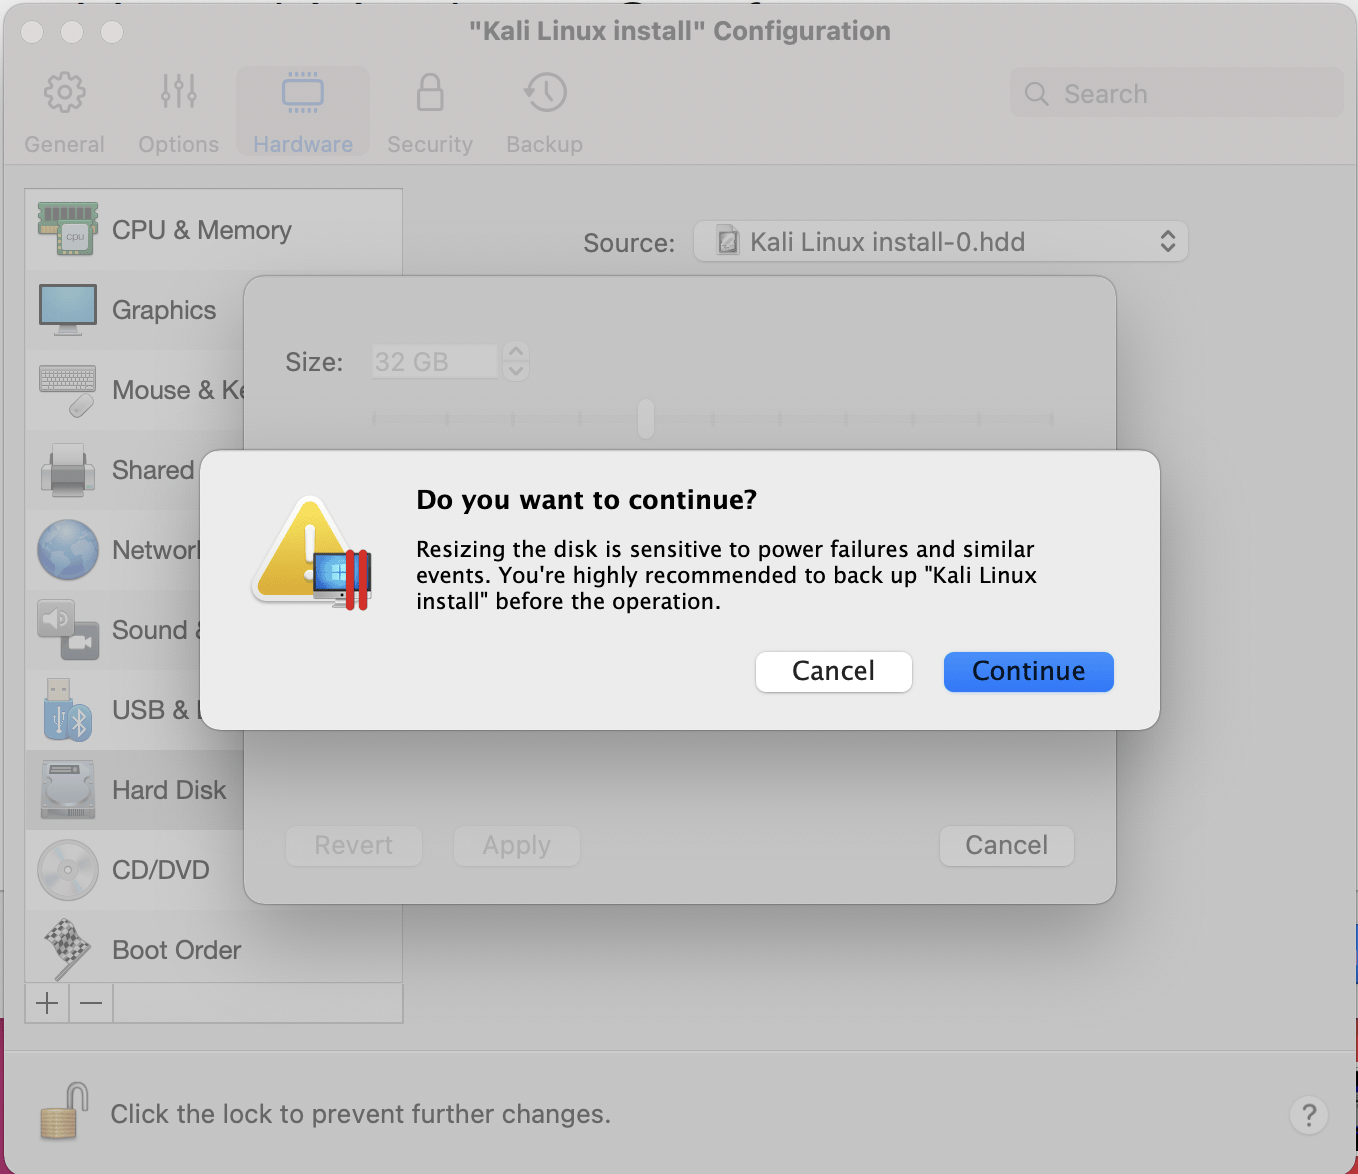
Click Continue
We can now close the Kali Linux Configuration window, and be back at the Installation Assistant screen.
After all this is done, we save, start up the VM, and then continue installing Kali Linux as we normally would for a bare metal install.
Updated on: 2023-Mar-06
Author: steev
Science Tony

Parallels, another virtual machine, can run guest O/S on a host machine. You will need to install Parallels first before continuing. If you wish to install Kali onto Parallels, please read on. After installation you will learn how to install parallels tools, which will allow for more interesting features such as auto adjust for your screen resolution.
Before installing any new applications, a hardware survey will need to be carried out. Subsequently, the applications website will have the minimum specifications listed.
- Open terminal and switch to root user. sudo su
- Ensure the cd drive is ejected by entering eject /dev/cdrom
- Go to settings and select details. from here update
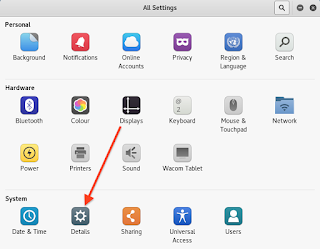
- Click the check for updates. This may take a long time.
- Do not do anything else until you see this window.

You may want to scroll down to Changing the permissions and try that first since some have found this way is no longer possible.
You have a choice of two ways to complete the next part. Way 2 is much easier.
Way 1
Eject the image, but leave the window open
- Open the CD rom by clicking on it. Eject the CD without closing the window, so you still have the window open. I suggest you eject it from Terminal.

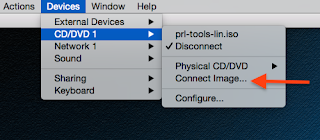
- Go to Devices on the Parallels menu bar and select Devices>CD/DVD>Connect image. Then go to Parallels Desktop>Contents>Resources>Tools>prl-tools-lin.iso and open again. This time you should have no cd icon on your desktop.
- Mount the CD from terminal using mount /dev/cdrom /media/cdrom
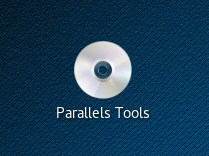
- You should now have this icon on your desktop.

- If you have a regular CD icon like the one below, you will need to start again since you will not be given the correct permissions.
- Using Terminal, navigate to the cdrom using cd /media/cdrom
- Use ls to check the contents. You should have install , installer, install-gui , kmods, tools and version.
- Enter ./install
- Open the cd rom by clicking on it.
- Copy and past the contents into a new folder on the desktop and rename it This.
- In the CLI (Terminal) type ls (list) then cd Desktop (change directory to desktop)
- Type ls again and you will see your folder This.
- Type sudo chmod 777 This -R
- Type ls and the folder This should be highlighted in green
- Type cd This
- Type sudo ./install

sudo chmod is how you change permissions. 777 will change the permissions to allow you to read, write and execute.
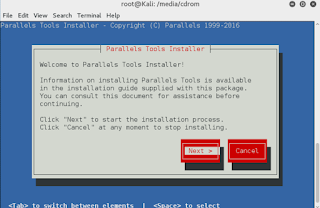
The instillation will now start. You can use the Tab to navigate and the Space bar to select.
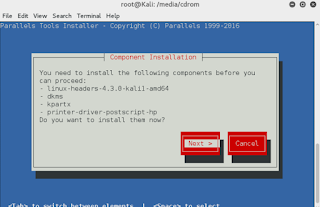
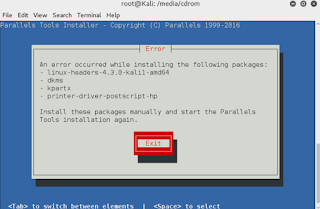
If you get an error like this, you will have to install the listed items from terminal using apt-get install followed by the item.
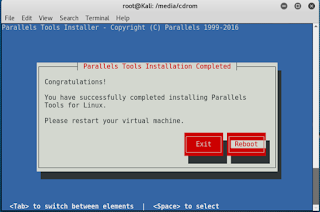
You should be fine as long as you updated. You have now installed Parallels tools and will be able to view in full screen without any black bars on the sides. Note you way need to reboot.
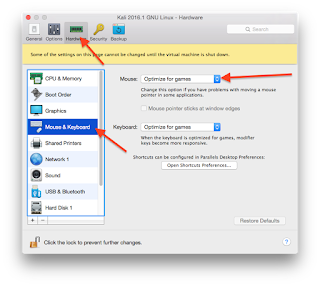
If you have no mouse pointer, go to Parallel settings and select Hardware>Mouse and Keyboard and from the mouse drop down menu select Optimise for games. You mouse pointer should now appear.
Please remember, Kali Linux is used of penetration testing by professionals. Misuse of this software can land you in prison for 25 years under section 2 of the UK Misuse of computer act 1990.
Hope you enjoyed this blog If you have any questions you can leave a comment, use the contact page or find me here
- Get link
- Other Apps
Comments
Thanks for your help. I have successfully installed dkms, kpartx and printer-***-hp, but I counldn’t install linux-headers-*** .
I used the command » apt-get install linux-headers-*** «, but the echo of the command was » E: Counldn’t find any package *** «.
Do you know the reason of installing » linux-headers-*** » ? I’m looking forward for your reply 🙂 Reply Delete

Hello! Yes, i have found that if you try to install the headers using apt-get, it doesn’t work to well. Don’t worry! Install the updates from Settings Details>Check for updates *Important* do this as administrator and not root user. The updates may take a long time and you may get a few questions, so read them carefully. Once done, go back to Terminal and navigate to the ‘This’ folder you created and install. Let me know how you get on. 🙂 Delete
PS the headers are so you can install Parallels tools and i think you may need them for future updates. Delete
> do this as administrator and not root user
How? Kali Linux runs as root by default! Reply Delete
Im stuck installing the tools. I got the error described above. I did install all but I’m still getting the error from «printer-driver-postscript-hp».
Try to install it and I get is already the newest version (3.17. ) Reply Delete
Post a Comment
Popular posts from this blog
Random Images from API with python

By T. McDonald | 2/07/19 You may have heard of API’s and wondered what you can do with them. This is a simple but satisfying use of this powerful technology. What is API? Application programming interface. What does it do? An API will allow communication between two applications. The API I am using is a publicly available web-based API , which returns data as in JSON or XML. In other words, I send a message to a stated website and request some data, in this case images are then returned to me. Using python 2 is a little different in the coding. It is worth noting that the [‘file’] at the end of json.loads() may be different in the website you are connecting to. I connected to randomcat.com . Hope you enjoyed this quick blog. Please leave a comment below.
Build A Test Website In 3 Easy Steps

By McDonald. T | Updated November 28th 2018 Building a website may seem daunting if you are new to web design. The truth is, however, that building your own test website is so easy it will embarrass you! You just need the correct tools to do the job. Brackets and xampp can be used on Mac, Windows or Linux, but in this blog I will focus on Mac. What is a test website? A test site is a site that you can create without the need for a server or a web host. You can create the test site all on your own computer and play around with it until you are happy with it. This is a really good way to learn HTML5 and PHP in a safe environment. 1) Install Brackets Brackets is an editor that will allow you to code and test files. Brackets is simple to use and has a nifty little feature, called live view, that allows you to view the code in a web browser as it would look as a webpage. In other words, it translates the code into a webpage. Brackets is free and open source softwa
How To Add A Jump Link To Your Blog

By McDonald, T. | Updated 30th of June 2022 While surfing the internet, you may have noticed that some sites have an index that lets you jump to different parts of the same webpage and thought ‘That is cool!’ Well, this is how you do it. I have used blogger to demonstrate how it is done, but the process will be very similar for most blogs. What is a jump link A jump link is a link that lets the user jump to certain pats of the same webpage they are viewing. How to add the code You will need to add a simple piece of code. Make sure you add it just before the code you want it to jump to. Note, the anchortext should have no spaces and anchortext can be anything you like. For instance, you can replace anchortext with intro or con. The code is encapsulated in a span tag. See below. tag in the HTML. Select