- Pi 400 & Kali Linux – The Perfect $100 Hacking System
- Installing Kali Linux
- Okay, So What Doesn’t Work
- WiFi Attacks with the Pi 400
- Bettercap
- Conclusion
- Saved searches
- Use saved searches to filter your results more quickly
- prodseanb/headless-kali-RPi
- Name already in use
- Sign In Required
- Launching GitHub Desktop
- Launching GitHub Desktop
- Launching Xcode
- Launching Visual Studio Code
- Latest commit
- Git stats
- Files
- README.md
Pi 400 & Kali Linux – The Perfect $100 Hacking System
The Pi 400 makes creating a hacking system with Raspberry Pi extremely simple – it is literally burn, boot and done!
The Pi 400 is an “all in one” keyboard version of the Raspberry Pi 4. For all intents and purposes, it is a Raspberry Pi 4, though it has been flattened out a bit and the circuitry has been modified to reflect the changes. The Pi 400 is perfect as a hacking system, as you can easily install and use a fully function version of Kali Linux on it.
In this article, we will look at installing Kali, and running some quick WIFI attacks. All that is needed hardware-wise for this article is the Pi 400 (complete kit) and a Kali compatible USB WIFI adapter. I used an TL-WN722N (v1!) and an Alfa AWUS036NHA, both worked “Out of the Box”.
I know, you can’t get the TL-WN722N v1 adapter new anymore, but there are tons of them out there, and it is one of the best short range WiFi adapters available.
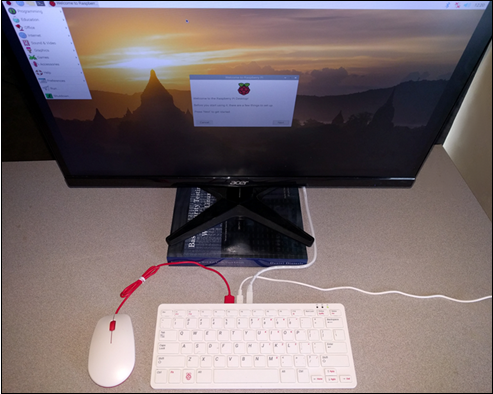
The Pi 400 Complete kit is nice – it comes with the Pi 400, power supply, a memory card, mouse, HDMI cable and a “Raspberry Pi Beginners Guide” book. All you need is a monitor!
The Pi 400 complete kit also comes with a 16GB memory card pre-loaded with RaspiOS. Literally all you need to do is unbox, attach the peripherals, insert the memory card into the Pi, apply power and in a few seconds, we have a Raspbian desktop.
**NOTE: Never insert or remove the memory card when power is applied!
If you have never used a Raspberry Pi before, take your time and play with it. RaspiOS is a very good operating system, and a great way to learn how to use the PI – If you bought the complete Pi-400 kit, the included beginners guide will walk you through using RaspiOS, and more advanced topics like using the GPIO board and sensors.
Though that is not the purpose of this article, we want to turn the Pi-400 into a hacking platform, so let’s get to it!
Installing Kali Linux
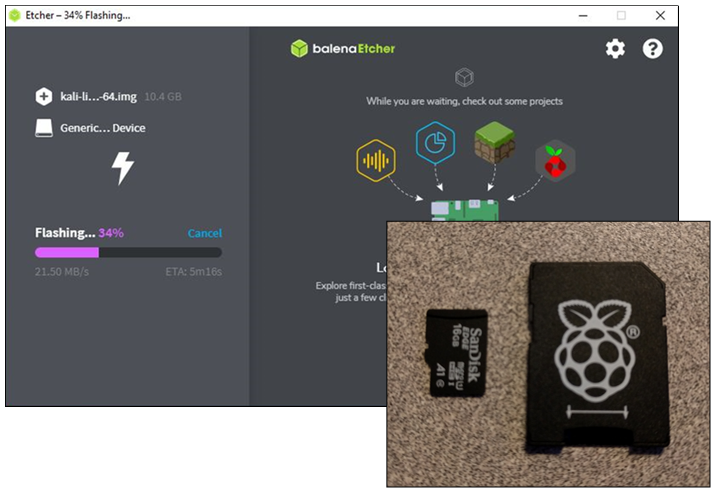
Installing Kali Linux on the Pi 400 is very simple. If you are finished using RaspiOS, you can use the memory card from the Pi 400 Kit or just use a new or blank one. All you need to do is download the official Kali Linux Pi 4 64-bit ARM image from Offensive Security, write it to the memory card using a program like BalenaEtcher, then insert the card into the Pi, apply power and boot.
- From the Offensive Security Website, under “Raspberry Pi Foundation”, Download Kali Linux 4 (64 bit) image – https://www.offensive-security.com/kali-linux-arm-images/

- Extract the image
- Write the image to the memory card – BalenaEtcher works great! https://www.balena.io/etcher/
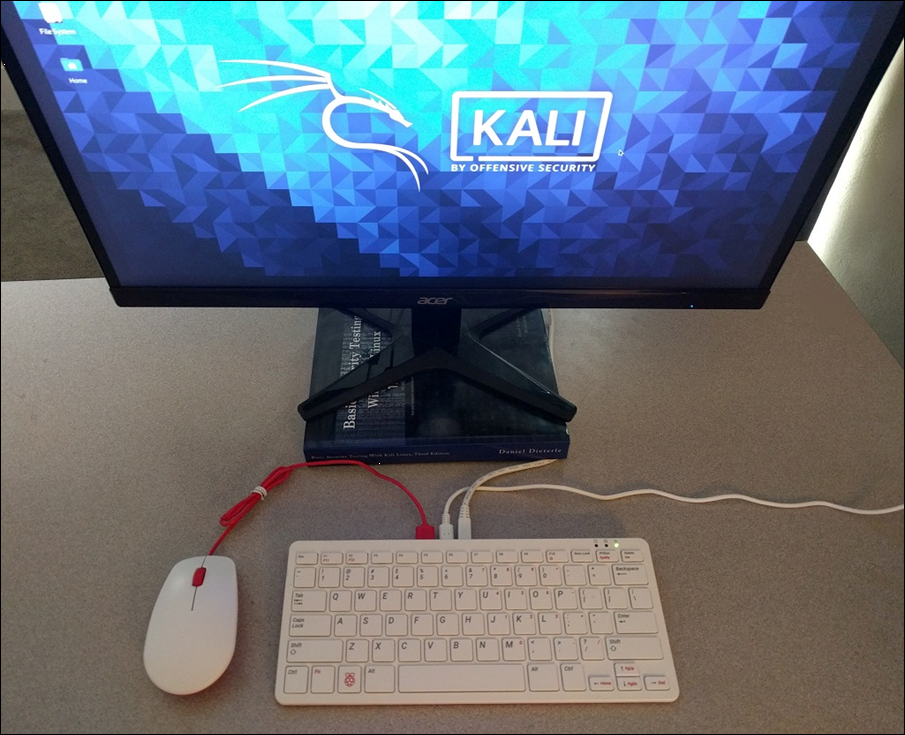
- Insert the memory card into the Pi 400, apply power and boot.
You now have a Kali Linux Desktop system!
Okay, So What Doesn’t Work
It’s not a Pi 4, it’s a Pi 400, something must be different, you say. Honestly, the only real difference I have run into so far is that the internal WiFi doesn’t seem to be recognized by Kali. Though it does work in RaspiOS. I am assuming it is some sort of driver issue, I haven’t had a chance yet to troubleshoot. Though I am not heart broken, I rarely use it, and always use a USB WiFi adapter for much better range and reliability.
WiFi Attacks with the Pi 400
Run “ifconfig” and make sure your wireless card is detected, it should show up as wlan0 and/or wlan1, once the onboard wifi driver is fixed.
First, let’s get the lay of the land with Airodump-ng. For the Wi-Fi hacking purists out there, who love iwconfig, Airodump will automatically put the card in the correct monitoring mode for you. All you need to do is run the command.

- sudo airodump-ng wlan0
Our target, “Death Star” is currently running on Channel 11.
We can go for a “quick kill” using Besside-NG

- sudo besside-ng -W -c [Channel] -b [Target_BSSID]
If the attack works, we get the WPA handshake file. It only took about 15 seconds; I’ve seen it work as fast as 5 seconds.
The Besside log file and the captured WPA handshake file (wpa.cap) are stored in the user’s home directory.

The handshake file can include a lot of unnecessary packets, you can clean these up with the beside-ng-crawler tool. Though it is really not necessary if just targeting a single target.
The handshake file then needs to be cracked.
Bettercap
Bettercap 2 is an awesome Wireless attack tool with a lot more options. It is not installed by default, but is included in the Kali repository.
Now all we need to do is run bettercap and turn on WiFi recon

- sudo bettercap -iface wlan0
- wifi.recon on
Looks a bit confusing, but we can clean it up with the Bettercap “Ticker” Display

- set wifi.show.sort clients desc
- set ticker.commands ‘clear; wifi.show’
- ticker on
We now have nice color-coded display that works great even through SSH.
Now, let’s grab some handshake files:

- wifi.recon.channel X (enter channel #)
- wifi.assoc [BSSID]
- or wifi.assoc all (warning – attacks all detected WiFi networks!)
Notice, “Death Star’s” Encryption type has turned to red. Bettercap successfully grabbed and saved the handshake. When finished, type “exit” to exit bettercap.
Captured handshake files and the bettercap log are stored in the Kali root user directory:

Unless the WPA key is extremely simple, you really don’t want to try to crack them on a Pi4. I highly recommend copying it off to a desktop system.
Conclusion
In this article we saw how to quickly and easily install Kali Linux on the new Pi 400 all in one keyboard system. The Pi 400 is a great choice as a hacking system due to it’s portability and compactness. It also can run a full desktop install of Kali Linux, or any other Pi 4 compatible OS, so your options are many.
We only covered using the Pi 400 in some quick WiFi tests, but as you have the full power of Kali Linux at your fingertips you could perform any level of pentesting with it that you could do with a normal desktop. Okay, it doesn’t have the same power as a high end desktop, so cracking passwords or some enterprise level tests may be out of the questions, but for $100 you can’t go wrong having the Pi 400 in your security testing toolkit.
If you want to learn a lot about security testing with the Raspberry Pi, check out my book, “Security Testing with Raspberry Pi“, available on Amazon.com.
Saved searches
Use saved searches to filter your results more quickly
You signed in with another tab or window. Reload to refresh your session. You signed out in another tab or window. Reload to refresh your session. You switched accounts on another tab or window. Reload to refresh your session.
Headless Kali Linux RPi setup guide. (Raspberry Pi Original, 2, 3, 4, 400, Zero, Zero W compatible)
prodseanb/headless-kali-RPi
This commit does not belong to any branch on this repository, and may belong to a fork outside of the repository.
Name already in use
A tag already exists with the provided branch name. Many Git commands accept both tag and branch names, so creating this branch may cause unexpected behavior. Are you sure you want to create this branch?
Sign In Required
Please sign in to use Codespaces.
Launching GitHub Desktop
If nothing happens, download GitHub Desktop and try again.
Launching GitHub Desktop
If nothing happens, download GitHub Desktop and try again.
Launching Xcode
If nothing happens, download Xcode and try again.
Launching Visual Studio Code
Your codespace will open once ready.
There was a problem preparing your codespace, please try again.
Latest commit
Git stats
Files
Failed to load latest commit information.
README.md

Headless Kali Linux RPi Setup Guide
A «headless» setup means any host on the network can remotely connect to a headless client via SSH or VNC. This removes the need for peripherals to operate a server.
In this walkthrough, we will be setting up a remote Kali Linux setup on ARM architecture. (RPi 1, 2, 3, 4, 400, Zero, Zero W)
Initially, we need to download a Kali Linux image that is compatible with ARM architecture.
Load the image into any image flasher
For this step, we’re going to use Etcher. Head over to this repo and follow the guide to install and configure Etcher on your OS.

- Make sure your chosen storage (SSD/Micro SD card) is inserted.
- Start Etcher
- Select the Kali-ARM image
- Select the storage
- Flash
Boot into your Raspberry Pi
The default username is ‘kali’ and the password is ‘kali’.
Remove unnecessary packages and apt cache to allow for upgrade:
sudo apt autoremove && sudo apt autoclean Make sure you are connected to the network, then run the updates:
sudo apt-get update sudo apt-get upgrade sudo apt-get dist-upgrade Update kali’s password (for obvious reasons):
Run the following to install OpenSSH and update the runlevels to allow SSH on boot:
sudo apt-get install openssh-server update-rc.d -f ssh remove update-rc.d -f ssh defaults cd /etc/ssh mkdir insecure_old mv ssh_host* insecure_old dpkg-reconfigure openssh-server sudo service ssh restart update-rc.d -f ssh enable 2 3 4 5 The output should look similar to this:
● ssh.service - OpenBSD Secure Shell server Loaded: loaded (/lib/systemd/system/ssh.service; enabled; vendor preset: disabled) Active: active (running) since Sun 2021-08-01 19:18:18 UTC; 1 day 8h ago If the SSH service is NOT running:
Configure wireless network availability on boot
Navigate into this directory:
cd /etc/NetworkManager/system-connections Verify that a .nmconnection file exists, containing the connected wireless network’s information. You can copy the template.nmconnection from this repo into this directory and replace the template and password fields if the file does NOT exist.
Change the permissions of this file:
sudo chmod 600 yournetwork.nmconnection Next, we’re going to edit NetworkManager.conf :
sudo nano /etc/NetworkManager/NetworkManager.conf Change the contents of the file to this (managed=true):
[main] plugins=ifupdown,keyfile [ifupdown] managed=true Next, we’re going to edit /etc/network/interfaces .
Add these lines:
auto wlan0 iface wlan0 inet dhcp To make our Kali completely headless, we need to edit /etc/lightdm/lightdm.conf :
sudo nano /etc/lightdm/lightdm.conf There will be 4 lines (2 sets of occurences) of these same lines in this file. Change all occurences to this:
autologin-user=kali autologin-user-timeout=0 Find this line and uncomment:
#pam-autologin-service=lightdm-autologin You can also take a look at lightdm.conf in this repo, copy and paste everything to your own lightdm.conf file.
Done! Run ifconfig to find Kali’s IP. We’re going to need this to SSH into it. You can now boot up your Pi without a monitor or keyboard and connect via SSH: