- Kali linux raspberry pi image
- Kali on Raspberry Pi 2 — User Instructions
- Kali on Raspberry Pi 2 — Tips
- Kali on Raspberry Pi 2 — Image Customization
- Kali linux raspberry pi image
- Kali on Raspberry Pi 3 — User Instructions
- Kali on Raspberry Pi 3 — Tips and Tricks
- Kali on Raspberry Pi 3 Headless — Tips and Tricks
- Kali on Raspberry Pi 3 — Image Customization
- Kali linux raspberry pi image
- Kali on Raspberry Pi Zero — User Instructions
- Kali on Raspberry Pi Zero — Image Customization
- Kali linux raspberry pi image
Kali linux raspberry pi image
If your Raspberry Pi 2 has Raspberry Pi 2 Model B V1.2 printed on the PCB above the CPU, we suggest to follow the Raspberry Pi 2 v1.2 documentation. However if it says Raspberry Pi 2 Model B V1.1 , keep reading
By default, the Kali Linux Raspberry Pi 2 image contains the kali-linux-default metapackage similar to most other platforms. If you wish to install extra tools please refer to our metapackages page.
The Raspberry Pi images use Re4son’s kernel, which includes the drivers for external Wi-Fi cards, TFT displays, and the nexmon firmware for the built-in wireless card on the Raspberry Pi 3 and 4. You will not need to download it and install it, and doing so will likely be a downgrade over the current installed kernel.
Kali on Raspberry Pi 2 — User Instructions
If you’re unfamiliar with the details of downloading and validating a Kali Linux image, or for using that image to create a bootable device, it’s strongly recommended that you refer to the more detailed procedures described in the specific articles on those subjects.
To install a pre-built image of the standard build of Kali Linux on your Raspberry Pi 2, follow these instructions:
- Get a fast microSD card with at least 16GB capacity. Class 10 cards are highly recommended.
- Download and validate the Kali RaspberryPi 2, 3, 4 and 400 (img.xz) image from the downloads area. The process for validating an image is described in more detail on Downloading Kali Linux.
- Use the dd utility to image this file to your microSD card (same process as making a Kali USB.
In our example, we assume the storage device is located at /dev/sdb . Do not simply copy these value, change this to the correct drive path.
This process will wipe out your microSD card. If you choose the wrong storage device, you may wipe out your computers hard disk.
This process can take a while, depending on your PC, your microSD’s speed, and the size of the Kali Linux image.
Once the dd operation is complete, boot up the Raspberry Pi 2 with the microSD plugged in.
Kali on Raspberry Pi 2 — Tips
If you are on the 5.10 kernel, you can use mt76 chipset USB Wi-Fi devices, but they require creating a configuration file in /etc/modprobe.d with the following contents:
Kali on Raspberry Pi 2 — Image Customization
If you want to customize the Kali Raspberry Pi 2 image, including changes to the packages being installed, changing the desktop environment, increasing or decreasing the image file size or generally being adventurous, check out the Kali-ARM Build-Scripts repository on GitLab, and follow the README.md file’s instructions. The script to use is raspberry-pi.sh .
Updated on: 2023-May-30
Author: steev
Kali linux raspberry pi image
The Raspberry Pi 3 has a quad core 1.2GHz processor, with 1GB of RAM. Kali Linux fits on an external microSD card.
By default, the Kali Linux Raspberry Pi 3 image contains the kali-linux-default metapackage similar to most other platforms. If you wish to install extra tools please refer to our metapackages page.
The Raspberry Pi 3 has a 64-bit processor and can run 64-bit images. Because it can run 64-bit images, you can choose either Kali Linux Raspberry Pi 2, 3, 4 and 400 (32-bit) (img.xz) or Kali Linux Raspberry Pi 2 (v1.2), 3, 4 and 400 (64-bit) (img.xz) as the image to run, the latter being 64-bit.
We recommend using the 32-bit image on Raspberry Pi devices as that gets far more testing, and a lot of documentation out there expects you to be running RaspberryPi OS which is 32-bit.
The Raspberry Pi images use Re4son’s kernel, which includes the drivers for external Wi-Fi cards, TFT displays, and the nexmon firmware for the built-in wireless card on the Raspberry Pi 3 and 4. You will not need to download it and install it, and doing so will likely be a downgrade over the current installed kernel.
Kali on Raspberry Pi 3 — User Instructions
If you’re unfamiliar with the details of downloading and validating a Kali Linux image, or for using that image to create a bootable device, it’s strongly recommended that you refer to the more detailed procedures described in the specific articles on those subjects.
To install a pre-built image of the standard build of Kali Linux on your Raspberry Pi 3, follow these instructions:
- Get a fast microSD card with at least 16GB capacity. Class 10 cards are highly recommended.
- Download and validate our preferred Kali Raspberry Pi 3 image from the downloads area. The process for validating an image is described in more detail on Downloading Kali Linux.
- Use the dd utility to image this file to your microSD card (same process as making a Kali USB.
In our example, we assume the storage device is located at /dev/sdb . Do not simply copy these value, change this to the correct drive path.
This process will wipe out your microSD card. If you choose the wrong storage device, you may wipe out your computers hard disk.
This process can take a while, depending on your PC, your microSD’s speed, and the size of the Kali Linux image.
Once the dd operation is complete, boot up the Raspberry Pi 3 with the microSD plugged in.
Kali on Raspberry Pi 3 — Tips and Tricks
The bluetooth service on the Raspberry Pi 3 needs a uart helper service before it works. To enable and start the bluetooth service run the following commands:
[email protected]:~$ sudo systemctl enable --now hciuart.service [email protected]:~$ sudo systemctl enable --now bluetooth.service If you are on the 5.10 or higher kernel, you can use mt76 chipset USB Wi-Fi devices, but they require creating a configuration file in /etc/modprobe.d with the following contents:
Kali on Raspberry Pi 3 Headless — Tips and Tricks
You can add a wpa_supplicant.conf file to the first partition of the microSD card to connect to a wireless network.
You can create this file on another Linux system by running wpa_passphrase YOURNETWORK > wpa_supplicant.conf . It will prompt you for the wireless network’s password. You can add the password to the command as you run it, but keep in mind that if you do, your wifi network password will be in your user’s shell history.
Kali on Raspberry Pi 3 — Image Customization
If you want to customize the Kali Raspberry Pi 3 image, including changes to the packages being installed, changing the desktop environment, increasing or decreasing the image file size or generally being adventurous, check out the Kali-ARM Build-Scripts repository on GitLab, and follow the README.md file’s instructions. The script to use is raspberry-pi.sh (32-bit) or raspberry-pi-64-bit.sh (64-bit).
Updated on: 2023-May-30
Author: steev
Kali linux raspberry pi image
The Raspberry Pi Zero is a single core 1GHz, with 512MB of RAM. Unlike the Raspberry Pi Zero W, the Raspberry Pi Zero has no networking on the board, so you will need to use a USB adapter for networking. Kali Linux fits on an external microSD card.
By default, the Kali Linux Raspberry Pi Zero image contains the kali-linux-default metapackage similar to most other platforms. If you wish to install extra tools please refer to our metapackages page.
The Raspberry Pi images use Re4son’s kernel, which includes the drivers for external Wi-Fi cards, TFT displays, and the nexmon firmware for the built-in wireless card on the Raspberry Pi 3 and 4. You will not need to download it and install it, and doing so will likely be a downgrade over the current installed kernel.
Kali on Raspberry Pi Zero — User Instructions
If you’re unfamiliar with the details of downloading and validating a Kali Linux image, or for using that image to create a bootable device, it’s strongly recommended that you refer to the more detailed procedures described in the specific articles on those subjects.
To install a pre-built image of the standard build of Kali Linux on your Raspberry Pi Zero, follow these instructions:
- Get a fast microSD card with at least 16GB capacity. Class 10 cards are highly recommended.
- Download and validate the Kali Raspberry Pi Zero/Zero W image from the downloads area. The process for validating an image is described in more detail on Downloading Kali Linux.
- Use the dd utility to image this file to your microSD card (same process as making a Kali USB.
In our example, we assume the storage device is located at /dev/sdb . Do not simply copy these value, change this to the correct drive path.
This process will wipe out your microSD card. If you choose the wrong storage device, you may wipe out your computers hard disk.
This process can take a while, depending on your PC, your microSD card’s speed, and the size of the Kali Linux image.
Once the dd operation is complete, boot up the Raspberry Pi Zero with the microSD card plugged in.
Kali on Raspberry Pi Zero — Image Customization
If you want to customize the Kali Raspberry Pi Zero image, including changes to the packages being installed, changing the desktop environment, increasing or decreasing the image file size or generally being adventurous, check out the Kali-ARM Build-Scripts repository on GitLab, and follow the README.md file’s instructions. The script to use is raspberry-pi-zero-w.sh .
Updated on: 2023-May-30
Author: steev
Kali linux raspberry pi image
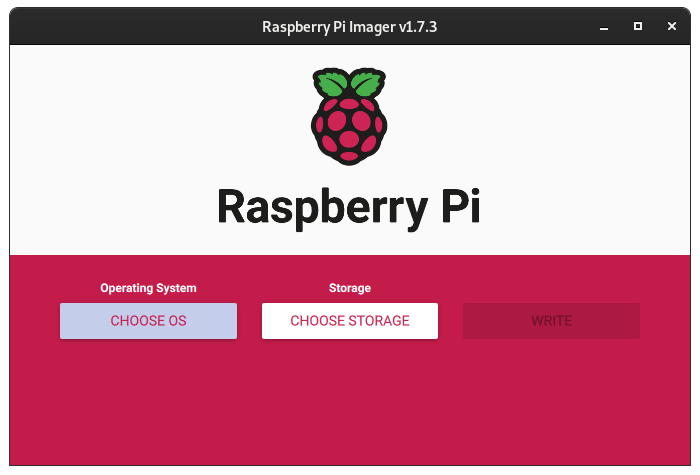
An additional option for writing Kali Raspberry Pi images to either a MicroSD card or USB device is to use the Raspberry Pi Imager software which is available for Windows, macOS, and Linux.
At this time we do NOT support the “Advanced” menu for setting options for customizing your Raspberry Pi. Please consult the documentation for your specific Raspberry Pi device for setting up the Wi-Fi network.
Once you have downloaded the software and installed it, simply run the software and you should be presented with the following screen:
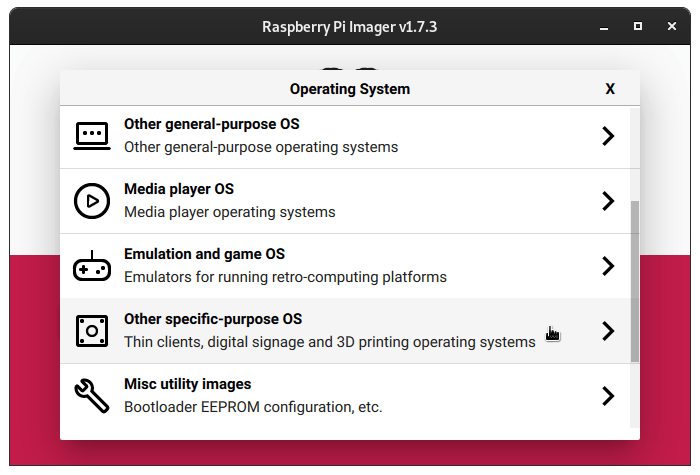
From here we will click the button that says Choose OS and then scroll down and choose Other specific-purpose OS :
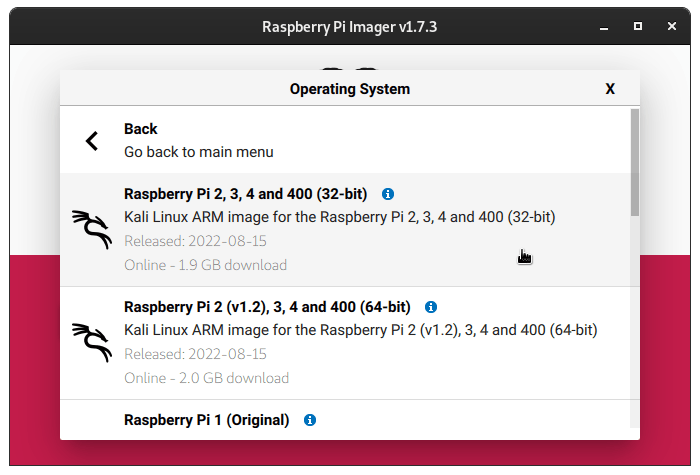
And then from this list choose Kali Linux :

From here you choose whichever Kali Raspberry Pi image you want to write, and it will take you back to the main screen of the application:
Now click on Choose Storage and the software should only let you choose from removable devices on your machine:

Once that is done, simply click the Write button:
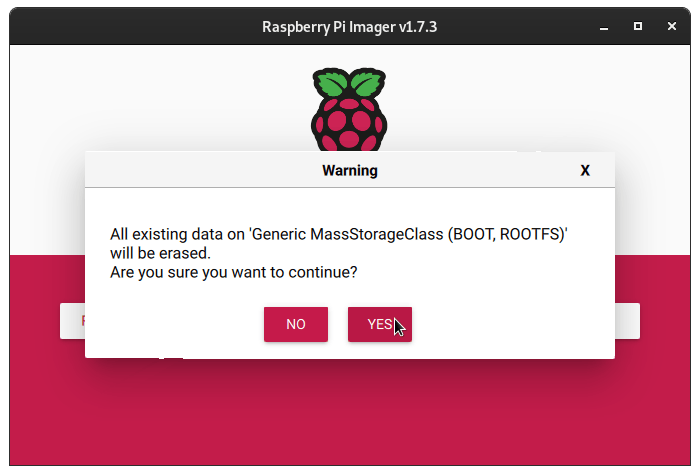
Once you have clicked the Write button, the software will start downloading the image, then write it to the removable storage device that you have chosen. It will verify the SHA256 checksum, and then verify that they also match after writing. Once it tells you that it is complete, you can plug the storage device into your Raspberry Pi and boot up the Raspberry Pi.
Updated on: 2023-Mar-06
Author: steev