- How to run terminal as root in Kali Linux? How to run a GUI program as root
- What needs to be done to make the terminal run as root?
- 1. Switch to root user
- 2. Open a root session
- 3. Using sudo, including with internal Bash commands
- 4. Using sudo without a password
- How to run a GUI program as root
- Related articles:
- Kali linux root commands
- How do I get root permission in Kali Linux?
- Method 1:
- Method 2
- Conclusion
How to run terminal as root in Kali Linux? How to run a GUI program as root
What needs to be done to make the terminal run as root?
Let’s consider several options
1. Switch to root user
In recent versions of Kali Linux, the default user has changed: before it was root, and now it is a regular user.
If you want to revert to the previous option, that is, make the root user the main user, then this is possible.
First, set the root password:

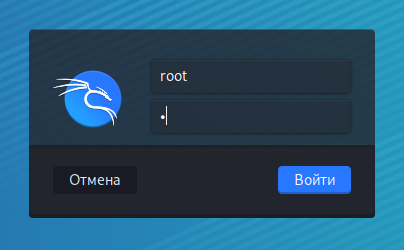
Now, when you turn on your computer, you can log in as root:
As a result, all opened terminals will have elevated privileges.
2. Open a root session
Start a terminal with as a normal user and run in it:
A root user session will be opened, all commands will be executed with elevated privileges.
Another option to start a session with elevated privileges is to run the following command:
To end the root session press Ctrl+d.
3. Using sudo, including with internal Bash commands
In fact, few commands require superuser rights. And for those that require root privileges, just run them with sudo:
But what if we need to add a line to a file requiring elevated privileges with the following command:
sudo echo "something" >> /etc/file_requiring_elevated_privileges
The command must be executed with elevated privileges, which should give write permissions to the file. But in this case, neither > nor >> can be used, including as root. And an error like this will be displayed:
bash: /etc/file: Access Denied
You can work around this problem by opening a superuser session:
Or with the tee command. Use it with the —append or -a options — this is important, without these options the file will be completely overwritten. Example:
echo 'new line' | sudo tee --append /etc/apt/sources.list
The above command will append a new line to the existing file.
But the peculiarity of the tee command is that it will not only add the file, but also print the added line to the console. If you do not want the data to be returned to the console again, then redirect the output to /dev/null.
echo 'new line' | sudo tee --append /etc/apt/sources.list > /dev/null
This will work in a similar way, but no ‘new line’ will be displayed.
Another use case for echo to write or add to a file as administrator:
sudo sh -c "echo 'something' >> /etc/privilegedfile"
The command uses both single and double quotes, which means that if the string you add to the file also contains quotes, then they must be escaped with backslashes.
4. Using sudo without a password
If it is not a problem for you to add sudo before commands, but you do not like entering a password every time, then the following command will allow you to run commands with sudo and will not be prompted for a password:
echo '%sudo ALL=(ALL) NOPASSWD: ALL' | sudo tee --append /etc/sudoers
Use this only if you understand the security risks!
How to run a GUI program as root
Any program, including those with a graphical interface, can be run as root. This is usually required for file managers and text editors, so that it is convenient to navigate through folders and edit files with limited access.
In fact, everything starts in the same way as with the console utilities:
But you need to know the name of the command. You can find out the name of the command using the following algorithm:
For example, a popular text editor with root privileges can be started like this:
On Kali Linux (Xfce), the file manager executable is called thunar. You can run it as root like this:
You can also specify the folder you want to open:

In Cinnamon, the file manager is called Nemo, run as root:
You can also specify the folder to open:
Related articles:
Kali linux root commands

Zip File, мои юные хацкеры. Нынче мы затронем насущную тему работы с правами root-пользователя в Kali Linux 2020. Одним из нововведением этой версии является механизм работы no-root. Т.е. по умолчанию, после установки или на готовой виртуалке вы работаете из-под обычного смертного юзверя. Это сделано сугубо из соображений безопасности. Ведь если использовать Kali’шку в качестве основной декстопной оси, постоянно сёрфить в дарке и периодически баловаться с инструментами пентестинга, вероятность однажды самому предстать в роли жертвы возрастает в разы.

Однако, если вы запускаете её изредка, используете исключительно в образовательных целях и изолируете от основной сети, максимально минимизируя уязвимость системы, вам будет гораздо удобнее сразу работать под root’ом.
Как минимум, это избавит вас от бесячих проблем забывания ввести «sudo» перед очередной командой, а как максимум, поможет не заморачиваться с отсутствием нужных прав при инсталляции того или иного пакета.
Сегодня, я покажу вам несколько вариантов, изучив которые, вы сможете повысить свою эффективность работы с системой Kali Linux и получить вожделенные рут-права. Устраивайтесь по удобнее и погнали чудить.
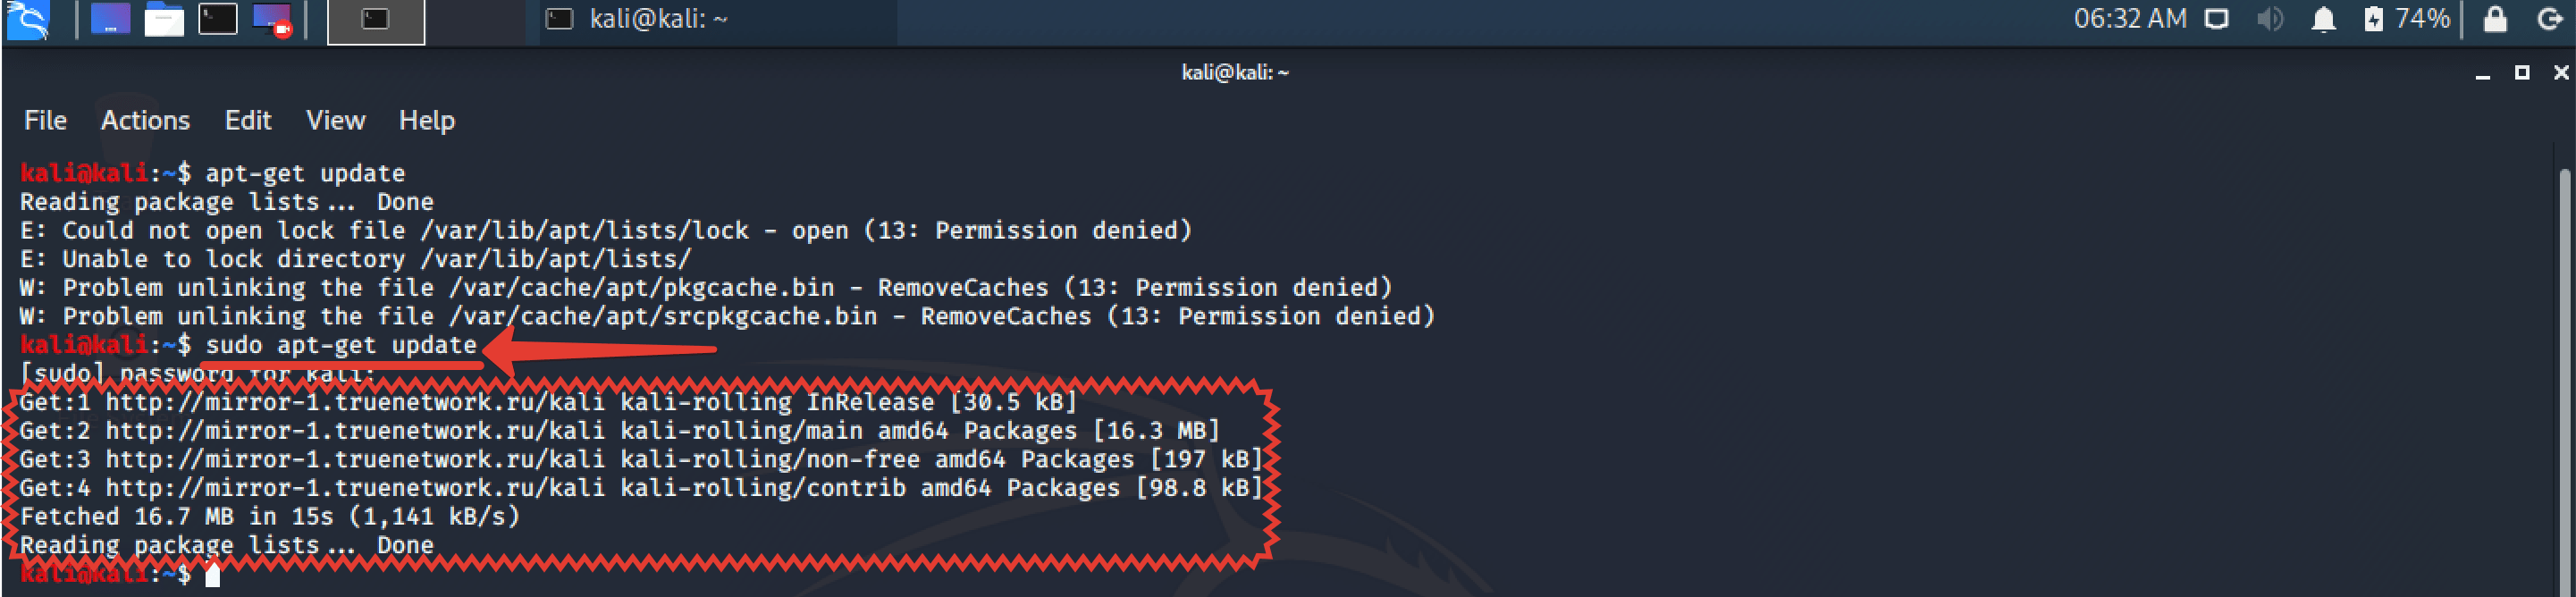
Шаг 1. Если не поняли из предисловия о чём идёт речь, покажу на практике. Вводим знакомую всем линуксоидам команду для обновления списка пакетов apt-getupdate и видим ошибку «permission denied», означающую отсутствие соответствующих прав.

Шаг 2. А теперь повторяем команду введя перед телом «sudo». Апдейт сразу завёлся. Всё потому, что приставка sudo позволяет выполнять нам любую команду с неограниченными правами супер-пользователя.
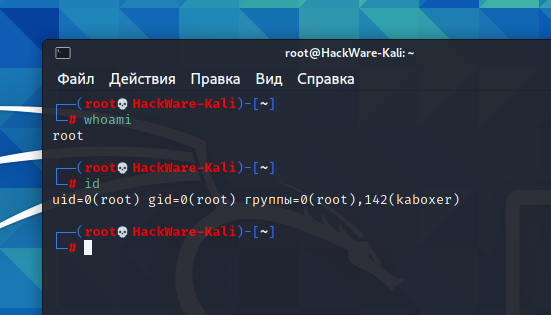
Шаг 3. А наш текущий, таковым, к сожалению, не является. В этом можно убедиться, введя id. Видите, юайди – тысяча. Это говорит нам о том, что перед нами самый обычный пользюк.

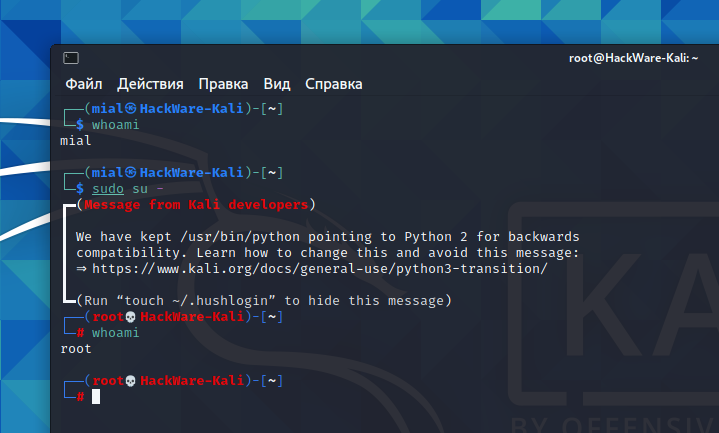
Шаг 4. Для того, чтобы работать в окне терминала с правами рута, достаточно ввести простенькую команду «sudo su».
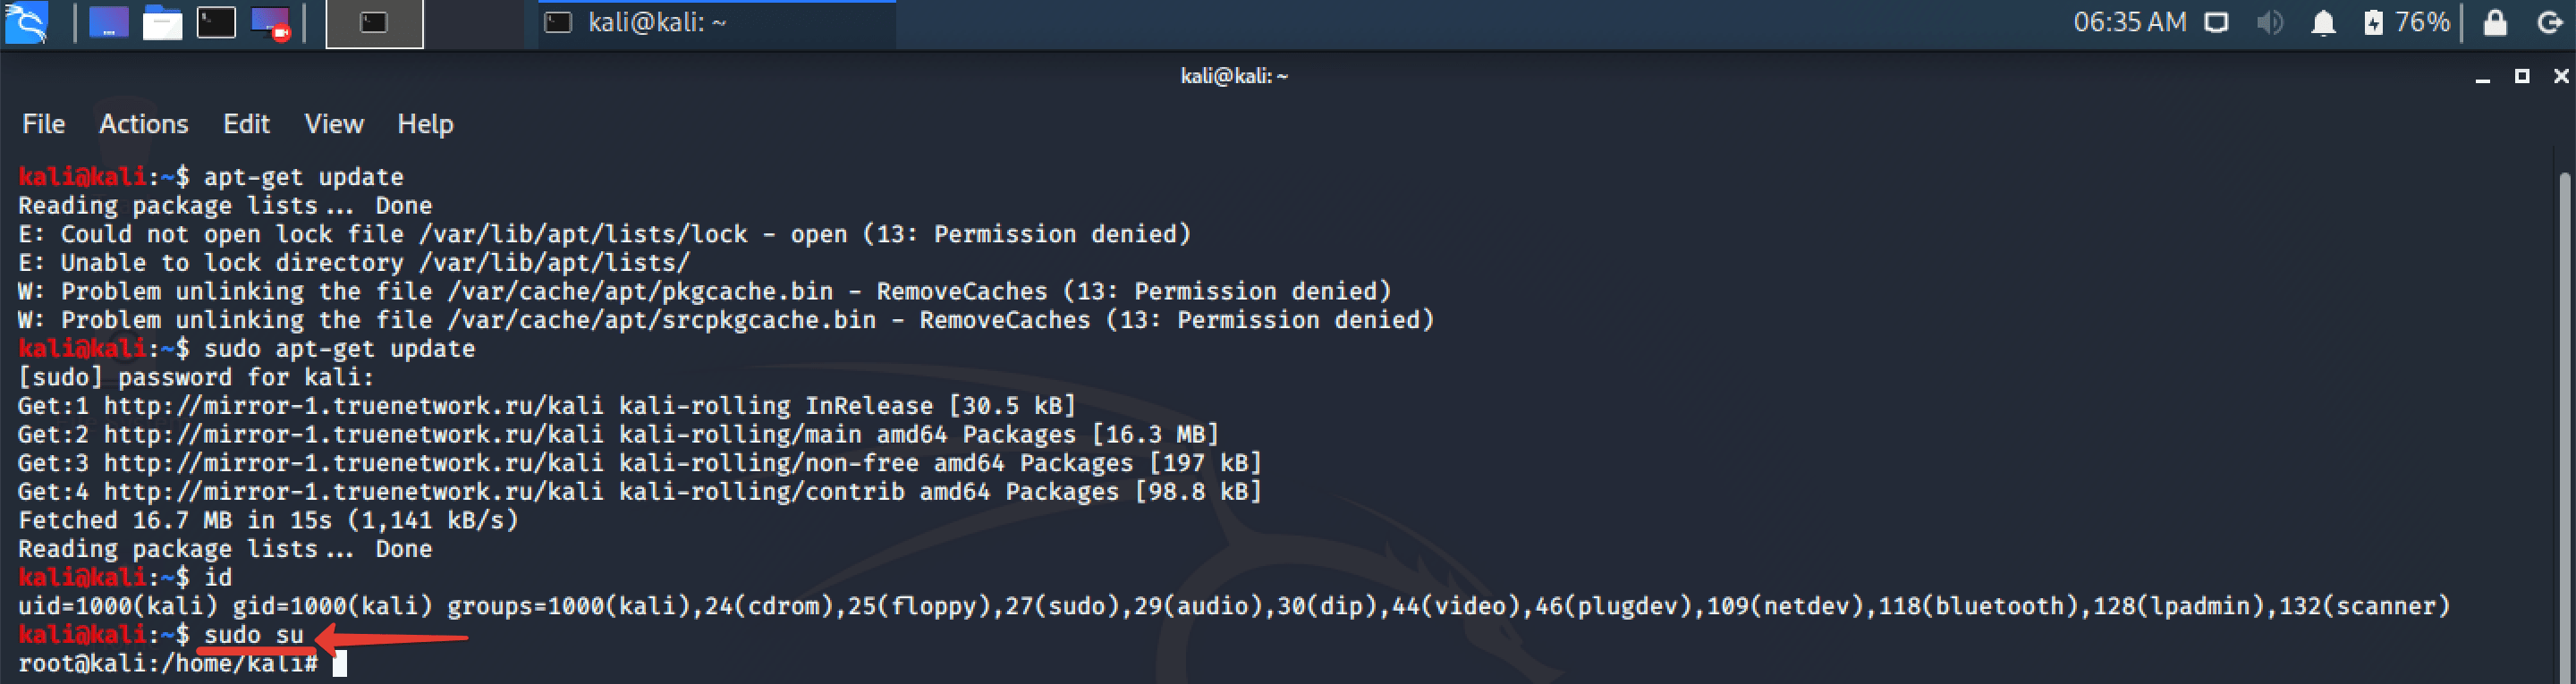
Шаг 5. Давайте теперь проверим юайди. Он упал до нуля, а следовательно мы сто пудово работаем с неограниченными правами. Имя пользователя, как видите, тоже изменилось.

Шаг 6. Однако согласитесь, что в плане безопасности этот способ переключения на рута, совсем уж топорный. Давайте хотя бы, для приличия, пароль установим. Sudo passwd. И дважды вводим сложный пассворд. Окей. Теперь давайте закроем окно терминала.

Шаг 7. И открыв новое введём su. Система запрашиваем пароль, который мы только что задали для root-пользователя. Вводим его.

Шаг 8. Давайте попробуем теперь обновить список пакетов, не вводя предварительно sudo. Так. Всё работает. В принципе, работа в таком режиме является наиболее безопасной для тех, кто использует Кали в качестве основной оси. Но если вы пользуетесь ей редко и заинтересованы в экономии времени, можете сразу ломиться под рутом. Давайте попробуем это сделать. Выходим из системы.

Шаг 9. И вводим логин суперпользователя и пароль, установленный ранее. «Log In».

Шаг 10. После входа вызываем окно терминала и убеждаемся в своей крутости.

Таким образом, вы теперь сможете реально экономить своё драгоценное время, вводя все команды без обременительной приставки sudo. Работать сразу с полными правами гораздо приятней.
И практически, и просто морально. Вообще до 2020 года в Kali всегда изначально создавался Root-пользователь, а вышеописанные танцы с бубном — это прямо-таки ноу-хау от разработчиков.
Ну да ладно. Главное, что вопрос при желании, более чем решаемый. Друзья, если вы хотите более подробно узнать обо всех нюансах работы с пользовательскими учетными записями и группами, то я настоятельно рекомендую вам ознакомиться с моим обучающим курсом «Администрирование Linux с нуля».
В нём я подробнейшим образом разбираю вопросы администрирования самой популярной серверной операционной системы семейства Linux. К слову, в данный момент на курс действует 50% скидка. Ссылку со всеми подробностями оставлю в описании.

>>>КЛИКНИТЕ, ЧТОБЫ УЗНАТЬ ПОДРОБНОСТИ
На этом у меня всё. Сегодня урок не столько долгий, сколько полезный. Мне просто нужно затестить звук напрямую с рекордера. Жена сказала, что он гораздо лучше раскрывает мой голос, нежели петличка.
Так что, олды, напишите пожалуйста в комменты, богаче ли стало звучание, или всё-таки стоить вернуть петлю. Мне действительно важно знать ваше мнение. И не забываем про лайки, если видос оказался полезен.
На а те, кто впервые забрёл на канал, не тупите. Обязательно клацайте колокольчик. Нажмёте, и в вашей ленте будут регулярно появляться ролики на тему kali linux’а, практических взломов и пентестинга.
Традиционно желаю удачи, успехов, отличного настроения. Изучайте Linux, заботьтесь о безопасности и никогда не забывайте пароль от Root’а. Это самое стрёмное, что может случиться. Уж поверьте. До новых встреч, ребятки. Всем пока.
How do I get root permission in Kali Linux?
![]()
The root user name or account has default permission to all available commands and files on a Linux or any other Unix-like operating system. It is also known as the superuser, the root account, and the root user. Username: “kali” are the standard credentials for logging into the new Kali system. This establishes a session as user “kali,” You must use this user password after “Sudo” to gain root access. Kali Linux was using the root account by default till recent times. Root login is restricted in the current versions of Kali, allowing you to utilize your regular user account to access the GUI. The reasons behind this modification should be clear, but if you are a Kali user, you are presumably already familiar with a Linux system; thus, there is a little risk in allowing you to log in with the root account. We will create a non-root user with administrative capabilities while we install Kali Linux. Other Linux distributions follow a similar procedure. The default user in older versions of Kali is root. But first, we must create a regular account before installing Kali Linux. To install any program or package under Kali, we must first log in and then use the Sudo command. So, to gain root access to Kali Linux, we must follow the appended methods:
Method 1:
If many users share the system, some of them may wish to serve as administrators and manage the system as a whole. So that no direct effect on the system’s operation and easy sharing across users, the suitable users can be granted administrator privileges and others with non-root privileges. It will be tough for an attacker to break into the system if there is a root user. The usage of sudo and the disablement of the root account might mislead intruders because they would not know which account had admin privileges. Sudo policies can be created and deployed in a corporate network as well as Kali Linux distributions. Having a root password improves monitoring capabilities because it allows you to see what others users have been doing in the system and whether or not any intrusions are occurring.
Step 1: To begin, download the kali-root-login package with the apt package manager.
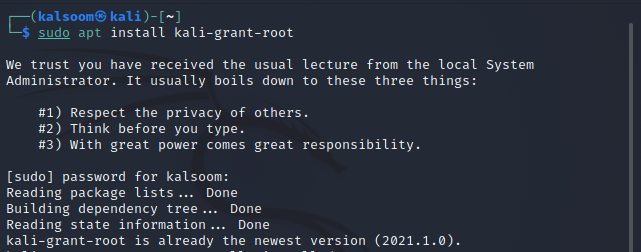
Step 2: Next, use the following listed command to configure the program we have just downloaded.

Step 3: Upon the execution of the above command, the following displayed screen will pop up.

Step 4: Ensure that “enable password-less privilege escalation” is selected before clicking enter to proceed further.
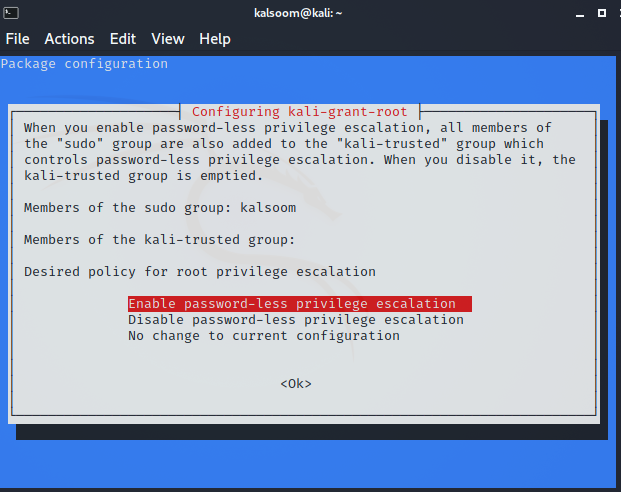
Step 5: Upon section, the user will be added to the “kali-trusted” group, as you can verify from the attached screenshot.

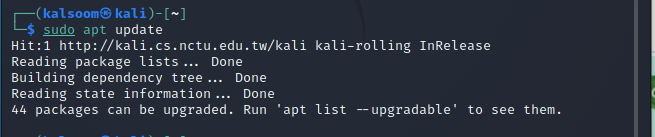
Step 6: It’s as simple as that. You can even use the Sudo command to perform all subsequent commands as root, but you will never require a password. Try logging out and then in, then perform a command that typically requires root access to see whether it works.
Method 2
We connect as non-root users by default on Kali Linux 2021, and we must set the root password ourselves. We do not even know the root password in the first session, so we can’t log indirectly. Instead, we have to log in as a non-user, which is established when we install Kali Linux.
Step 1: To begin, you must first open the terminal and then use this command to determine the current login user.

You can check that the user name is kalsoom in our system.
Step 2: To change the standard user account to the root account, execute the following cited command into the terminal.
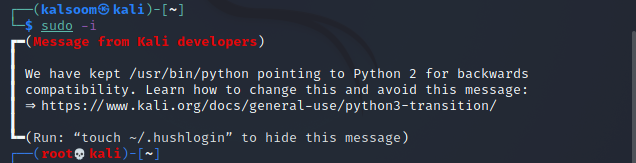
Step 3: You can now verify that you are in the root by using the appended command.

The output displays the user name as “root”.
Conclusion
In this tutorial, we learned how to grant root rights to a regular user in Kali Linux. You can use the instructions in this guide to prefix any command with sudo and never have to input a password again. When the Kali developers restricted root login in the latest releases, they must have anticipated that some users would be irritated; therefore, they provided numerous options for restoring capability. One word to the wise when using the root password: keep it safe in your control; otherwise, the system could be compromised. I hope the article will be instructive for you while working on Kali Linux. You can use either of these two methods to get access to root rights in your system.