- Install Kali Linux on Raspberry Pi 4
- Things You Will Need:
- Downloading Kali Linux for Raspberry Pi 4:
- Flashing Kali Linux for Raspberry Pi 4 on the MicroSD Card:
- Booting Kali Linux on Raspberry Pi 4:
- Changing the Default Password of Kali Linux:
- Issue#1: Fixing Black Edges Around the Monitor:
- Conclusion:
- About the author
- Shahriar Shovon
- Raspberry Pi 4 and Kali
- What’s new on the Raspberry Pi 4?
- Try it out!
Install Kali Linux on Raspberry Pi 4
Kali Linux is a Debian based operating system specially made for penetration testing. Kali Linux has all the required tools for penetration testing installed by default. Even if something is not installed by default, it will be in the official package repository of Kali Linux. So, you can easily install whatever you need from the official package repository of Kali Linux. Kali Linux is any penetration tester’s best friend.
In this article, I am going to show you how to install Kali Linux on Raspberry Pi 4. So, let’s get started.
Things You Will Need:
To try this article, you need the following things:
- A Raspberry Pi 4 single-board computer.
- A USB Type-C power adapter for Raspberry Pi 4.
- A 32GB or higher capacity microSD card.
- A card reader for flashing Kali Linux on the microSD card.
- A computer/laptop for flashing the microSD card.
- A keyboard and a mouse.
- A micro-HDMI to HDMI cable.
Downloading Kali Linux for Raspberry Pi 4:
You can download the Kali Linux image for Raspberry Pi from the official Kali Linux ARM images download page.
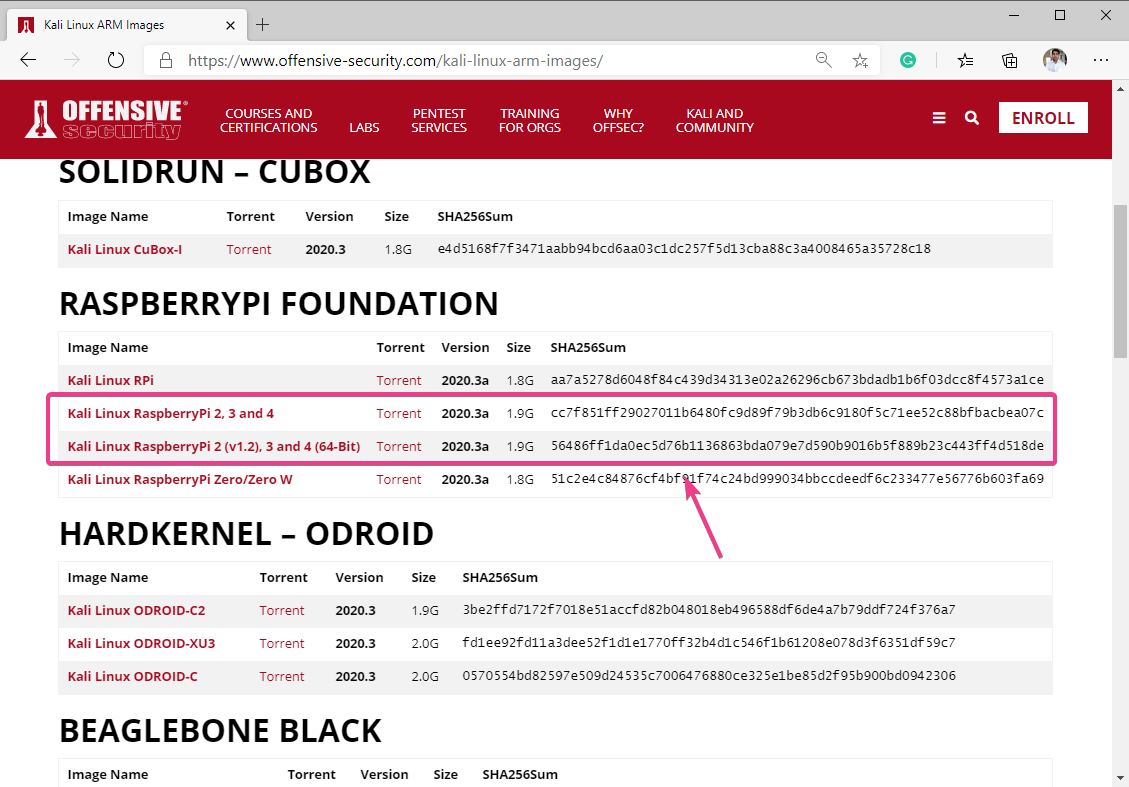
First, visit the official Kali Linux ARM images download page from your favorite web browser. Once the page loads, scroll down to the RASPBERRYPI FOUNDATION section and click on one of the Kali Linux Raspberry Pi images as marked in the screenshot below.
If you have the 2GB version of the Raspberry Pi 4, then download the Kali Linux RaspberryPi 2, 3, and 4 images.
If you have the 4GB or 8GB version of the Raspberry Pi 4, then download the Kali Linux RaspberryPi 2 (v1.2), 3, and 4 (64-bit) image.
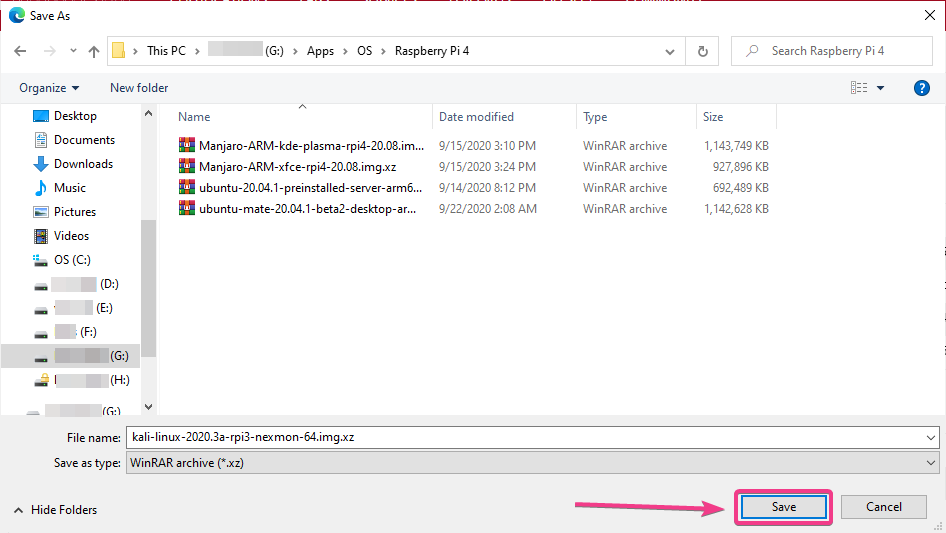
Once you click on a download link, your browser should prompt you to save the Kali Linux Raspberry Pi image. Select a directory where you want to save the image and click on Save.
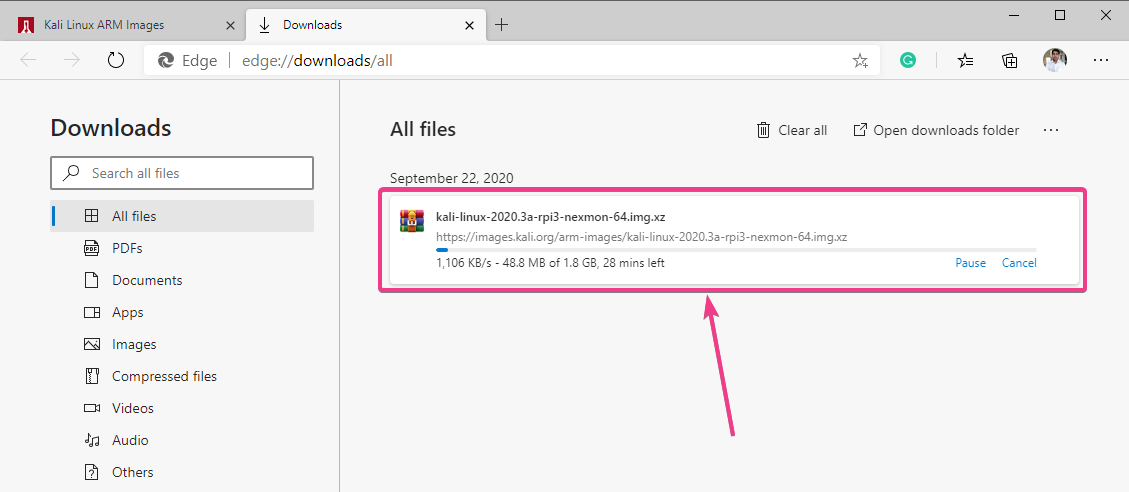
Your browser should start downloading the Kali Linux Raspberry Pi image. It may take a while to complete.
Flashing Kali Linux for Raspberry Pi 4 on the MicroSD Card:
Once the Kali Linux Raspberry Pi image is downloaded, you have to flash it on a microSD card. You can use programs like Balena Etcher, Raspberry Pi Imager, etc. to flash the Kali Linux Raspberry Pi image on a microSD card.
In this article, I will use the Raspberry Pi Imager program to flash the Kali Linux image on a microSD card. Raspberry Pi Imager can be downloaded from the official website of the Raspberry Pi Foundation. It is available for Windows 10, Mac, and Ubuntu. If you need any assistance on installing Raspberry Pi Imager, check out my article How to Install and Use Raspberry Pi Imager at LinuxHint.com.
Once you have Raspberry Pi Imager installed on your computer, insert the microSD card on your computer and run Raspberry Pi Imager.
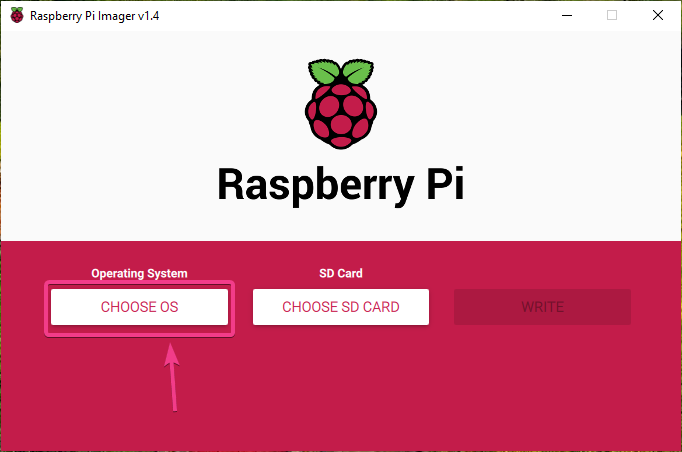
Then, click on CHOOSE OS to select an operating system image.
Click on Use custom from the list.
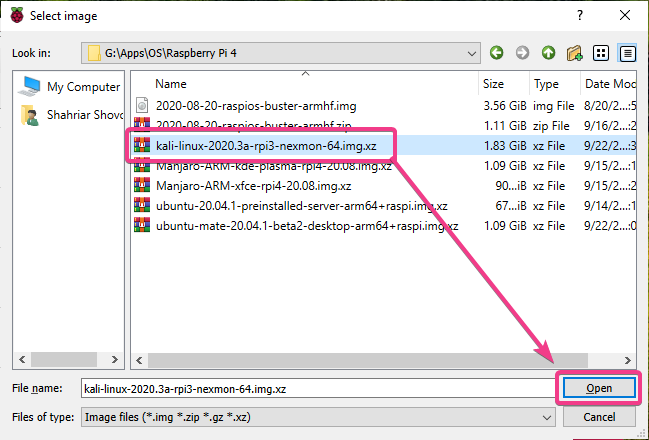
Select the Kali Linux Raspberry Pi image that you have just downloaded and click on Open.
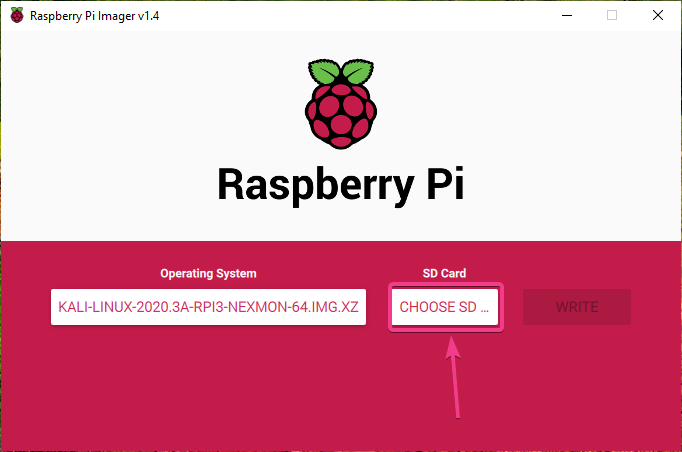
To select your microSD card, click on CHOOSE SD CARD as marked in the screenshot below.
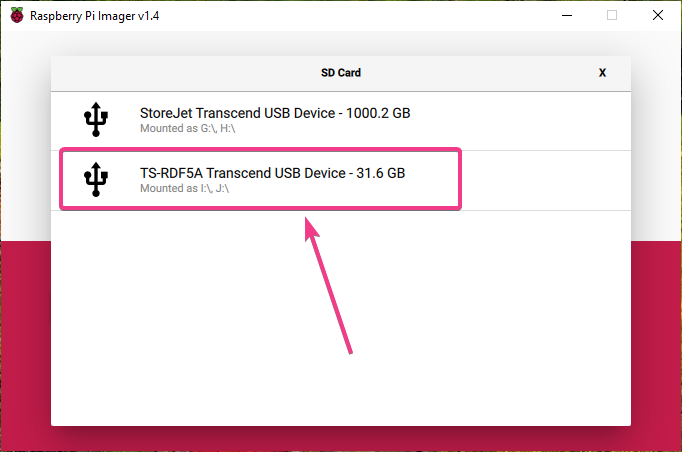
Click on your microSD card from the list.
To flash the Kali Linux image to the selected microSD card, click on WRITE.
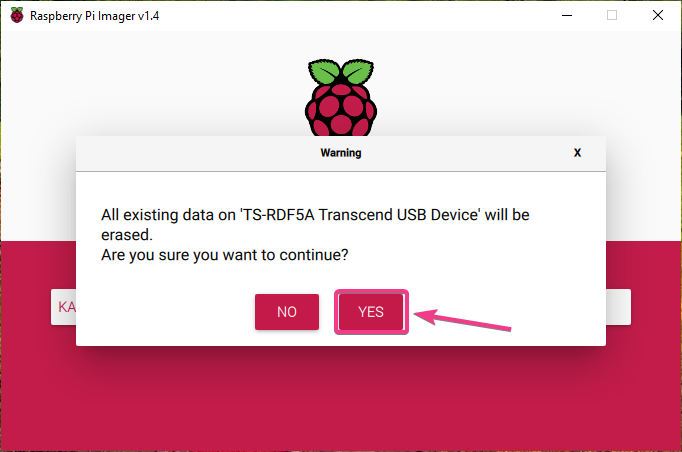
Before the microSD card can be flashed with a new operating system image, it must be erased. If you don’t have any important data on your microSD card, click on YES.
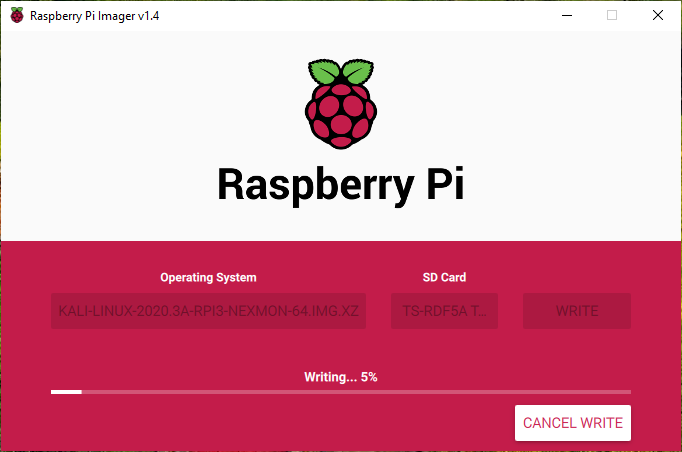
Raspberry Pi Imager should start flashing the Kali Linux Raspberry Pi image on the microSD card. It may take a while to complete.
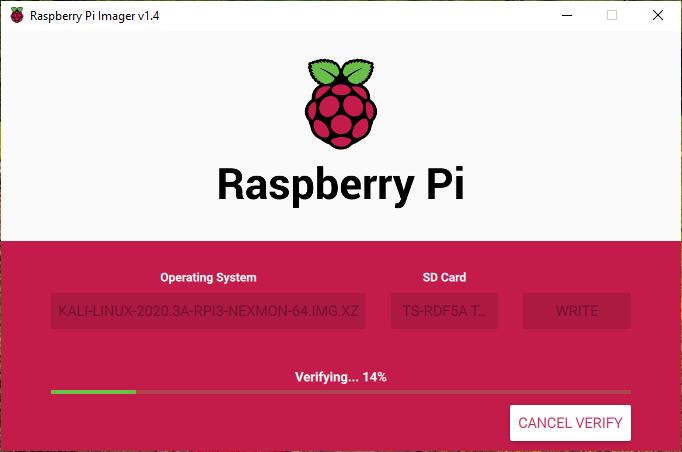
Once the Kali Linux Raspberry Pi image is written on the microSD card, Raspberry Pi Imager will check the microSD card for write errors. It may take a while to complete.
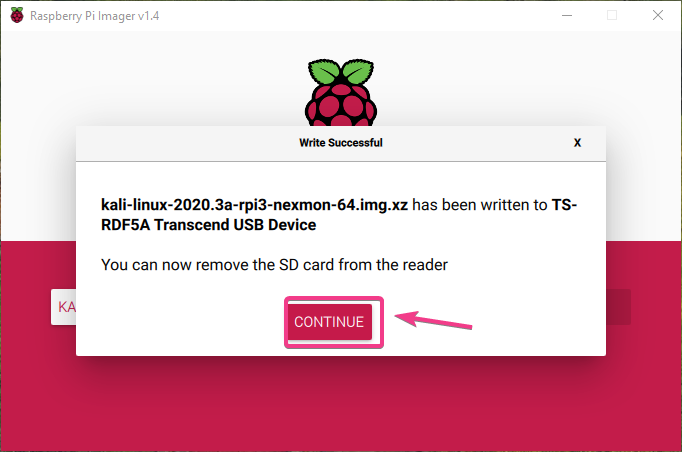
At this point, the Kali Linux Raspberry Pi image should be flashed on to the microSD card. Click on CONTINUE and close Raspberry Pi Imager. Then, remove the microSD card from your computer.
Booting Kali Linux on Raspberry Pi 4:
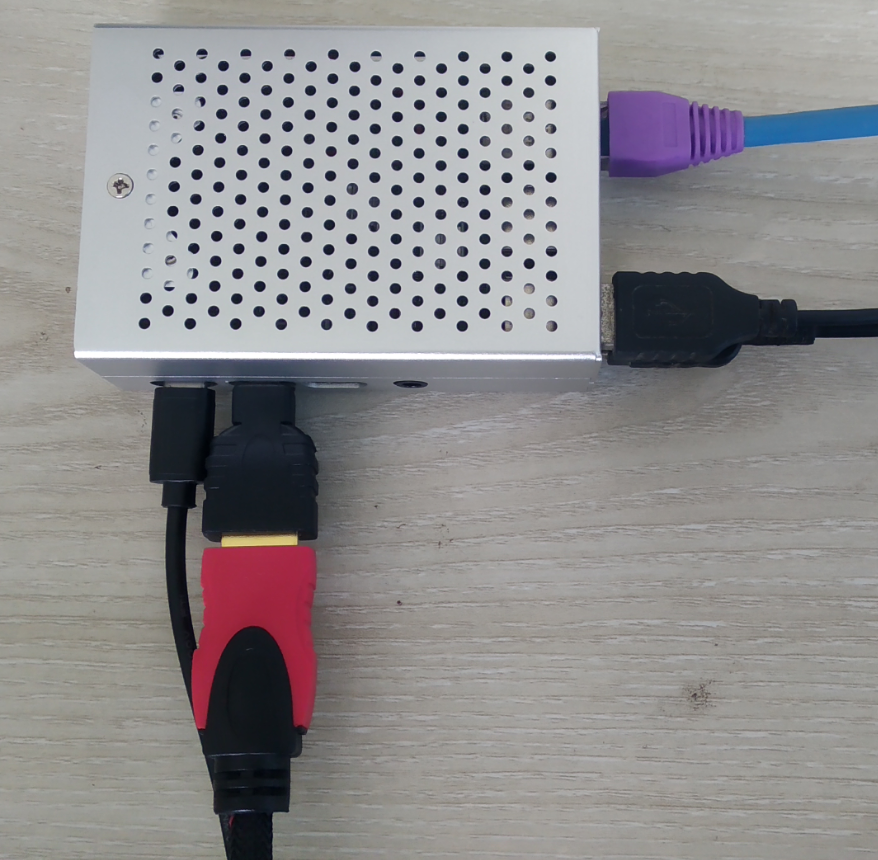
Once you have ejected/removed the microSD card from your computer, insert it on the MicroSD card slot of your Raspberry Pi 4. Also, connect the micro HDMI to HDMI cable, a USB keyboard, a USB mouse, a network cable on the RJ45 port (optional), and a USB Type-C power cable on your Raspberry Pi 4.
Once you’ve connected all the accessories, power on your Raspberry Pi 4.
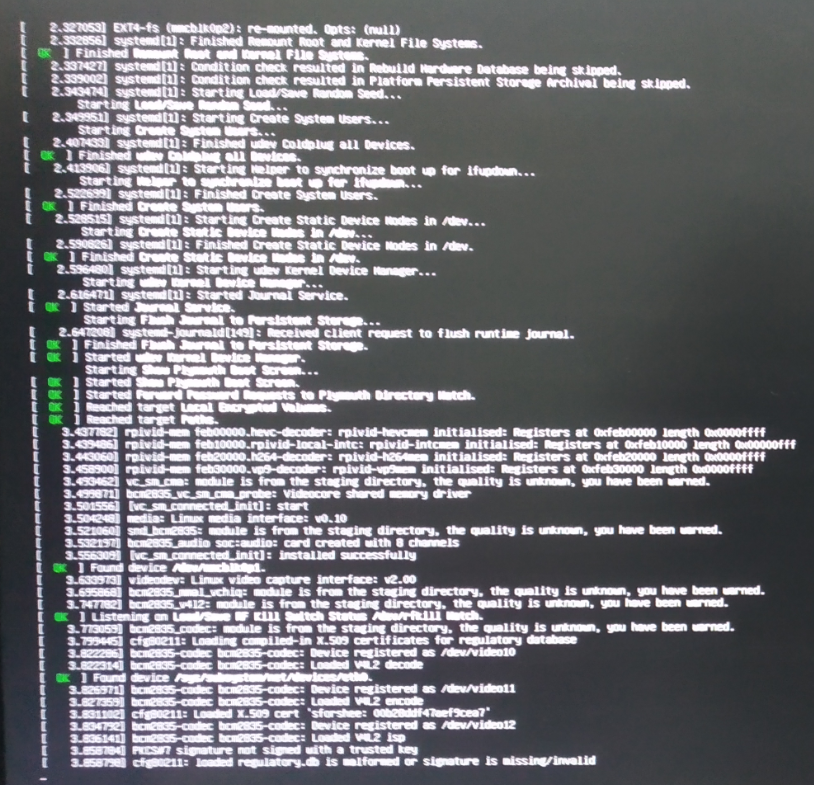
Kali Linux is being booted.
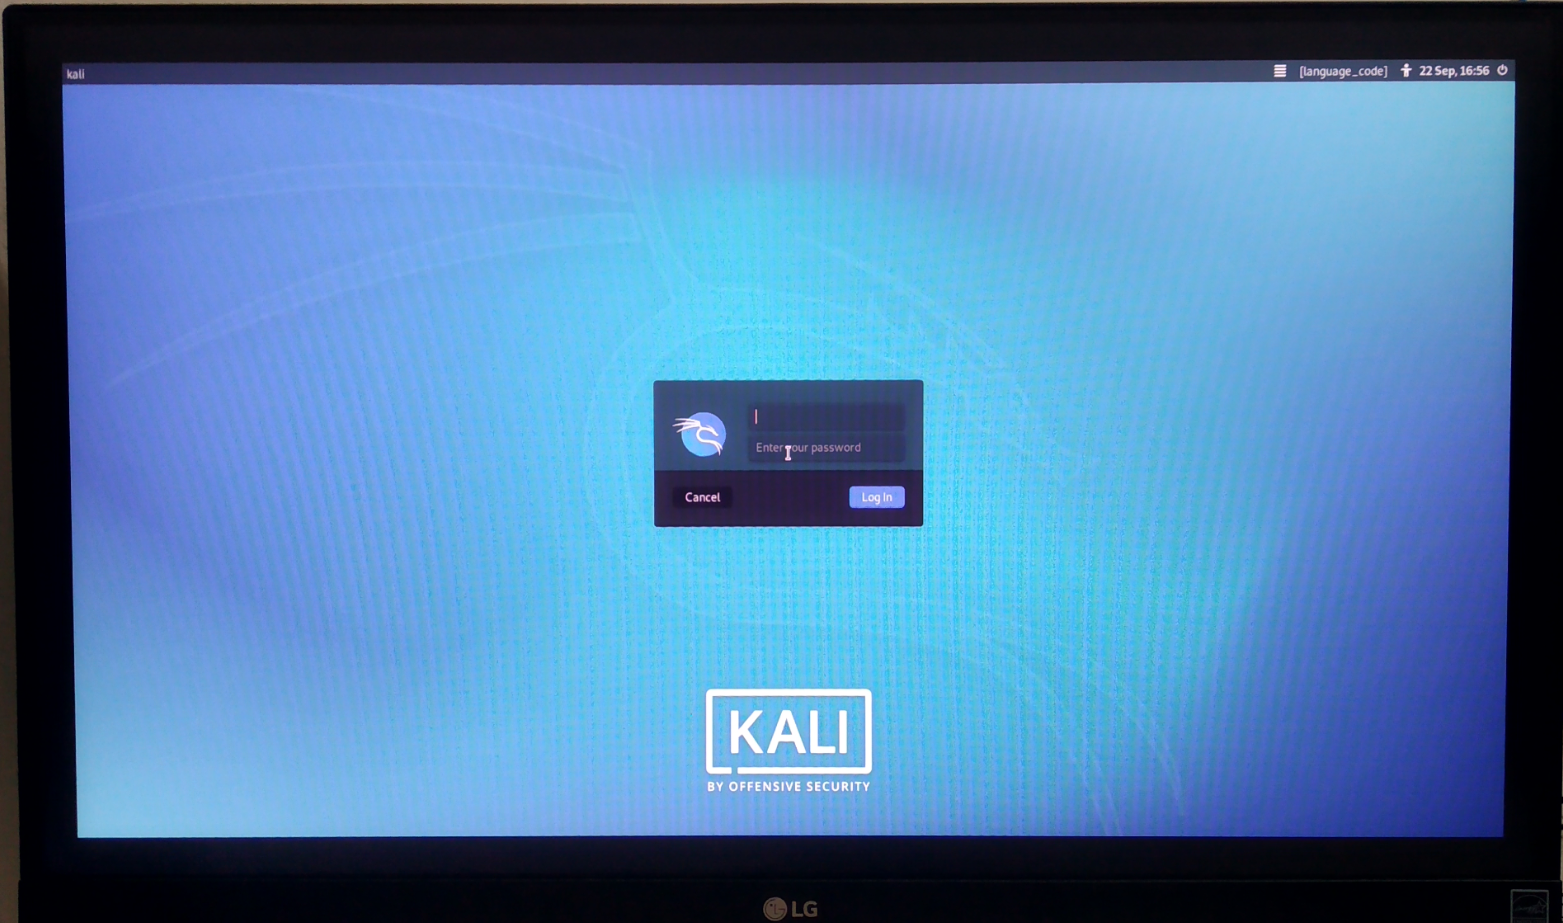
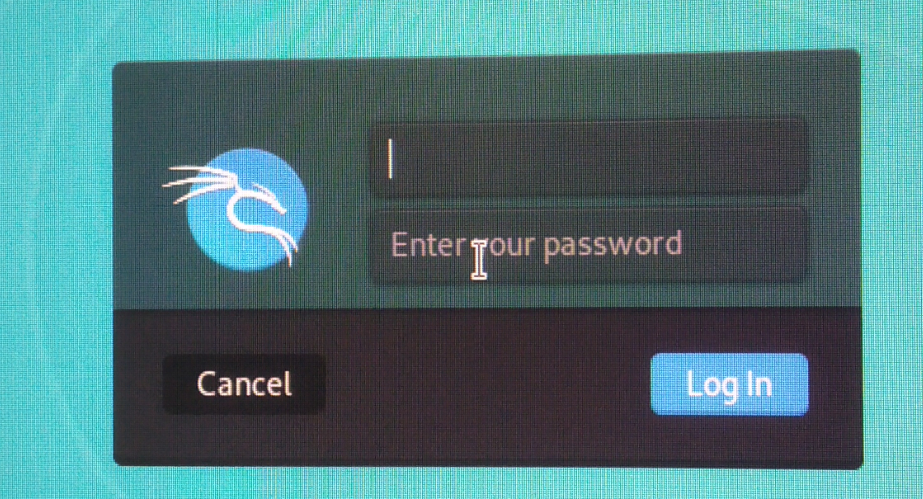
Shortly, you should see the login window of Kali Linux.
The default username is kali and the default password is kali. Type in the username and password and click on Log In.
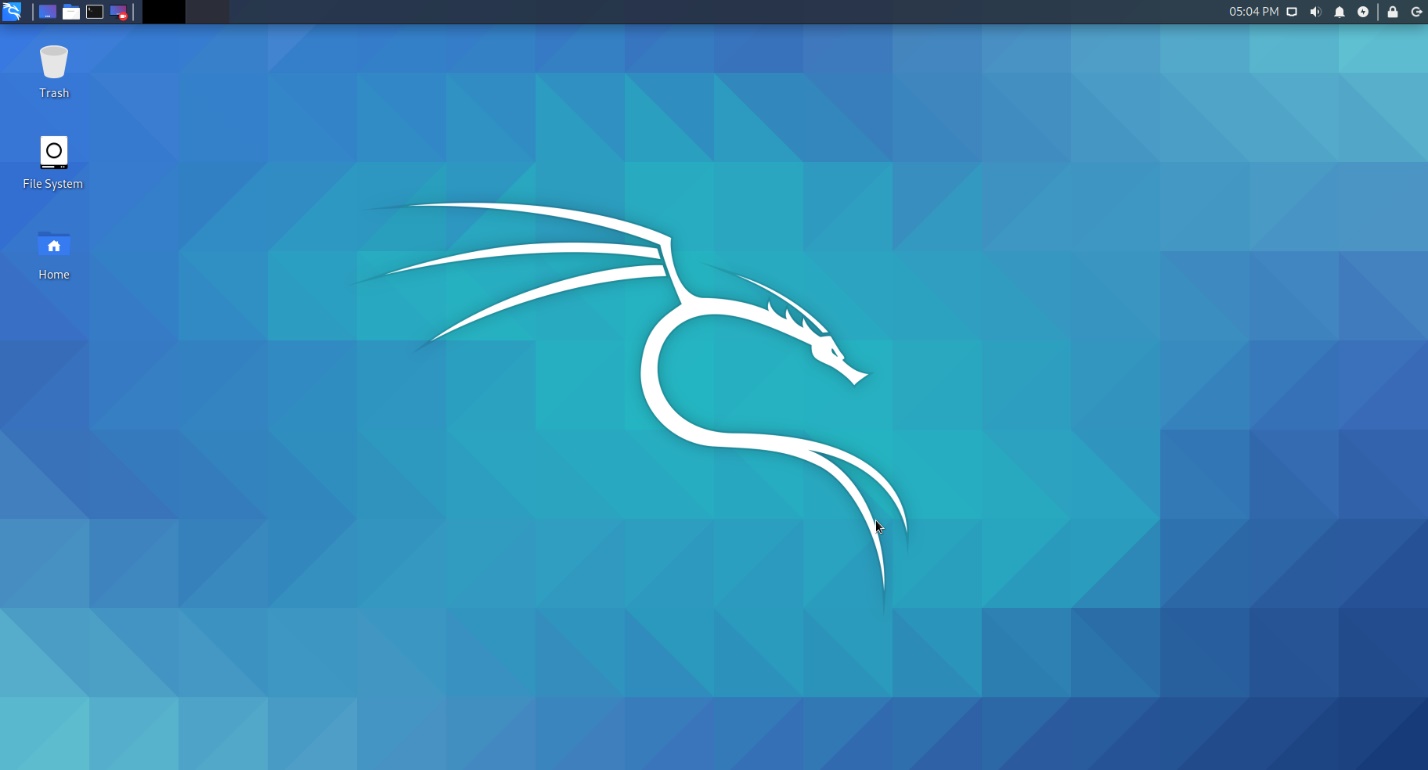
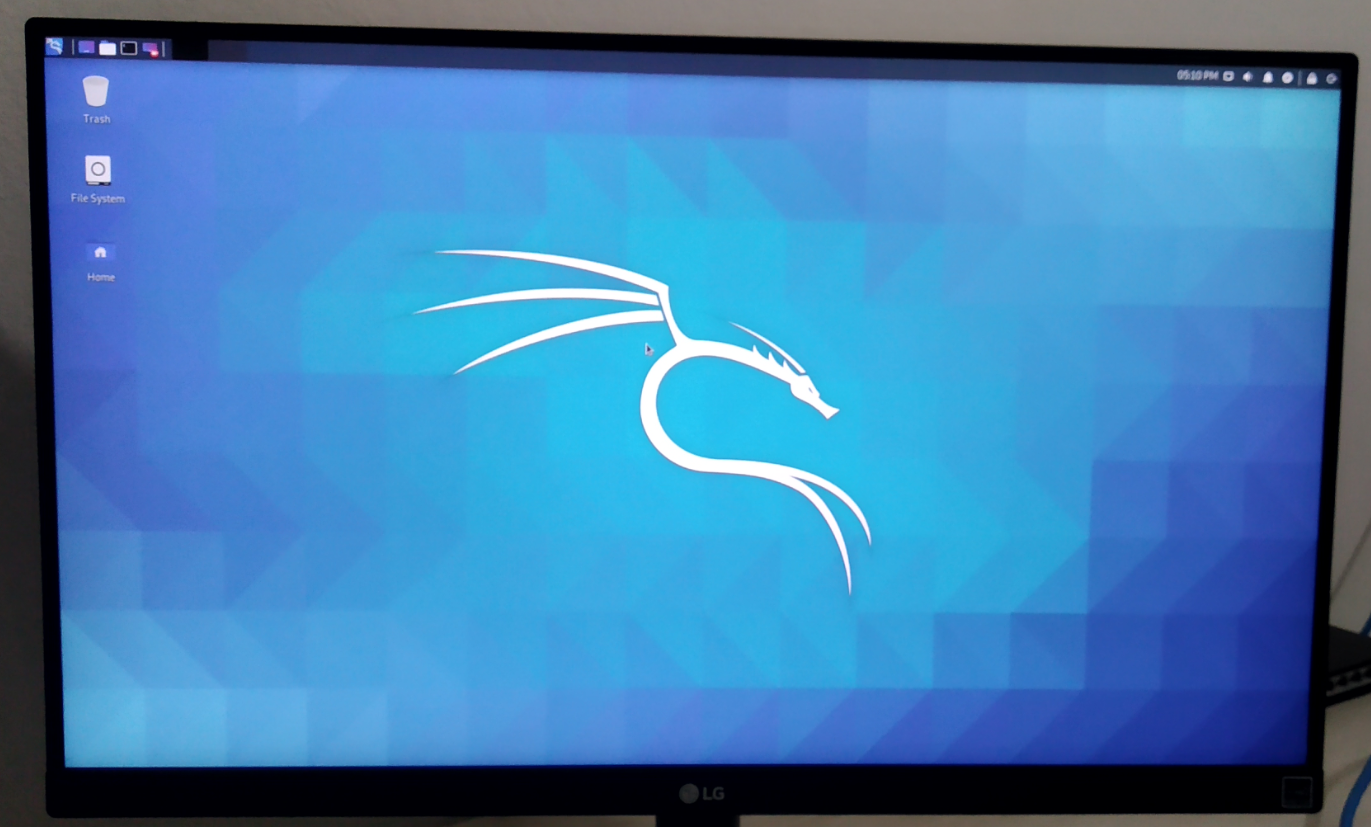
You should be logged in to the Kali Linux desktop environment.
As you can see, I am running Kali Linux 2020.3 on my Raspberry Pi 4.
Kali Linux uses about 457 MiB of memory when no programs are running. The Kali Linux desktop environment is lightweight and very responsive on the Raspberry Pi 4. I did not face any usability issues.
Changing the Default Password of Kali Linux:
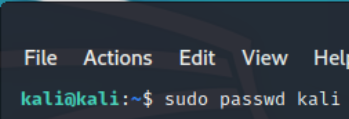
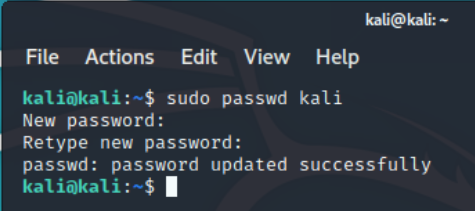
If you want to change the default password of the Kali Linux operating system running on your Raspberry Pi 4, open a terminal and run the following command:
Type in a new password and press .
Retype the new password and press .
The password should be changed.
Issue#1: Fixing Black Edges Around the Monitor:
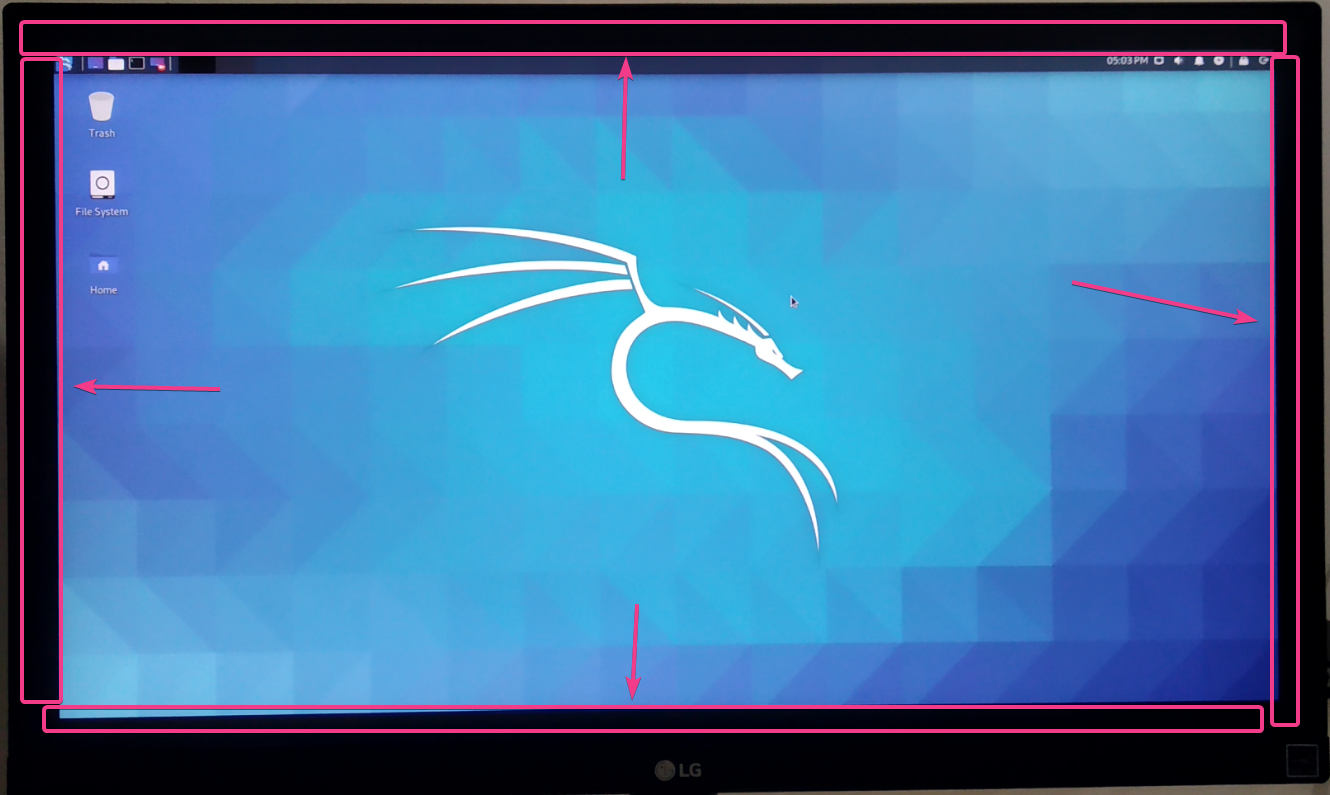
You may see black borders or exclusion zones around your monitor when you boot Kali Linux on your Raspberry Pi. This is because of overscan. When overscan is enabled, it excludes a few pixels from each corner of the screen. Overscan is enabled by default on Kali Linux for Raspberry Pi. Luckily, it is very easy to disable.
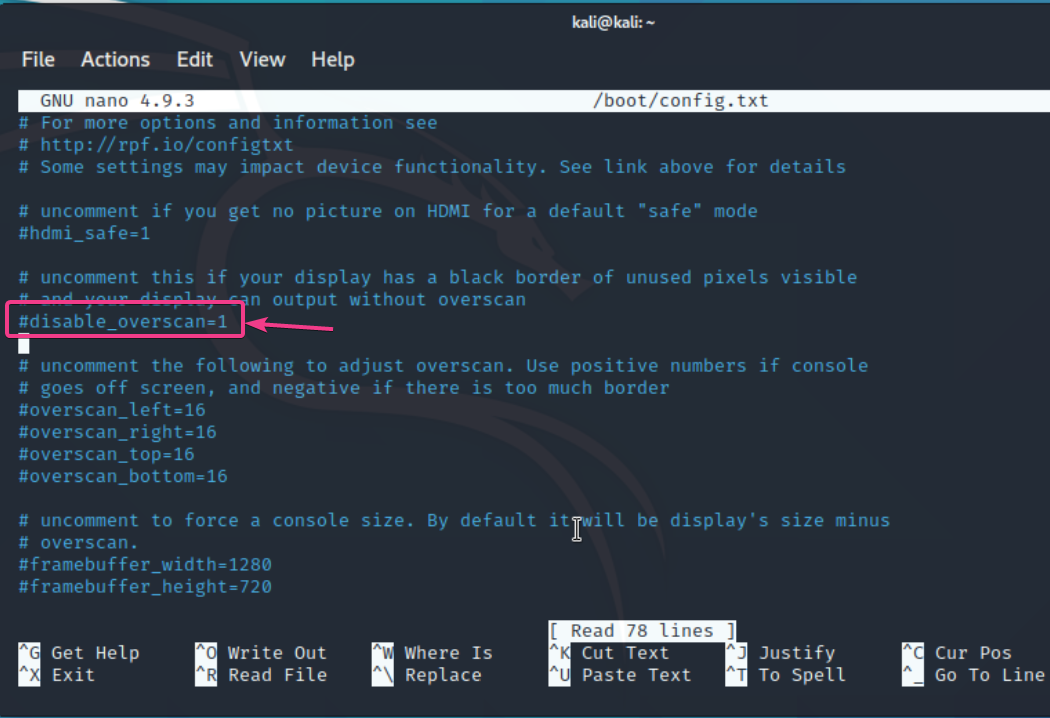
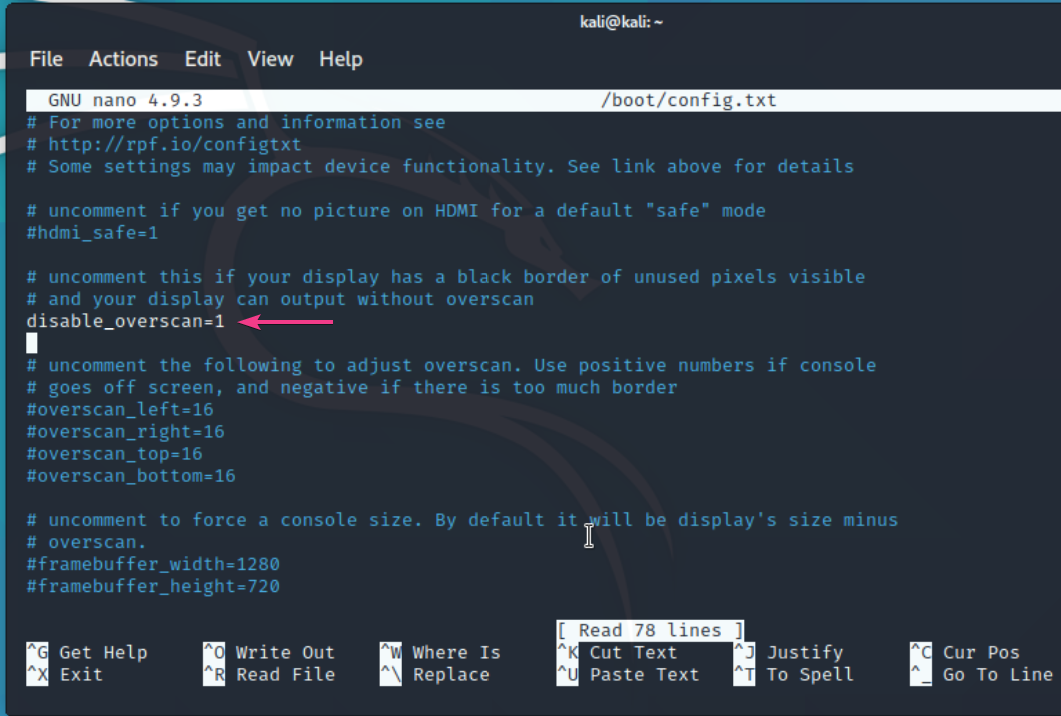
To disable overscan, open a terminal and open the /boot/config.txt file with the following command:
The disable_overscan=1 line is commented out in the /boot/config.txt file.
Remove the # sign from the front of the disable_overscan=1 line. This will uncomment the line.
Then, press + X followed by Y and to save the /boot/config.txt file.
For the changes to take effect, reboot your Raspberry Pi 4 with the following command:
Once your Raspberry Pi 4 boots, the black borders or exclusion zones around your screen should be gone.
Conclusion:
In this article, I have shown how to install Kali Linux on Raspberry Pi 4. Kali Linux is a great operating system for pen-testers. Kali Linux runs very well on Raspberry Pi 4. The default Kali Linux desktop environment is lightweight. The user interface is really snappy and very responsive. I did not find any usability issues so far.
About the author
Shahriar Shovon
Freelancer & Linux System Administrator. Also loves Web API development with Node.js and JavaScript. I was born in Bangladesh. I am currently studying Electronics and Communication Engineering at Khulna University of Engineering & Technology (KUET), one of the demanding public engineering universities of Bangladesh.
Raspberry Pi 4 and Kali
We love the Raspberry Pi, and judging by the response we got to a late night tweet we sent out last weekend a lot of you love the Pi too!
Because of that, when the Pi 4 dropped we wanted to get Kali supported on it right away.
What’s new on the Raspberry Pi 4?
The Raspberry Pi 4 is actually a pretty amazing little machine. The Pi has always been known for its low cost and easy accessibility, but with the 4 we can actually throw real performance onto that list as well.
With the Raspberry Pi 4 we have a completely upgraded, re-engineered device that includes:
- A more powerful CPU
- Options for 1, 2, or 4 GB of RAM
- USB-C power supply
- USB 2 & USB 3
- Gigabit ethernet
- 2 micro HDMI ports
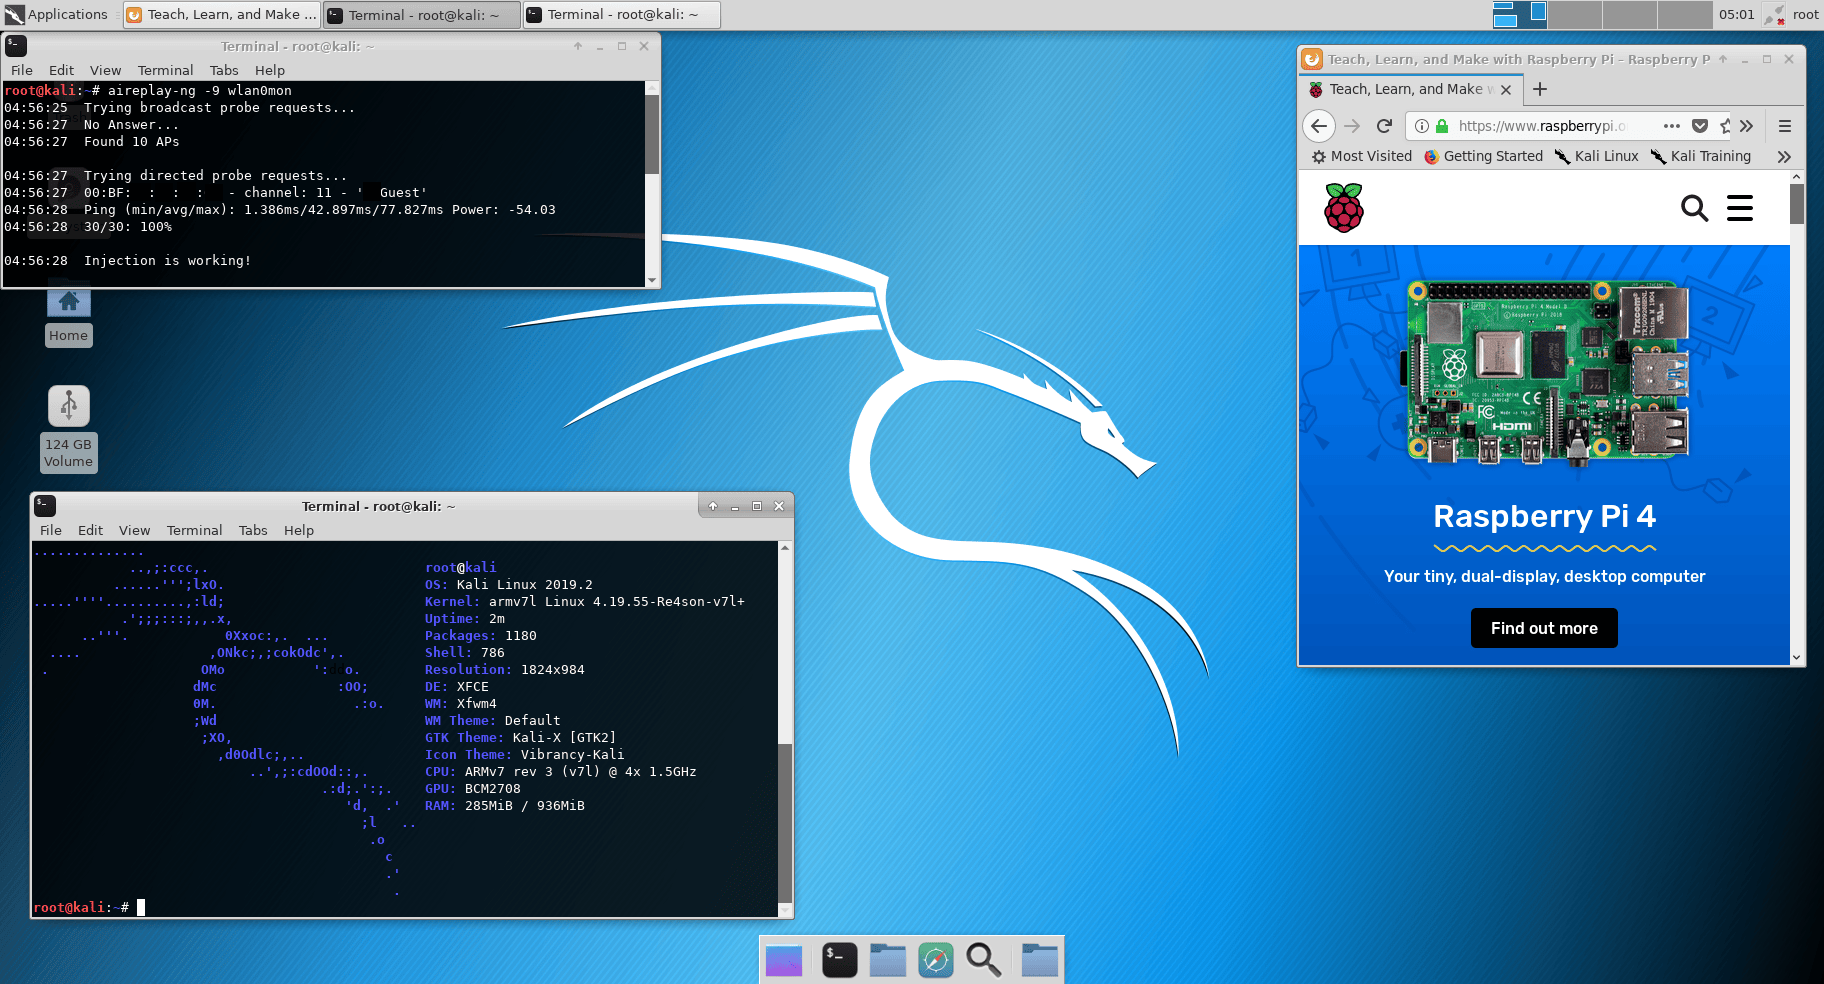
And now you can add to that list full Kali Linux support complete with on-board wifi monitor mode & frame injection support!
To say we are excited about this is an understatement, and we hope many of you are just as excited!
Try it out!
You can download Kali Linux for the Raspberry Pi 4 on the Kali ARM download page. Currently we only have 32Bit support for it, but expect 64Bit in the near future. The installation instructions are not any different than the Pi2, so feel free to follow our docs on getting it setup if you don’t know how.
Once you have it running feel free to let us know how its working for you on our forums. Stay tuned for more Pi updates as we work with the 4 and find new and interesting things to do with it!

