- Install and use Kali Linux on Android without root
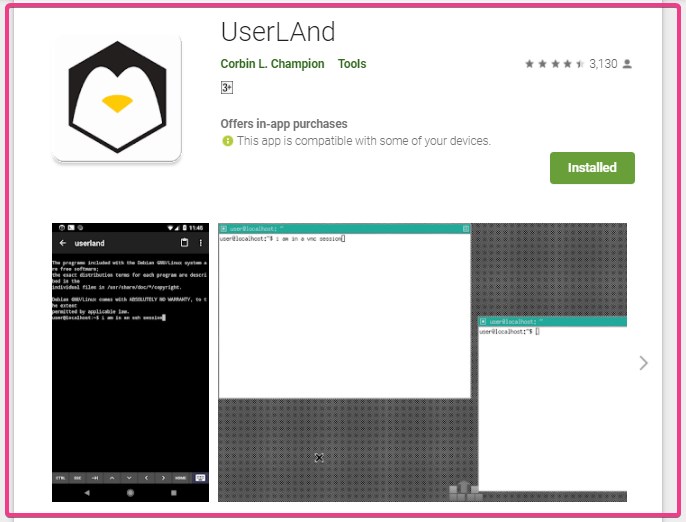
- Download UserLand App
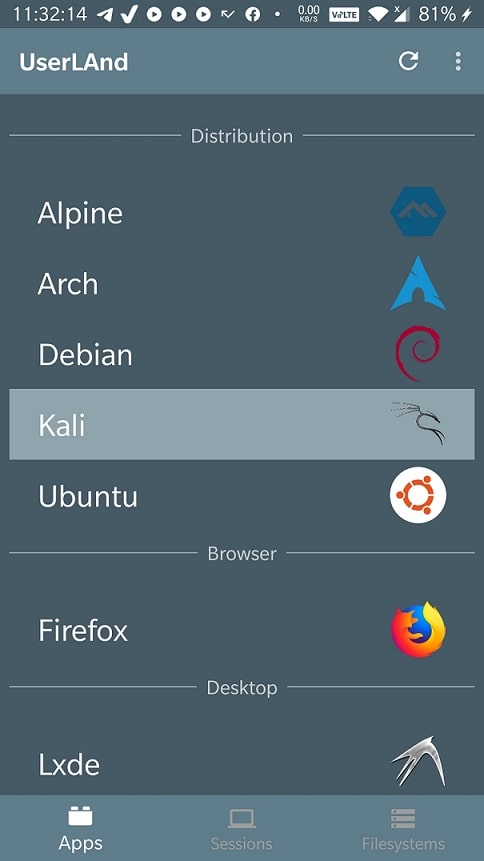
- Install Kali on Android
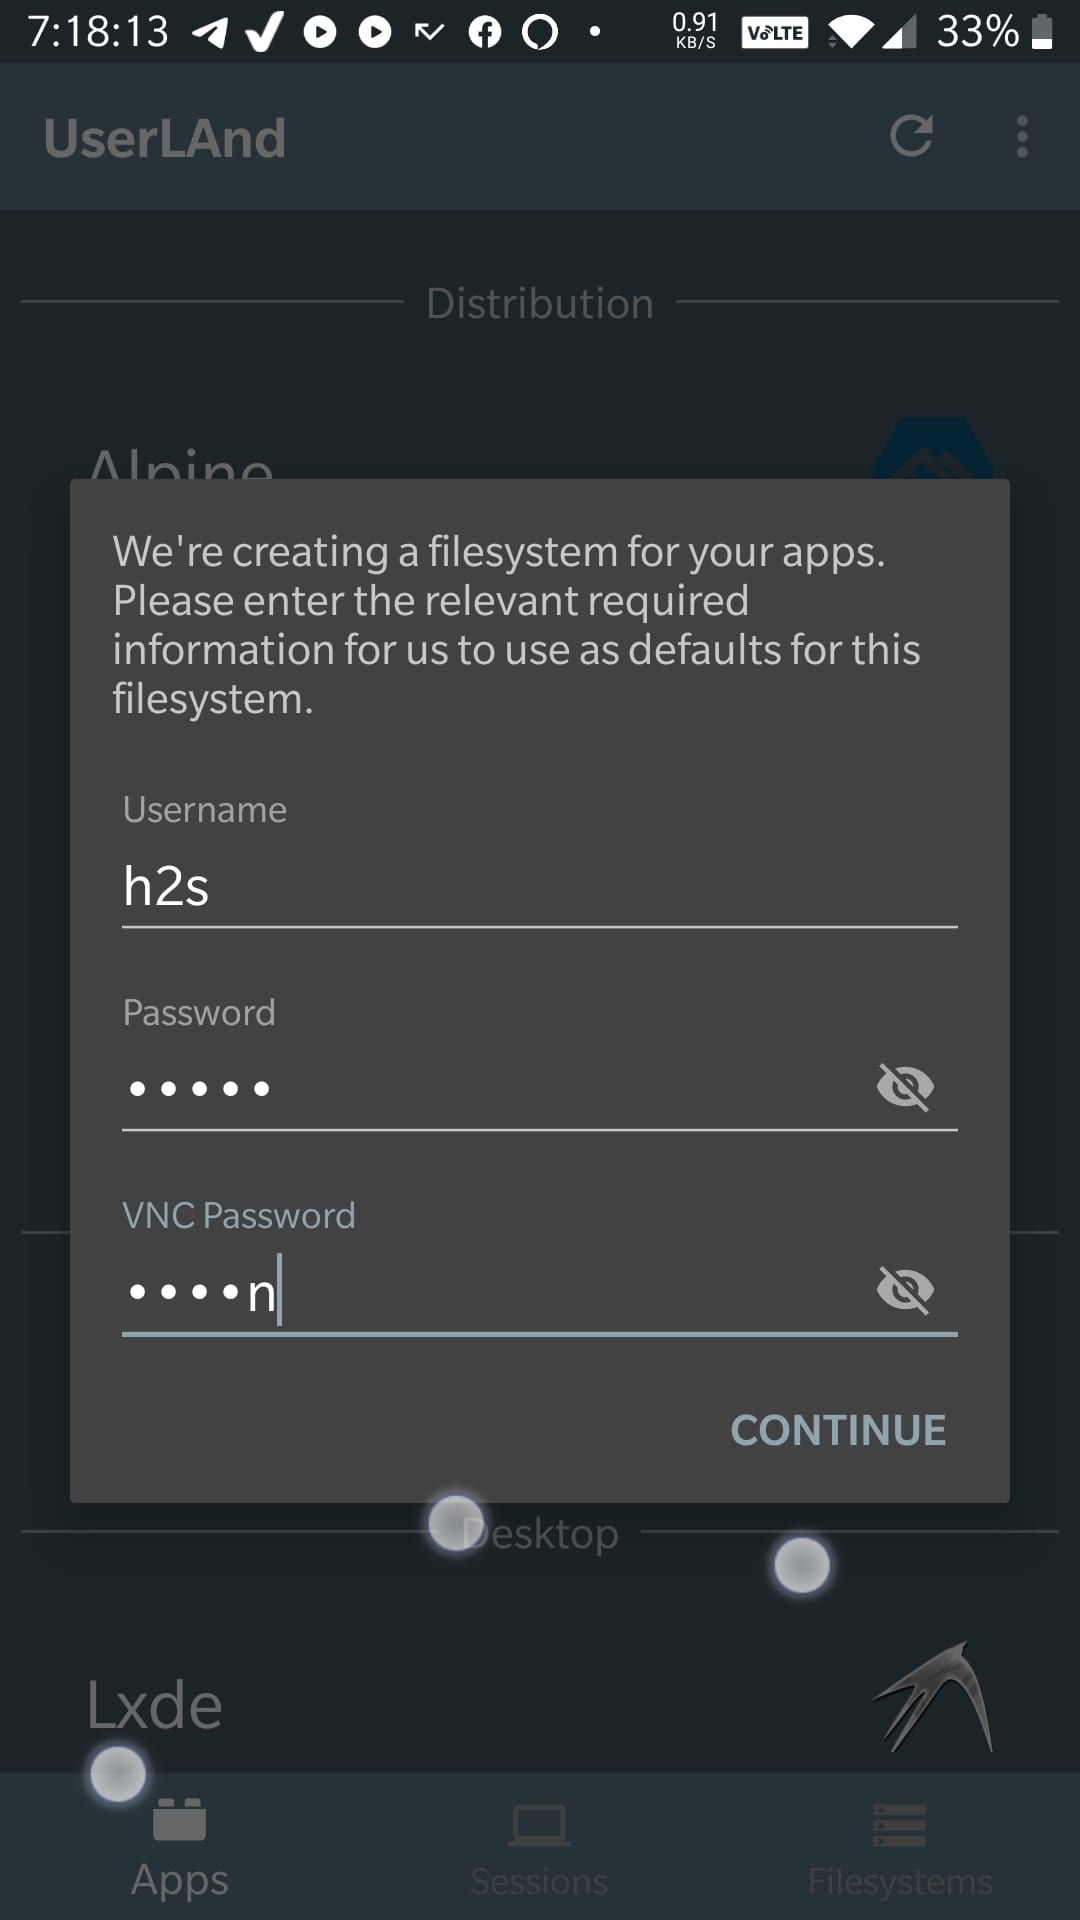
- Setup Username and Password
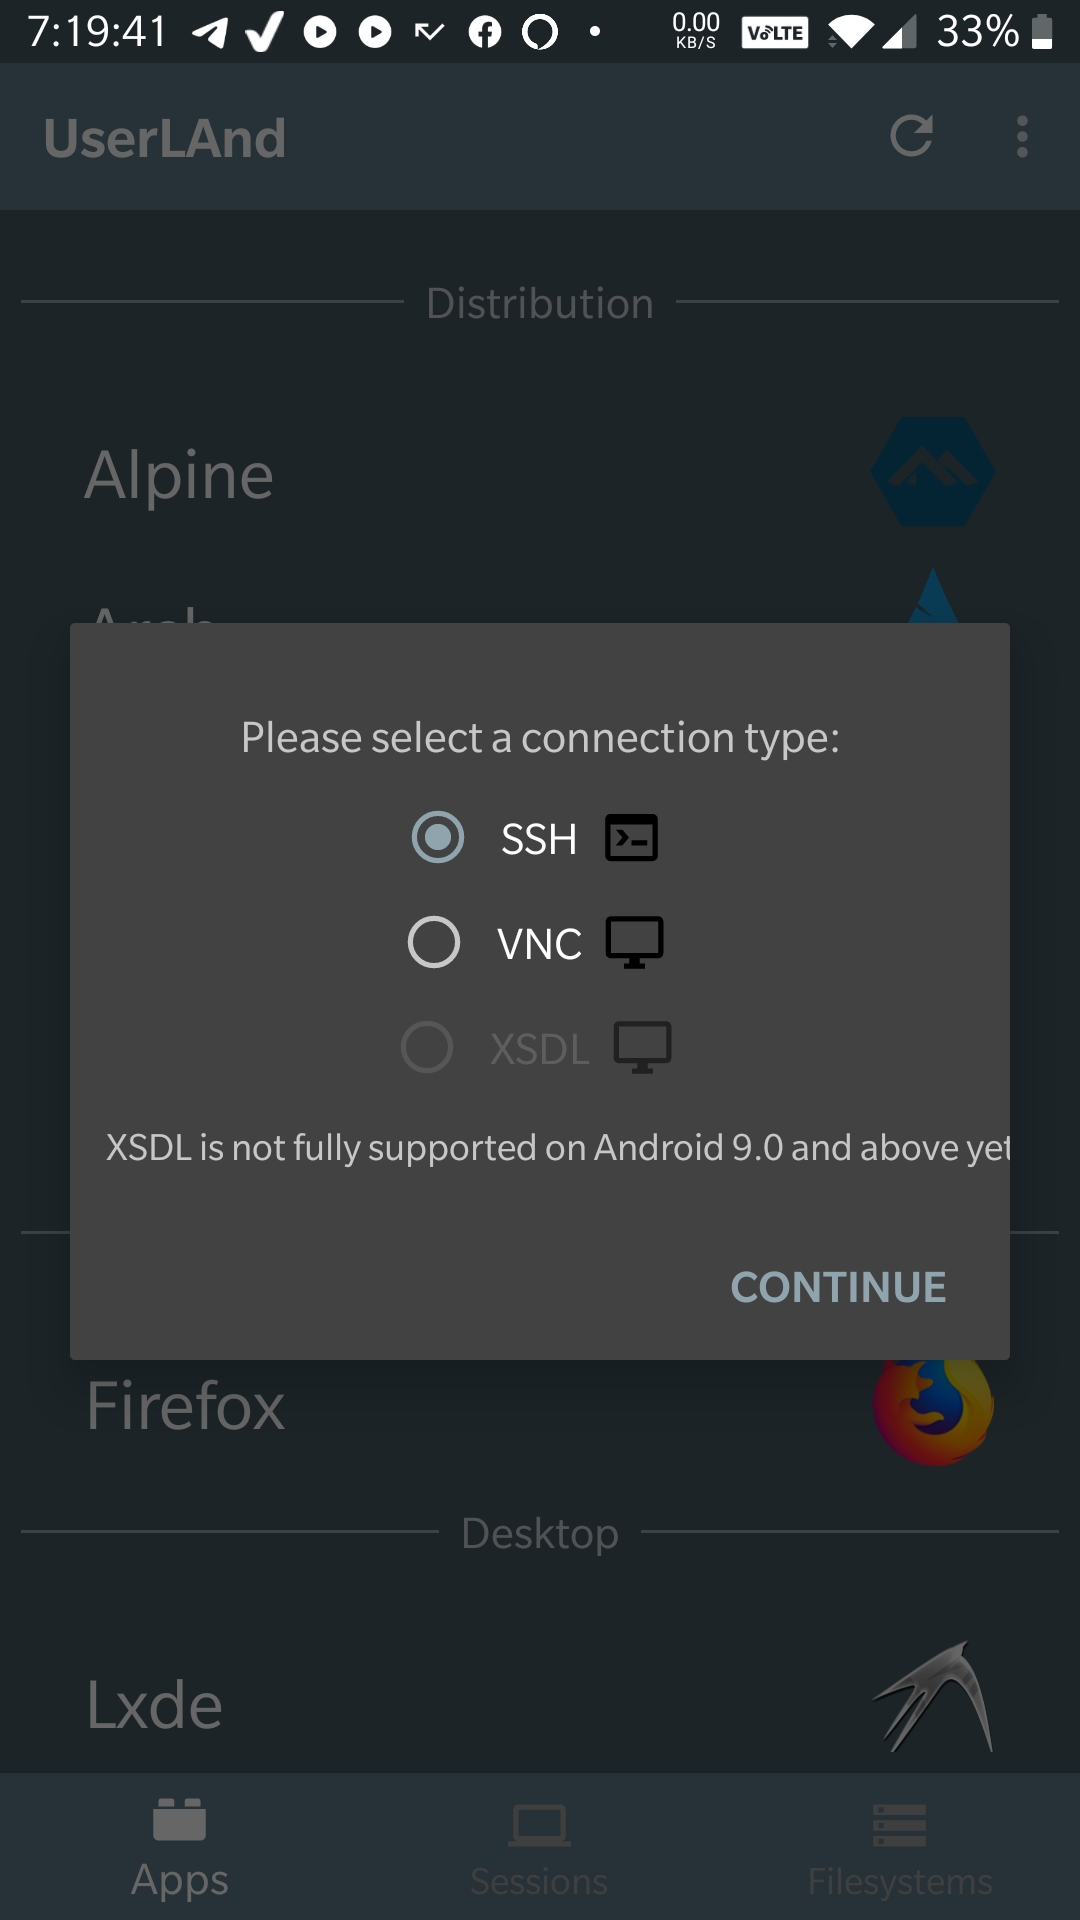
- Select the Connection Method
- Access Kali SSH Session
- Start Command Line
- Kali Linux on Android using Linux Deploy
- How to install all Kali Linux tools in Termux Android Users
- What is Termux?
- How to install Smtools in Termux
Install and use Kali Linux on Android without root
We generally use the Linux operating system on Desktop or Laptop because on Android it is not stable to use GUI-based Linux OS, however, the command line will be. Yes, we can set up Kali on Android, which is popular and known for its security testing tools.
So, let’s start with the tutorial, and yes you don’t need to do any modification in your Android OS that would temper the warranty of your phone.
Download UserLand App
Although if you go on the Kali official website, the developers recommend using an Android app called “Linux Deploy“. Indeed that has better performance and access, however, for using it your phone should not only rooted but also you have to purchase the Kali Images available in the app to install and use on Android OS.
Therefore, here we are going to use a free solution called UserLand, this app is available on the Google Play store to download. Here is the link.
The good thing is, apart from Kali Linux, it also allows the user to download and use pre-configured Ubuntu, Arch, Debian, and Alpine Linux images.
Install Kali on Android
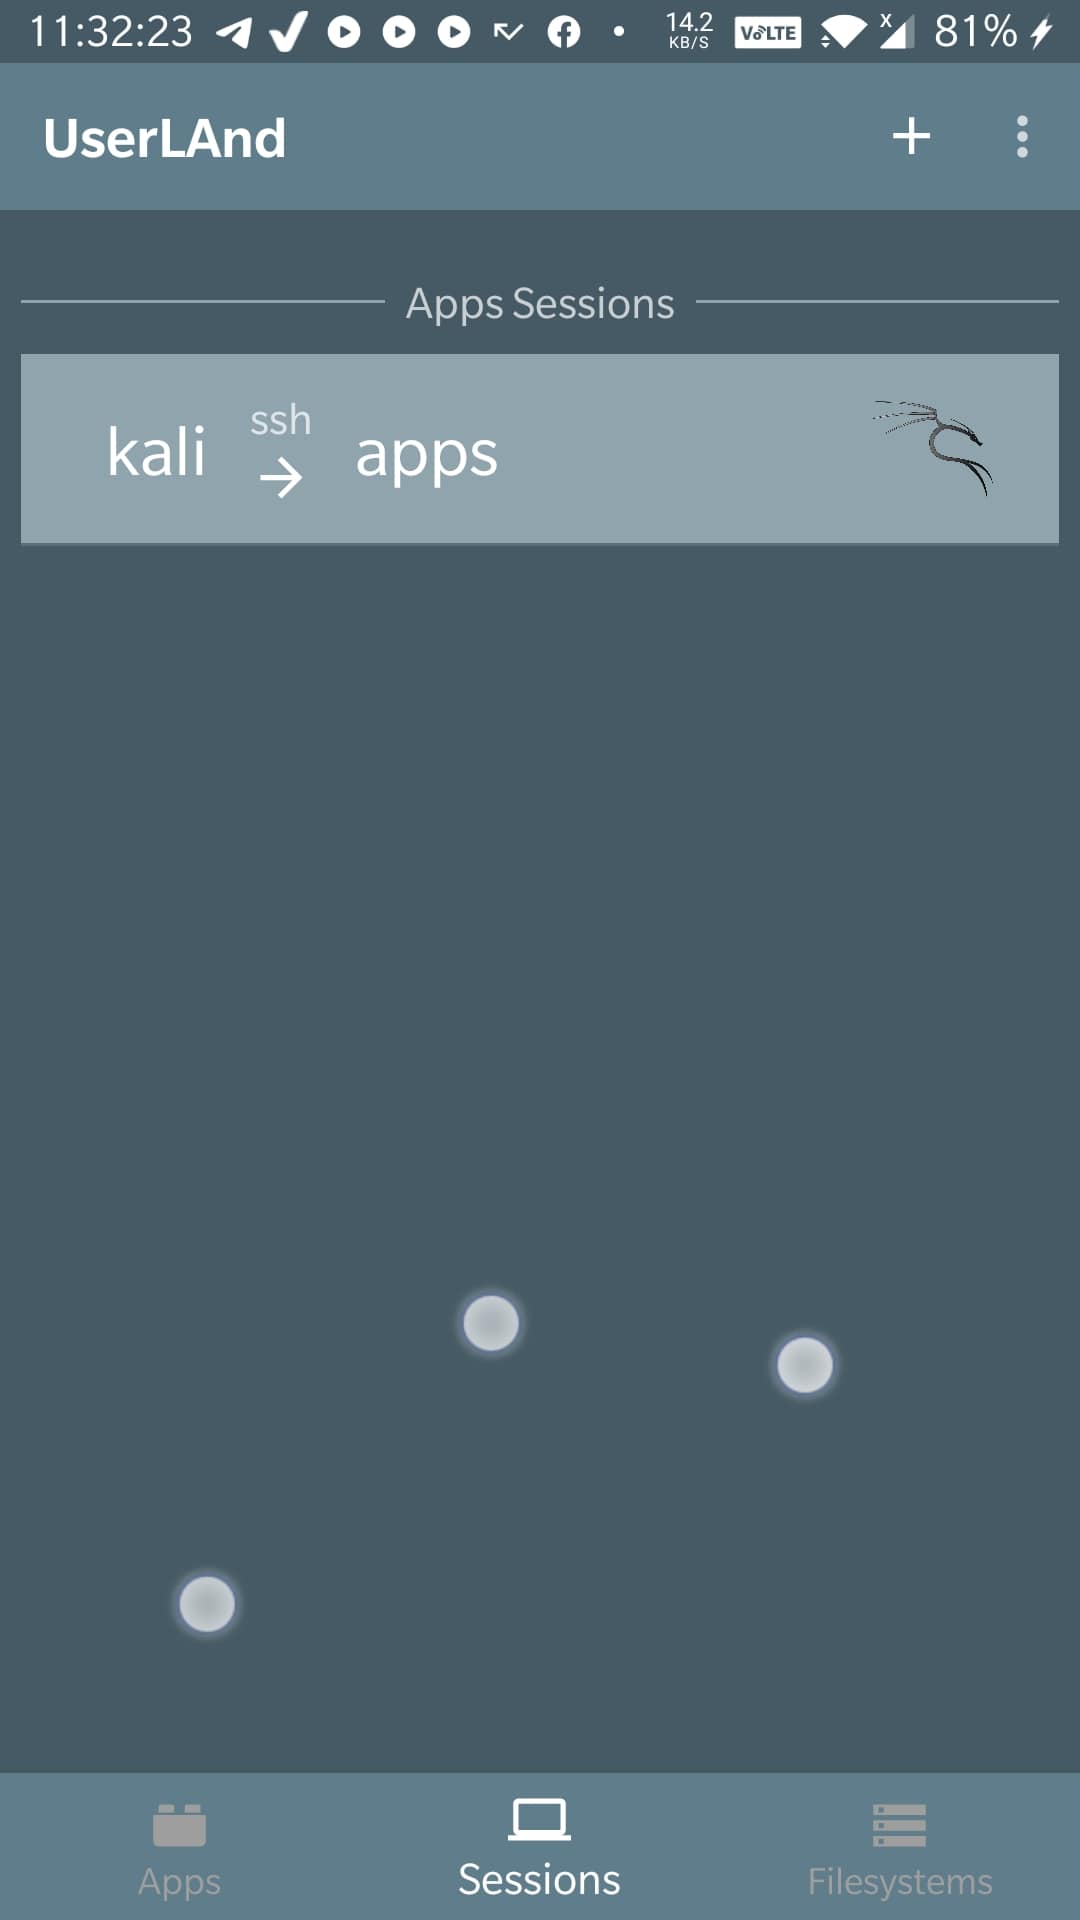
Now, open the UserLAnd and tap on the Kali option. Apart from that, you can also try other available images.
Setup Username and Password
Before setting up further, the app will ask you to set the username and password for the Kali base Image including the password for the VNC server.
Select the Connection Method
We can connect the installed kali using SSH or VNC, thus while setting up the image the UserLAnd app will aks you to choose the default method to connect the Kali. Select SSH. You can change it to VNC later from the session tab but that doesn’t work properly.
Access Kali SSH Session
After installing and setting up the Kali, tap on the Session Tab and then the create Kali app session. If you want to change the SSH session to VNC, then tap & hold the Kali app session and select the Edit option. After changing to VNC, it will ask you to download another app to view the GUI session.
Start Command Line
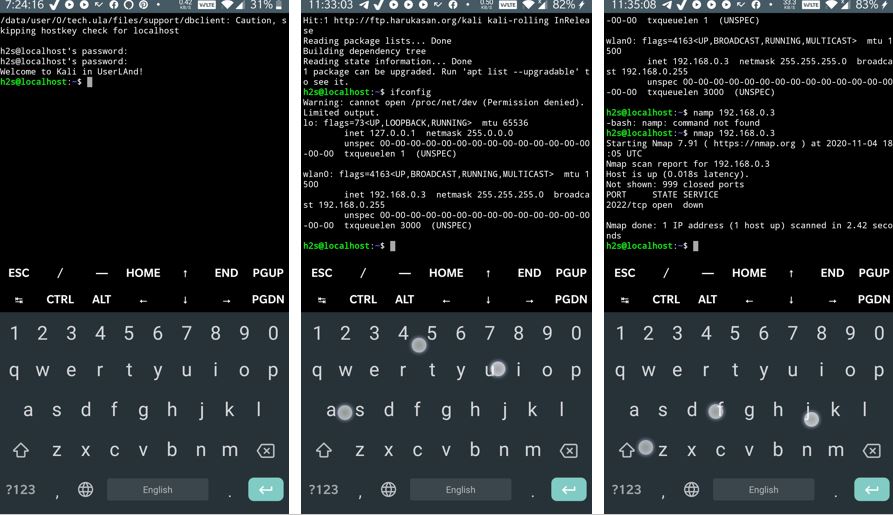
Now, you will see the command terminal window connected to Kali using the SSH method. Login with the password you have created and start playing around with Debian or Kali commands.
Ending note
Yes, as we are using Kali on Android without rooting the device, thus restriction would be there. Therefore, just try it out to find out what possibilities you can discover.
Kali Linux on Android using Linux Deploy
Getting Kali Linux to run on ARM hardware has been a major goal for us since day one. So far, we’ve built native images for the Samsung Chromebook, Odroid U2, Raspberry Pi, RK3306, Galaxy Note 10.1, CuBox, Efika MX, and BeagleBone Black to name a few. This however does not mean you cannot install Kali Linux in a chroot on almost any modern device that runs Android. In fact, the developers of Linux Deploy have made it extremely easy to get any number of Linux distributions installed in a chroot environment using a simple GUI builder.
Prerequisites
- A device running Android 2.1 and above, rooted.
- At least 5 GB free space on internal or external storage.
- A fast, wireless internet connection.
- Patience to wait for a distribution to bootstrap from the network.
Configuring Linux Deploy for Kali
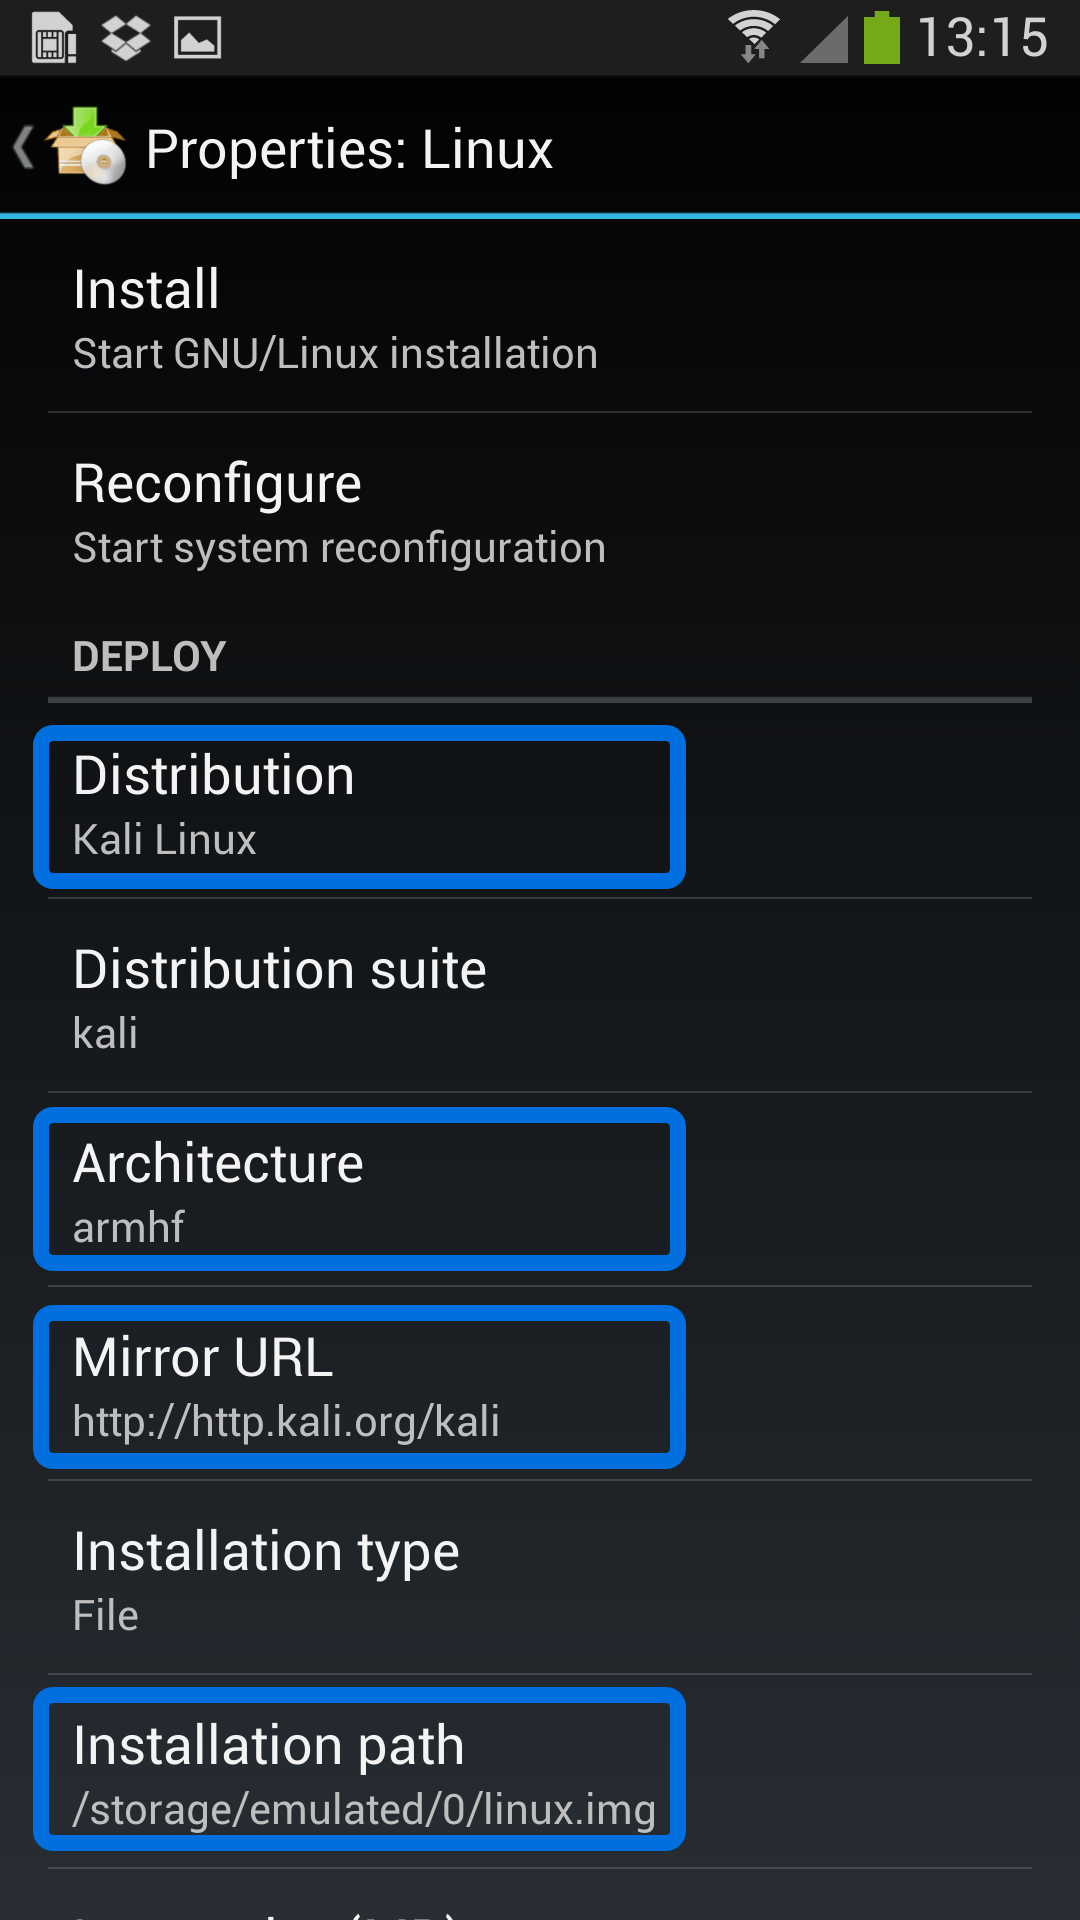
There’s actually very little to be done to get Kali installed. By choosing Kali Linux in the “Distribution” tab, you’ve pretty much covered the important stuff. Optionally, you can choose your architecture, verify that the Kali mirror is correct, set your installation type and location on your Android device, etc. Generally speaking, the defaults provided by Linux Deploy are good to begin with.
Building the Kali Image
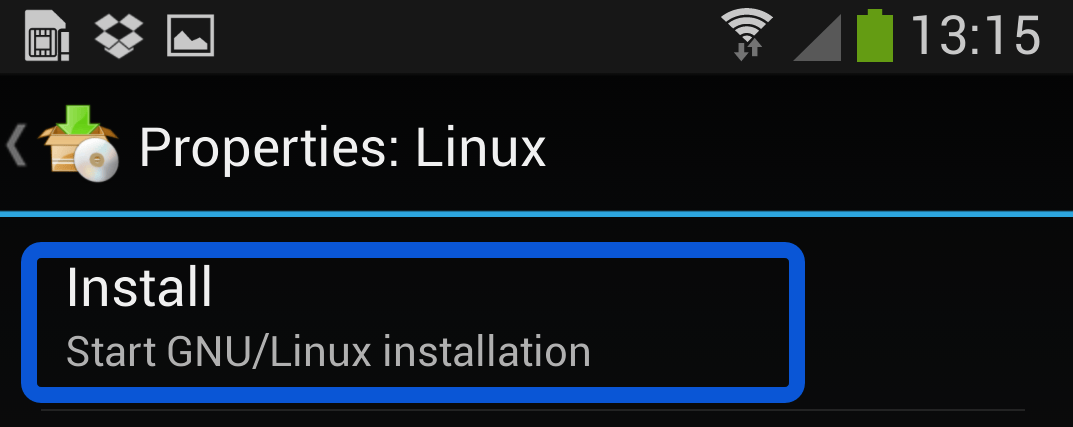
Once you are happy with all the settings, hitting the “install” button will start a Kali Linux bootstrap directly from our repositories. Depending on your Internet connection speed, this process could take a while. You’ll be downloading a base install of Kali Linux (with no tools) at minimum.
Starting up your chrooted Kali
Once the installation is complete, you can have Linux Deploy automatically mount and load up your Kali Linux chroot image. This also includes the starting of services such as SSH and VNC for easier remote access. All of this is automagically done by hitting the “start” button. You should see Linux Deploy setting up your image with output similar to the following:
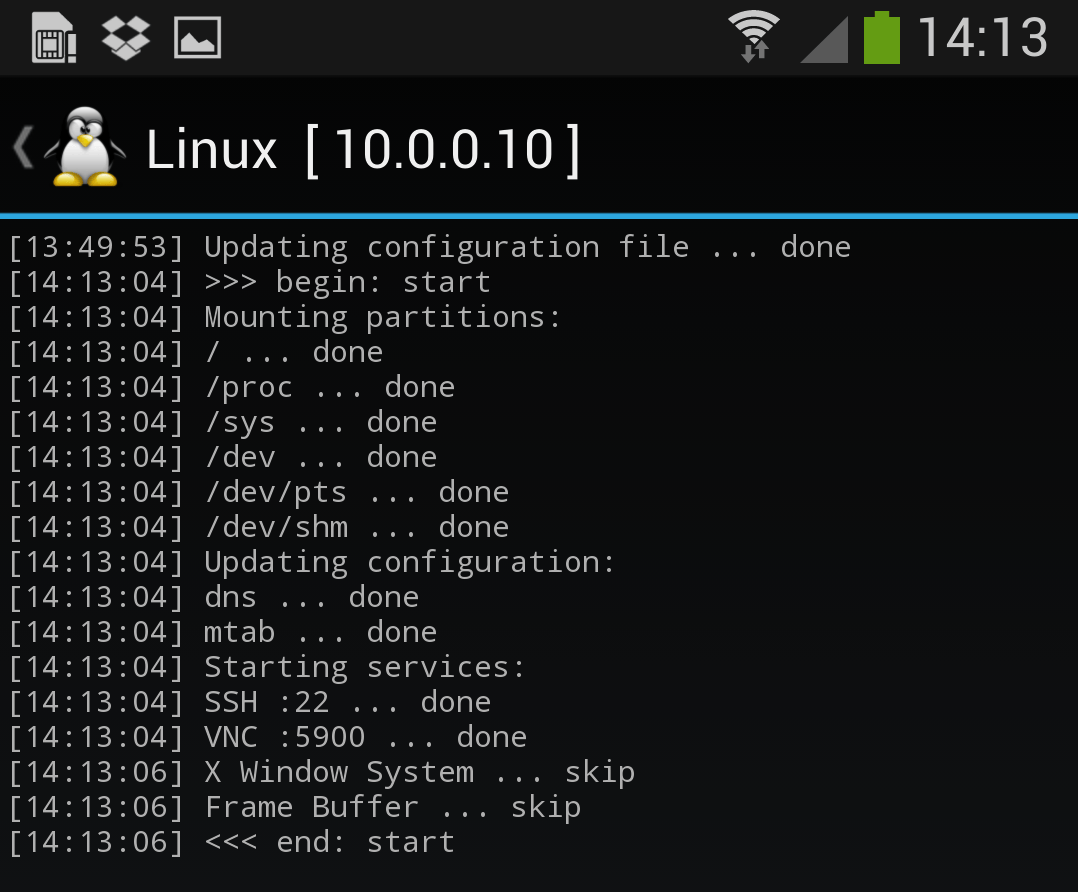
At this stage, Linux Deploy has started a VNC and SSH server inside your chrooted Kali image. You can connect to the Kali session remotely using the IP address assigned to your Android device (in my case, 10.0.0.10).
Logging in to your chrooted Kali
Now you can use either a SSH or VNC client to access your Kali instance. The VNC password is “changeme” and the SSH credentials are “android” for the username (configured via Linux Deploy) and “changeme” as the password:
[email protected]:~$ ssh andr[email protected] [email protected] password: Linux localhost 3.4.5-447845 #1 SMP PREEMPT Fri Apr 12 17:22:34 KST 2013 armv7l Kali GNU/Linux 1.0 [running on Android via Linux Deploy] [email protected]:~$ sudo su [email protected]:/home/android# df Filesystem 1K-blocks Used Available Use% Mounted on /dev/loop3 4180944 667268 3304012 17% / tmpfs 952708 80 952628 1% /dev tmpfs 952708 0 952708 0% /dev/shm [email protected]:/home/android# [email protected]:/home/android# apt-get update Hit http://http.kali.org kali Release.gpg Hit http://http.kali.org kali Release Hit http://http.kali.org kali/main Sources Hit http://http.kali.org kali/contrib Sources Hit http://http.kali.org kali/non-free Sources Hit http://http.kali.org kali/main armel Packages Hit http://http.kali.org kali/contrib armel Packages Hit http://http.kali.org kali/non-free armel Packages Ign http://http.kali.org kali/contrib Translation-en_US Ign http://http.kali.org kali/contrib Translation-en Ign http://http.kali.org kali/main Translation-en_US Ign http://http.kali.org kali/main Translation-en Ign http://http.kali.org kali/non-free Translation-en_US Ign http://http.kali.org kali/non-free Translation-en Reading package lists. Done [email protected]:/home/android# Image Size Considerations
If left unchanged, Linux Deploy will automatically set an image size of around 4 GB, for a “naked” installation of Kali. If you would like to install additional Kali tools down the road, you might want to consider using a larger image size, which is configurable via the settings in Linux Deploy.
Local VNC Connections
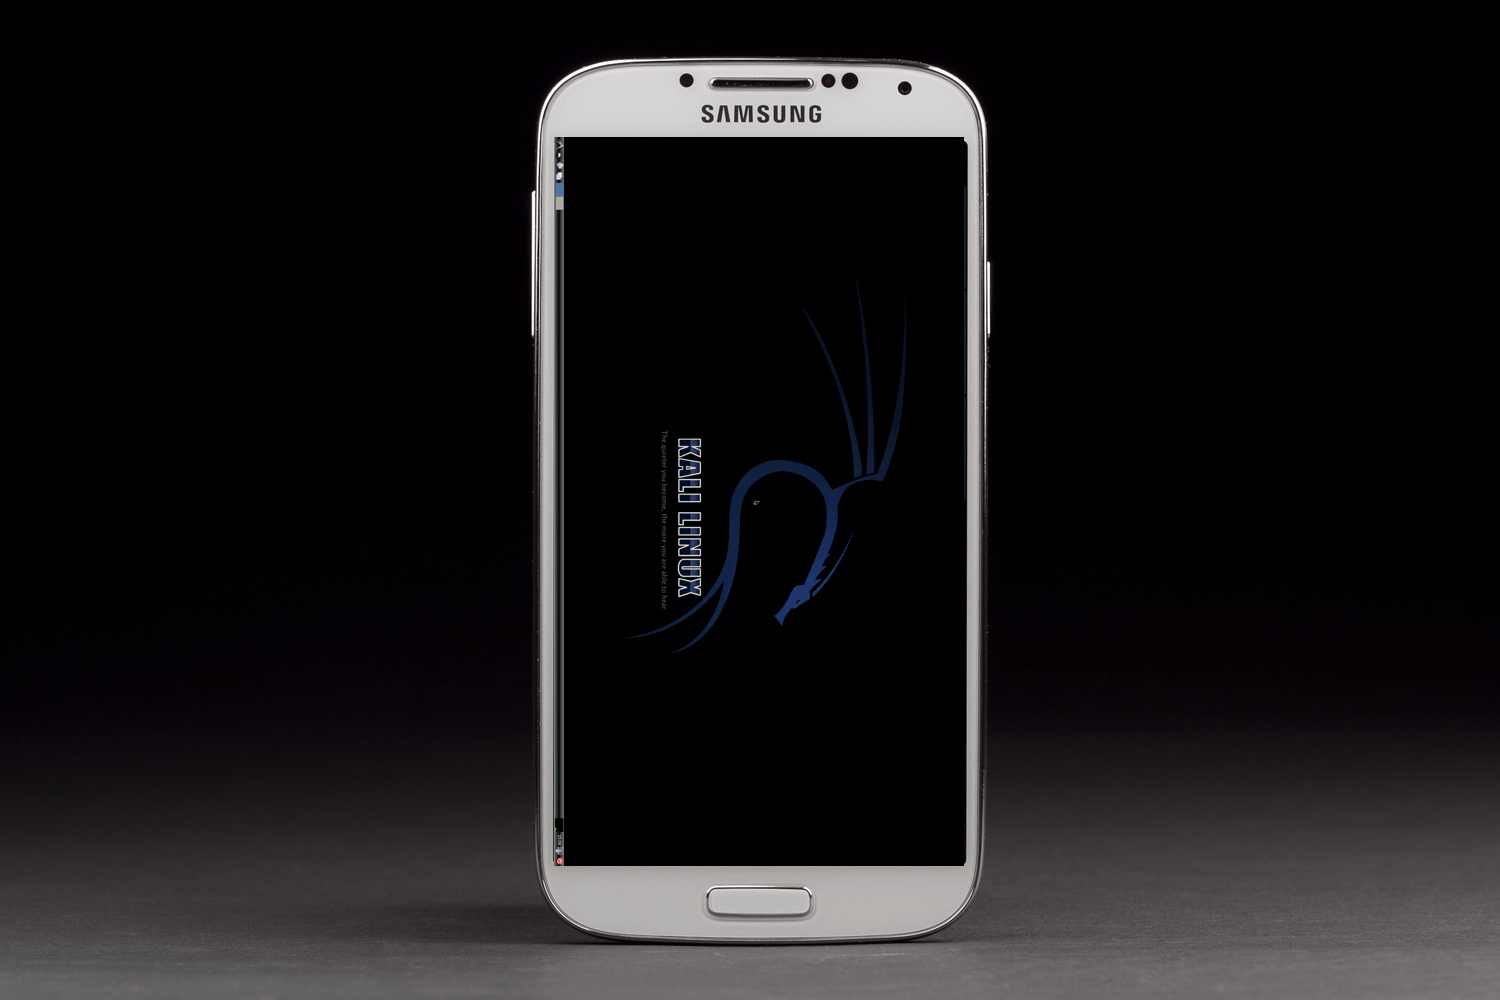
We had to try a couple of VNC clients to get one to work properly. Although controlling Kali through a local VNC client isn’t the most convenient of tasks, it certainly is possible. However, we suspect that most people will be SSH’ing into this instance. The picture below was overlayed with a Kali Linux desktop screenshot taken from a Galaxy S4.
Anyone fancy a simple smartphone hardware backdoor?
How to install all Kali Linux tools in Termux Android Users

Today in this tutorial I am gonna show you, How to install Kali Linux Tools on Android phone using Termux App and this script SmTools.
What is Termux?
Termux is a Kali Linux terminal emulator with an extensive Linux packages collections, It is specially designed for Android device for penetration testing.
we can install Tools from Github and easily use.this is not a root terminal of Kali Linux but, if Your Device is Rooted Then we can make this Termux Terminal as a root terminal by installing Sudo on Termux.
So first we need to install SmTools on Your Termux
How to install Smtools in Termux
Step 1:- Install Termux from Play Store
Step 2 – Open Termux application
Step 3:- Update termux using this command
Step 4:- now install some important packages
pkg install clang && pkg install git
Step 5:- install python2, you must have python2 installed
Step 6:- Install Smtools on Your Termux
Step 7:- Open the tool directory
Step 8:- Now make the python file executable
Step 9:- Then run Lazymux:-
Now select the number of a tool, which you want to install simply by entering the number, then enter, the tool can start installing on your Termux.
You can also watch the video below 👇👇👇

if you like this article then make sure to follow this blog for android penetration testing, termux tutorials. Gnu Root Debian Tutorials, Technology, hackers info, Thank you.
Here are a few hand-picked guides for you to read next: