How to install Kali Linux (step by step tutorial)
Kali Linux is a popular Linux distribution that specializes in hacking software. This operating system is primarily suitable for those studying information security and IT, system administrators and webmasters for networks and sites security audit.
This manual will detail the installation process for Kali Linux. Possible different installation options, for example:
- installing Kali Linux as the main operating system
- installing Kali Linux as a second operating system
- installing Kali Linux in a virtual machine
- installing Kali Linux on a USB flash drive (external drive)
In general, the process is similar in all cases, I will consider the first option, namely the installation of Kali Linux as the second operating system. I will also note how the installation differs in other cases, so that you can apply this instruction in any situation.
How to Flash a Kali Linux installation image
Go to the official Kali Linux page: https://www.kali.org/downloads/
Find Kali Linux 64-Bit (Installer) there and download the torrent.
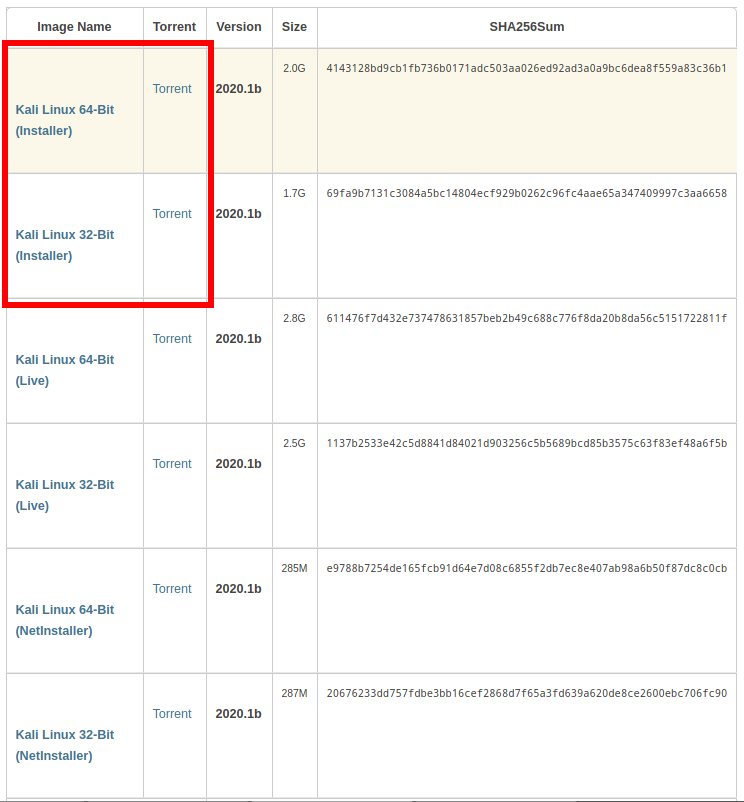
Now go to the Etcher program website: https://www.balena.io/etcher/ and download it:

Plug in your USB flash drive, launch Etcher, select the downloaded Kali Linux LIVE ISO image, then just click the Flash! button and wait for the completion.
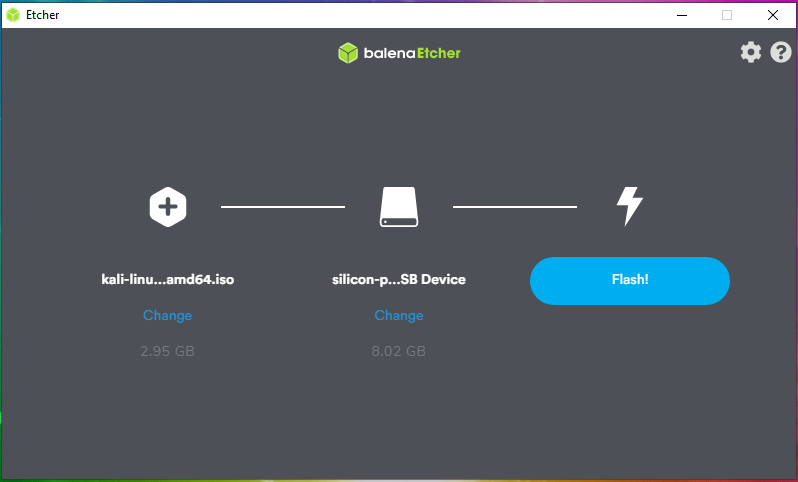
How to boot from a flash drive
Now we need the following:
1) disable Secure boot and Fast boot in EFI (BIOS)
2) select a USB flash drive with Kali Linux as the boot disk
Secure boot and Fast boot are only present in EFI – this is such a new BIOS. If you have an ancient computer, then these settings may be missing and you do not need to disable them.
Go into the BIOS – on different laptops and motherboards this can be done in different ways, as a rule, for this at the very beginning of the booting you need to press the ESC button, or the Delete button, or one of the F1-12 function keys many times. If all else fails, then google to find out how to enter BIOS for your laptop/motherboard model.

Disabling Secure boot and Fast boot is only necessary to boot from a USB flash drive, that is, after resetting the Windows password, these settings can be returned to their original state.
Then, when loading, or in the same place, in BIOS, select the USB flash drive or external drive as the boot disk:
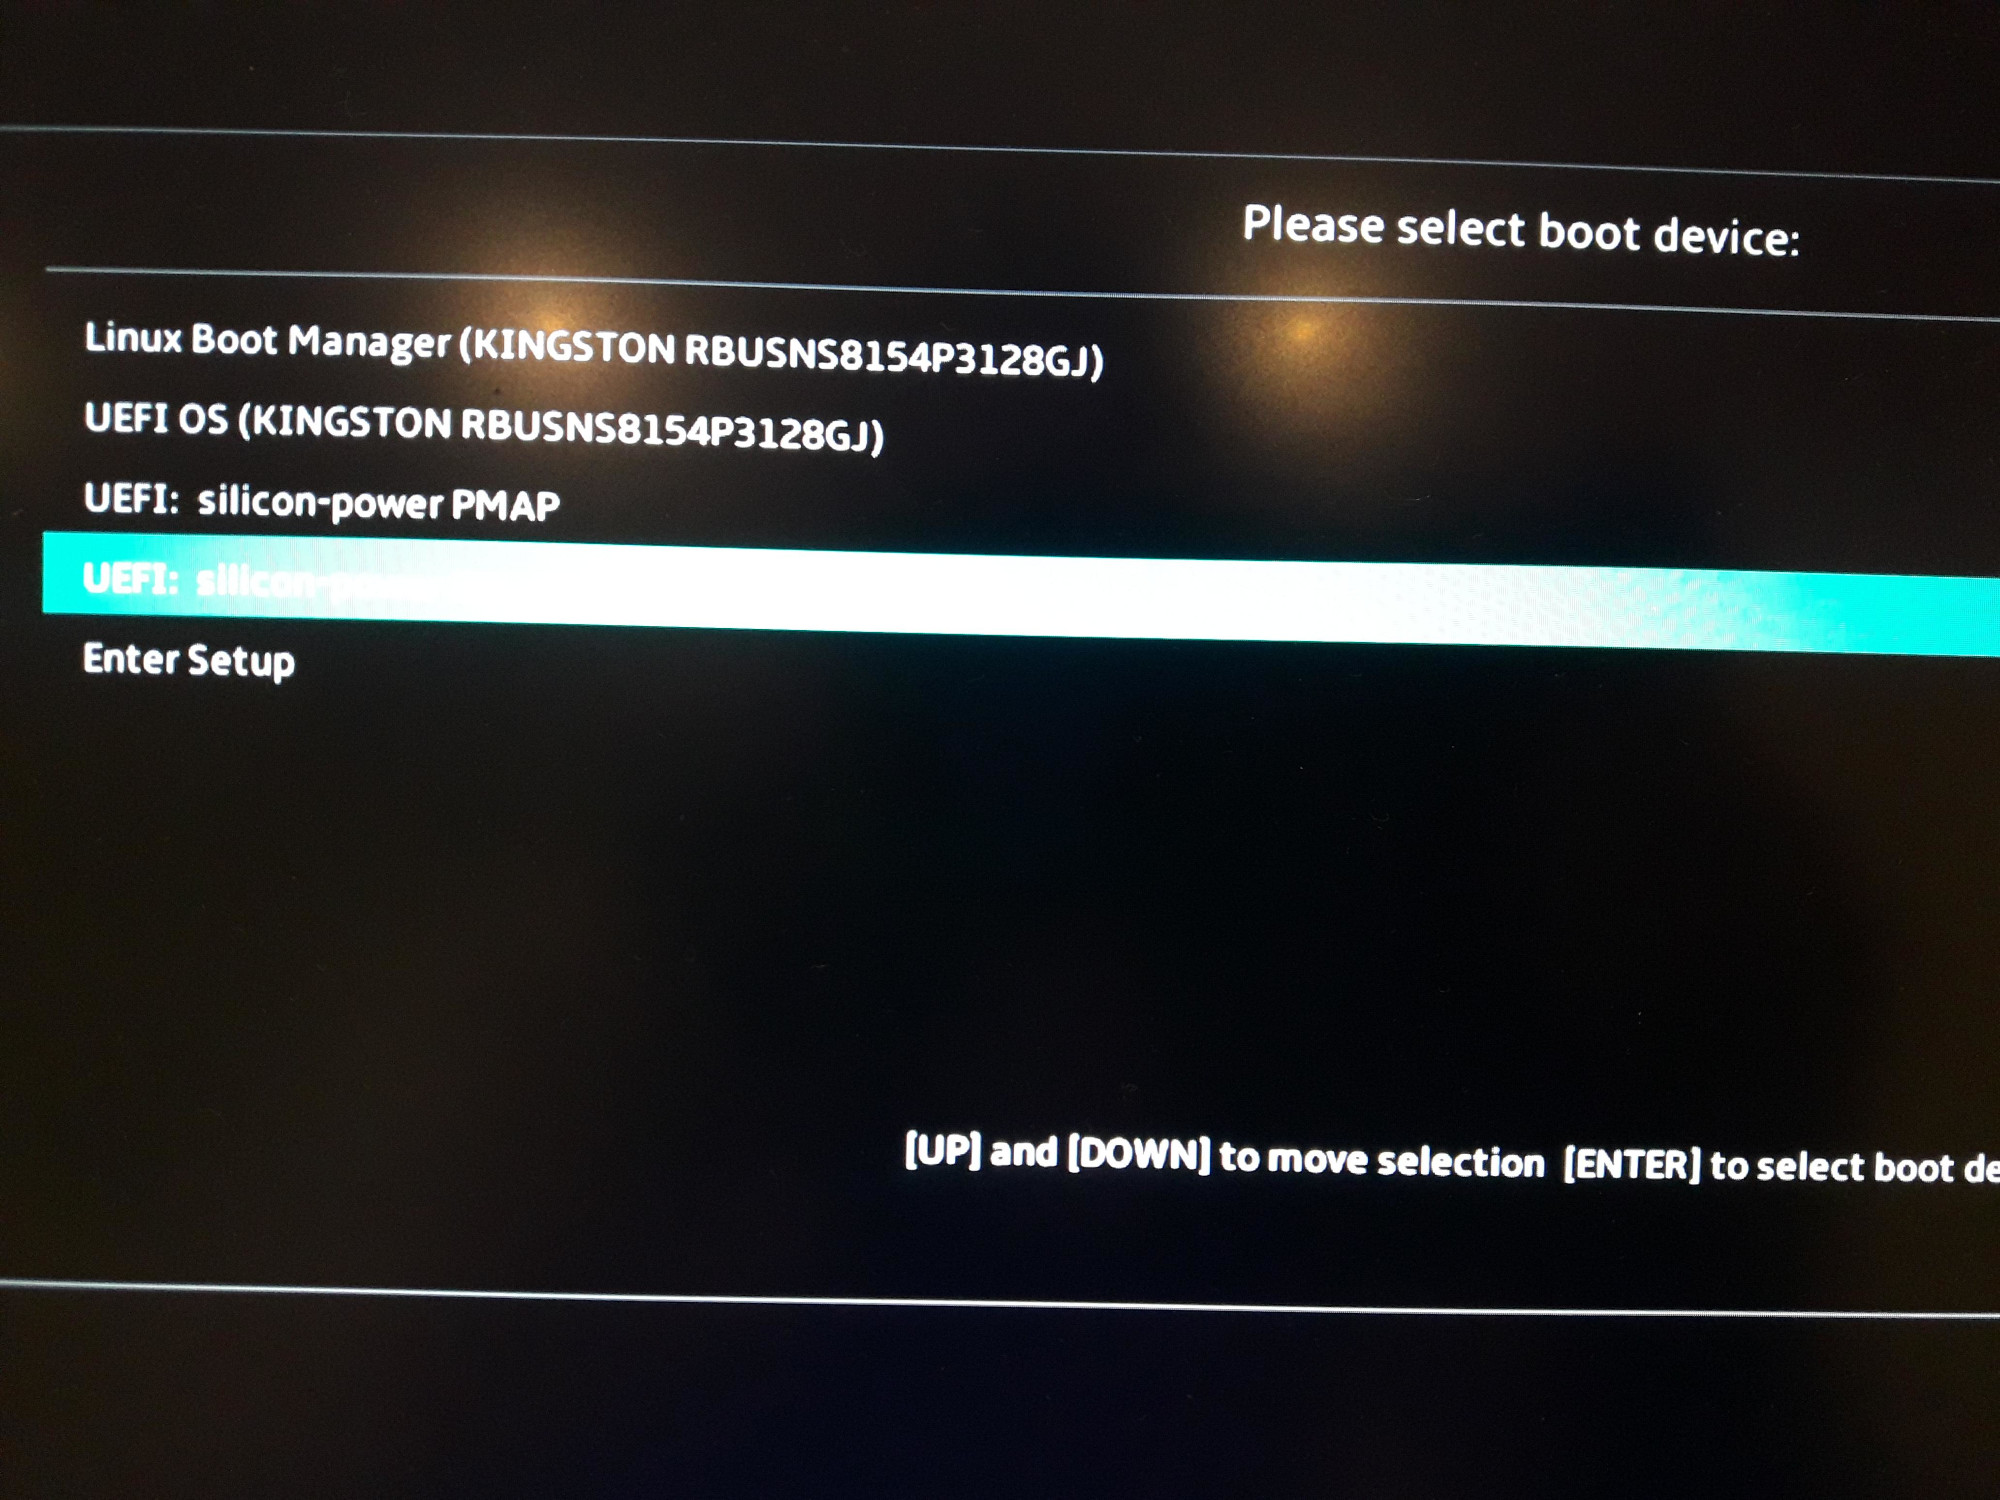
If you see the Kali Linux boot menu, then you have succeeded:

What to do if I can’t enter the BIOS (UEFI)
Modern computers with SSD drives boot very fast. In addition, “quick boot” can be enabled in BIOS. In these cases, getting into the BIOS settings (or rather the UEFI settings) will fail.
To cope this situation, use the following method:
1. In Windows turned on, click the Win → Power.

2. While holding down the Shift key, click Restart.
3. Then select “Troubleshooting”.
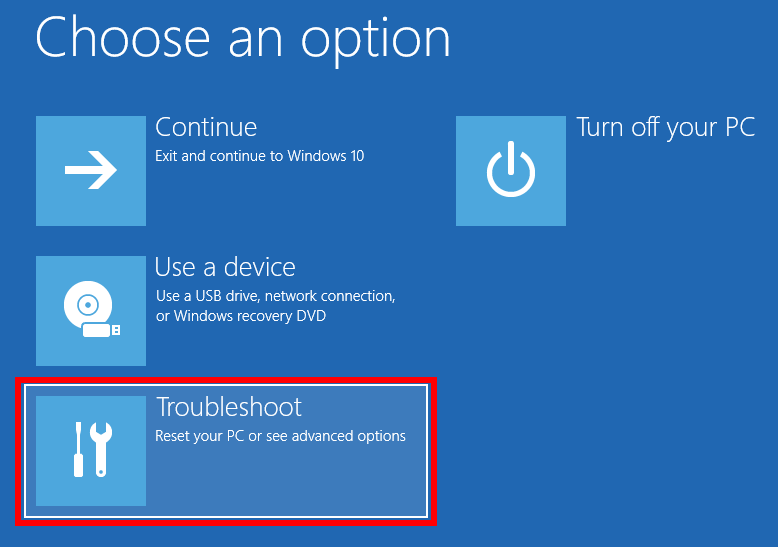
4. Then “Advanced Options”.
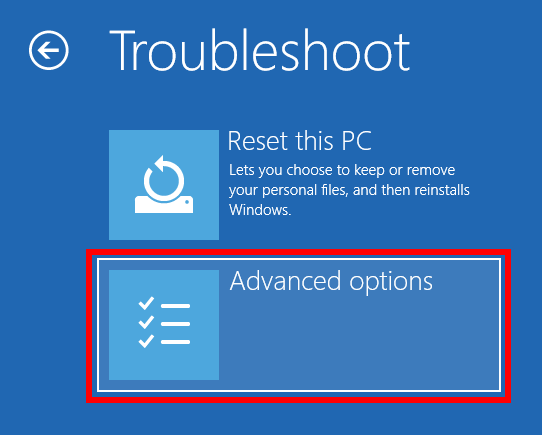
5. Next, “UEFI Firmware Settings”.
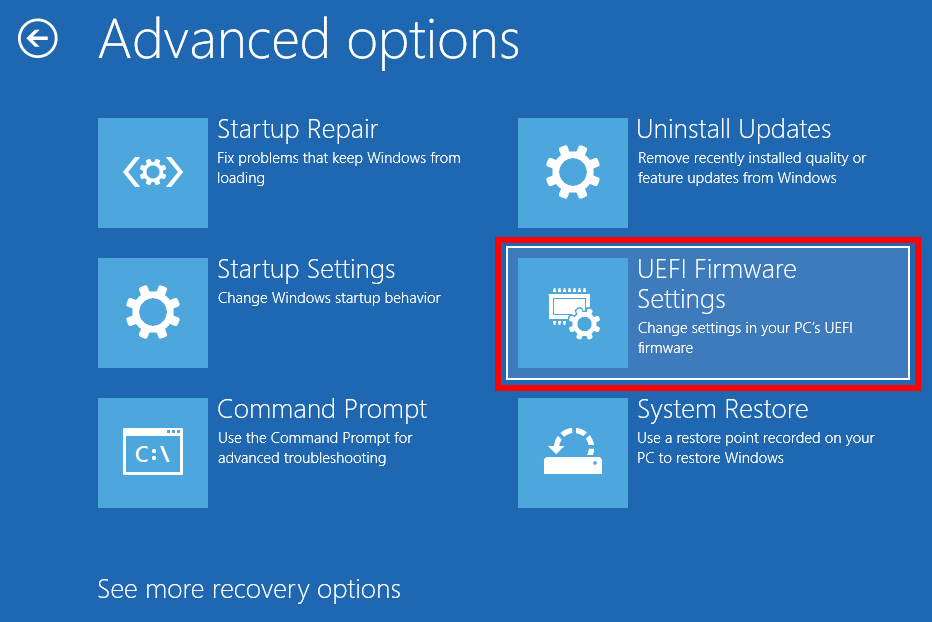
6. Click the “Restart” button.

After rebooting, you will find yourself in the BIOS settings (UEFI).
How to install Kali Linux
Select “Graphical install”:
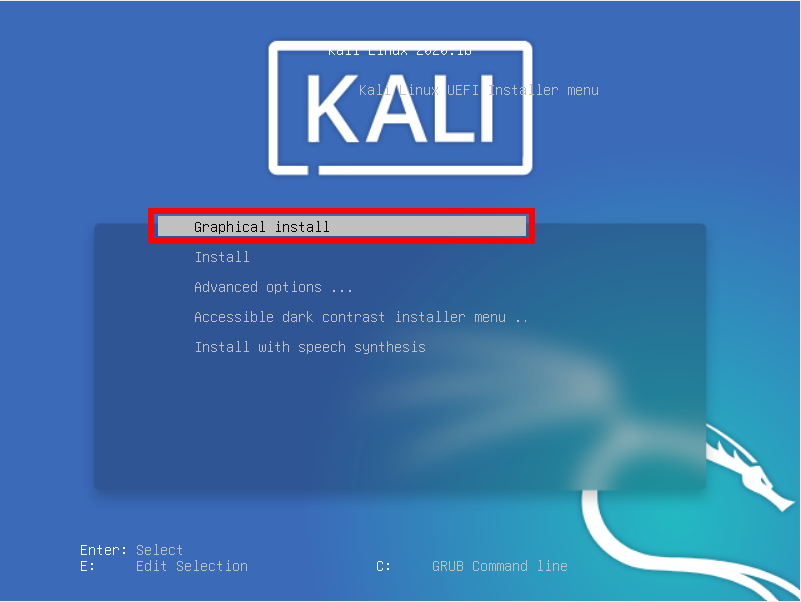
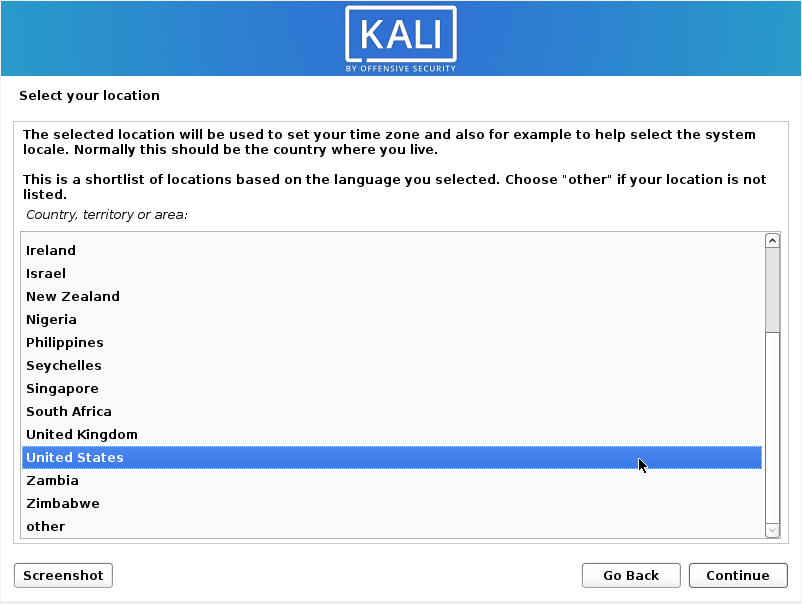
Select your preferred operating system language:
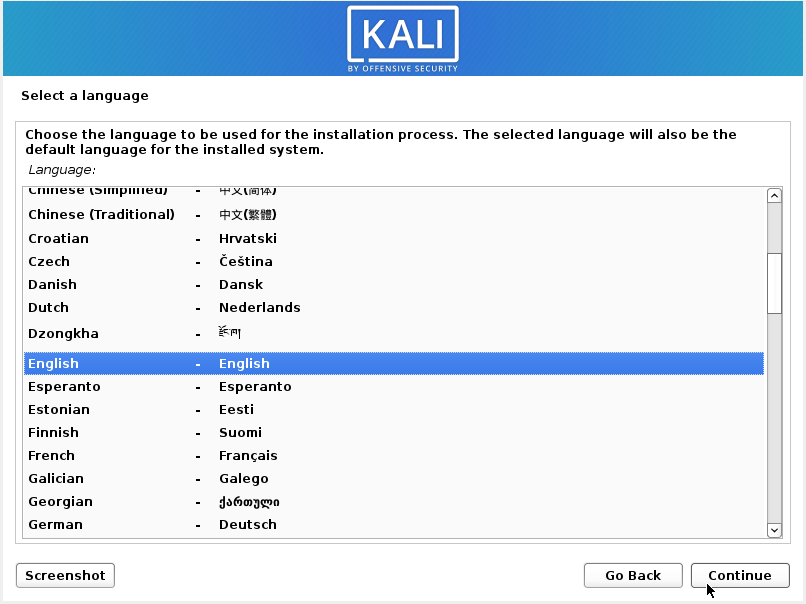
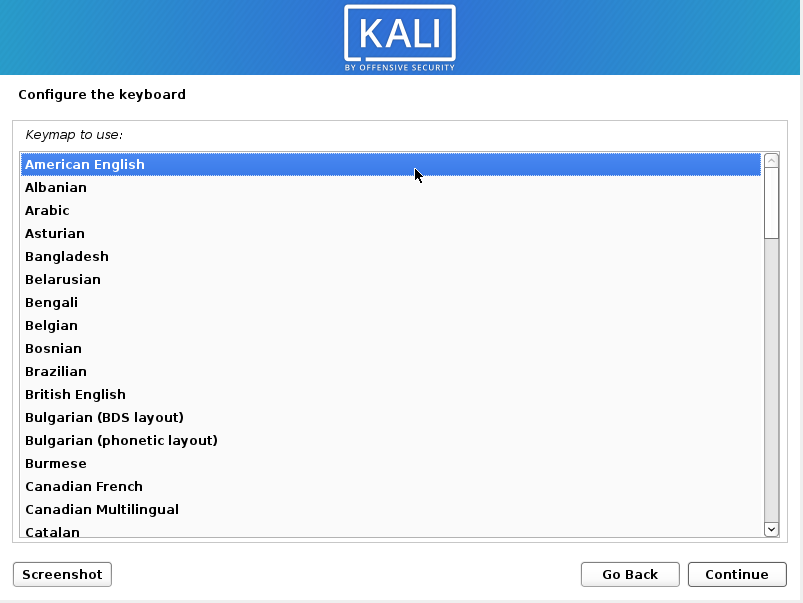
Specify the desired keyboard layout:
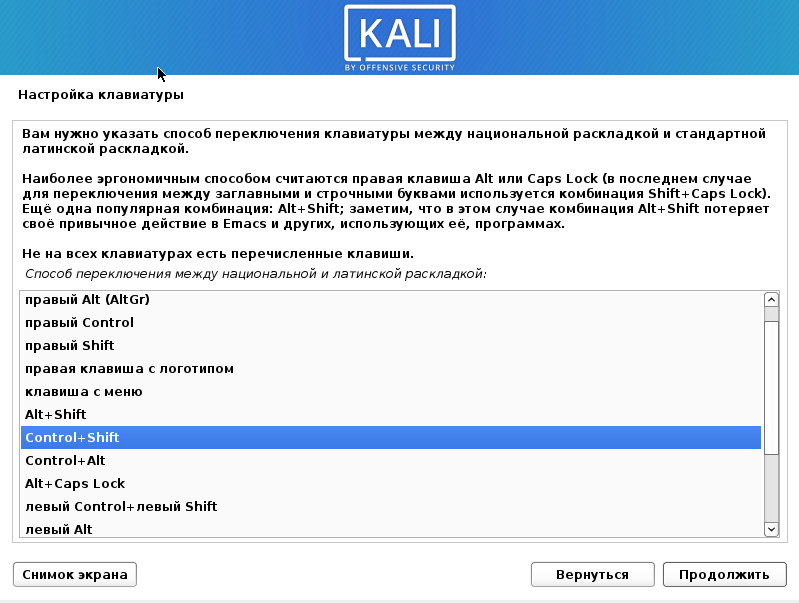
Select a key combination to switch keyboard language:
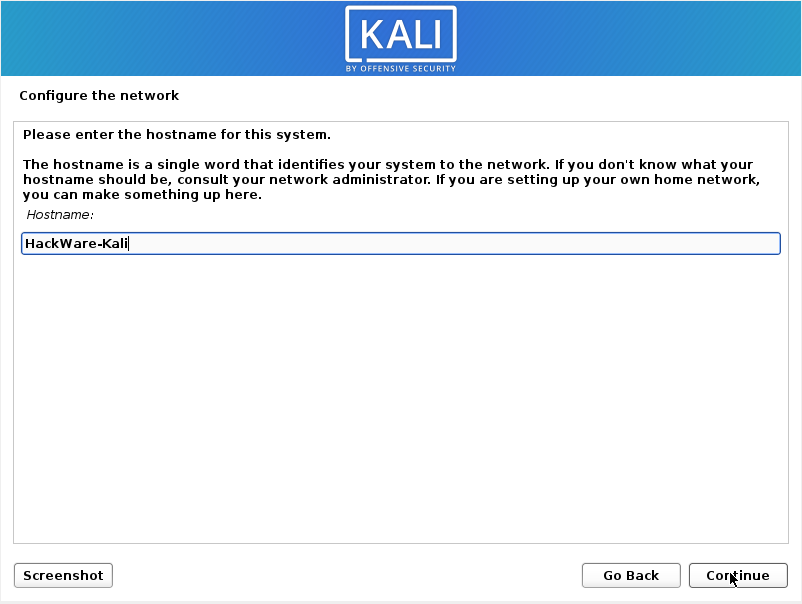
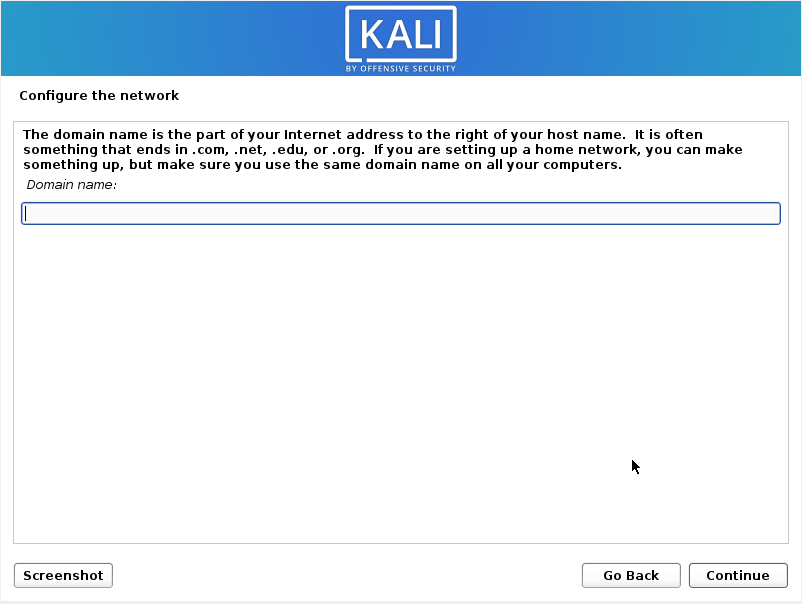
The domain name can be left blank:
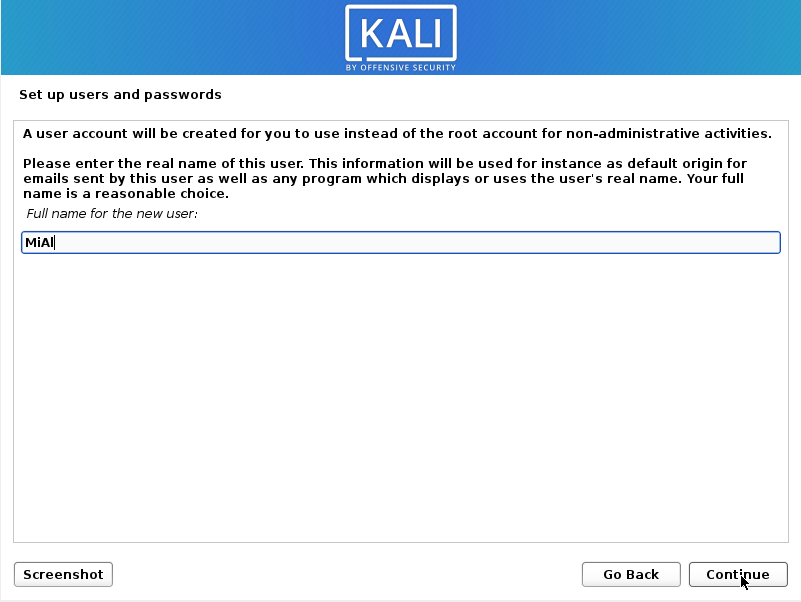
You need to distinguish between “name of the user” and “account username”. The of the user can contain spaces and capital letters. This name is not used anywhere. As for the name of the account, you will always enter it when you log in to the system, also the name of the account is used when executing various commands with users: changing the user password, executing commands from another user, deleting the user.
The name of the user is entered here – enter anything:
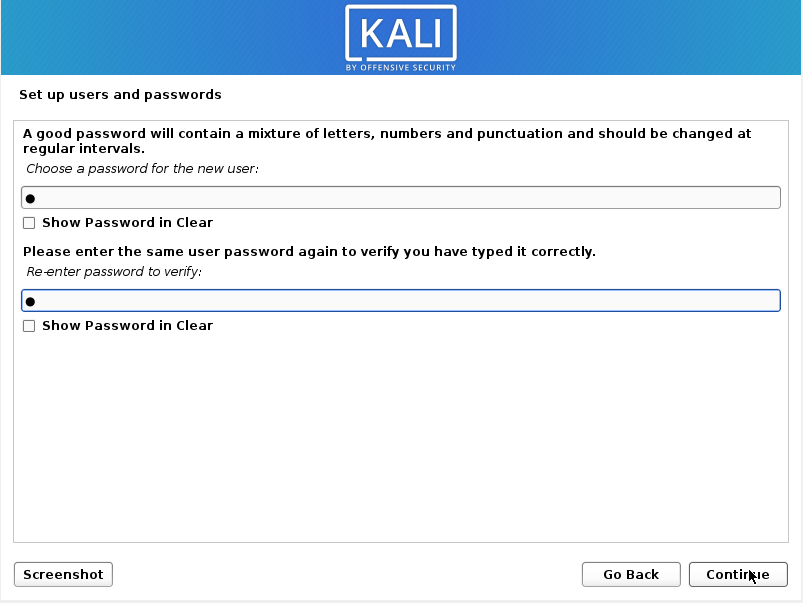
And here the account username is entered – it cannot contain spaces or capital letters. Only lowercase letters and numbers can be used for the account name:

Create a password – you will need it to log in the system and to perform operations that require superuser privileges:
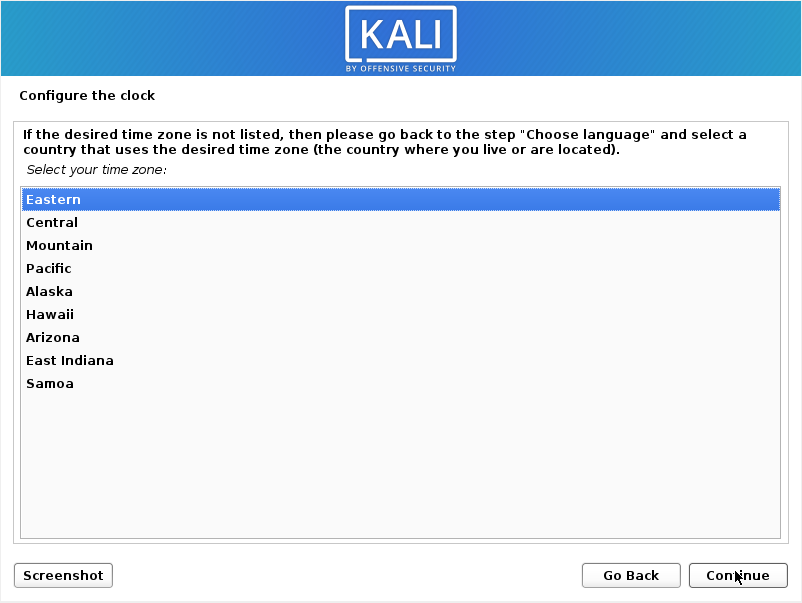
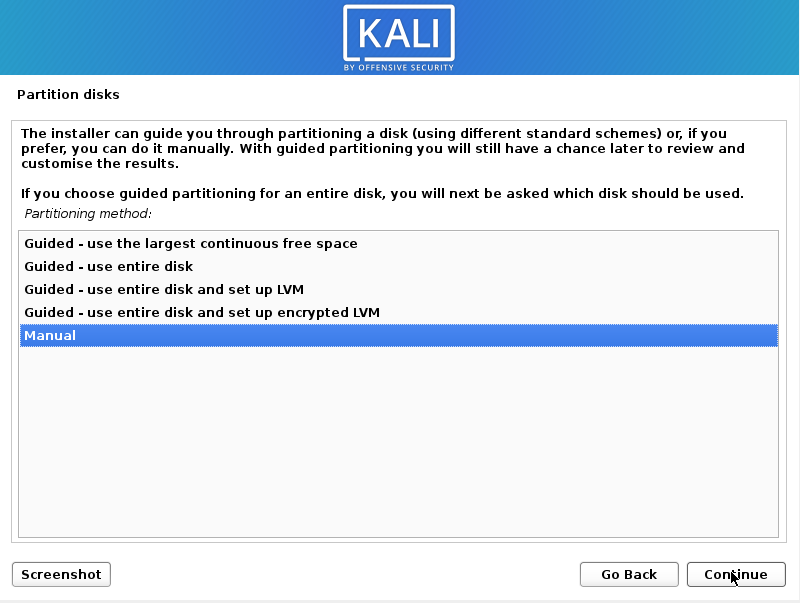
Select “Manual”:
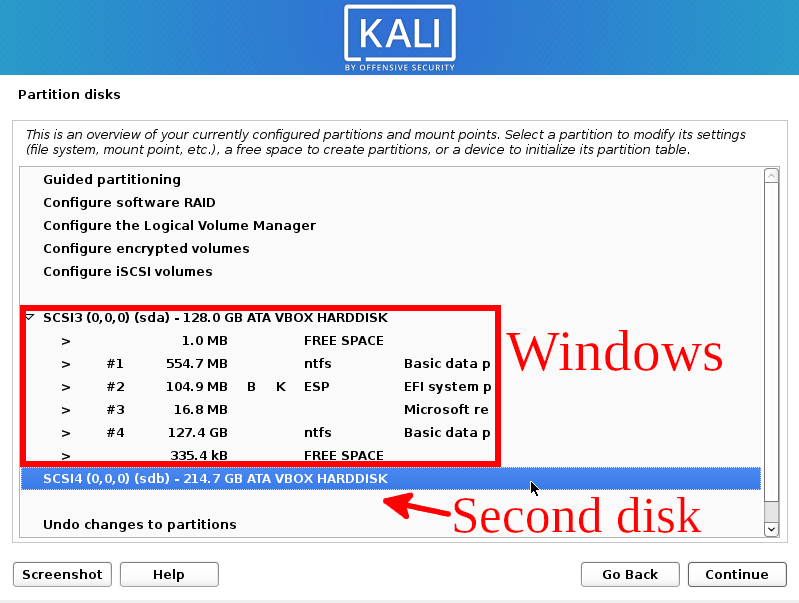
There are two disks on the computer where Kali Linux is installed, and Windows is already installed on one of them, so I select the second disk (be guided by the name and size of the hard disk):
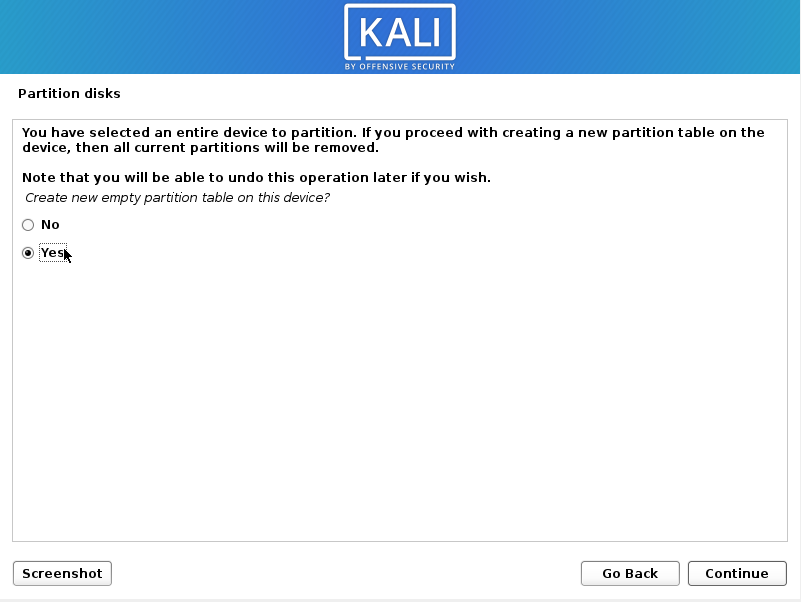
The disk is empty and not formatted, so we are offered to create a partition table, select “Yes”:
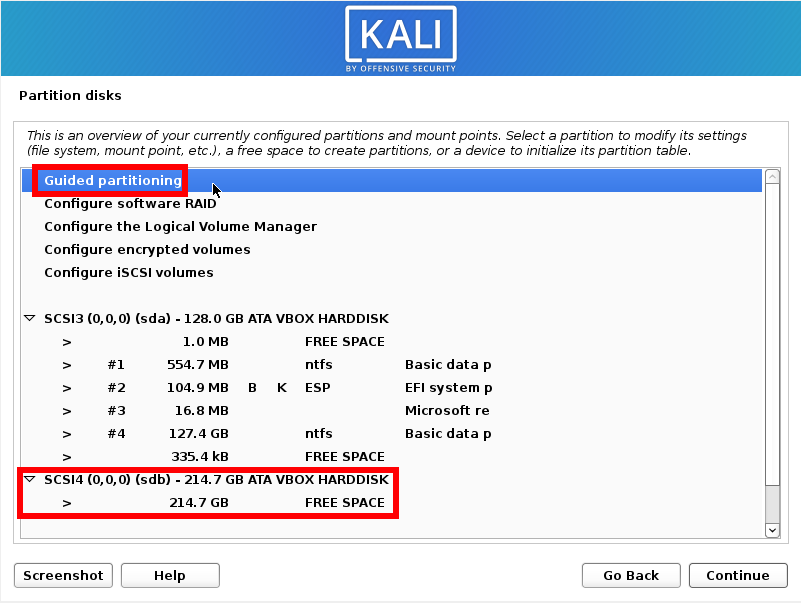
Please note that now a partition has been created on the second disk, now we select “Guided partitioning”:
Choose “Guided — use the largest continuous free space”:
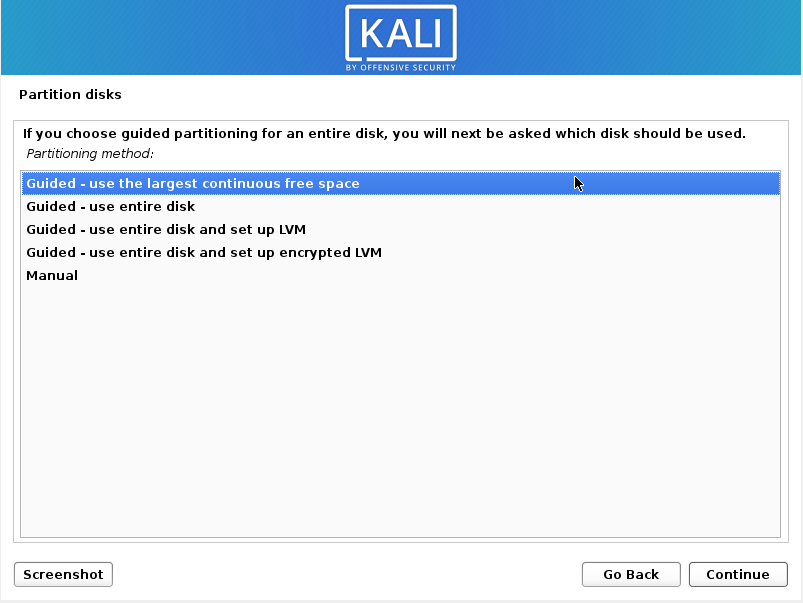
On the next screen, double check that the disk is selected correctly – look at its name and size, then select “All files in one partition (recommended for new users)”:
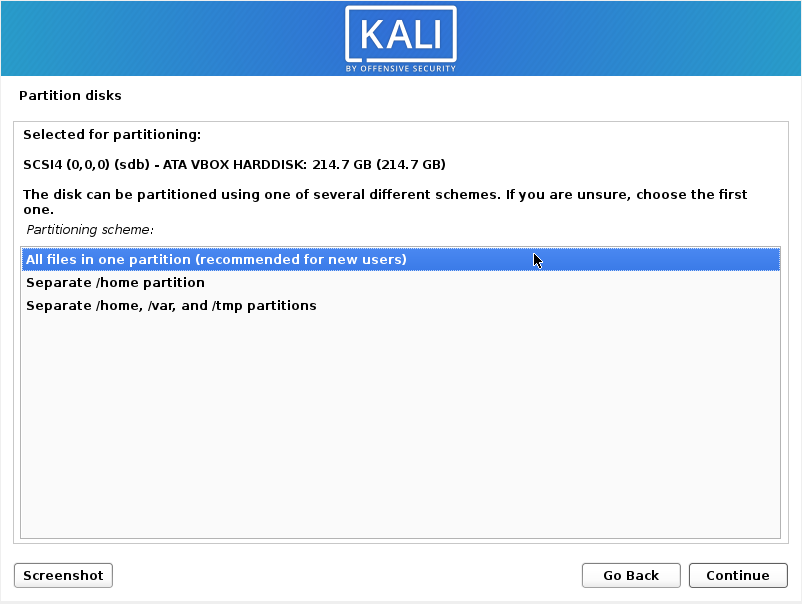
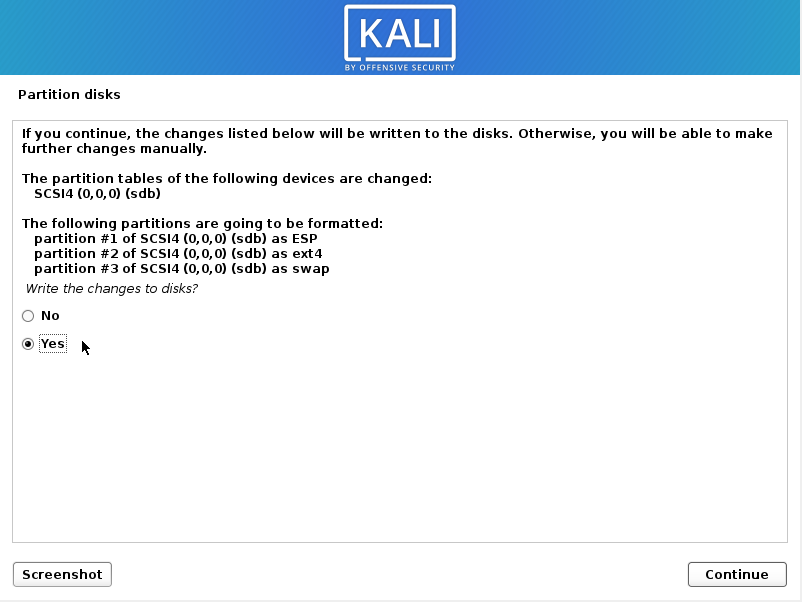
Once again, make sure that the system will be installed exactly in the disk where you want — at this stage, you can still undo the changes made, since they have not yet been written to the disk. Then it will be impossible to undo the changes. When you are sure that everything is correct, click “Finish partitioning and write changes to disk” → “Continue”:

Check everything again and select “Yes”:
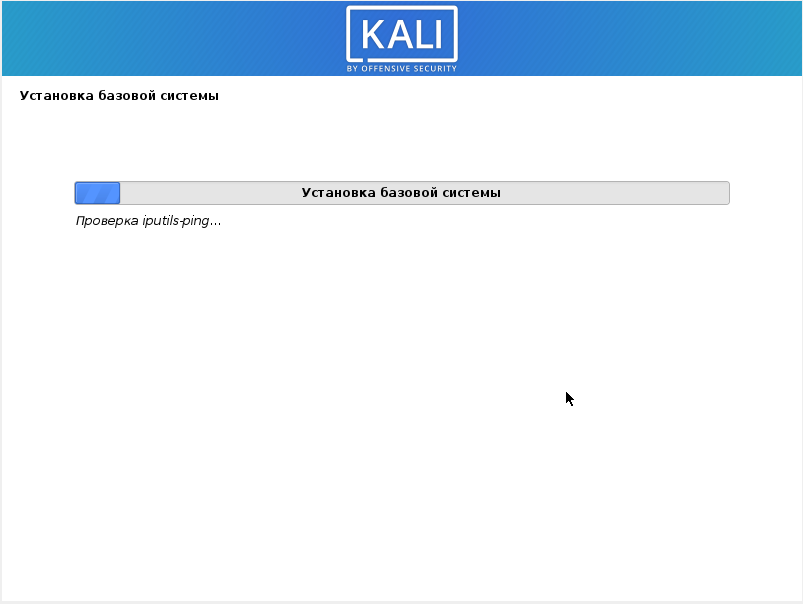
Wait for the installation to complete:
Click Continue:
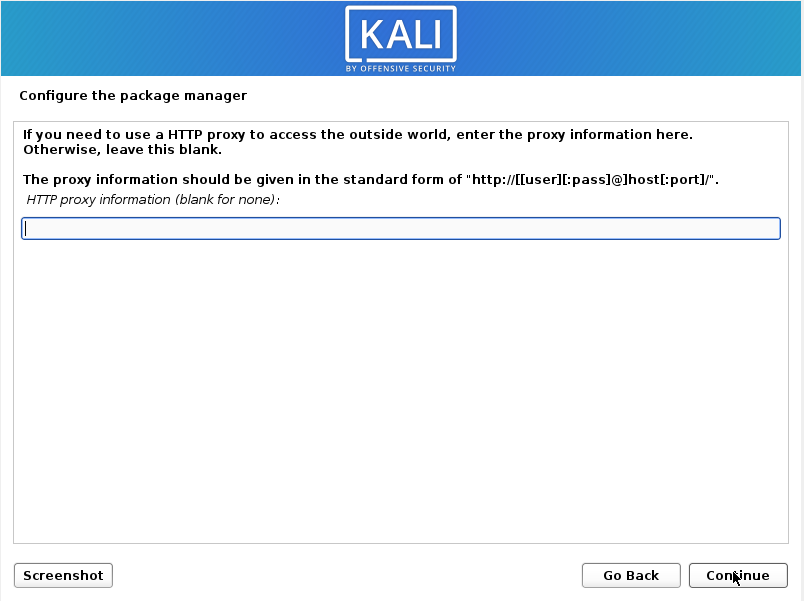
We need to decide which desktop environment we want to install and which set of programs to choose. The following desktops are available:
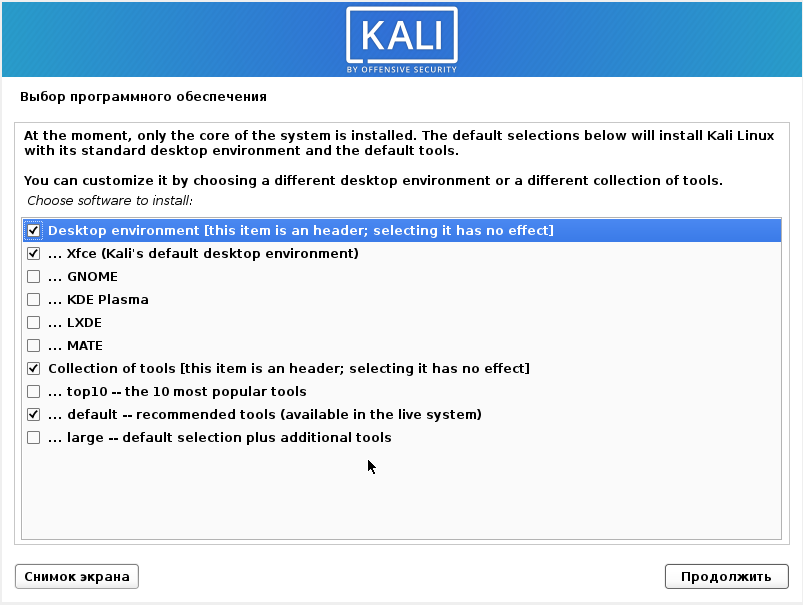
In my opinion, Cinnamon is the best desktop environment on Linux, but it is not present here. I don’t like GNOME – it’s impossible to perform basic actions, such as creating a shortcut on the desktop, not a logical and not intuitive menu, and generally poor usability. KDE Plasma is a beautiful desktop, but when I used it (it was many years ago), it was very buggy and heavy. MATE is essentially the current version of GNOME 2, that is, a classic-looking desktop, but it lacks modern functions (which are available in Cinnamon, for example).
Xfce and LXDE are lighter, if you have a not powerful computer, select one of them.
If you do not know what to choose, then leave Xfce.
Linux desktop environment can be changed at any time!
The following tool sets are available:
- top10 (only the 10 most popular tools)
- default (regular set, as on the Live system)
- large (includes default as well as additional tools)
Regardless of what you select, in the future it will be possible to install or remove any tool.
Wait for the installation of all packages to complete and reboot.
If you are prompted to install the bootloader, then see the section “On which drive to install the bootloader”.
Congratulations, Kali Linux installation is complete!

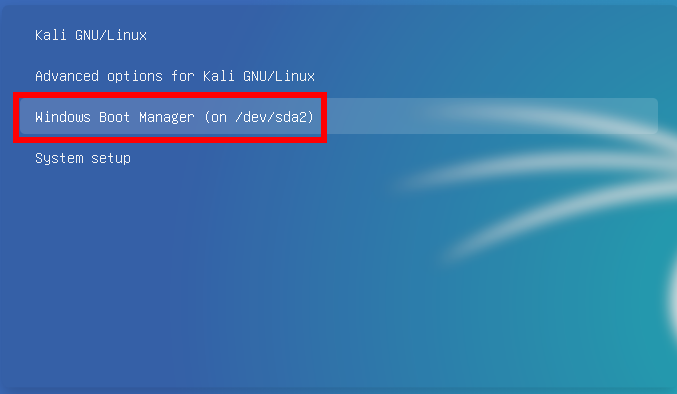
If you need to boot into Windows, then select the appropriate item in the boot menu:
On which drive to install the bootloader
In my Kali Linux installation example, the installer did not ask which drive to install the system bootloader on. The reason is that the UEFI partition can store data about several operating systems, and the installer wrote the necessary information to the existing bootloader. On computers with BIOS, the installer will ask which disk to install the bootloader on. To make a decision, you need to have a general idea of operating system booting process. Simply put, the following happens:
1. BIOS (UEFI) checks which drive is selected for boot and transfers control to the bootloader on that drive.
2. The bootloader of the specified disk starts working, if several operating systems are registered in it, then it shows the user a boot menu to select one of them. If the operating system is only one, then it just loads it.
So, if you already have Windows installed, then there are two options:
- Install the Linux bootloader instead of the Windows bootloader on the Windows drive
- Install the Linux bootloader on the disk with Linux itself
Advantages of the first option:
- To select a bootable operating system, you do not need to change BIOS settings – you can select the desired OS in the boot menu
The disadvantages of the first option:
- The Windows boot loader is erased, and if you want to restore it, you will need to use a special program.
- Even if you remove Linux, the OS selection menu for loading will still appear.
The advantage of the second option:
- The Windows and Linux boot loaders will be saved, they will be located each on its own disk, independently of each other.
- If you decide to uninstall Linux, then you do not have to worry about restoring the Windows boot loader.
- The Linux disk can be moved to another computer and it will work!
The disadvantages of the second option:
In my opinion, the second option is much better, so I install the Linux bootloader on the Linux drive, and to change the OS, which will boot by default, I will go into the BIOS and select the drive to boot there.
How to install Kali Linux in VirtualBox
Start by creating a virtual machine. No need to flash the ISO image to a USB flash drive, it can be plugged to a virtual machine.