Weekly Virtual Machines, with Build Scripts
We have always made all our build-scripts public. These are the same set of tools which we use to generate Kali Linux (for each release, or our weekly images). You may have noticed that previously there wasn’t anything about Virtual Machines (VMs). This is because until recently it was a manually done process, which followed our guides (VMware & VirtualBox). We have now upped our DevOps game, and automated the build process! Enter build-scripts/Kali-VM.
Another positive outcome of this is that it allows us to generate weekly VMs now! These images are more up-to-date, meaning less packages need updates out of the box, but the only set of tests run are the automated ones. Our release images have an additional set of Quality Assurance (QA) smoke-tests run against them, with the knowledge of last-snapshot , meaning the packages are in a known state. You have a choice: Stable vs updates!
Let’s start with a quick introduction to the weekly VMs, then we’ll have a glimpse at the Kali-VM build script.
Weekly Kali VMs
You can find these Kali images in the Virtual Machines section of Get Kali. Scroll down a bit, they are just there. At the moment we have weekly images for VMware and VirtualBox.
The VMware weekly image will be no surprise for those who already use the quaterly Kali VMware images: it’s pretty much identical, except that it’s built from the kali-rolling branch. In order to use it you just need to import it in VMware.
However, the VirtualBox weekly image is published in a different format than the one we use for Kali releases. For various reasons, we decided to distribute it in the “native” VirtualBox format, that is: a VDI disk and a .vbox metadata file. Fear not though, because importing this VM in VirtualBox is super easy. If you’re already a user of the VirtualBox image, we’d love to hear your feedback on this new image! Feel free to drop us a word on the Kali-VM GitLab repository.
The Kali-VM build script
For the most demanding users, here’s the good news: we published the build script to generate those images! If you are wondering “Cool, but what can I do with Your Kali-VM repository,” a feature highlight (for the time being):
- Create VMs for VMware, VirtualBox, QEMU or a single VM which works with all three (aka “generic”)
- Create VMs for x64 and x86 (sorry, no ARM64 at this point in time!)
- Create the VMs directly on the host or in a container (Docker or Podman)
- Select as many (or as little!) tools/metapackages you wish to be included
- Configure your locale, timezone, username and password
The build script is stable enough that we are using it in production, but its still early days. As a result, there is a roadmap of features we would like to add:
- ARM64 support
- Hyper-V support
- Hook support (allowing you to customize Kali’s settings, such as changing preferences or altering the wallpaper)
- Many more ideas!
If the above sounds great to you, we would love a hand adding it! We are gladly encouraging merge requests! If you find a bug, great! Let us know as well =)
Now if you are wondering “Okay, this is pretty cool. How do I get started?” please take a look at the README. This will give you a basic idea of what requirements are needed, and how to get started. Then its just a case of looking at the help screen, and customizing the arguments to your needs!
Want some examples to get you going?
Kali linux virtual machines
This guide is about virtualizing Kali Linux inside of VirtualBox, allowing you to have a Kali VM. This is a great way to use Kali, as it is completely separate from the host, allows you to interact with other VMs (as well as the host machine and other machines on the network), and allows you to revert to snapshots.
You may wish to follow our other guide if you are trying to install VirtualBox on Kali Linux (as a host).
The guide below is what we use to generate our pre-made Kali Linux VirtualBox images. You may alter this to your needs. We always generate the images using the latest version of VirtualBox.
You may need to enable virtualization in your BIOS/UEFI for (e.g. Intel VT-x/AMD-V)
Wizard
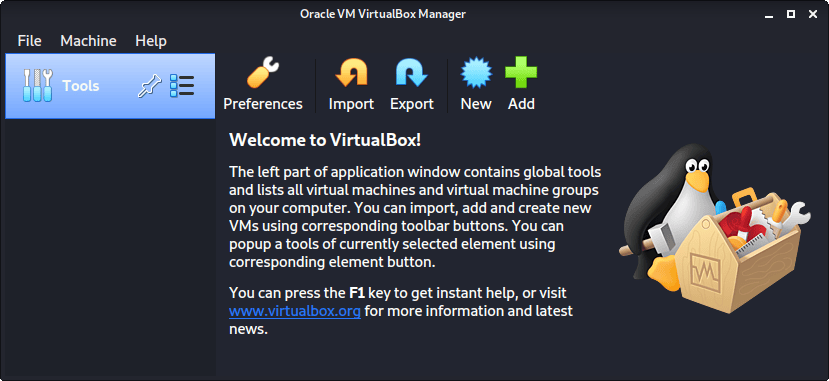
Upon starting up VirtualBox, select “New” (Machine -> New).
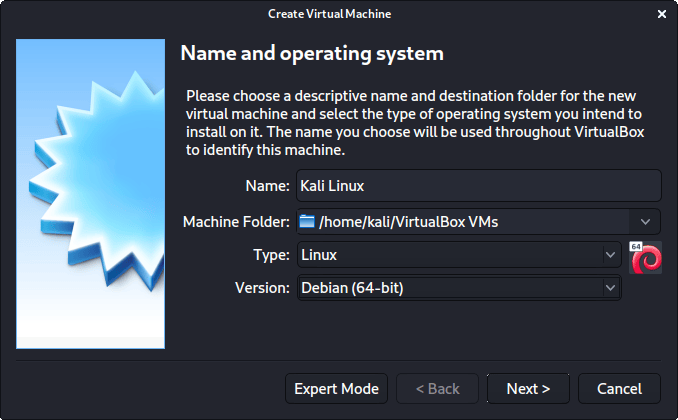
The next screen is “Name and operating system” which is where you name the VM. This name is also used in any filenames (such as the configuration, hard disk and snapshot — which isn’t changed from this point).
We are keeping it generic in this guide (as Kali is a rolling distribution, and we update it), however for our releases, we use the version number in the name as it is a fixed release ( kali-linux-YYYY.N-vbox-ARCH . Example: kali-linux-2023.2-vbox-amd64 ).
For the “Type”, we set it as Linux . For the “Version”, we are going to be using the x64 desktop image, so we are going to select Debian (64-bit) .
“Memory size” is the next section, where we can define how much RAM to use. Again, the higher the amount of RAM, the more applications can be open and at increased performance. Various tools inside of Kali can be demanding of resources. When we make the general VMs, we select 2048 MB (2GB) for RAM, but we often increase this for our personal machines as we have high-performing devices with spare RAM which Kali can utilize.

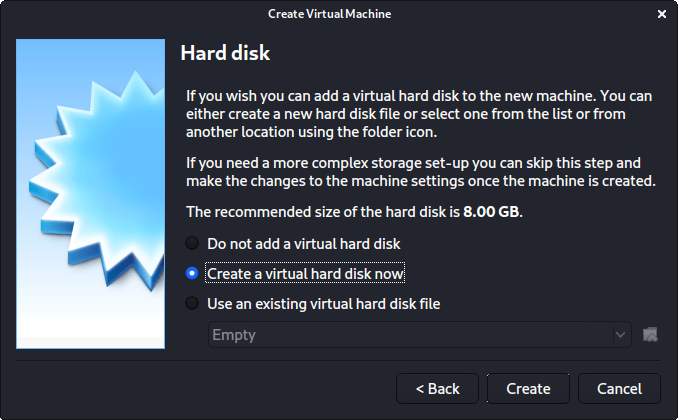
This screen below, “Hard disk”, allows us to Create a new virtual disk now .
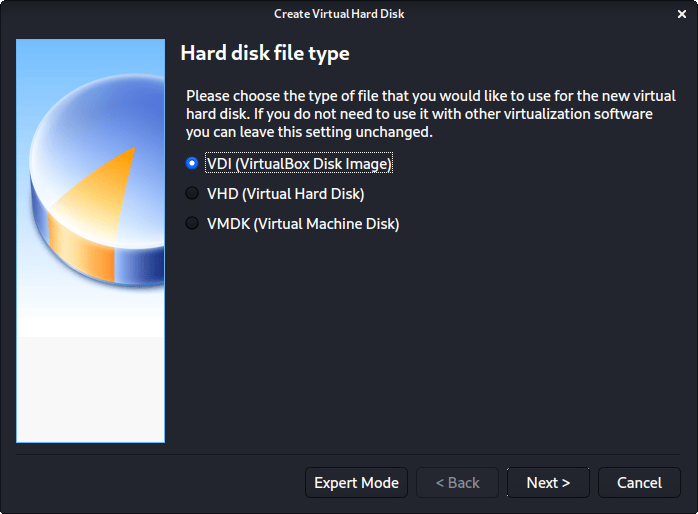
For the “Hard disk file type”, we select VDI (VirtualBox Disk Image) (and its the default option).
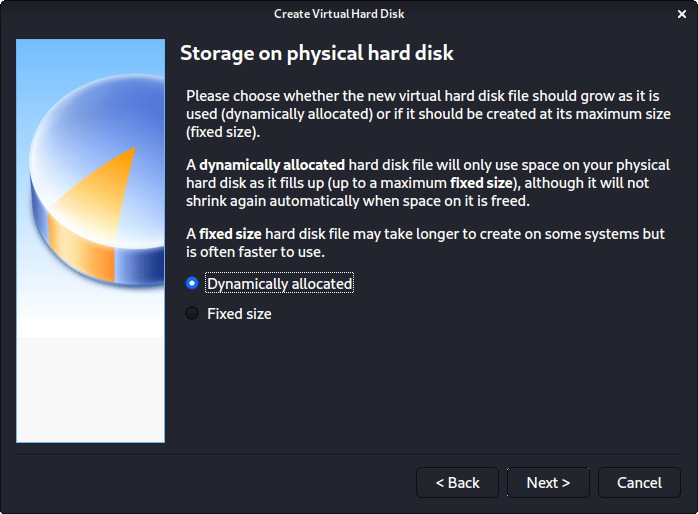
For the following screen, “Storage on physical hard disk”, we go with the default option of Dynamically allocated .
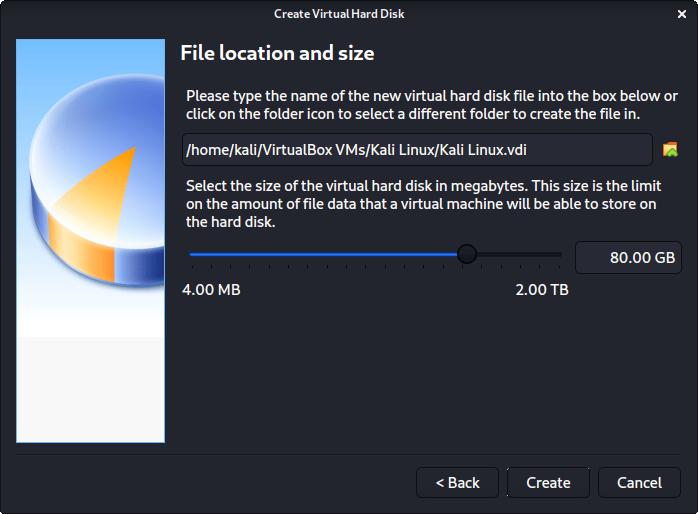
Now with “File location and size”, we can now define how large the virtual hard disk will be. We use 80.00 GB for our VMs.
After clicking on “Create”, the wizard is complete.
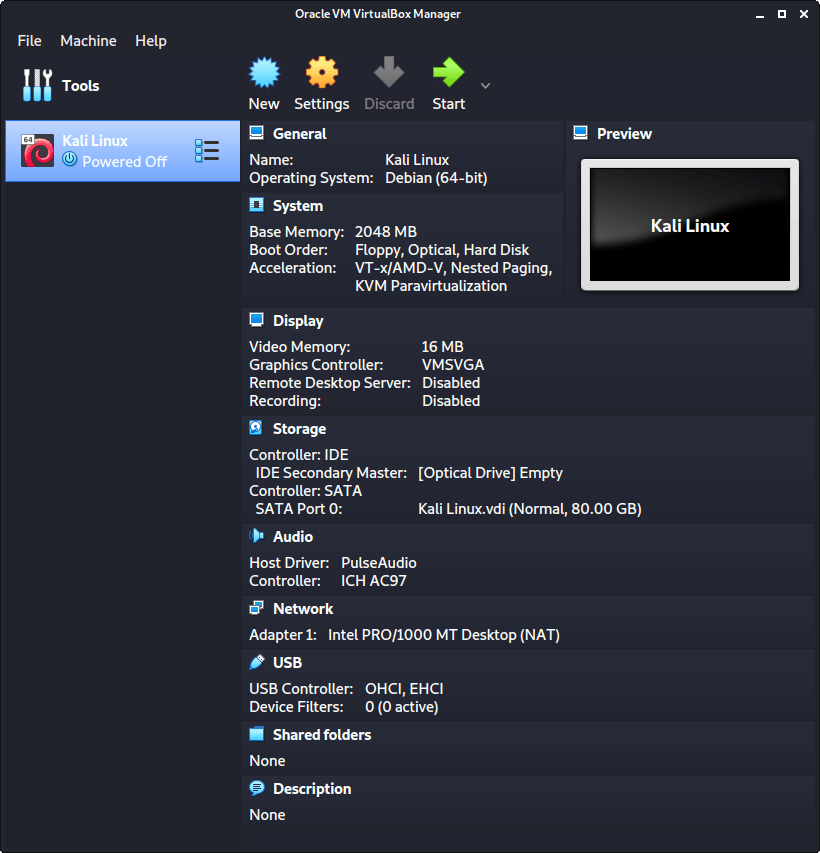
Now we click on “Settings”, to customize the VM further.
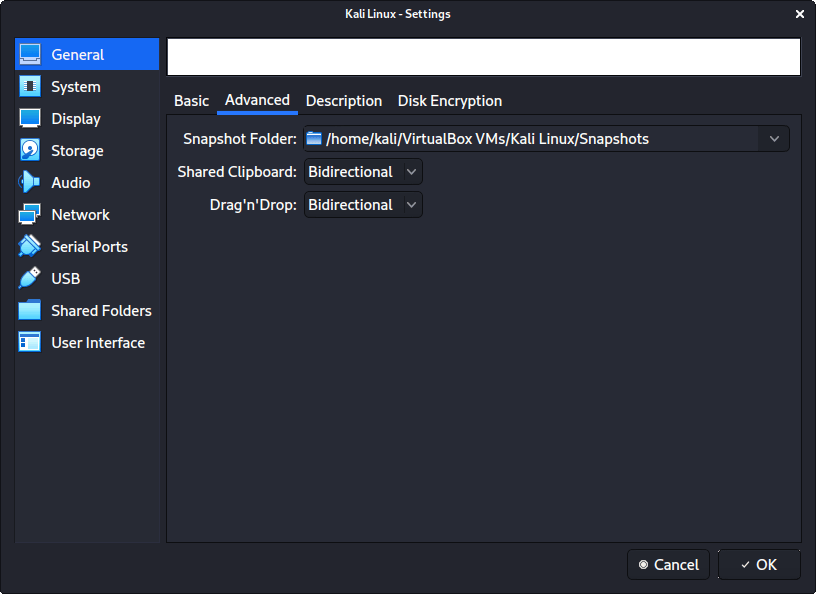
In “General” -> “Advanced”, we make sure to set “Shared Clipboard” to bidirectional , as well as “Drag’n’Drop” to bidirectional
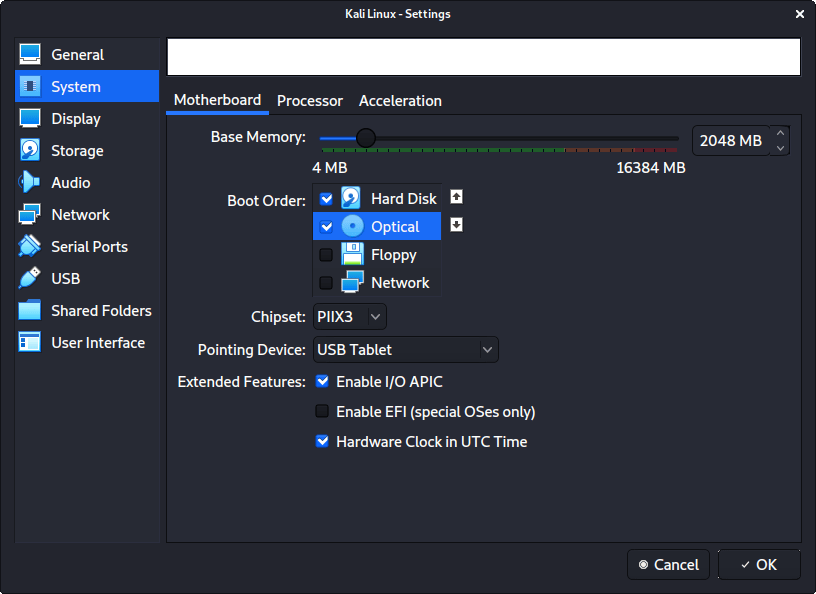
In “System” -> “Motherboard”, we change the “Boot Order” to make sure Hard Disk is top and Optical is the second. Everything else is disabled.
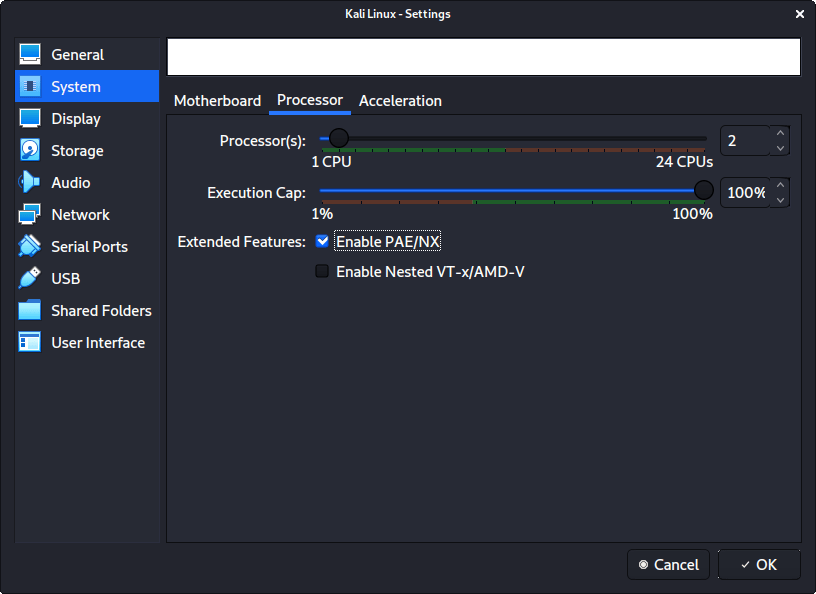
In “System” -> “Processor”, we increase the “Processor(s)” to be 2 .
At the same time, we also enable “Extended Features” for Enable PAE/NX .
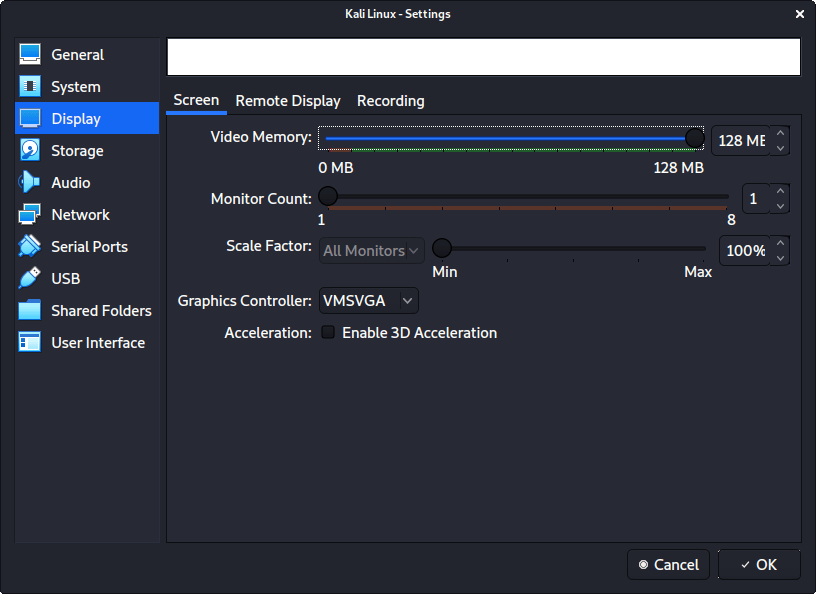
In “Display” -> “Screen”, we make sure to have “Video Memory” set to 128 MB
Another item to point out is to make sure that “Accelerated 3D graphics” is disabled, as people have reported that causes issues.
The final settings view looks like the following:
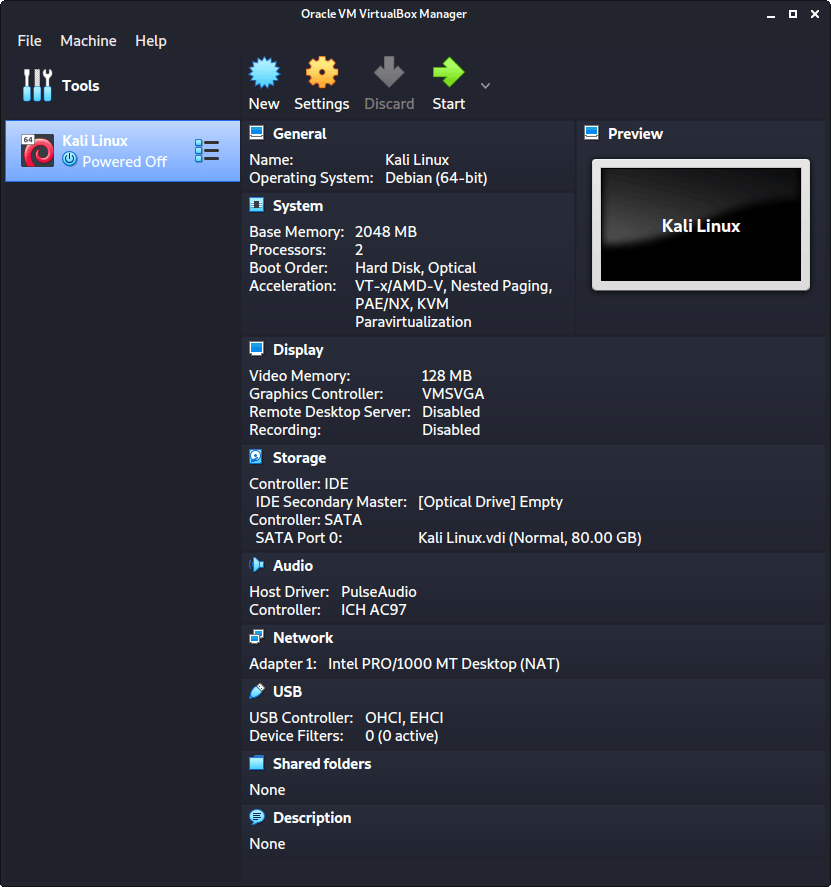
When we are ready to go, press “Start”.
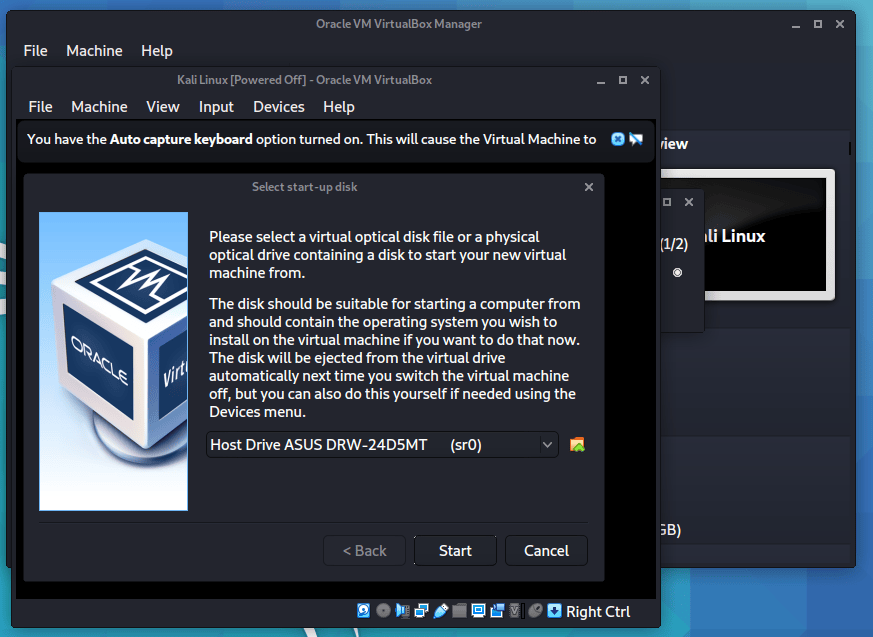
The first time we run it, we will get a prompt saying do we wish to mount an image to use as a “start-up disk”. We want to use our Kali image, rather than a physical drive, so we select the icon to the side of the drop down.
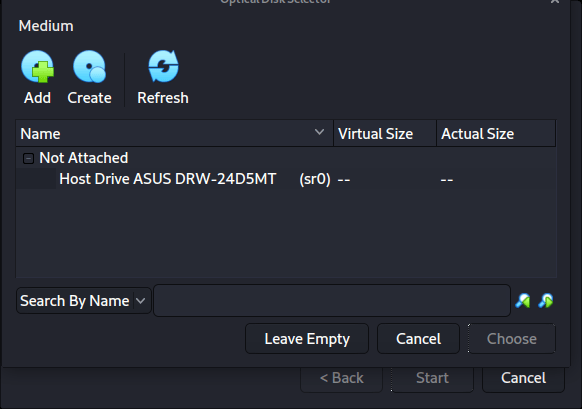
A new pop up will open, “Optical Disk Selector”. We will now press “Add”, then navigate to where our ISO is located.
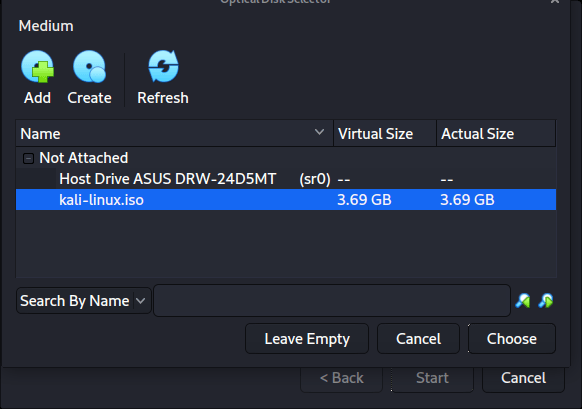
After pressing “Open”, we can see its been added, so we make sure its selected and press “Choose”.
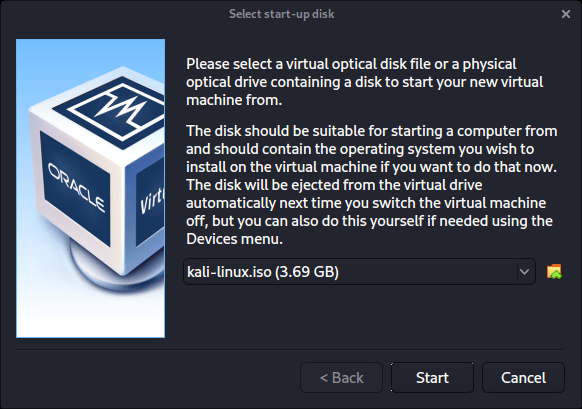
All that is left now to do is press “Start”.
After all this is done, we save, start up the VM, and then continue installing Kali Linux as we normally would for a bare metal install.
During Kali Linux setup process, the install wizard should detect if its inside a VM. If it is, should then automatically install any additional tools (such as virtualbox-guest-x11 ) to give a better user experience. If you want to manually re-install it, you can see our VirtualBox Guest Guide.
Updated on: 2023-May-30
Author: g0tmi1k
Kali linux virtual machines
You can install VirtualBox on Kali Linux, allowing you to use virtual machines (VMs) inside of Kali Linux. However if you are wanting to install Kali Linux as a VM, you want our Kali Linux Guest VirtualBox guide.
VMs are great. There are many upsides with using them. One of the being, able to run multiple Operating Systems (OSs) at the same time. You can have your host machine “untouched”, and then only interact with the guest VMs. Another is when something is going right, take a snapshot. When something goes wrong, revert back.
VirtualBox is free and open source. There are a few other software such as QEMU, KVM/Xen with virt-manager. Then there is also VMware Workstation & Fusion, which is a commercial software (there is VMware Player which is free but it is limited in features).
Preparation
Before trying to install VirtualBox, please make sure your version of Kali Linux is up-to-date, and if required, reboot the machine:
[email protected]:~$ sudo apt update [. ] [email protected]:~$ [email protected]:~$ sudo apt full-upgrade -y [. ] [email protected]:~$ [email protected]:~$ [ -f /var/run/reboot-required ] && sudo reboot -f [email protected]:~$ Download
The first thing we are going to do is import VirtualBox’s repository key:
[email protected]:~$ curl -fsSL https://www.virtualbox.org/download/oracle_vbox_2016.asc|sudo gpg --dearmor -o /etc/apt/trusted.gpg.d/oracle_vbox_2016.gpg [. ] [email protected]:~$ curl -fsSL https://www.virtualbox.org/download/oracle_vbox.asc|sudo gpg --dearmor -o /etc/apt/trusted.gpg.d/oracle_vbox.gpg [. ] [email protected]:~$ We then move onto adding VirtualBox’s repository. We add this to a separate file, so it does not interfere with Kali Linux’s main repository. We also will be making sure to state where the keyring is at so the files can be properly signed. Our CPU architecture is amd64. You may need to alter the example below if yours is different.
One thing to bear in mind, Kali Linux is based on Debian, so we need to use Debian’s current stable version (even though Kali Linux is a rolling distribution). At the time of writing, its “bullseye”:
[email protected]:~$ echo "deb [arch=amd64] https://download.virtualbox.org/virtualbox/debian bullseye contrib" | sudo tee /etc/apt/sources.list.d/virtualbox.list [email protected]:~$ As we have altered our network repository, we need to re-build the cache:
[email protected]:~$ sudo apt update [. ] [email protected]:~$ As VirtualBox has various kernel modules (e.g. vboxdrv , vboxnetflt and vboxnetadp ), we need to make sure they are kept up-to-date when Kali Linux’s kernel gets updated. This can be achieved using dkms:
[email protected]:~$ sudo apt install -y dkms [. ] [email protected]:~$ Setup
Now its time to install VirtualBox itself (along with its Extension Pack to expand VirtualBox’s advanced features):
[email protected]:~$ sudo apt install -y virtualbox virtualbox-ext-pack [. ] [email protected]:~$ When prompted, read and accept the license.
You can now find VirtualBox in the menu or start it via the command line:
[email protected]:~$ virtualbox [email protected]:~$ If you now wish, you are able to install Kali Linux in a VirtualBox VM (on Kali Linux).
Kali linux virtual machines
We understand there are a lot of options for interfacing with KVM and QEMU to create different VMs, however for the purposes of this guide we will be using the most common option.
To get a Debian based system prepared for this, we can simply run the following command:
[email protected]:~$ sudo apt update && sudo apt install virt-manager -y [. ] This will pull in all of the necessary packages and will allow us to create our VM just fine.
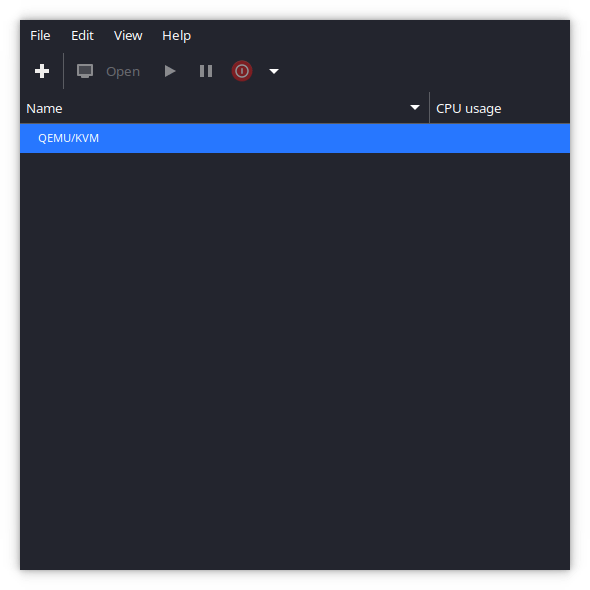
After virt-manager is installed, we can launch it and put in our password as we need elevated permissions for some tasks.
From here we can select the “+” and begin to create our VM:
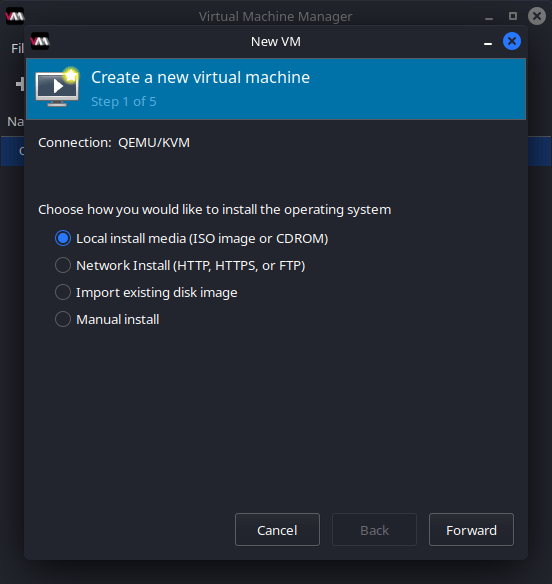
We want to ensure we select local ISO file:
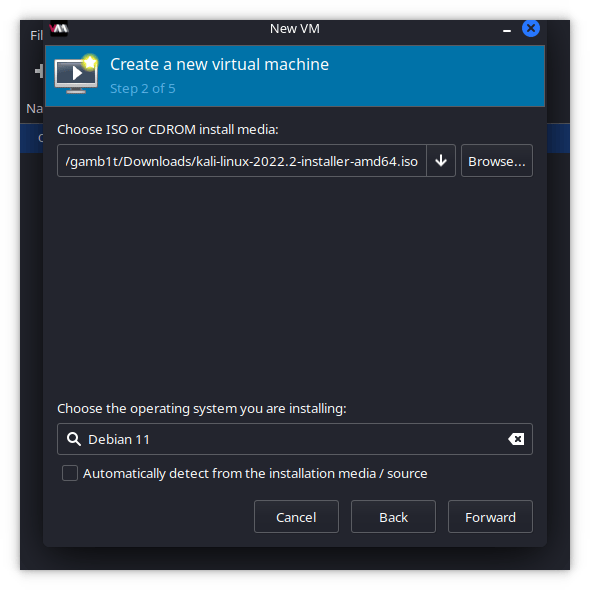
We choose our ISO and also de-select guessing the OS and input “Debian 11”:
We make sure to use 2GB of memory and 2 CPU cores:

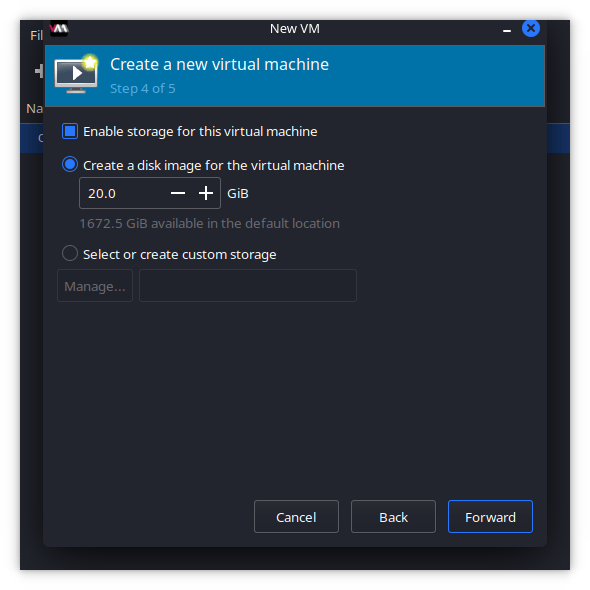
We set our system to be 20GB:
We can now finalize setup by changing the system name to “kali-linux”:
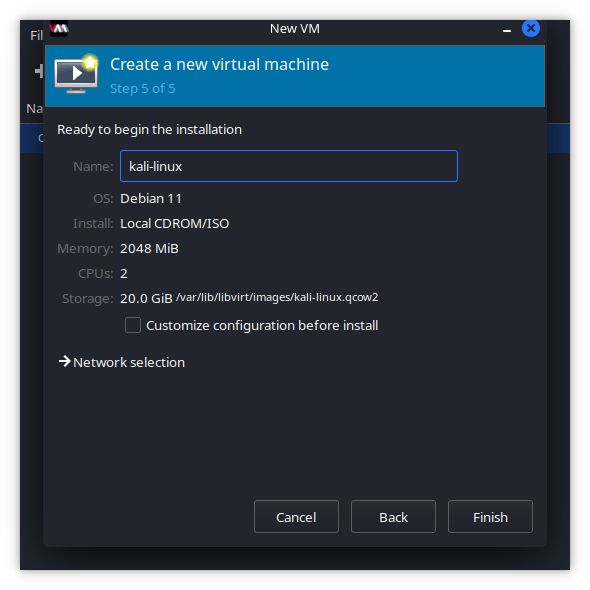
From here we can follow the normal Kali Linux installation
Updated on: 2023-May-05
Author: gamb1t