- Install Kali Linux in a VMware ESXi Virtual Machine
- Download Kali Linux
- Import Kali Linux Virtual Machine to VMware ESXi
- Import to ESXi host
- Enable SSH and convert vmdk disk
- Install a Kali Linux VM in a VMware ESXi 6.7 Environment
- Kali Download
- Kali Installation
- Patch Current
- Setup SSH
- Test SSH
- Now Explore
- How to Install & Setup Kali Linux on VMware ESXi
- Tutorial Install Kali Linux on VMware ESXi
- How to Download Kali Linux
- How to Create the Virtual Machine
- Installing Kali Linux on VMware ESXi
- Conclusion
Install Kali Linux in a VMware ESXi Virtual Machine
There are many compatible devices under Kali Linux as we can see on the download page : https://www.kali.org/.
Curiously there is no native ESXi prebuild image. Indeed, in the Virtual Machines part there is a VMware Kali Linux image but it is for VMware Workstation product which is not natively compatible with the VMware ESXi product.
I will detail here a method to import the VMware Workstation image to an VMware ESXi host.
Download Kali Linux
The first thing to do is to connect to the official download page : https://www.kali.org

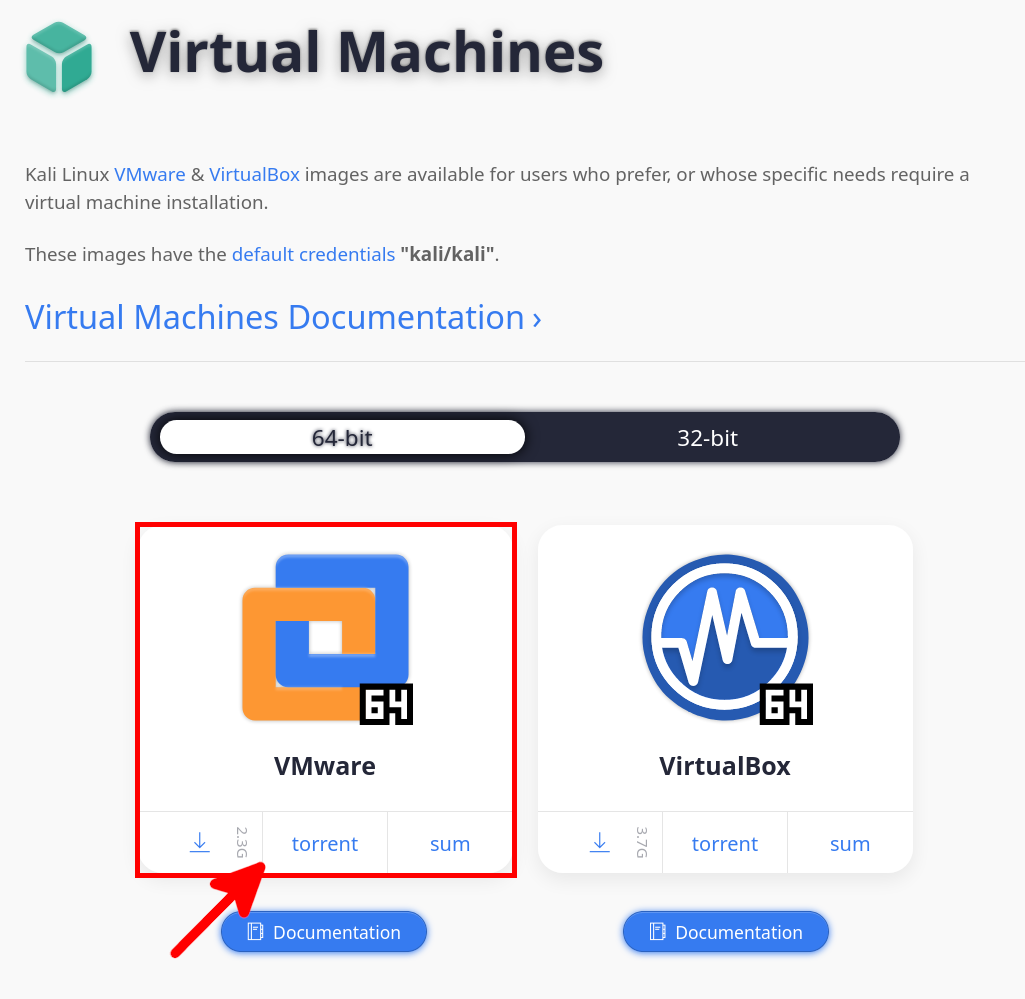
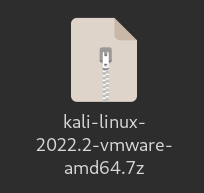
- Once downloaded you should have an 7zip archive file :
- Extract files, here for example, from a GNU/Linux shell (this command extract files to a KALI folder) :
user@host:~$ mkdir KALI && 7z e ./kali-linux-2022.2-vmware-amd64.7z -o./KALI/
Import Kali Linux Virtual Machine to VMware ESXi
Import to ESXi host
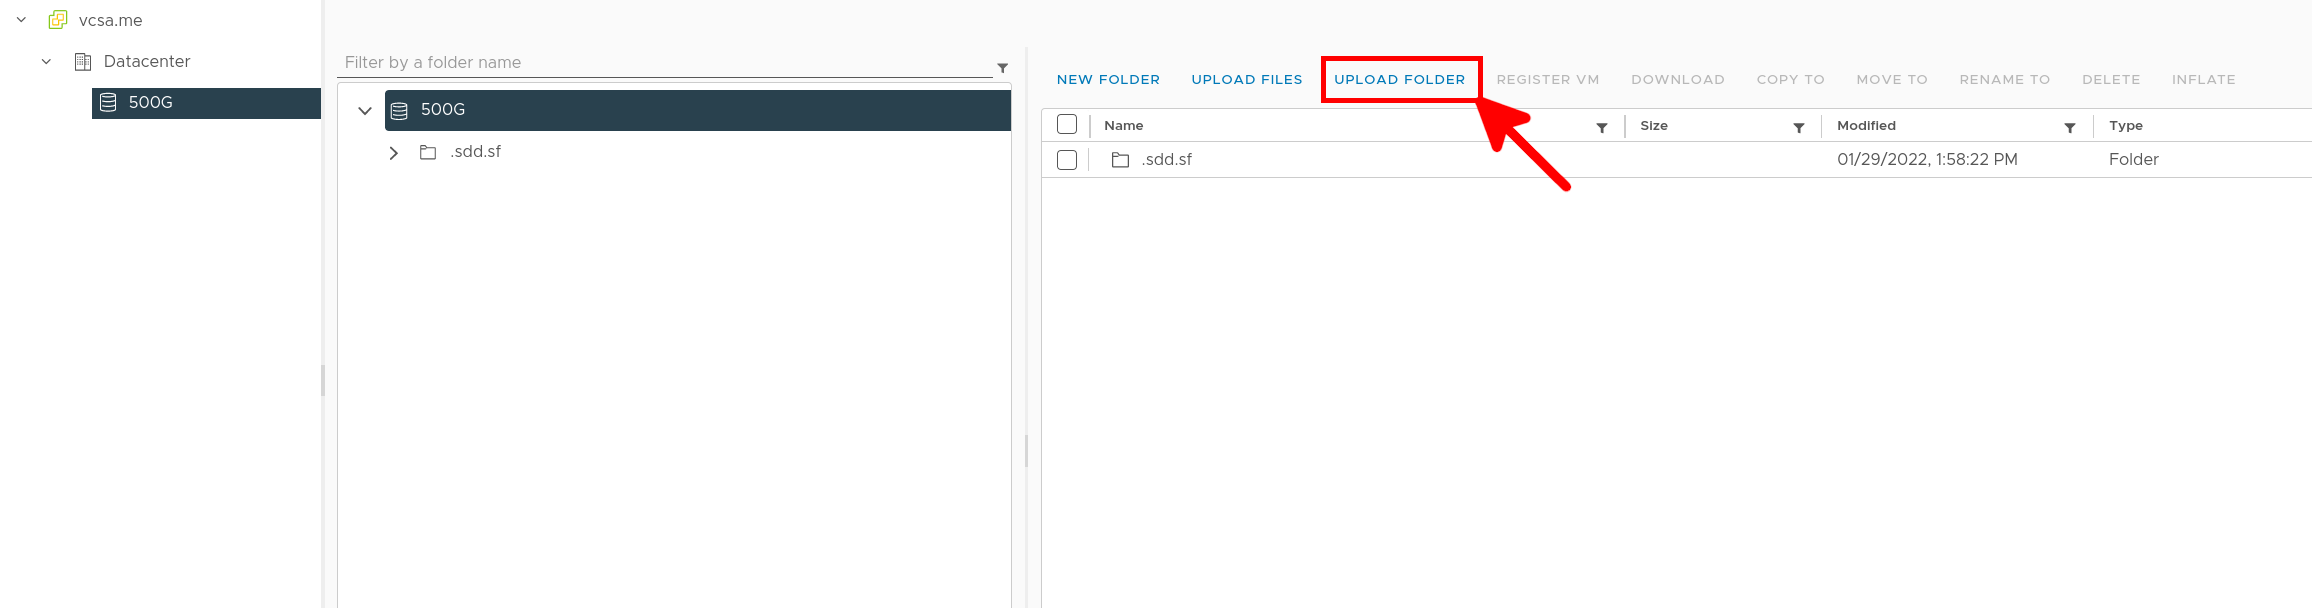
Note : Connect to your ESXi web page and accept the https web certificate first (otherwise upload from vcsa won’t work).
- Go to datastore menu, select storage where you want to store the Kali Linux Virtual Machine and click to «UPLOAD FOLDER» link :
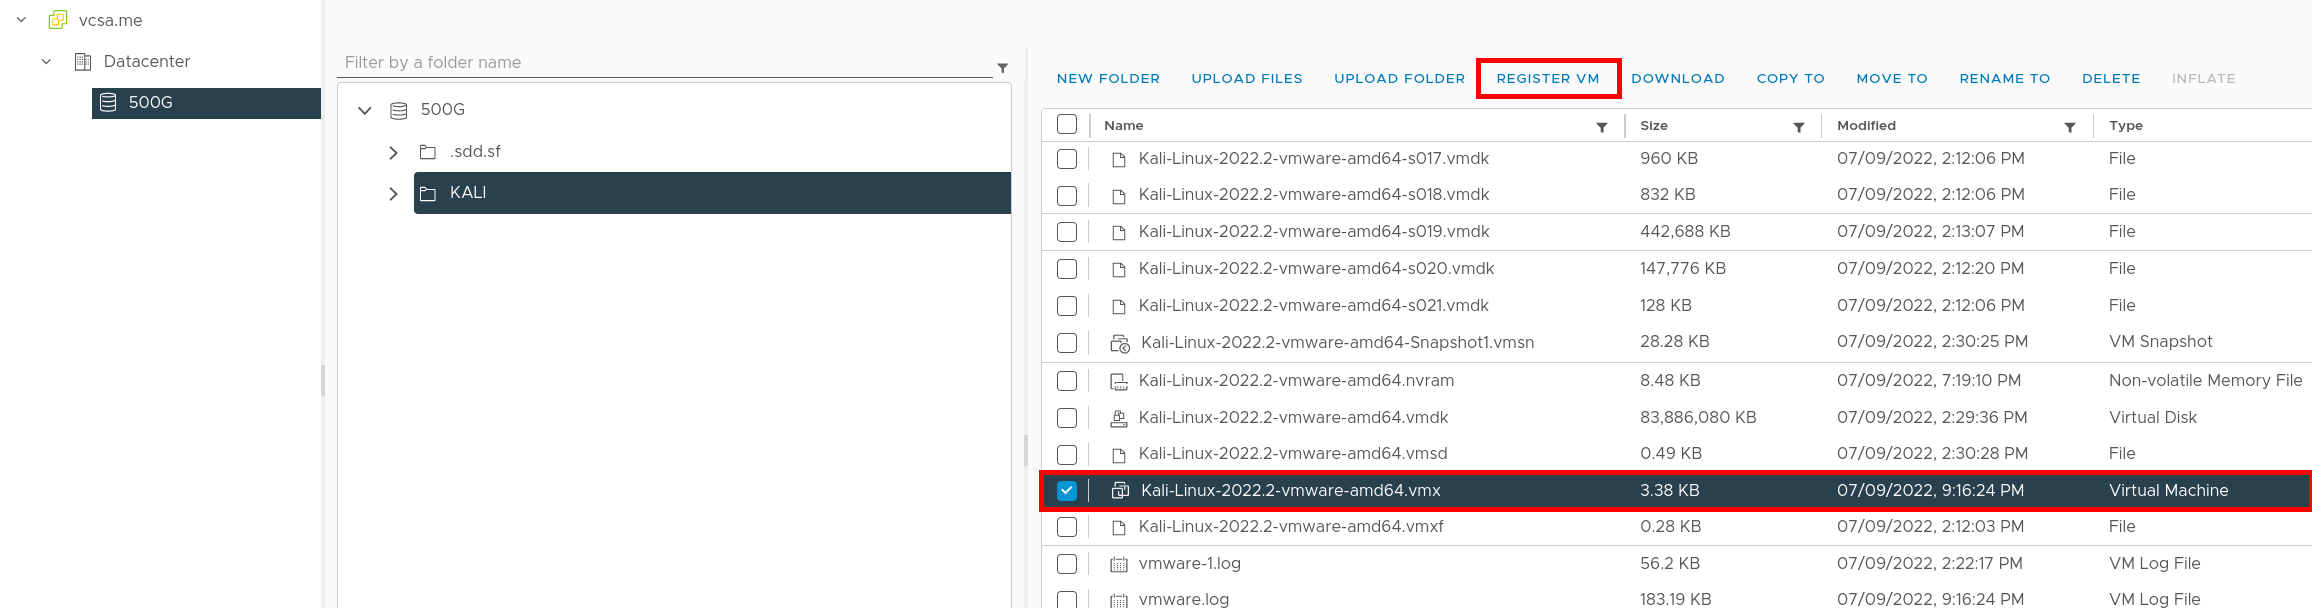
- Once uploaded, open KALI folder, select Kali-Linux-2022.2-vmware-amd64.vmx file and click to «REGISTER VM» link :
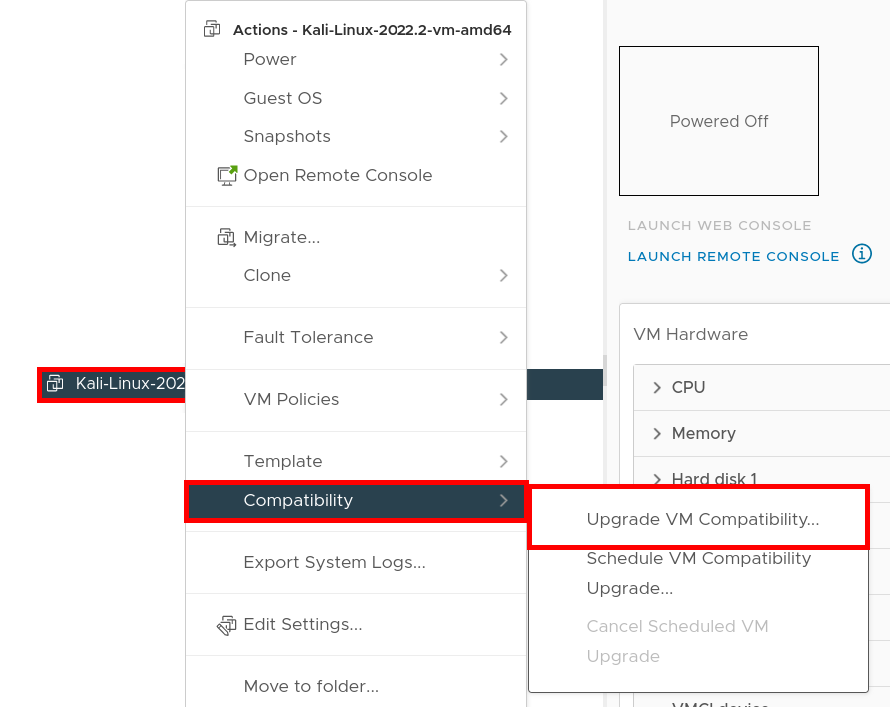
- From main menu do a right click to Kali-Linux-2022.2-vmware-amd64 Virtual Machine and Upgrade VM Compatibility :
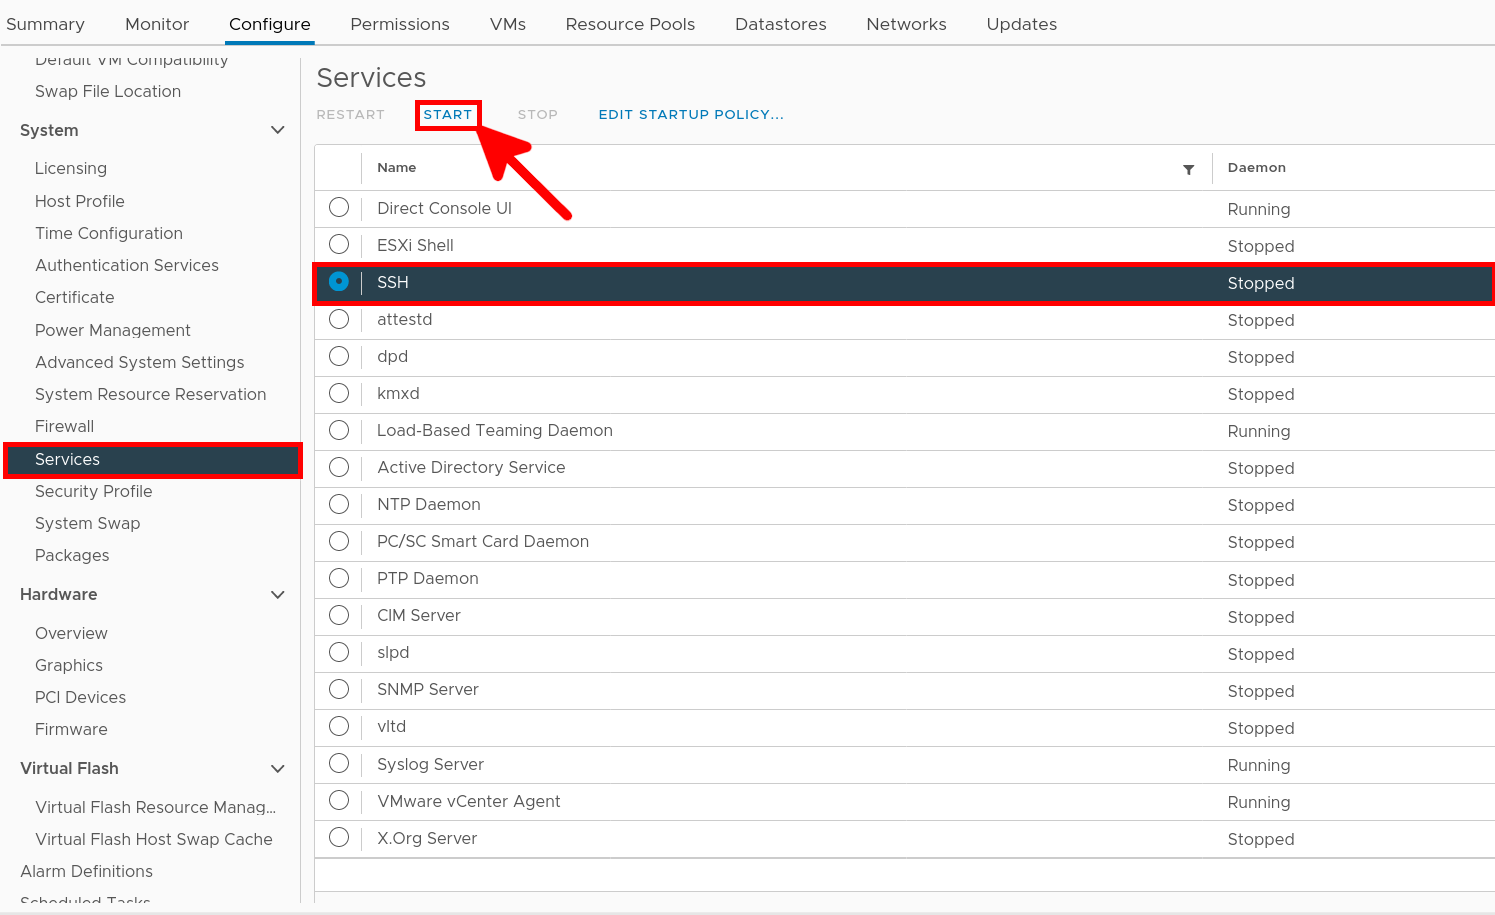
Enable SSH and convert vmdk disk
[root@localhost:~] df -h Filesystem Size Used Available Use% Mounted on VMFS-6 465.0G 286.4G 178.6G 62% /vmfs/volumes/500G VMFS-L 119.8G 3.9G 115.9G 3% /vmfs/volumes/OSDATA-0269c4cb-fe6feb41-f534-d4be32a1d43e vfat 4.0G 203.8M 3.8G 5% /vmfs/volumes/BOOTBANK1 vfat 4.0G 64.0K 4.0G 0% /vmfs/volumes/BOOTBANK2 [root@localhost:~] cd /vmfs/volumes/500G/KALI [root@localhost:~] mv Kali-Linux-2022.2-vmware-amd64.vmdk OLD.vmdk
[root@localhost:~] vmkfstools -i OLD.vmdk Kali-Linux-2022.2-vmware-amd64.vmdk
- You should now be able to start the Kali Linux Virtual Machine, don’t forget the default login / password : kali / kali 🙂
This work is licensed under a Creative Commons Attribution-NonCommercial-ShareAlike 4.0 International License.
This work is licensed under a Creative Commons Attribution-NonCommercial-ShareAlike 4.0 International License.
Install a Kali Linux VM in a VMware ESXi 6.7 Environment

Beginning of the Security Lab There are a few options, when it comes to Kali, and running it as a VM . Available for download are, prebuilt VM images, as well as different prebuilt ISO ’ s, depending on the environment. Here, I’m downloading the full ISO , and going to install manually, apply all outstanding updates, and install/configure SSH .
Kali Download
Go to Kali.org download section and select you desired download.


Create the Virtual Machine I’ve opened a VMware HTML5 client session with the Host, as I have not yet installed the VSCA . Click Create VM . Name the VM , select VM options, and configure system resources. The only non default item I configured, was to change the CD/DVD to DataStore ISO , and mount the Kali ISO , downloaded earlier.

Kali Installation
Start the VM , and click on the little remote window, to open a remote console connection tab.
When the boot menu appears, select Install


Enter the Lab Domain Name


Reenter the Root password


Setting up the disk partitions, I’m selecting Guided setup with LVM . I’ll explore best practices, and different partition scheme’s in a future lab.

Select the disk to be partitioned

Mentioned above, I’ve chosen to put everything on one partition

Select Yes, to write changes to disk

Select Finish Partitioning, and write changes to disk


Select No to Network Mirror


Select Yes, to install Grub to MBR

Select drive to make system bootable


Installation Complete, select Continue


Patch Current
To check for, and apply all available updates, type the following: apt-get update && echo ‘ y’ | apt-get upgrade && echo ‘ y’ | apt-get dist-upgrade && echo ‘ y’

Setup SSH
Next, I’m setting up SSH . First thing is to create a key. Type: ssh-keygen Answer file in which to save the key, and assign a password

Since we are using Root to login, edit the /etc/ssh/sshd_config. Change the option PermitRootLogin to Yes. Save and Exit the file

Restart the SSH service by typing: service ssh restart

Test SSH
Open your SSH client of choice on another device, and test SSH to Kali

Accepted the thumbprint, and we are in!

Now Explore
Now with Kali installed, I have a ton of stuff to explore and lab!
How to Install & Setup Kali Linux on VMware ESXi
Kali Linux is one of the popular operating systems used for security testing by various people. To get to know the Kali Linux operating system better, it is better to install it on VMware. This article will teach you How to Install & Setup Kali Linux on VMware ESXi. You can check out the packages offered on our website if you intend to buy cheap Linux VPS packages.
Tutorial Install Kali Linux on VMware ESXi
Kali Linux is one of the most popular Linux distributions based on Debian Linux. It has many hacking and penetration testing tools by default. This operating system was developed by Offensive Security Ltd. It is used by security professionals to perform penetration testing or by hackers to perform penetration, hacking, and cracking operations. So, the best way to install Kali Linux is to install it on VMware ESXi.
How to Download Kali Linux
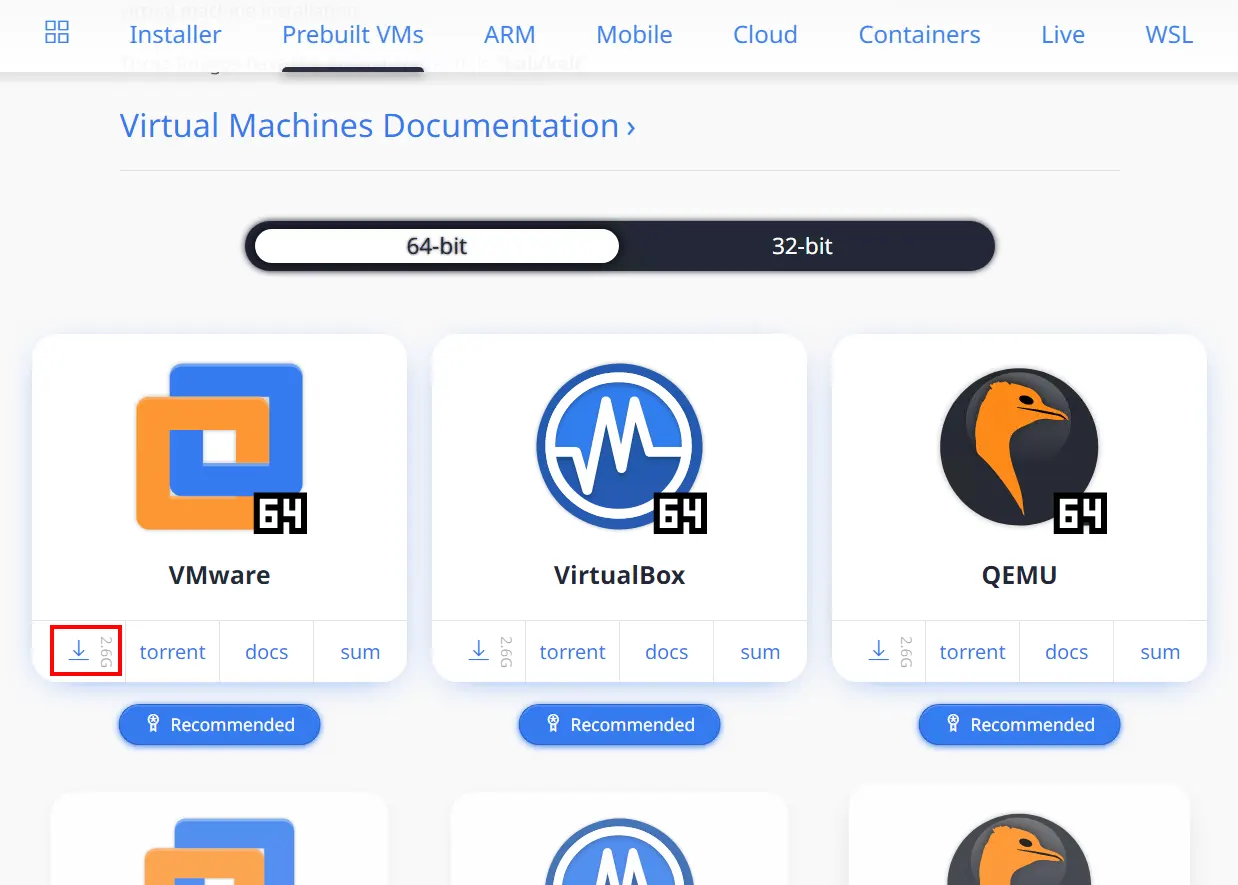
Firstly, navigate to the Kali Linux official website and download the latest ISO by pressing the download icon:
Wait for the download to complete.
How to Create the Virtual Machine
In this step, you should create the virtual machine. We are working with the HTML5 vSphere client session with the host. To do this, follow the steps below:
–> Firstly, right-click on your cluster and choose New Virtual Machine.
–> Click on Create a New Virtual Machine:

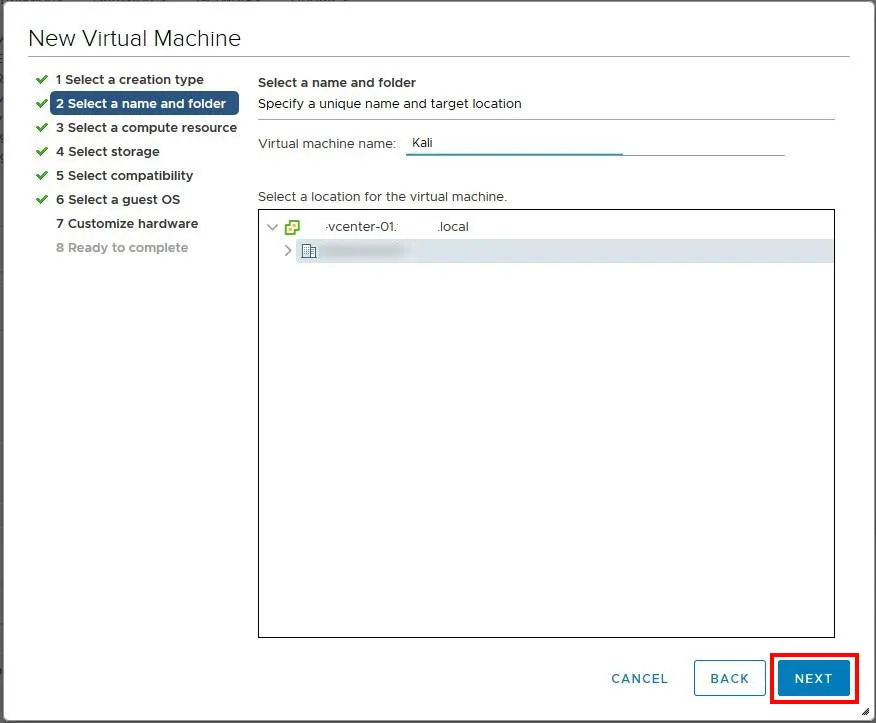
–> Name your Virtual Machine and choose the location for it:
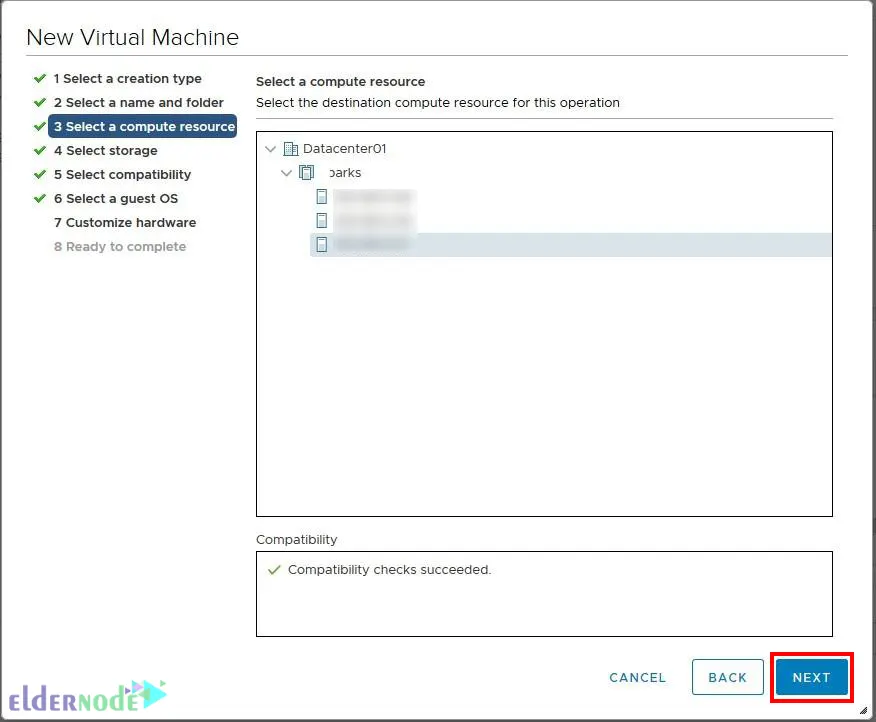
–> Choose the destination resources for the new Virtual Machine:
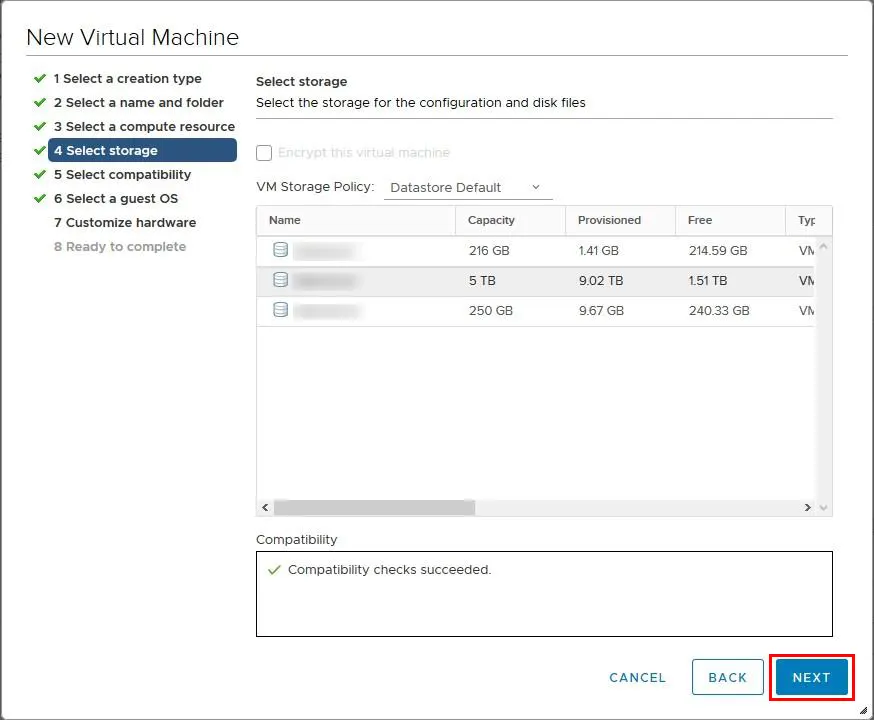
–> Now you should choose the storage for the new Virtual Machine:
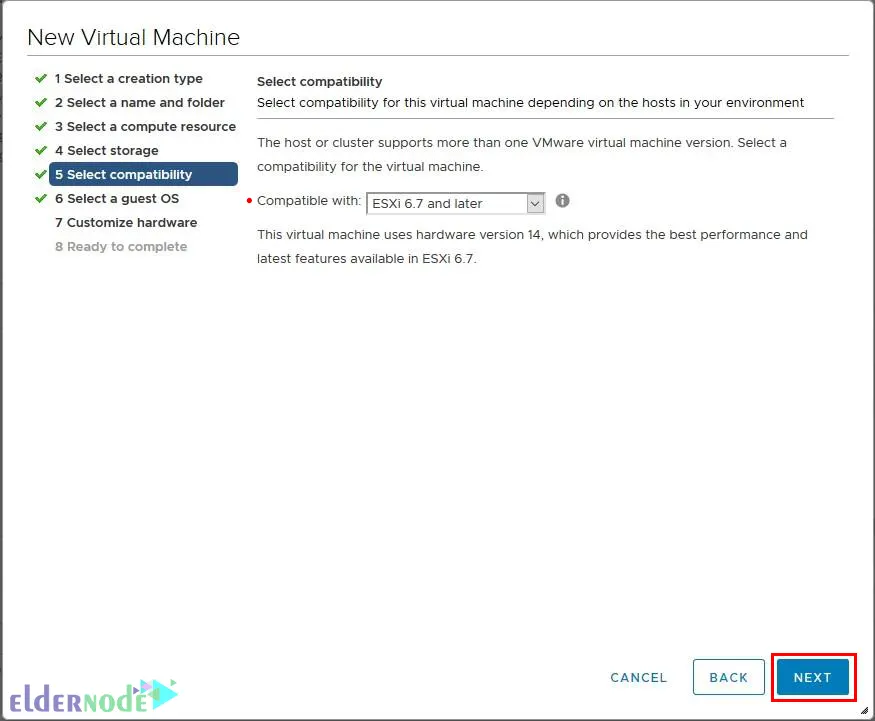
–> And choose the compatibility for it:
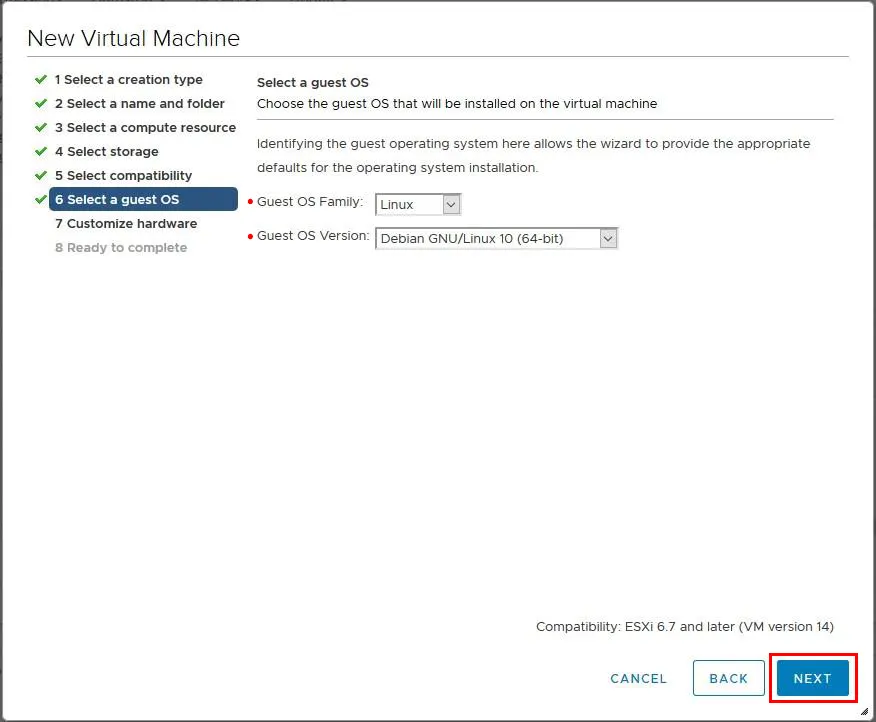
–> Then choose the guest Operating System:
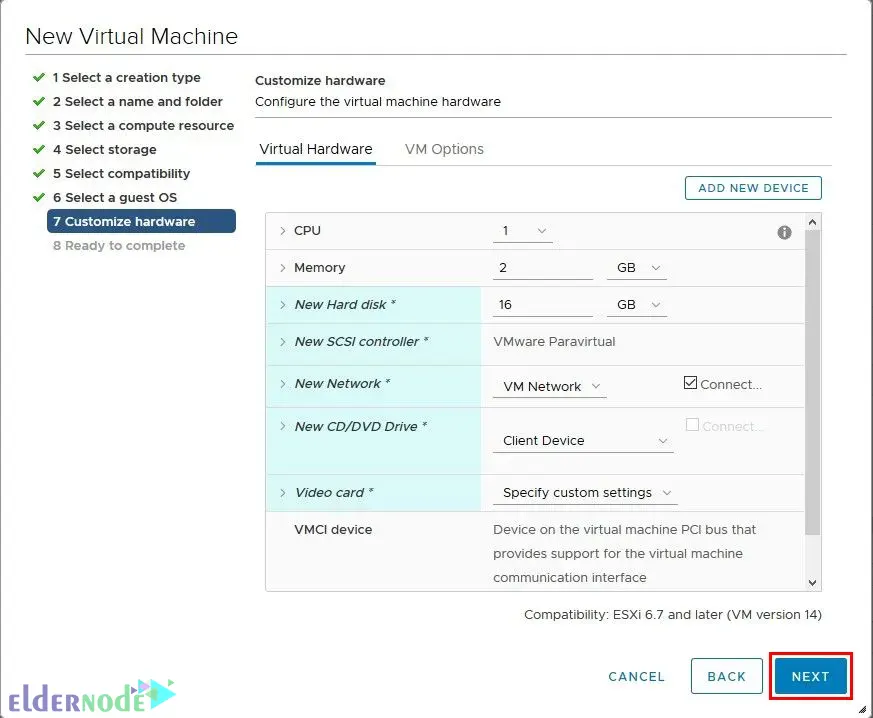
–> Customize the hardware and then click on Next:
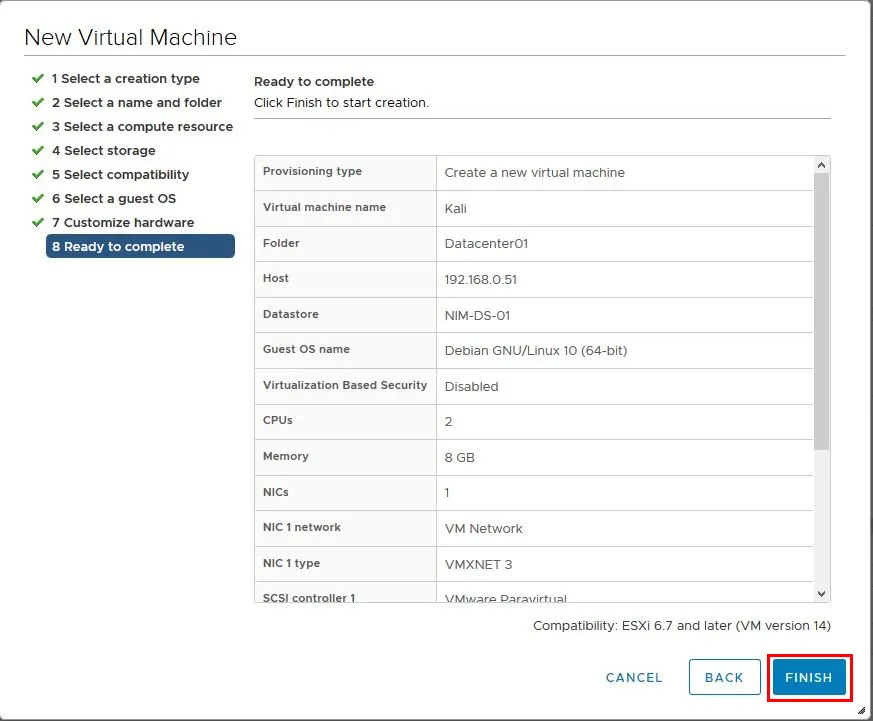
–> Lastly, review the settings you choose and click Finish:
Installing Kali Linux on VMware ESXi
1) Firstly, you should mount the ISO. You should connect the CD/DVD drive to the ISO you downloaded earlier.
2) So, to do this right-click on the name of your new Virtual Machine and choose Edit Settings.
3) Next, expand the CD/DVD drive 1.
4) Then choose Connect At Power On and browse to the ISO.
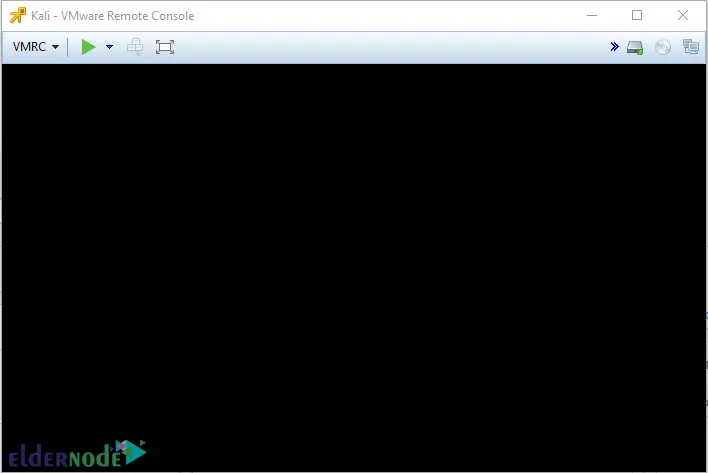
5) Now it’s time to power on your new Virtual Machine by choosing Launch Remote Console. You should see the following screen:
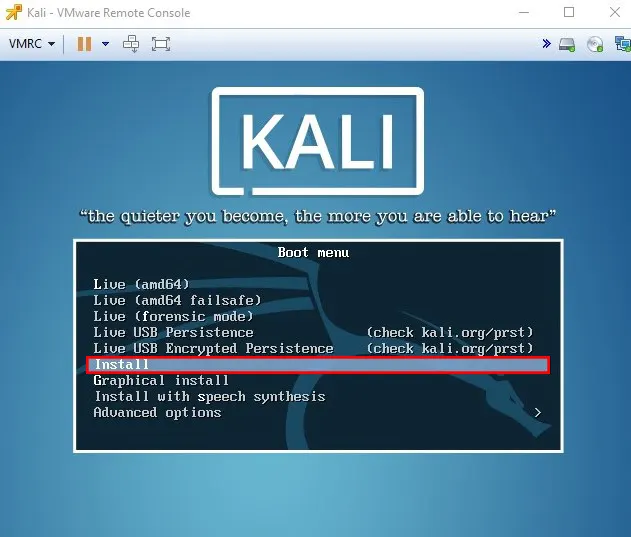
The boot menu will appear. Choose Install and press Enter:
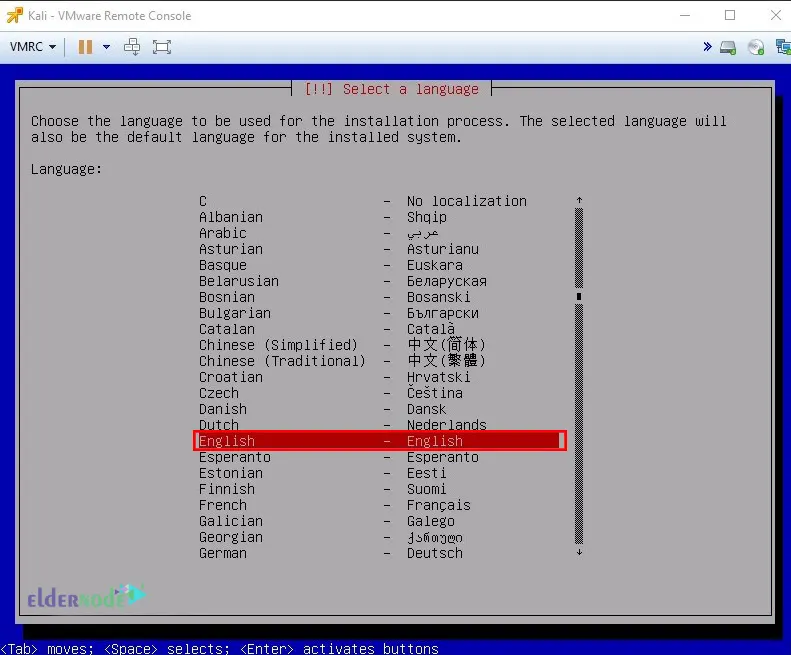
Choose the Language you want to use for the installation process:
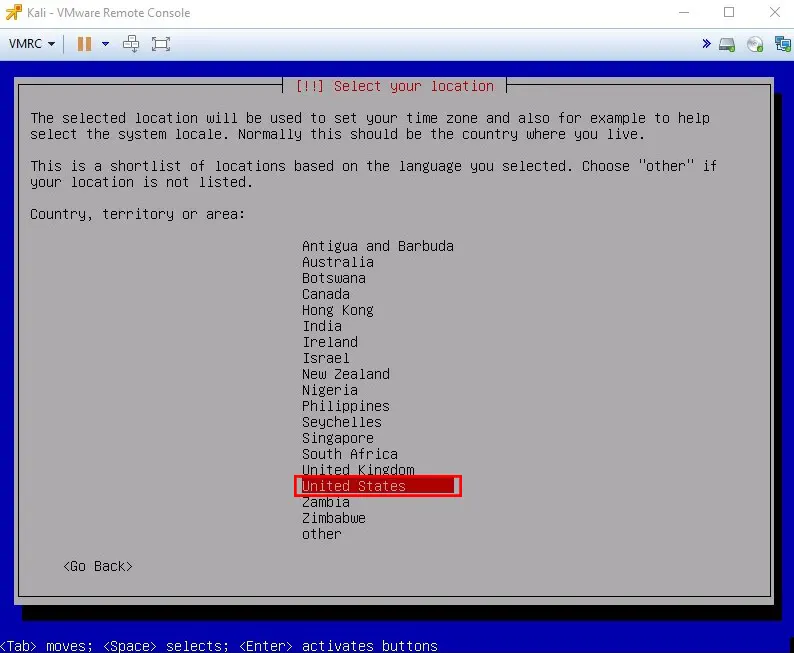
And now select the Location that will be used to set your time zone:
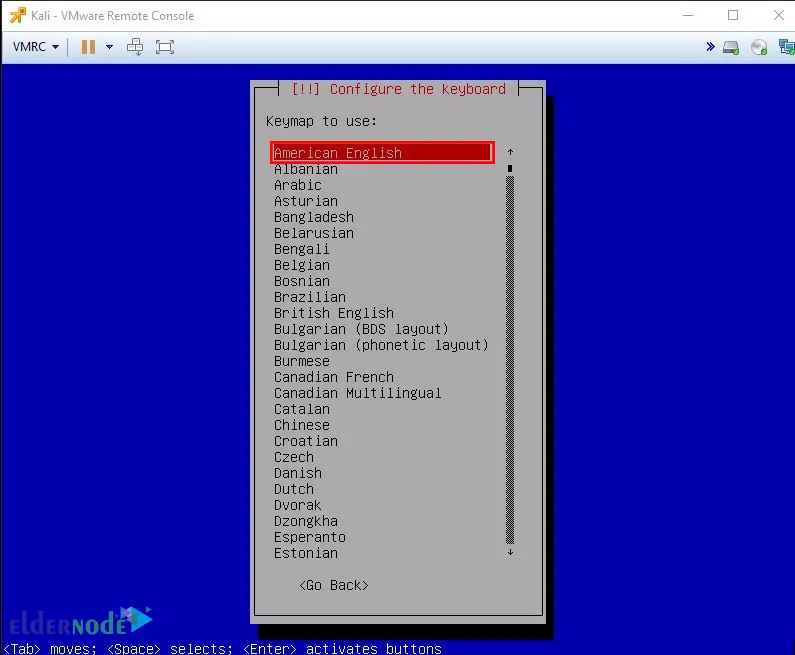
In this step, choose your desired Keyboard Layout:
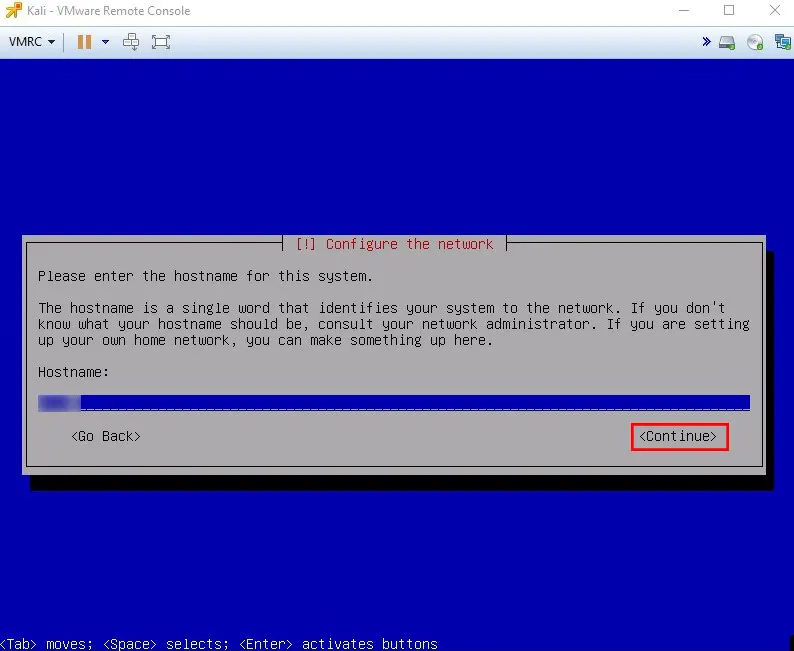
Next, you should enter the hostname for your system:
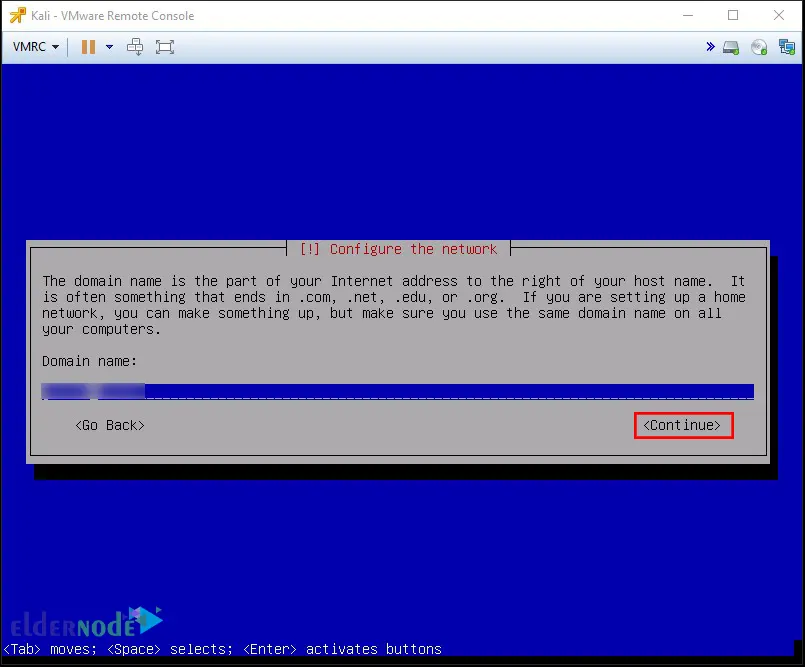
Now, enter your domain name if you have:
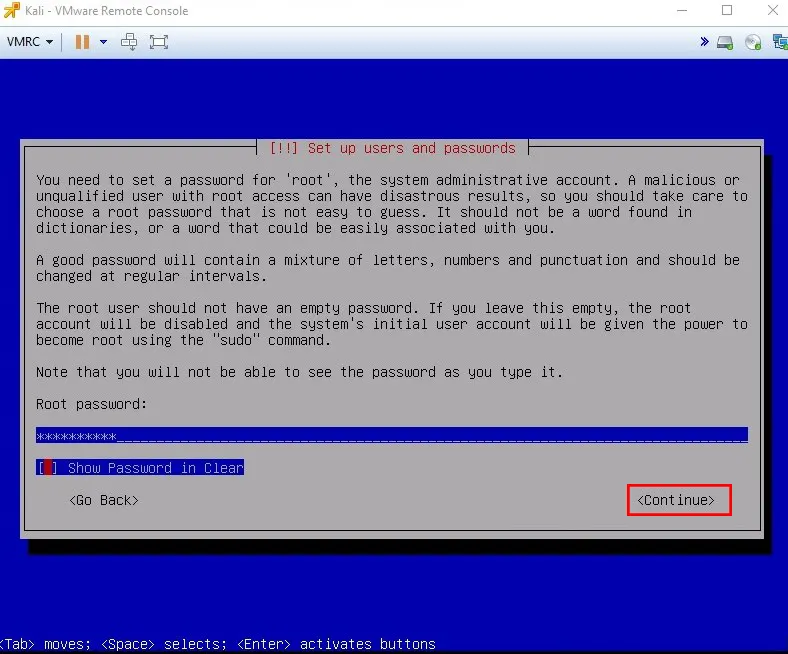
And specify the password for the root user:
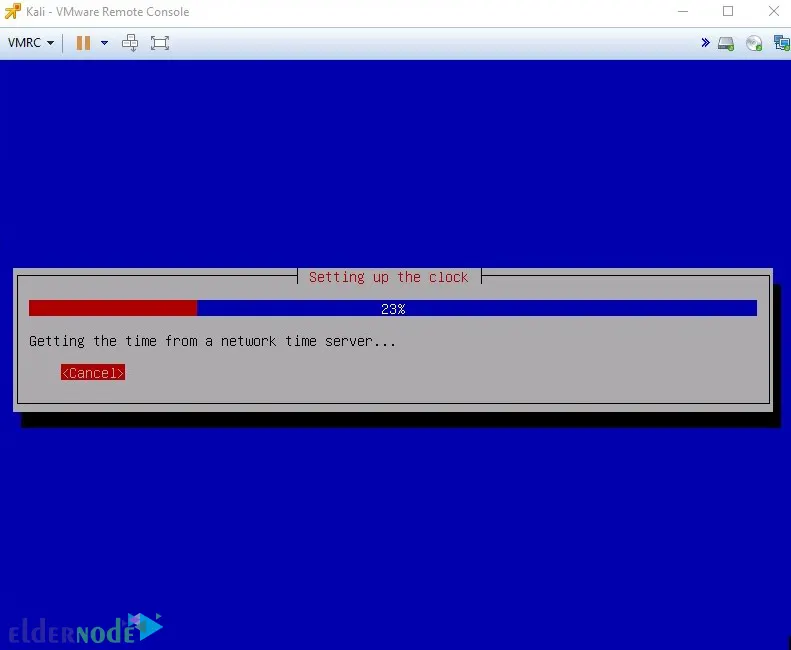
This screen will try to get the time from your network time server:
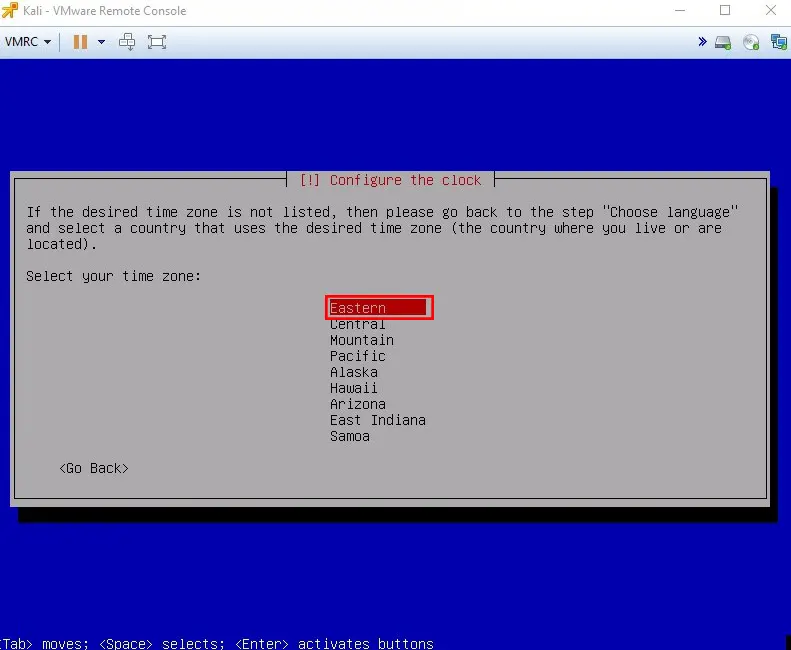
If that doesn’t work, you should choose the current time zone from the following list:
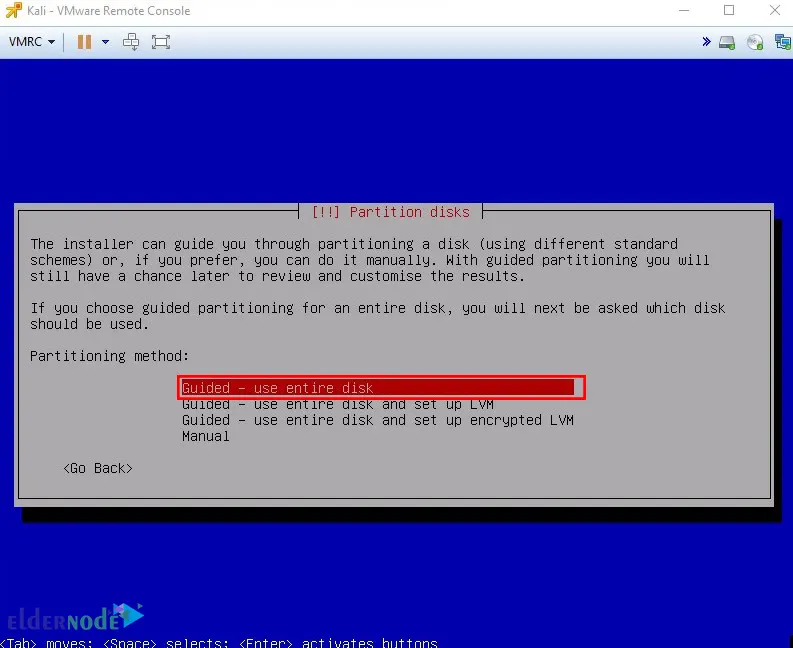
Now you will see the options for partitioning the disk. Choose the Guided – use entire disk option:
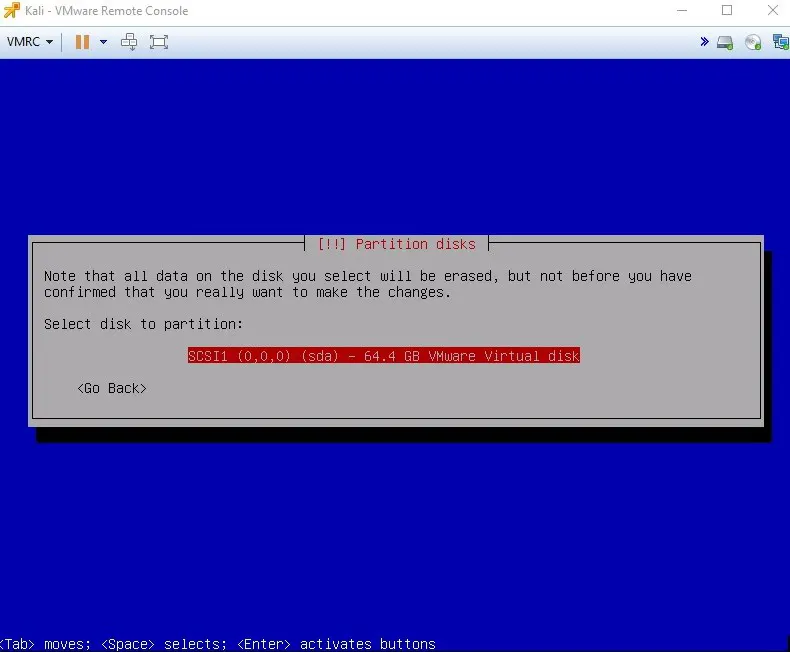
And choose the disk you want to partition:
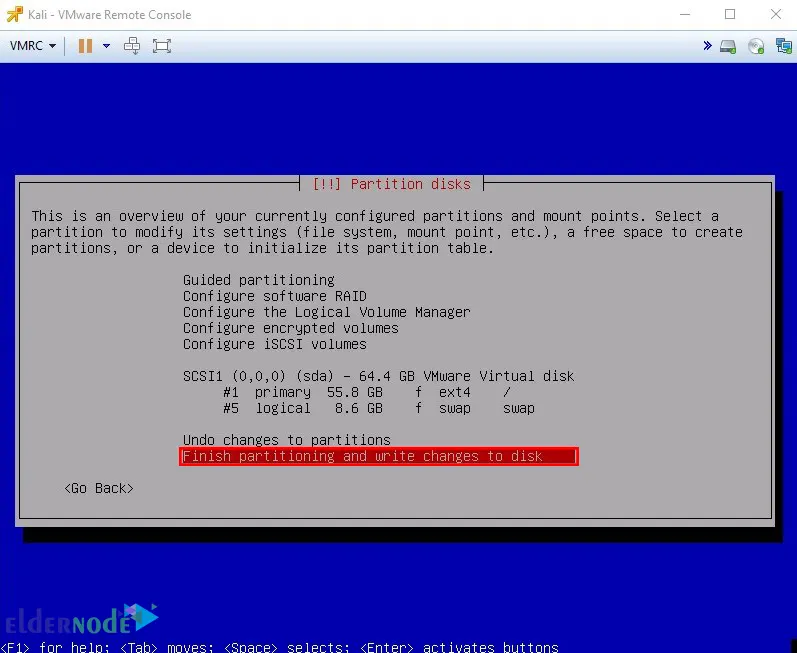
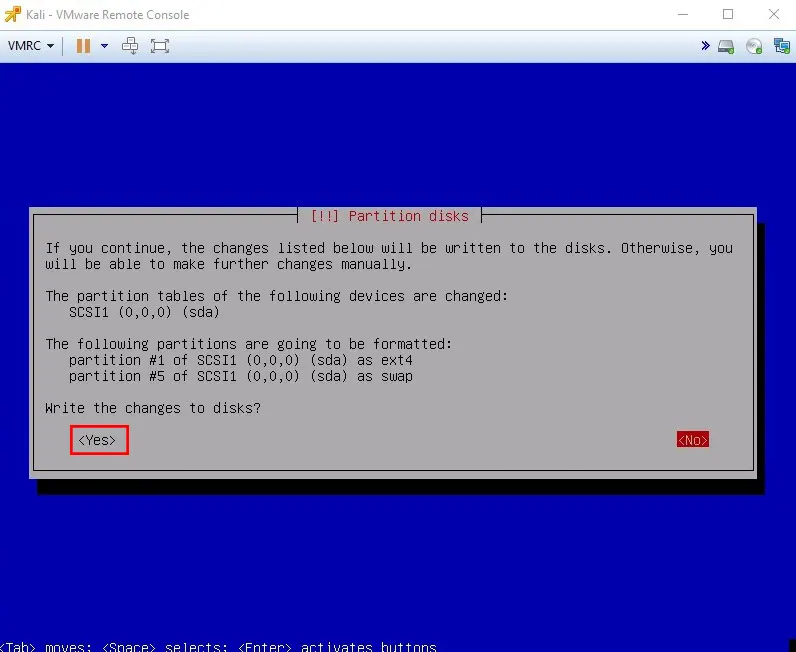
If everything is OK, choose Finish partitioning and write changes to disk:
Press Yes to write the changes to disks:
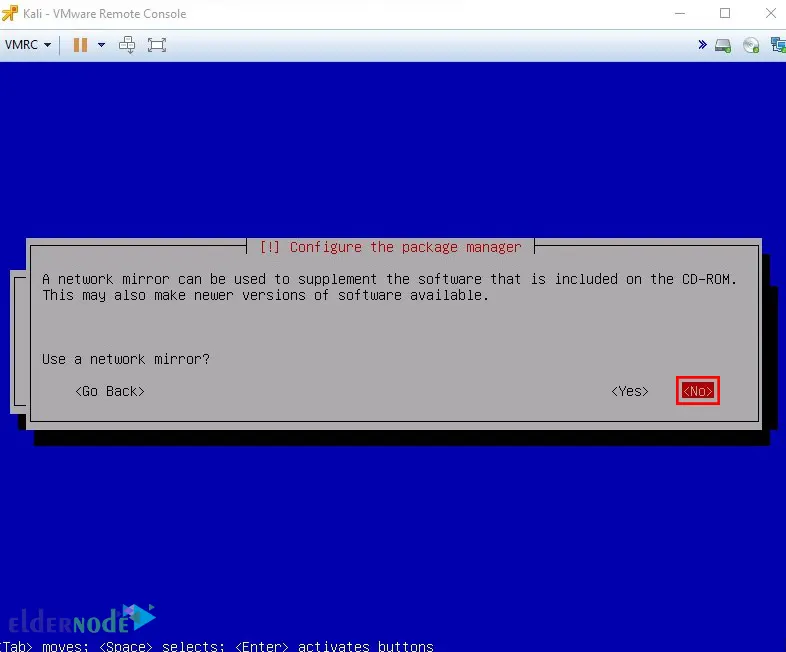
This screen will ask if you want to use Network Mirror. I prefer not to use it, so I press No:
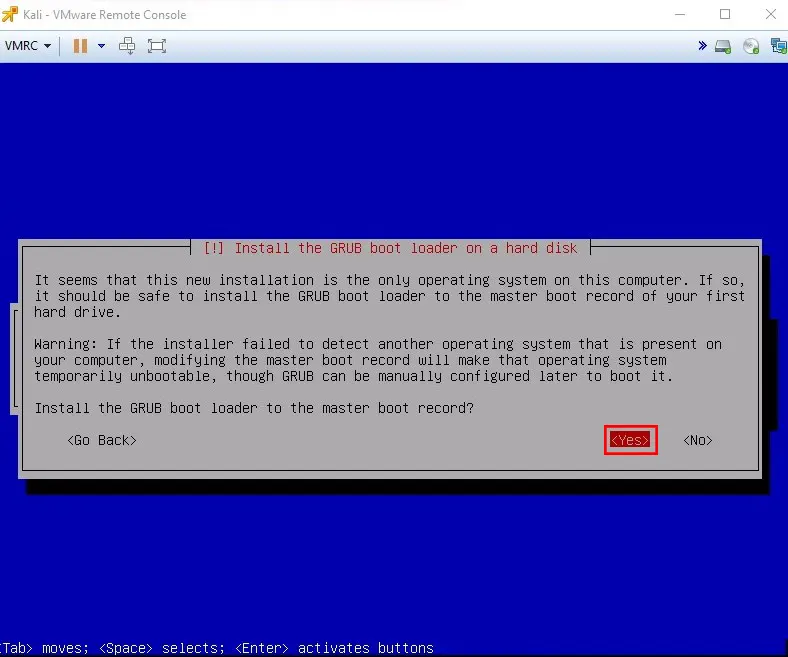
And now press Yes to install the GRUB boot loader on the HD:
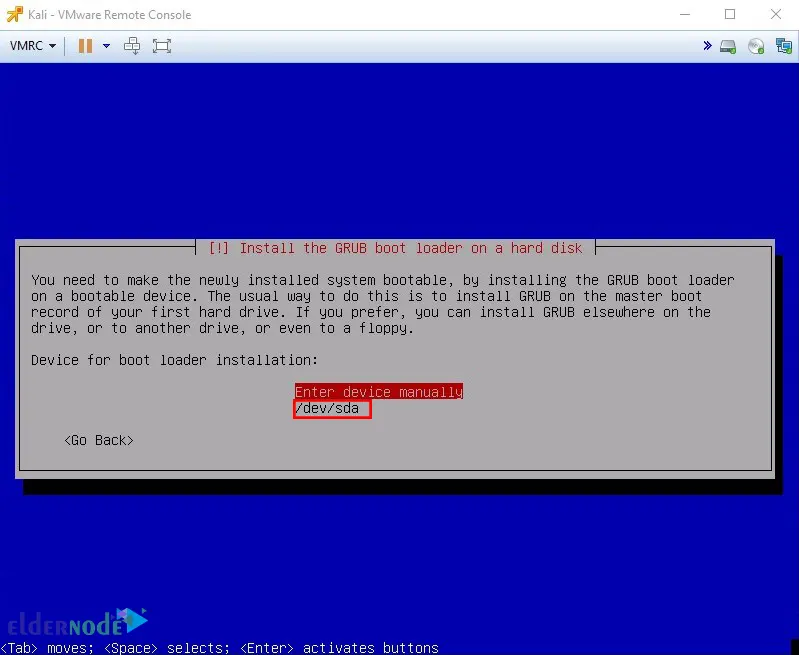
Choose the /dev/sda device for boot loader installation:
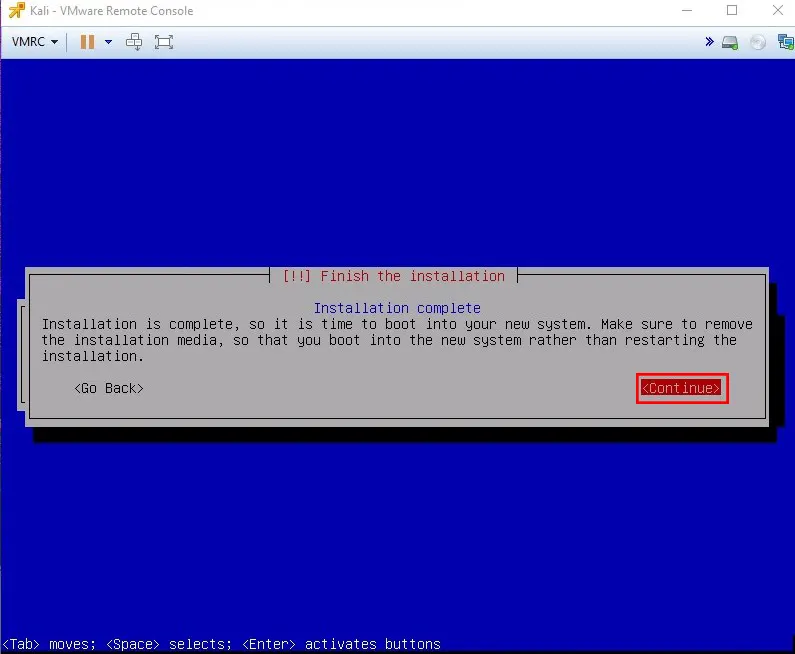
So, wait for the installation to complete.
Once completed, click on Continue to reboot your machine:
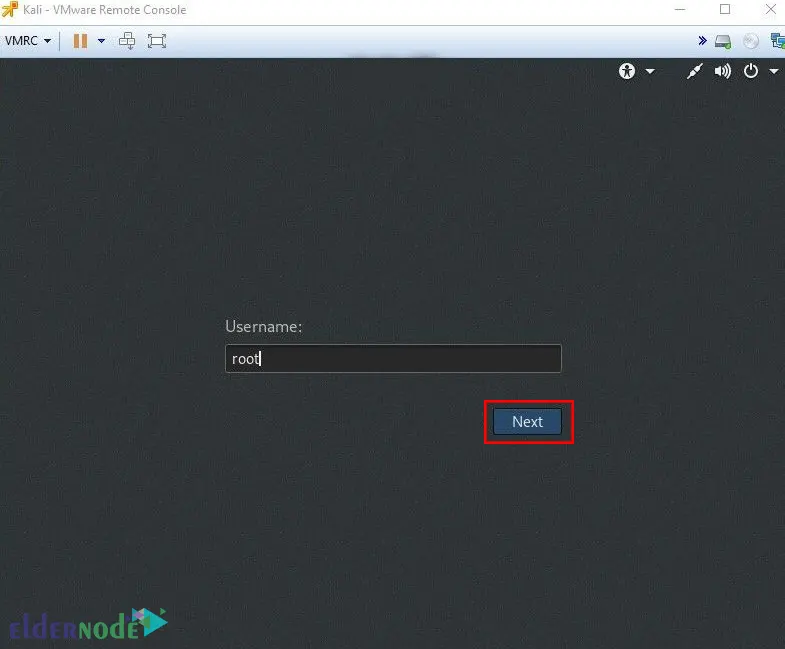
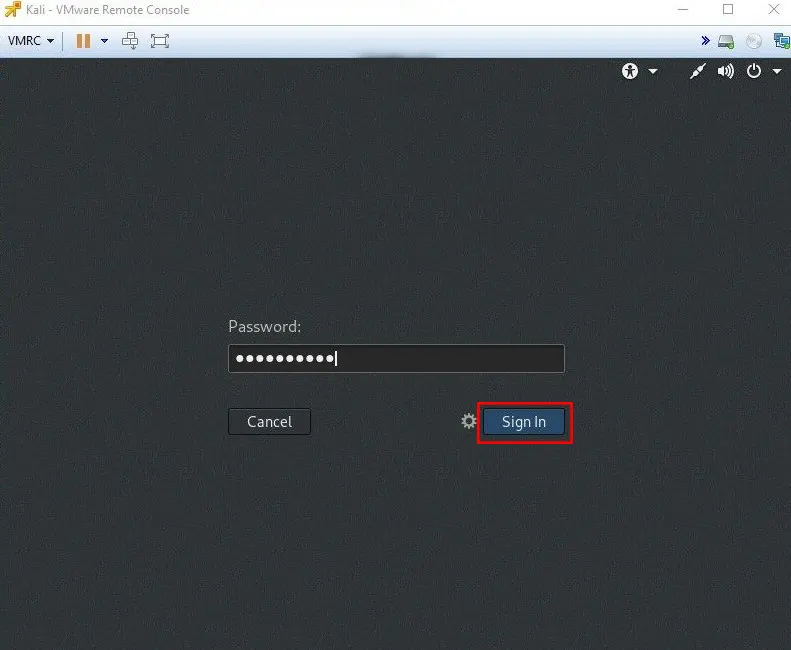
Once your machine reboots, you will face the log-on screen. Enter your root user and password setup during installation to log in to your new machine:
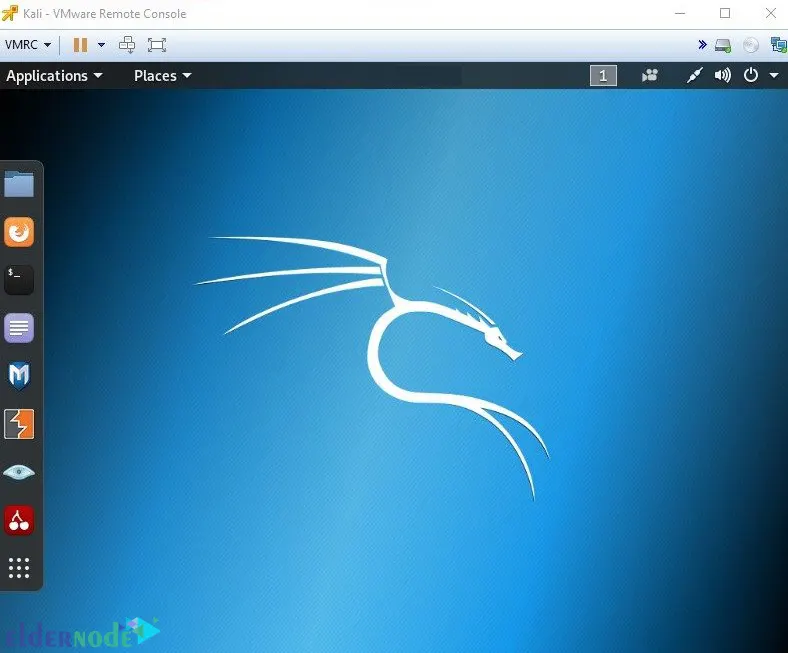
Lastly, you will see the Kali Linux environment:
Conclusion
To get to know the Kali Linux operating system better, it is better to install it on VMware ESXi. This article taught you how to install and set up Kali Linux on VMware ESXi. I hope you found this tutorial useful and helps you to set up Kali Linux on VMware ESXi. If you encounter any problems in the installation process, you can contact us in the Comments section.
Click on a star to rate it!
Average rating 0 / 5. Vote count: 0
No votes so far! Be the first to rate this post.