- Kali Linux получил графический интерфейс для подсистемы Windows для Linux (WSL2). Инструкция по установке
- How to install Kali Linux with GUI on WSL Windows 10
- Kali Linux GUI installation on Windows 10 Subsystem for Linux (WSL)
- Step 1: Install Kali Linux on WSL Windows 10 or server
- Step 2: Update Kali Linux
- Step 3: Install XFCE on Kali WSL Linux
- Step 4: Install XRDP on WSL
- Step 5: Start xrdp server
- Step 6: Connect to Kali using RDP
- Step 7: Start using Kali Linux XFCE GUI on WSL Linux
- Kali linux windows server
- Installation
- Prerequisites
- Install Win-KeX
- Run Win-KeX
- Window Mode
- Enhanced Session Mode
- Seamless Mode
- Optional Steps
- Kali’s Default Tools
- Windows Terminal
- Help
Kali Linux получил графический интерфейс для подсистемы Windows для Linux (WSL2). Инструкция по установке
Команда разработчиков Kali Linux представила графический интерфейс для подсистемы Windows для Linux (WSL). Решение называется Win-Kex (Windows + Kali Desktop EXperience). Теперь можно запускать популярный дистрибутив для пентеста на ПК с Windows 10 в WSL2 с GUI.
Специалисты портала Bleeping Computer проверили, что это действительно работает. Они опубликовали свою инструкцию по установке и запуску Kali Linux с графическим интерфейсом для подсистемы Windows для Linux (WSL2).
Установка Kali Linux с GUI возможна только на ПК с ОС Windows 10 версии 2004.
На подготовительном этапе необходимо в ОС активировать подсистему Windows для Linux.
Открыть PowerShell (сейчас и далее под администратором) и запустить:
Enable-WindowsOptionalFeature -Online -FeatureName Microsoft-Windows-Subsystem-LinuxОткрыть PowerShell и запустить:
dism.exe /online /enable-feature /featurename:VirtualMachinePlatform /all /norestartdism.exe /online /enable-feature /featurename:Microsoft-Windows-Subsystem-Linux /all /norestartДалее необходимо скачать и установить WSL2.
Потом нужно открыть PowerShell и запустить:
Далее нужно установить Kali Linux из магазина Microsoft Store.
Чтобы поменять тип установки kali-linux с WSL1 на WSL2 нужно в PowerShell запустить:
wsl --set-version kali-linux 2Далее нужно выполнить установку и запустить Kali Linux.
Потом нужно установить пакет Win-KeX.
sudo apt update && sudo apt install kali-win-kexsudo apt update sudo apt dist-upgrade sudo apt install -y kali-win-kexМожно также установить расширенную сборку Kali Linux.
sudo apt install kali-linux-largeПосле окончание установки GUI для Kali Linux запускается командой «kex».
How to install Kali Linux with GUI on WSL Windows 10
Do you want to run the Kali Linux operating system on Windows subsystem for Linux on Windows 10 but GUI- Graphical user interface? Then here is the solution.
WSL on Windows 10 has been around for quite some time now but most of the time we use it with command-line interface since it comes with that only by default. However, if you know how to handle commands then this article might not be that much useful for you. But those do not they definitely want to install Graphical user interface on WSL- Windows subsystem for Linux.
Moreover, it is not that much difficult as it sounds, what we need is the installation of some Desktop environment on WSL Linux such as Kali, Ubuntu or Debian and then accessing it using WIndows 10 default RDP (Remote Desktop) protocol. This means no third party tool just need some opensource files on the existing tools.
Yet, running GUI for Kali Linux running on WSL(Windows Subsystem for Linux) can be a good idea for the learner. But if you want a Linux with GUI for some professional work then it is recommended to use VM on VirtualBox or VMware.
Kali Linux GUI installation on Windows 10 Subsystem for Linux (WSL)
Let’s start with the tutorial to see the steps that are required to operate Kali Linux WSL using GUI.
Step 1: Install Kali Linux on WSL Windows 10 or server
You can either install Kali or Ubuntu to follow the steps given in this tutorial. However, as this guide focuses on Kali, thus we will go with that. Just enable WSL on Windows->Go to Microsoft Store-> Search for Kali App-> Click on Get and then Install.
Here is the detailed guide on Kali Linux installation on WSL.
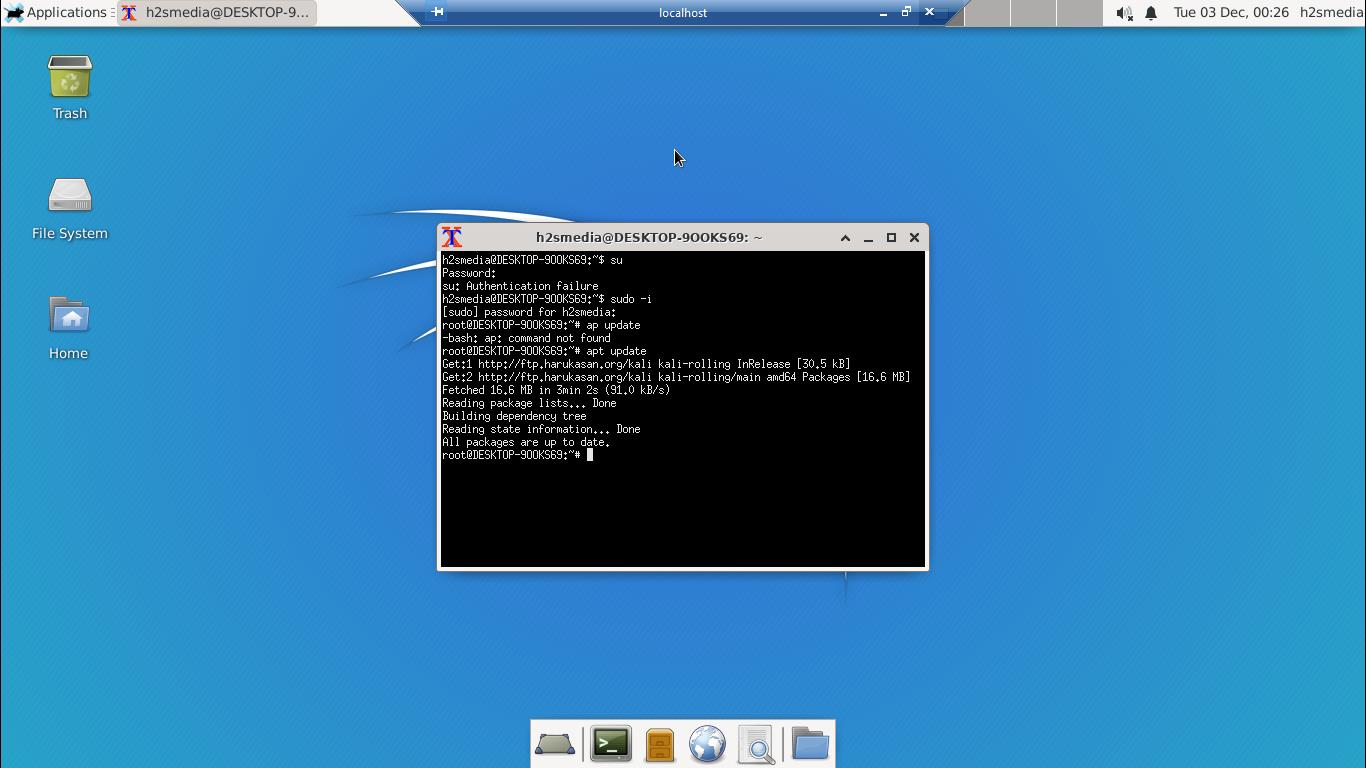
Step 2: Update Kali Linux
If you already have the Kali on your system then before moving further just update its installed packages to their latest state. Here is the command for that.
Step 3: Install XFCE on Kali WSL Linux
Although we can install the open-source GNOME desktop environment on Kali WSL, to make it lightweight so that we can easily access it using Windows Remote Desktop tool even on standard resources computer system, we use Xfce DE.
The latest version while writing this article of the XFCE Desktop environment was 4.xx.
sudo apt-get install xfce4
The installation will take some time depending upon your internet connection, the total size of files the KALI or Ubuntu WSL will download for the setup of XFCE GUI will be around 124MB. When it asks you to confirm the downloading of files, type Y and proceed further.

Step 4: Install XRDP on WSL
After the installation of the XFCE 4 desktop environment, we have GUI on our Kali WSL but now the thing how to access it. We can’t directly boot Windows subsystem Linux with GUI like any other operating system, however, still the DE process is running in the background which we can access using RDP tool.
XDRP is a free and opensource counterpart of Windows RDP server that makes other operating systems such as Linux to easily access them using RDP clients of FreeRDP, rdesktop, NeutrinoRDP and Remote Desktop Client (for Windows, macOS, iOS and Android).
To install it on WSL, use this command:
Step 5: Start xrdp server
Finally, start XDRP server installed above, so that we can access of Kali GUI using the default Remote Desktop client present on Windows 10.
You will see a port number 3389, note that.
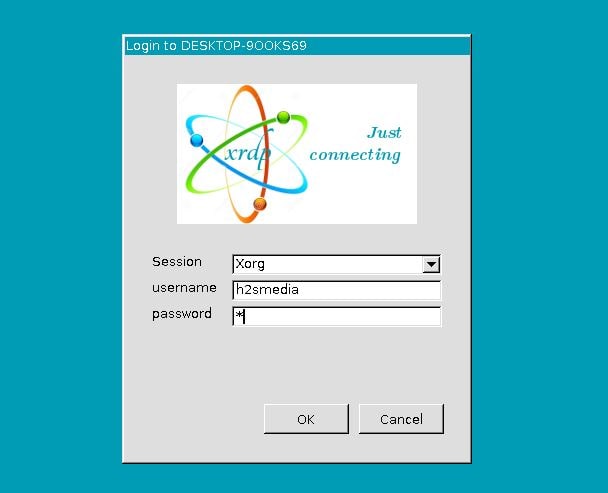
Step 6: Connect to Kali using RDP
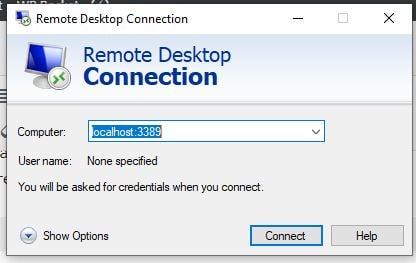
Simply go to Windows 10 search box and type- Remote desktop., as its icon appears, click on it to start.
Now, enter localhost:3389 and hit the Connect button.
If you get an error “Your computer could not connect to another console session on the remote computer because you already have a console session in progress” it is because WSL running Linux by default share the same port and IP address of host computer; thus we cannot connect the same computer where we are trying to use RDP client, therefore we need to change the port number of our WSL XRDP server.
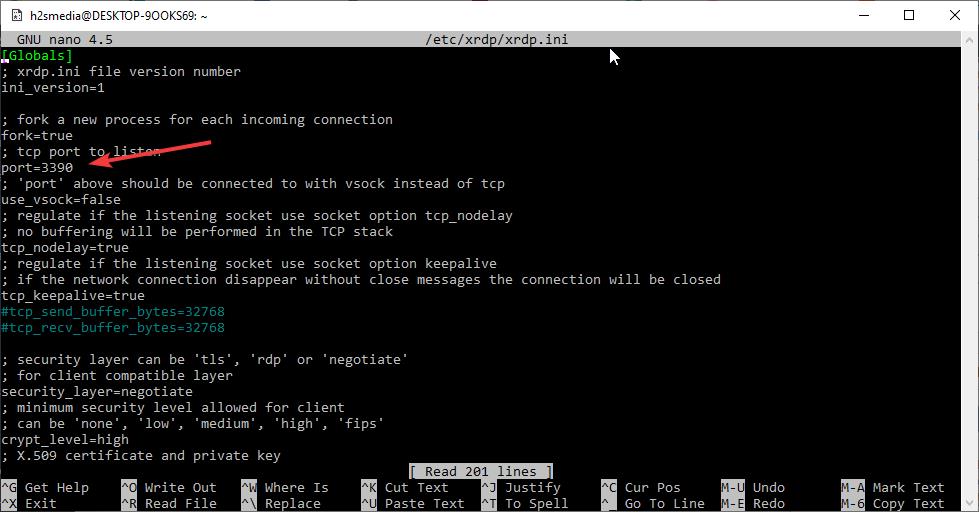
For that, edit the XRDP configuration file using the below command on Kali Linux.
Change the default port 3389 of XRDP to 3390. To save, press Ctrl+X and then type Y and hit the Enter button.
Restart XRDP server:
sudo /etc/init.d/xrdp restart
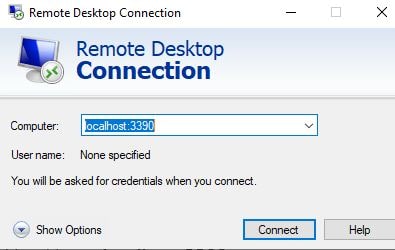
Now, again connect using RDP with this address- localhost:3390
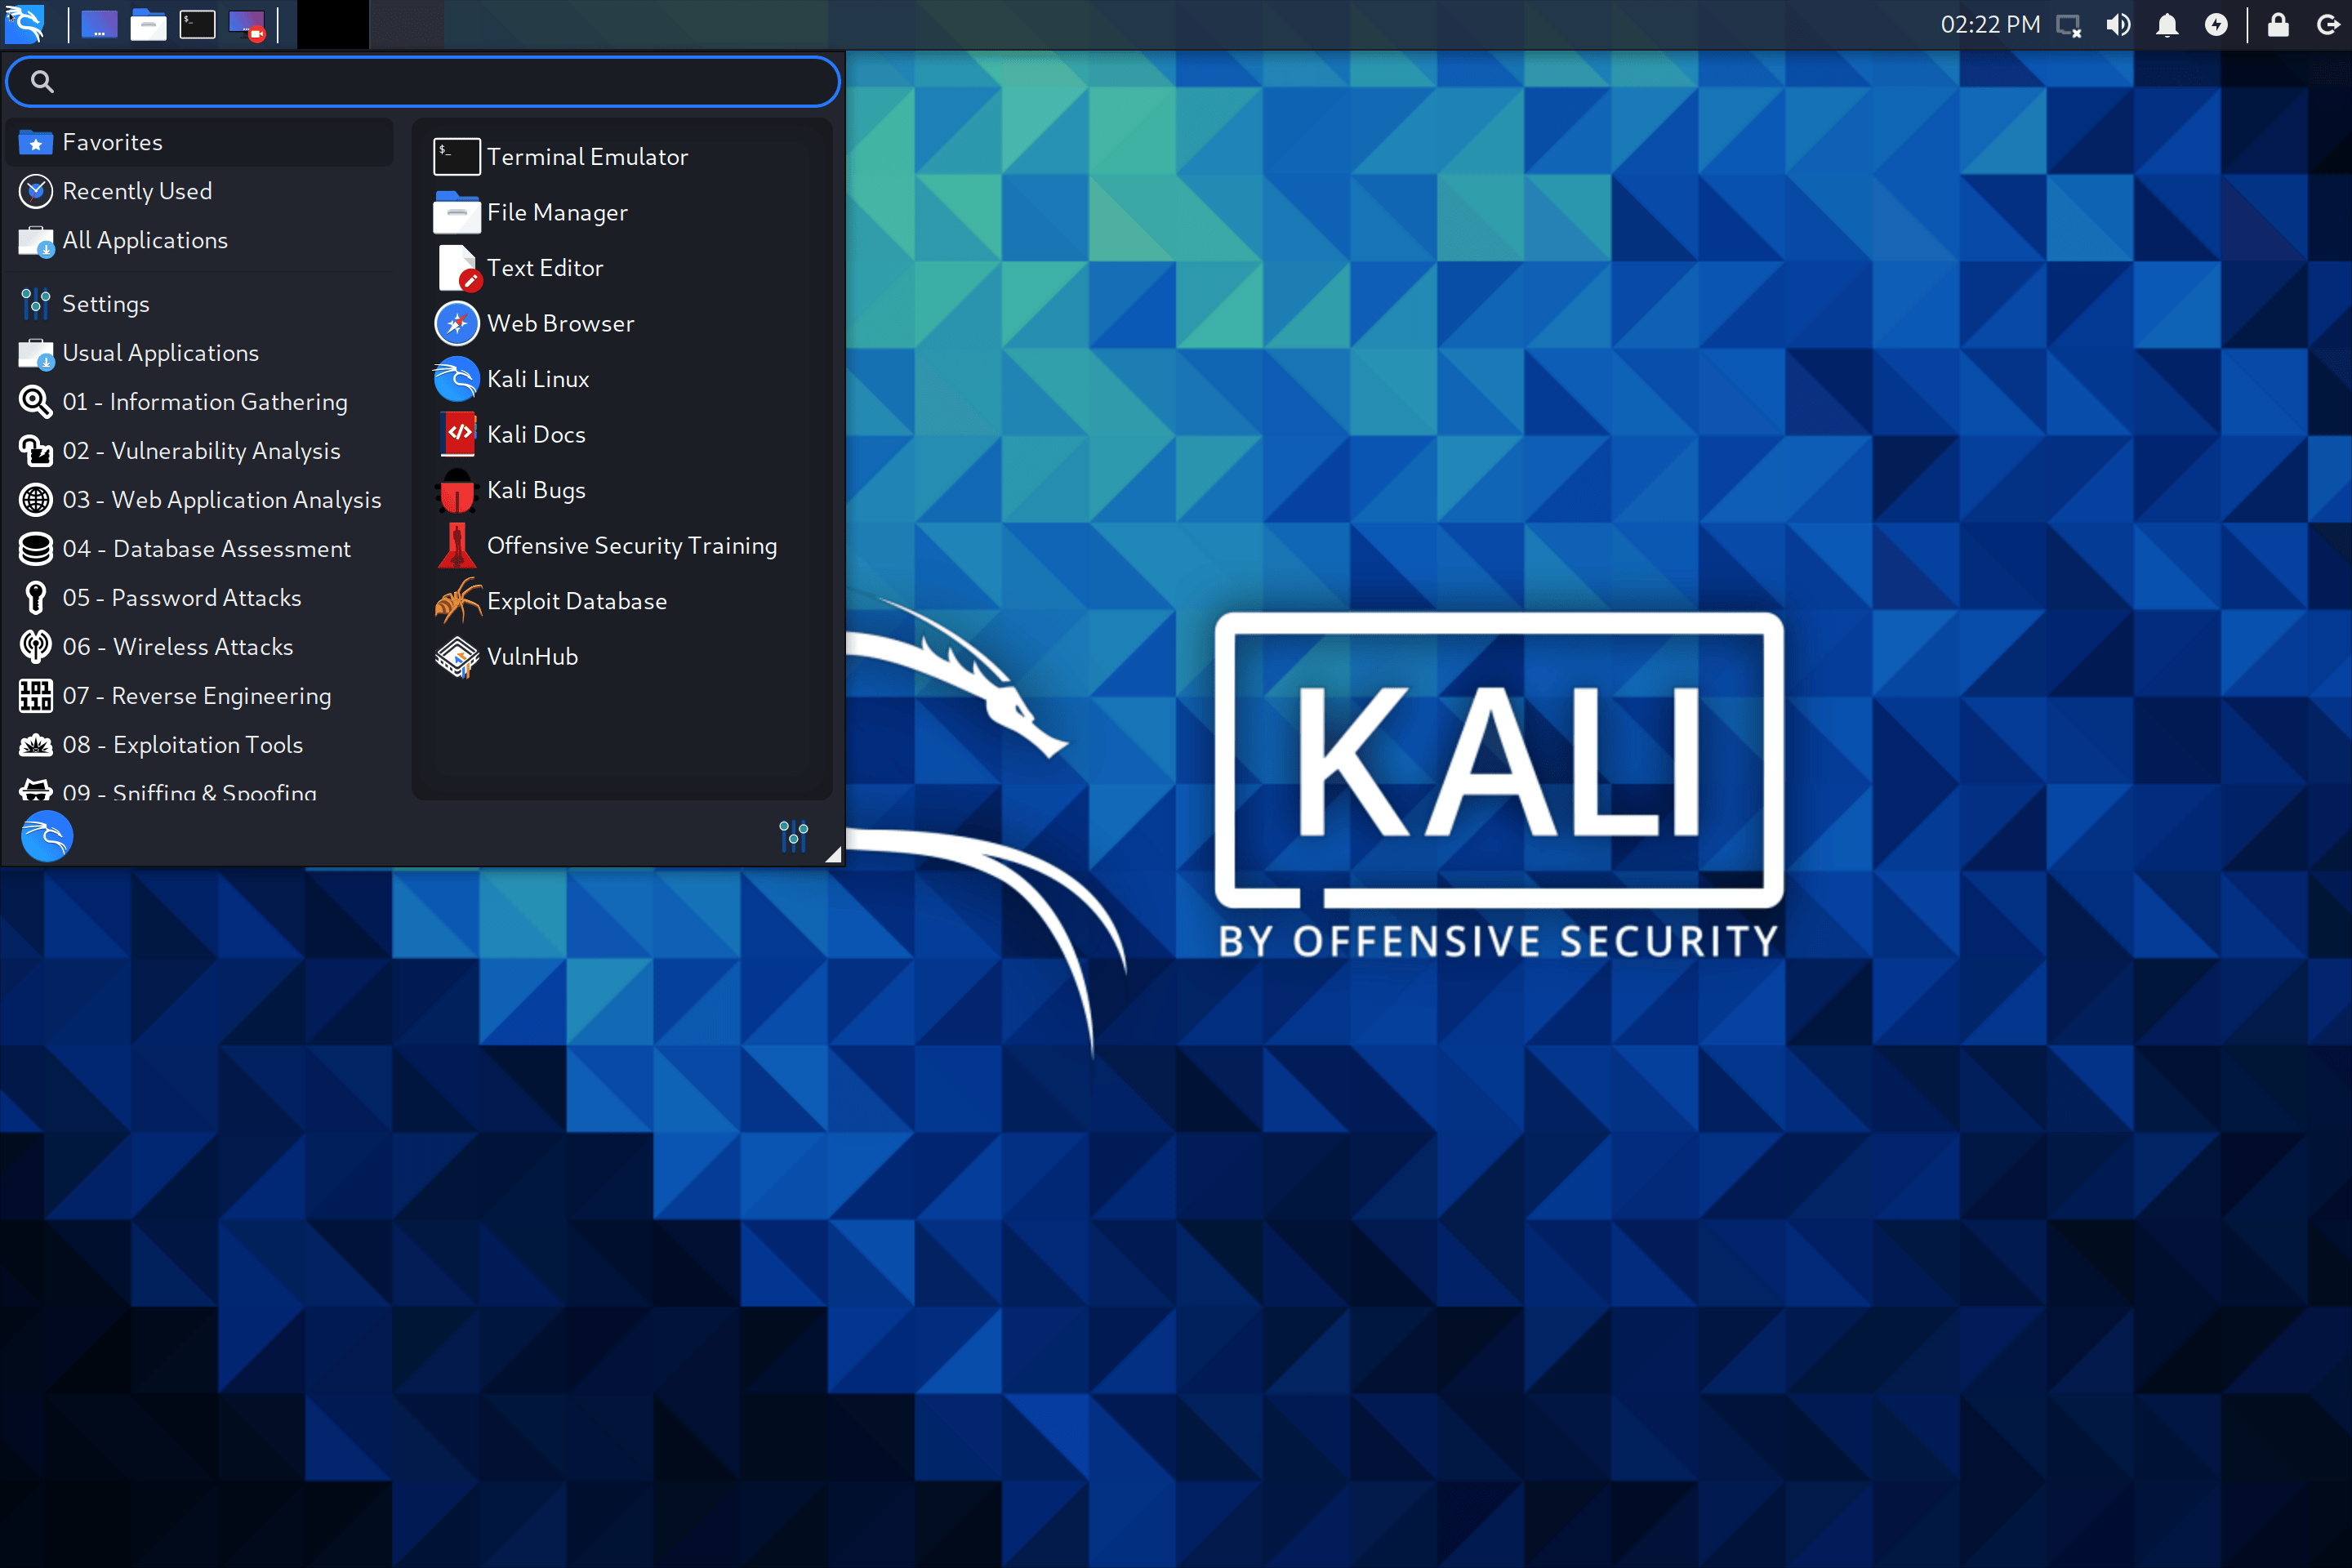
Step 7: Start using Kali Linux XFCE GUI on WSL Linux
When you connect it, a warning message will appear, ignore that and click on the Yes button.
After that enter your Kali Linux username and password
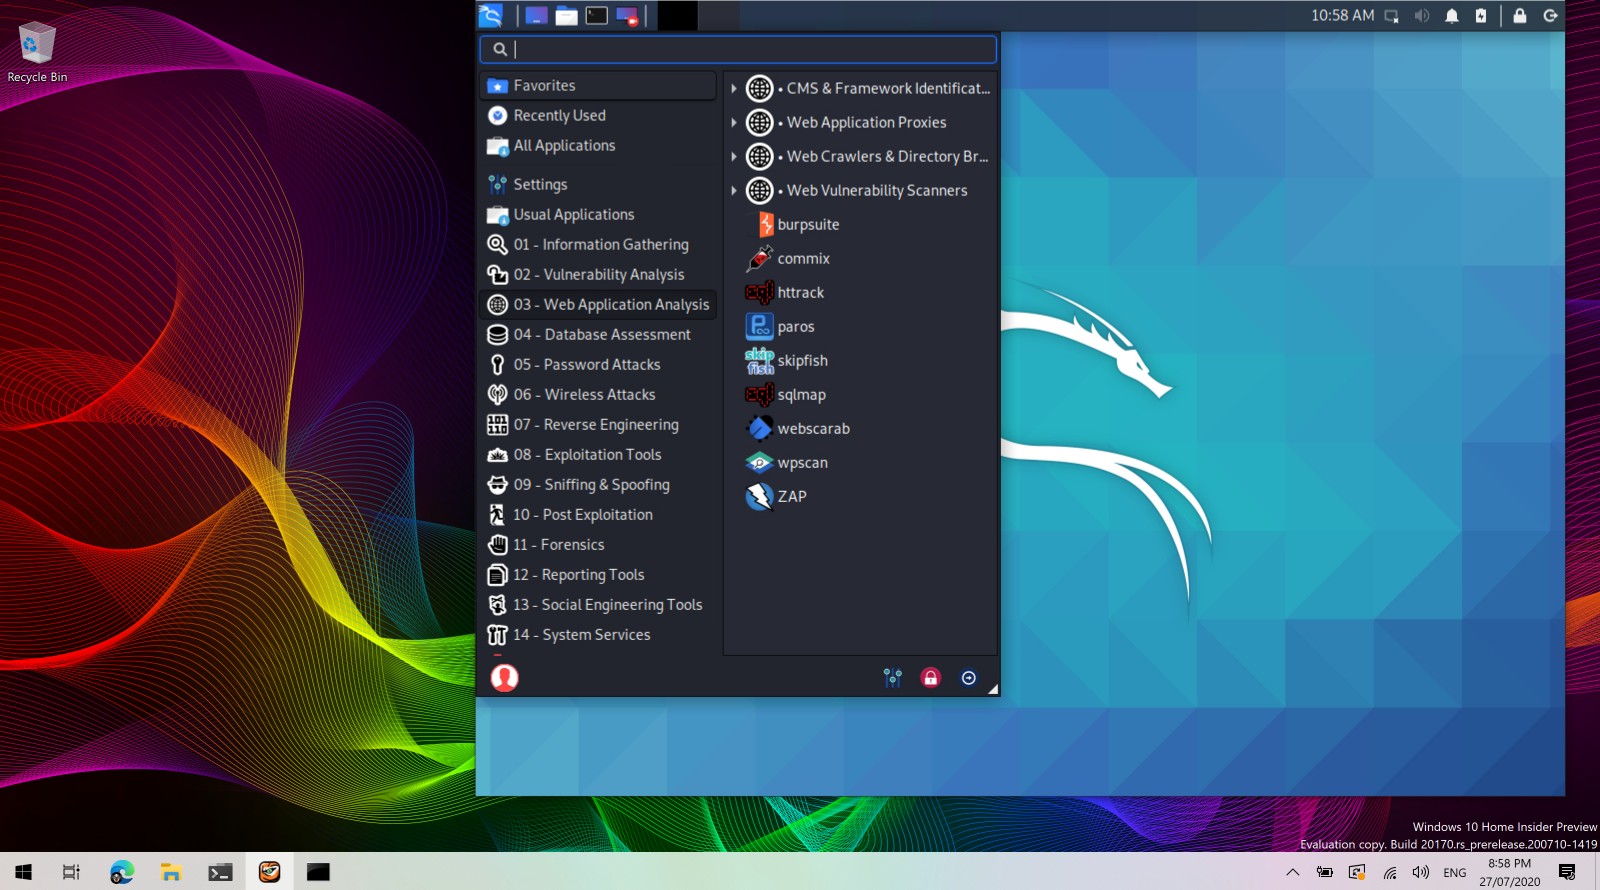
Finally, you have the Graphical user interface for Linux app running on the WSL.
See this tutorial -If you just want to Linux GUI apps on WSL.
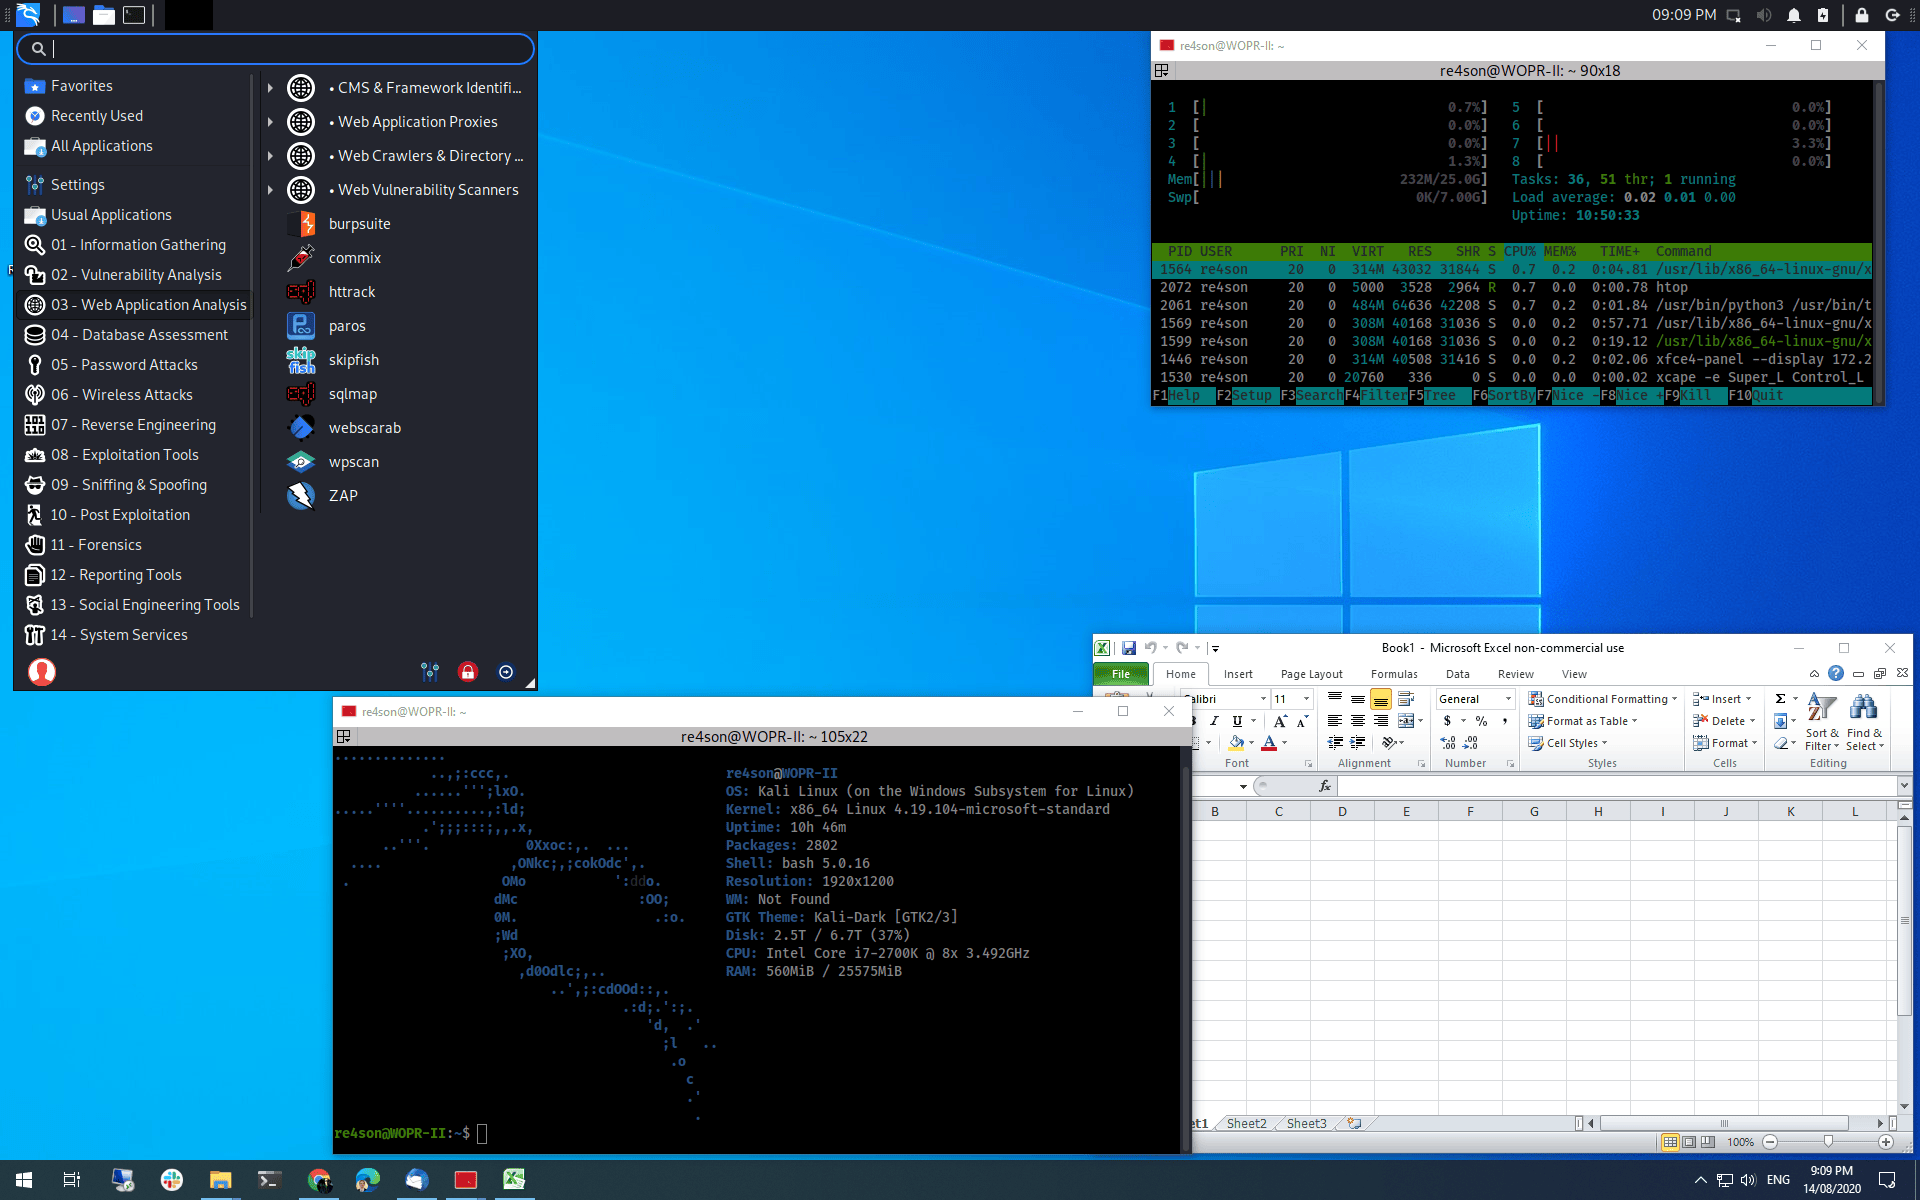
Kali linux windows server
Win-KeX provides a GUI desktop experience for Kali Linux in Windows Subsystem for Linux (WSL 2) with the following features:
- Window mode: start a Kali Linux desktop in a dedicated window
- Seamless mode: share the Windows desktop between Windows and Kali application and menus
- Enhanced session mode: Similar to Hyper-V, uses RDP for a more feature rich experience
- Sound support
- Shared clipboard for cut and paste support between Kali Linux and Windows
- Root & unprivileged session support
- Multi-session support: root window & non-privileged window & seamless sessions concurrently
- Fully compatible with WSLg
This page details the steps to install Win-KeX in under 2 minutes.
Installation
All installation steps, up to the point where we install Win-KeX, are also explained in the 5 minute video guide by NetworkChuck: New Kali Linux GUI on Windows 10 (WSL 2) // 2020.3 Release
Prerequisites
Install Win-KeX
Inside of Kali WSL, install Win-KeX via:
[email protected]:~$ sudo apt update [email protected]:~$ [email protected]:~$ sudo apt install -y kali-win-kex Run Win-KeX
Win-KeX supports the following three modes.
Window Mode

To start Win-KeX in Window mode with sound support, run either:
Refer to the Win-KeX Window Mode usage documentation for further information.
Enhanced Session Mode
To start Win-KeX in Enhanced Session Mode with sound support and ARM workaround, run either:
- Inside of Kali WSL: kex —esm —ip -s
- On Window’s command prompt: wsl -d kali-linux kex —esm —ip -s
Seamless Mode
To start Win-KeX in Seamless mode with sound support, run, run either:
Refer to the Win-KeX SL usage documentation for further information.
Optional Steps
Kali’s Default Tools
If you have the space, why not install “Kali with the lot”? This will also give you the traditional “default” tools of Kali that you may expect:
sudo apt install -y kali-linux-large 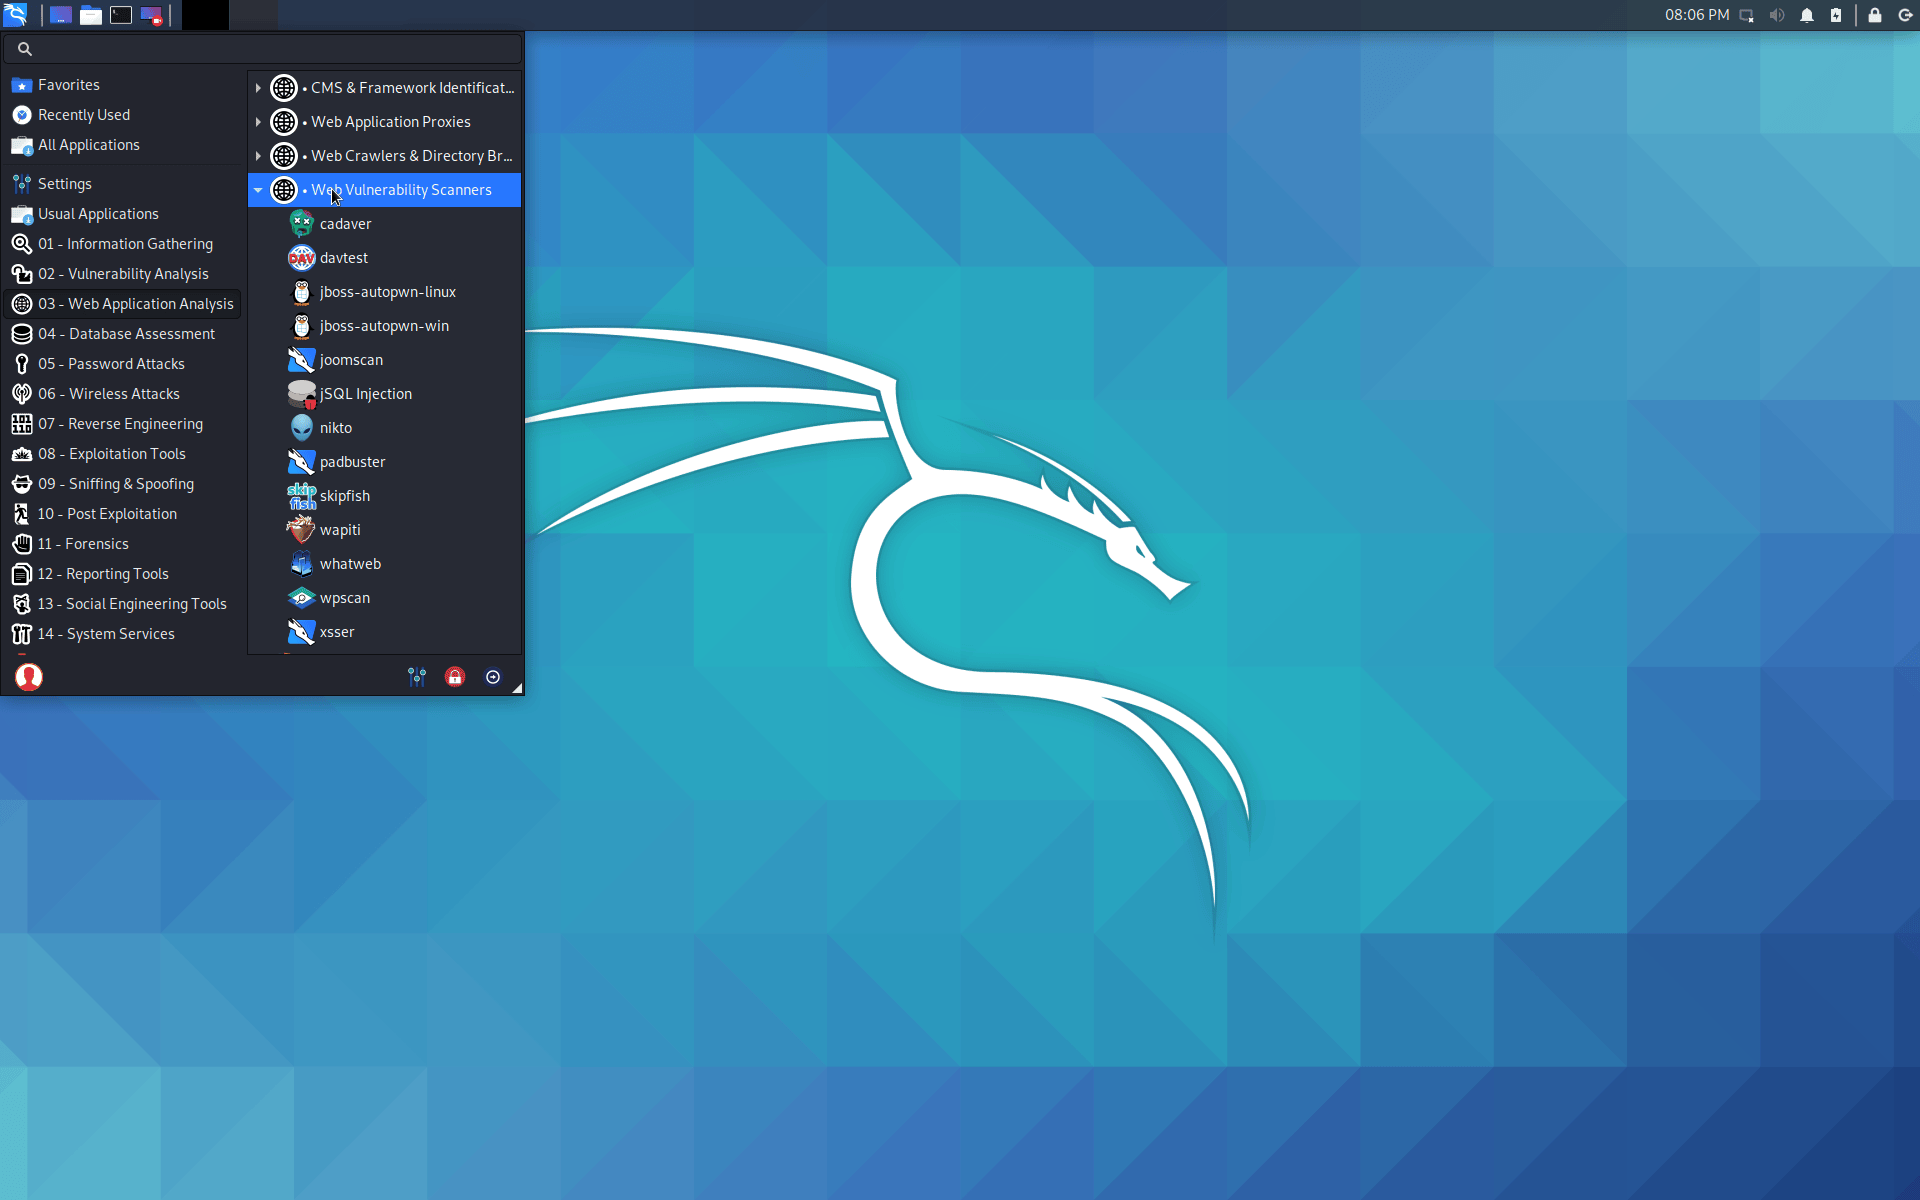
Windows Terminal
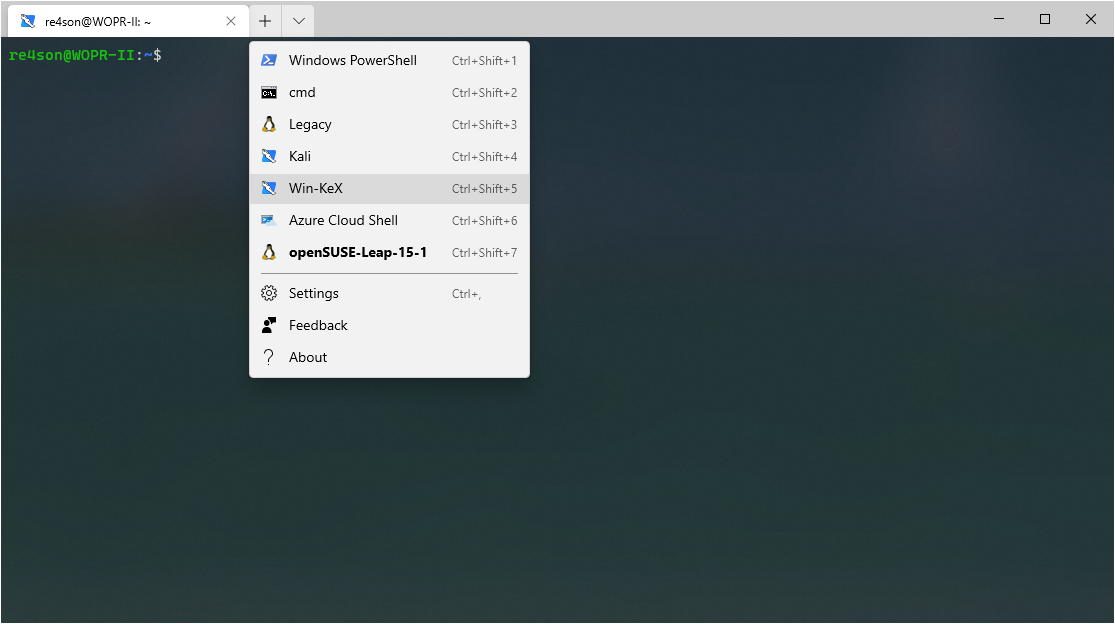
Choose amongst these options:
Basic Win-KeX in window mode with sound:
", "hidden": false, "name": "Win-KeX", "commandline": "wsl -d kali-linux kex --wtstart -s", >, Advanced Win-KeX in window mode with sound — Kali icon and start in kali home directory:
Copy the kali-menu.png icon across to your windows picture directory and add the icon and start directory to your WT config:
", "hidden": false, "icon": "file:///c:/users//pictures/icons/kali-menu.png", "name": "Win-KeX", "commandline": "wsl -d kali-linux kex --wtstart -s", "startingDirectory" : "//wsl$/kali-linux/home/" >, Basic Win-KeX in seamless mode with sound:
", "hidden": false, "name": "Win-KeX", "commandline": "wsl -d kali-linux kex --sl --wtstart -s", >, Advanced Win-KeX in seamless mode with sound — Kali icon and start in kali home directory:
Copy the kali-menu.png icon across to your windows picture directory and add the icon and start directory to your WT config:
", "hidden": false, "icon": "file:///c:/users//pictures/icons/kali-menu.png", "name": "Win-KeX", "commandline": "wsl -d kali-linux kex --sl --wtstart -s", "startingDirectory" : "//wsl$/kali-linux/home/" >, Basic Win-KeX in ESM mode with sound:
", "hidden": false, "name": "Win-KeX", "commandline": "wsl -d kali-linux kex --esm --wtstart -s", >, Advanced Win-KeX in ESM mode with sound — Kali icon and start in kali home directory:
Copy the kali-menu.png icon across to your windows picture directory and add the icon and start directory to your WT config:
", "hidden": false, "icon": "file:///c:/users//pictures/icons/kali-menu.png", "name": "Win-KeX", "commandline": "wsl -d kali-linux kex --esm --wtstart -s", "startingDirectory" : "//wsl$/kali-linux/home/" >,


Help
For more information, ask for help via:
Updated on: 2023-May-15
Author: Re4son