- Kali linux with virtualbox
- virtualbox-guest-x11
- How to Install Kali Linux on VirtualBox
- Steps For Installing Kali Linux on VirtualBox
- Step 1: Download Kali Linux ISO Image
- Step 2: Create Kali Linux VirtualBox Container
- Step 3: Configure Virtual Machine Settings
- Step 4: Installing and Setting Up Kali Linux
- Kali linux with virtualbox
- Wizard
Kali linux with virtualbox
Installing “Guest Addition”, gives a better user experience with VirtualBox VMs (e.g. proper mouse and screen integration, as well as folder sharing). This is why since Kali Linux 2019.3, during the setup process it should detect if Kali Linux is inside a VM. If it is, then automatically install any additional tools (in VirtualBox’s case, virtualbox-guest-x11 ). The Guest Addition is also pre-installed in the Live image since Kali Linux 2021.3.
You must use VirtualBox 4.2.xx or higher in order to take advantage of the improvements, including compatibility updates, and enhanced stability of both the core application and the Guest Additions.
virtualbox-guest-x11
Should you decide to create your own VirtualBox installation of Kali Linux (rather than using our pre-made VirtualBox images), and you want to force a manual reinstall of virtualbox-guest-x11 (as something has gone wrong), first make sure you are fully updated, then enter the following:
[email protected]:~$ sudo apt update [. ] [email protected]:~$ [email protected]:~$ sudo apt install -y --reinstall virtualbox-guest-x11 [. ] [email protected]:~$ [email protected]:~$ sudo reboot -f [email protected]:~$ For older versions of Kali Linux, here is our previous guide.
Updated on: 2023-Mar-06
Author: g0tmi1k
How to Install Kali Linux on VirtualBox
Kali Linux is a Debian-derived Linux distribution designed for penetration testing. With over 600 preinstalled penetration-testing programs, it earned a reputation as one of the best-operating systems used for security testing. As a security-testing platform, it is best to install Kali as a VM on VirtualBox.
Kali has a rolling release model, ensuring up-to-date tools on your system. Also, there is an active community of users providing ongoing support.
This step by step tutorial shows you how to install Kali Linux on VirtualBox.
- At least 20 GB of disk space
- At least 1 GB of RAM (preferably 2) for i386 and amd64 architectures
- VirtualBox (or alternative virtualization software)
Steps For Installing Kali Linux on VirtualBox
Since these instructions take you through the installation process in a virtual environment, you need to ensure you have one set up on your system. In this article, we are using VirtualBox, as it is a simple to use, open-source virtualization solution.
In case you do not have VirtualBox installed, use this step-by-step VirtualBox installation guide.
Step 1: Download Kali Linux ISO Image
On the official Kali Linux website downloads section, you can find Kali Linux .iso images. These images are uploaded every few months, providing the latest official releases.
Navigate to the Kali Linux Downloads page and find the packages available for download. Depending on the system you have, download the 64-Bit or 32-Bit version.

Step 2: Create Kali Linux VirtualBox Container
After downloading the .iso image, create a new virtual machine and import Kali as its OS.
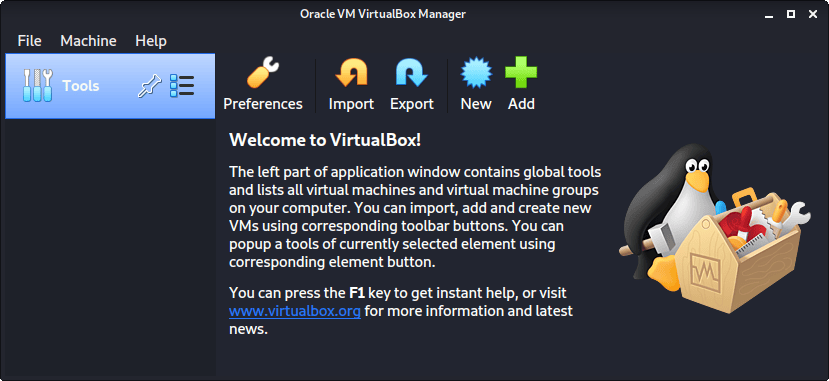
1. Launch VirtualBox Manager and click the New icon.
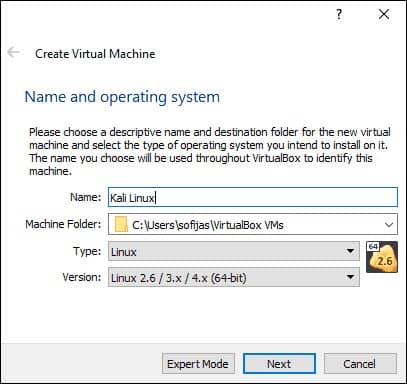
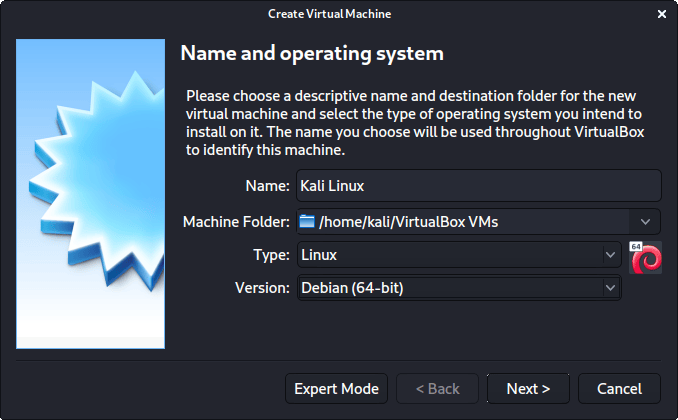
2. Name and operating system. A pop-up window for creating a new VM appears. Specify a name and a destination folder. The Type and Version change automatically, based on the name you provide. Make sure the information matches the package you downloaded and click Next.
3. Memory size. Choose how much memory to allocate to the virtual machine and click Next. The default setting for Linux is 1024 MB. However, this varies depending on your individual needs.
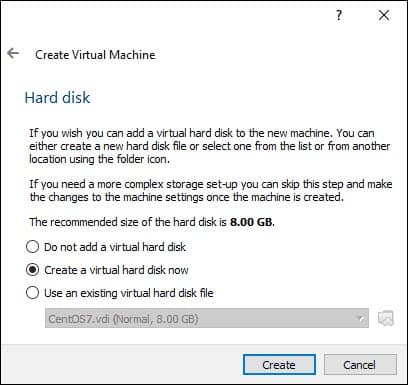
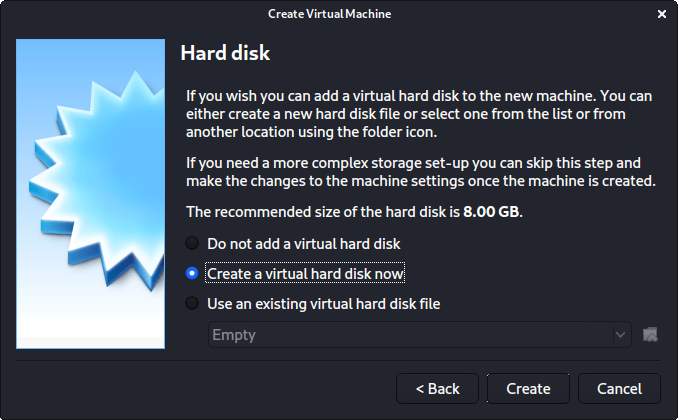
4. Hard disk. The default option is to create a virtual hard disk for the new VM. Click Create to continue. Alternatively, you can use an existing virtual hard disk file or decide not to add one at all.
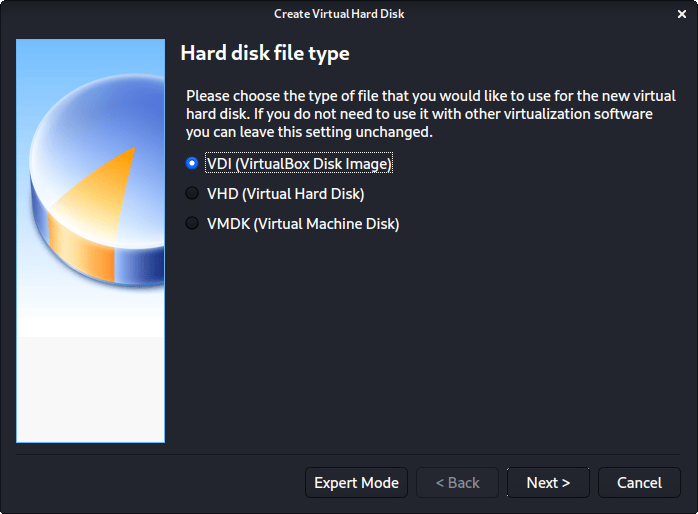
5. Hard disk file type. Stick to the default file type for the new virtual hard disk, VDI (VirtualBox Disk Image). Click Next to continue.
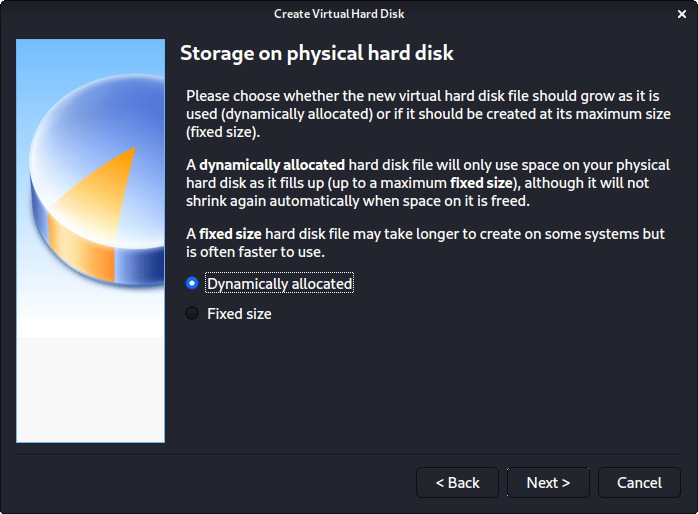
6. Storage on a physical hard disk. Decide between Dynamically allocated and Fixed size. The first choice allows the new hard disk to grow and fill up space dedicated to it. The second, fixed size, uses the maximum capacity from the start. Click Next.
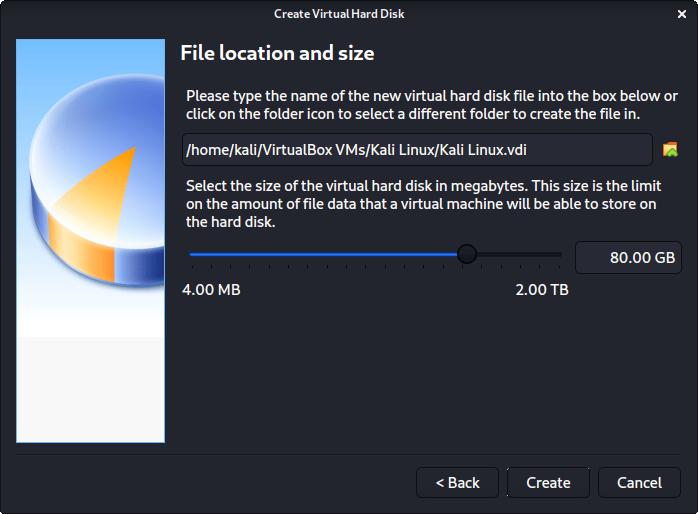
7. File location and size. Specify the name and where you want to store the virtual hard disk. Choose the amount of file data the VM is allowed to store on the hard disk. We advise giving it at least 8 gigabytes. Click Create to finish.
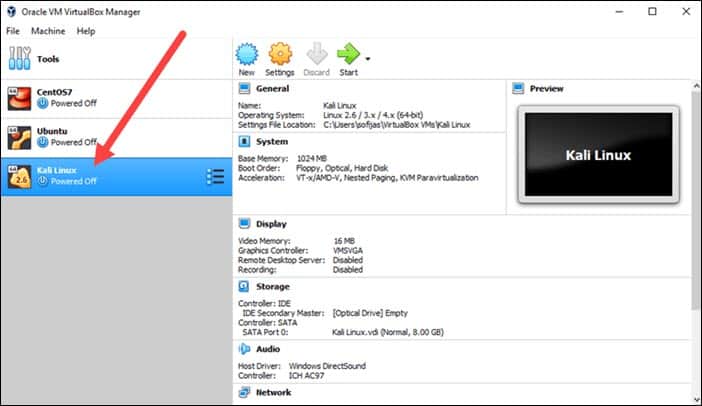
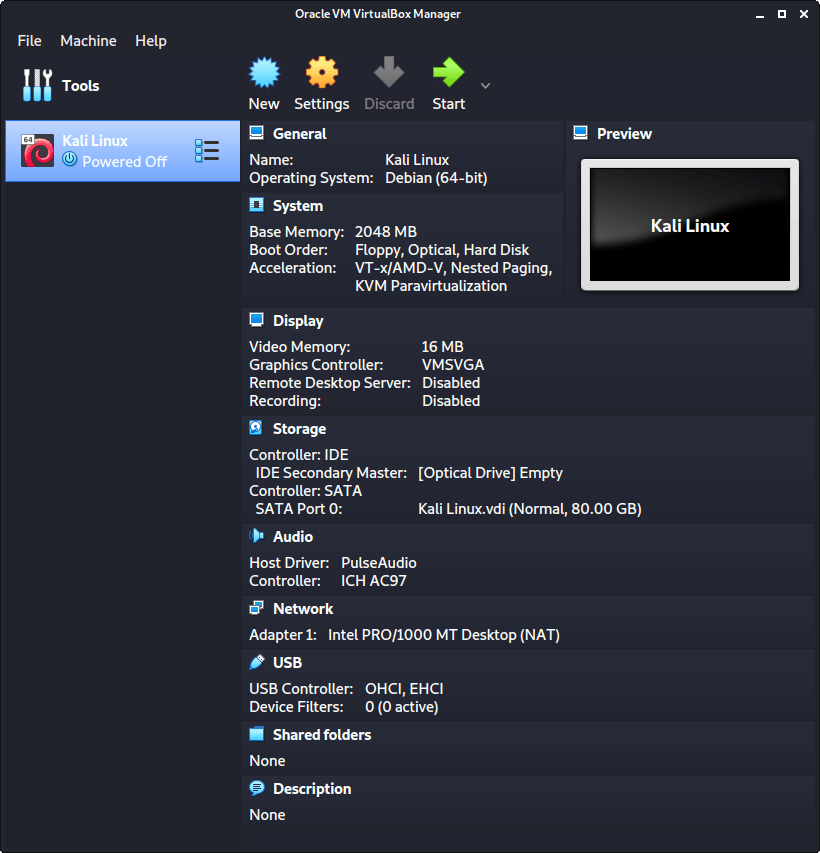
Now you created a new VM. The VM appears on the list in the VirtualBox Manager.
Step 3: Configure Virtual Machine Settings
The next step is adjusting the default virtual machine settings.
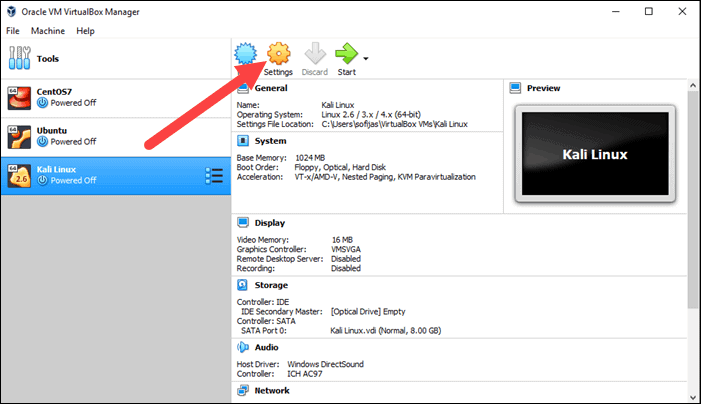
1. Select a virtual machine and click the Settings icon. Make sure you marked the correct VM and that the right-hand side is displaying details for Kali Linux.
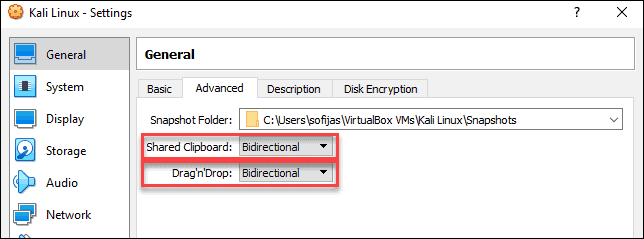
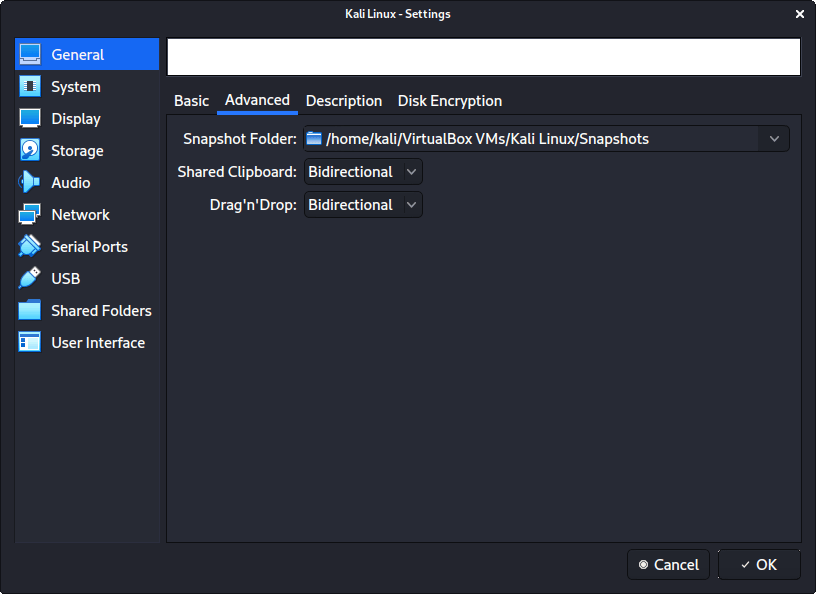
2. In the Kali Linux – Settings window, navigate to General > Advanced tab. Change the Shared Clipboard and Drag’n’Drop settings to Bidirectional. This feature allows you to copy and paste between the host and guest machine.
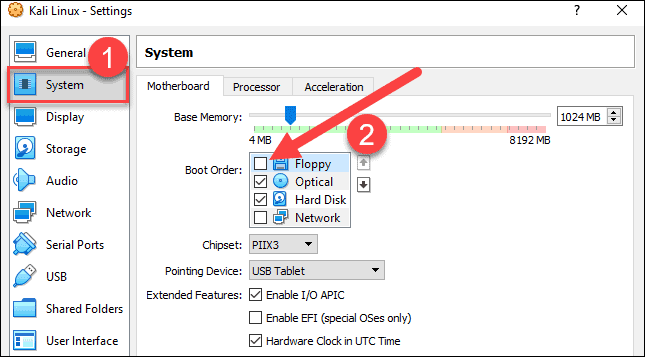
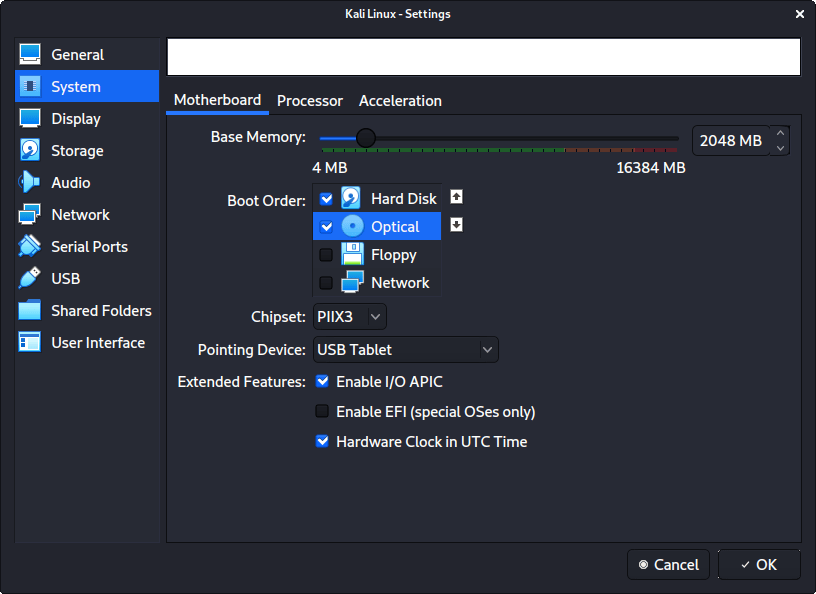
3. Go to System > Motherboard. Set the boot order to start from Optical, followed by Hard Disk. Uncheck Floppy as it is unnecessary.
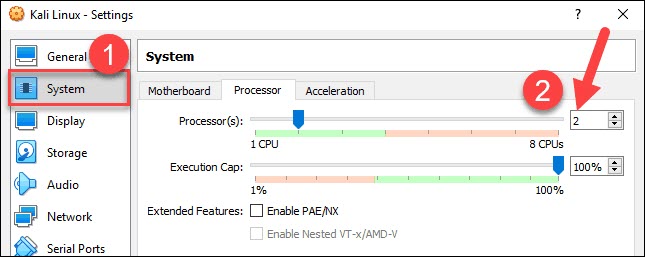
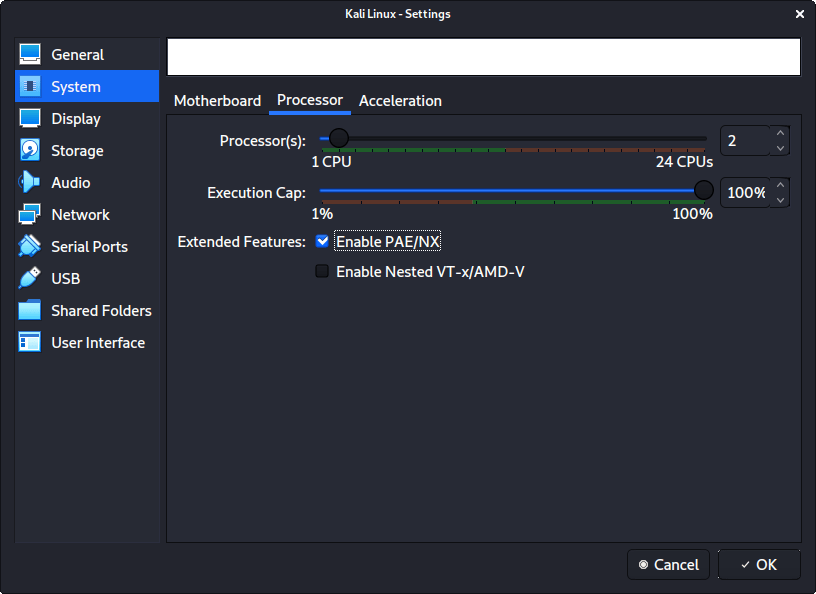
4. Next, move to the Processor tab in the same window. Increase the number of processors to two (2) to enhance performance.
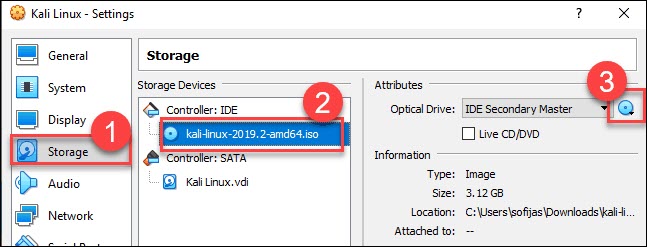
5. Finally, navigate to Storage settings. Add the downloaded Kali image to a storage device under Controller: IDE. Click the disk icon to search for the image. Once finished, close the Settings window.
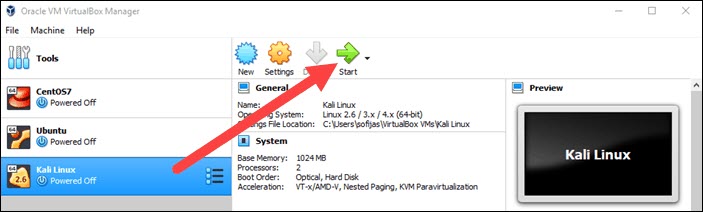
6. Click the Start icon to begin installing Kali.
Step 4: Installing and Setting Up Kali Linux
After you booted the installation menu by clicking Start, a new VM VirtualBox window appears with the Kali welcome screen.
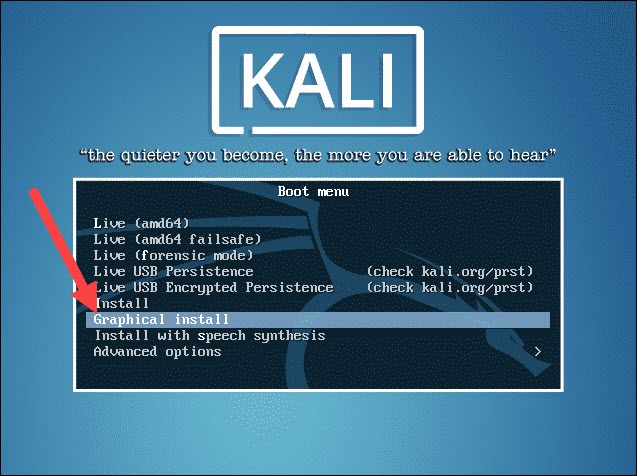
Select the Graphical install option and go through the following installation steps for setting up Kali Linux in VirtualBox.
1. Select a language. Choose the default language for the system (which will also be the language used during the installation process).
2. Select your location. Find and select your country from the list (or choose “other”).
3. Configure the keyboard. Decide which keymap to use. In most cases, the best option is to select American English.
4. Configure the network. First, enter a hostname for the system and click Continue.
5. Next, create a domain name (the part of your internet address after your hostname). Domain names usually end in .com, .net, .edu, etc. Make sure you use the same domain name on all your machines.
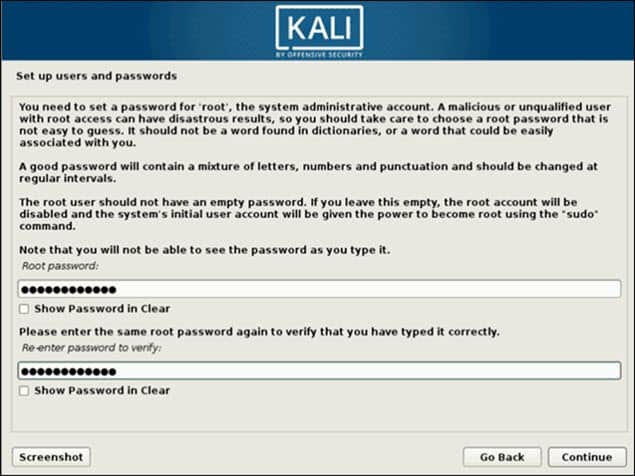
6. Set up users and passwords. Create a strong root password for the system administrator account.
7. Configure the clock. Select your time zone from the available options.
8. Partition disks. Select how you would like to partition the hard disk. Unless you have a good reason to do it manually, go for the Guided –use entire disk option.
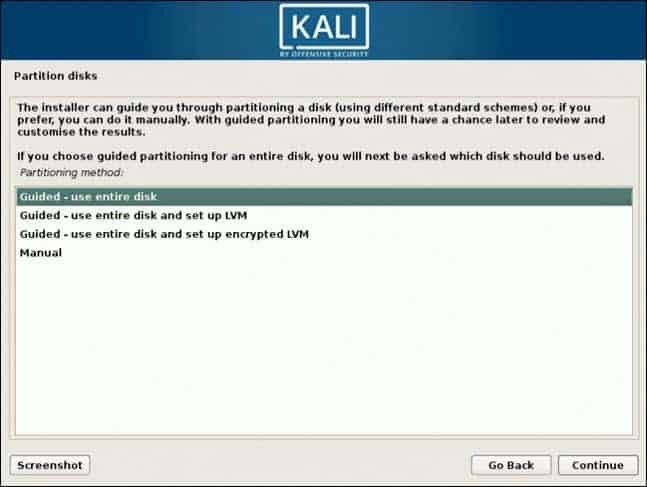
9. Then, select which disk you want to use for partitioning. As you created a single virtual hard disk in Step 3: Adjust VM Settings, you do not have to worry about data loss. Select the only available option – SCSI3 (0,0,0) (sda) – 68.7 GB ATA VBOK HARDDISK (the details after the dash vary depending on your virtualization software).
10. Next, select the scheme for partitioning. If you are a new user, go for All files in one partition.
11. The wizard gives you an overview of the configured partitions. Continue by navigating to Finish partitioning and write changes to disk. Click Continue and confirm with Yes.
12. The wizard starts installing Kali. While the installation bar loads, additional configuration settings appear.
13. Configure the package manager. Select whether you want to use a network mirror and click Continue. Enter the HTTP proxy information if you are using one. Otherwise, leave the field blank and click Continue again.
14. Install the GRUB boot loader on a hard disk. Select Yes and Continue. Then, select a boot loader device to ensure the newly installed system is bootable.
15. Once you receive the message Installation is complete, click Continue to reboot your VM.
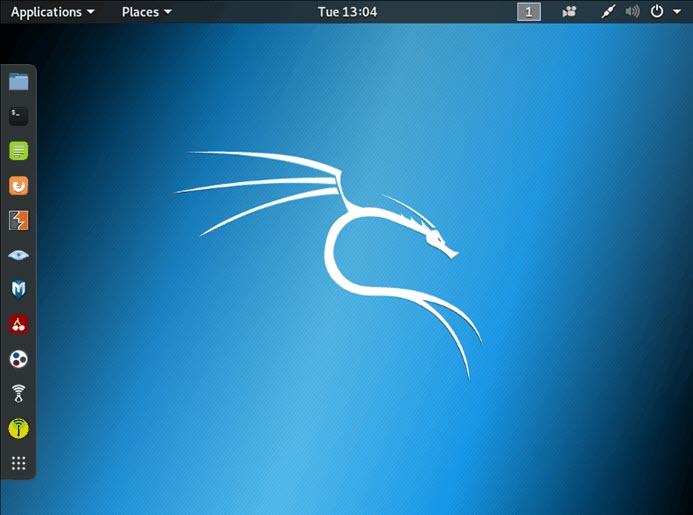
With this, you have successfully installed Kali Linux on VirtualBox. After rebooting, the Kali login screen appears. Type in a username (root) and password you entered in the previous steps.
Finally, the interface of Kali Linux appears on your screen.
Note: If you are looking for a different Linux distribution, feel free to check out our guide How to Install Rocky Linux on VirtualBox.
With this guide, you have learned how to install Kali Linux in VirtualBox. We also covered setup and configuring to start penetration and security testing.
If you are just starting with penetration testing, we suggest you read our article on penetration testing types and techniques.
Kali linux with virtualbox
This guide is about virtualizing Kali Linux inside of VirtualBox, allowing you to have a Kali VM. This is a great way to use Kali, as it is completely separate from the host, allows you to interact with other VMs (as well as the host machine and other machines on the network), and allows you to revert to snapshots.
You may wish to follow our other guide if you are trying to install VirtualBox on Kali Linux (as a host).
The guide below is what we use to generate our pre-made Kali Linux VirtualBox images. You may alter this to your needs. We always generate the images using the latest version of VirtualBox.
You may need to enable virtualization in your BIOS/UEFI for (e.g. Intel VT-x/AMD-V)
Wizard
Upon starting up VirtualBox, select “New” (Machine -> New).
The next screen is “Name and operating system” which is where you name the VM. This name is also used in any filenames (such as the configuration, hard disk and snapshot — which isn’t changed from this point).
We are keeping it generic in this guide (as Kali is a rolling distribution, and we update it), however for our releases, we use the version number in the name as it is a fixed release ( kali-linux-YYYY.N-vbox-ARCH . Example: kali-linux-2023.2-vbox-amd64 ).
For the “Type”, we set it as Linux . For the “Version”, we are going to be using the x64 desktop image, so we are going to select Debian (64-bit) .
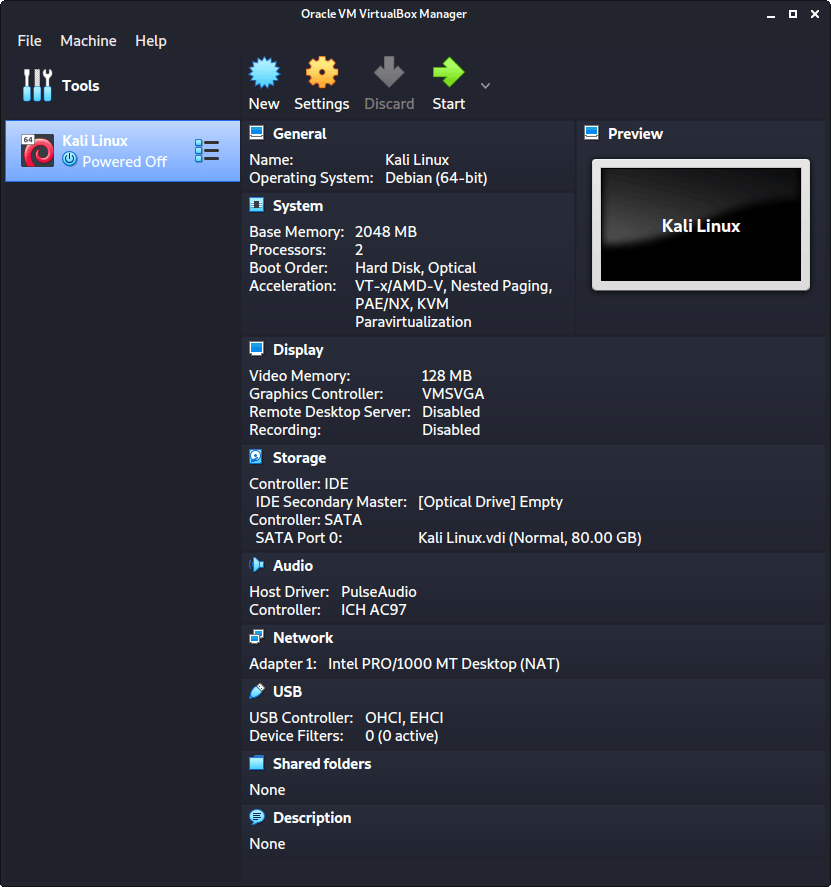
“Memory size” is the next section, where we can define how much RAM to use. Again, the higher the amount of RAM, the more applications can be open and at increased performance. Various tools inside of Kali can be demanding of resources. When we make the general VMs, we select 2048 MB (2GB) for RAM, but we often increase this for our personal machines as we have high-performing devices with spare RAM which Kali can utilize.

This screen below, “Hard disk”, allows us to Create a new virtual disk now .
For the “Hard disk file type”, we select VDI (VirtualBox Disk Image) (and its the default option).
For the following screen, “Storage on physical hard disk”, we go with the default option of Dynamically allocated .
Now with “File location and size”, we can now define how large the virtual hard disk will be. We use 80.00 GB for our VMs.
After clicking on “Create”, the wizard is complete.
Now we click on “Settings”, to customize the VM further.
In “General” -> “Advanced”, we make sure to set “Shared Clipboard” to bidirectional , as well as “Drag’n’Drop” to bidirectional
In “System” -> “Motherboard”, we change the “Boot Order” to make sure Hard Disk is top and Optical is the second. Everything else is disabled.
In “System” -> “Processor”, we increase the “Processor(s)” to be 2 .
At the same time, we also enable “Extended Features” for Enable PAE/NX .
In “Display” -> “Screen”, we make sure to have “Video Memory” set to 128 MB
Another item to point out is to make sure that “Accelerated 3D graphics” is disabled, as people have reported that causes issues.
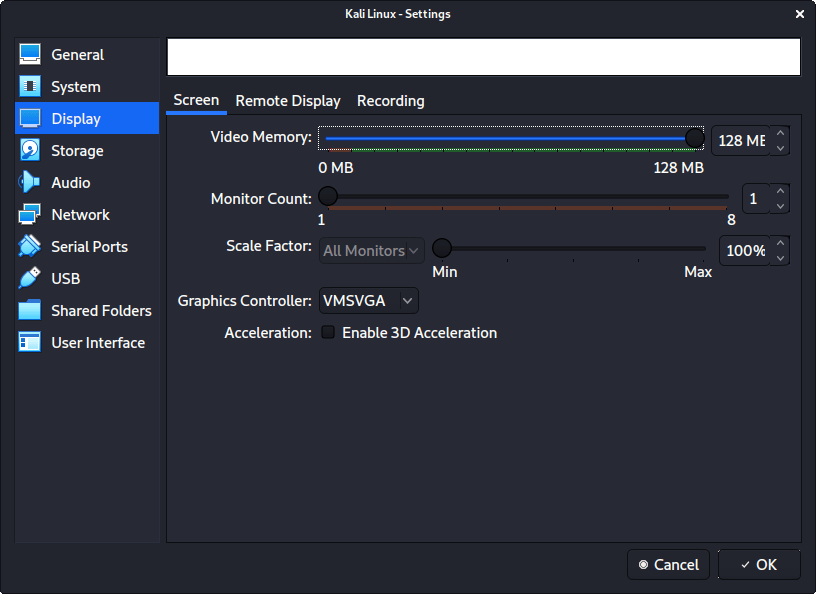
The final settings view looks like the following:
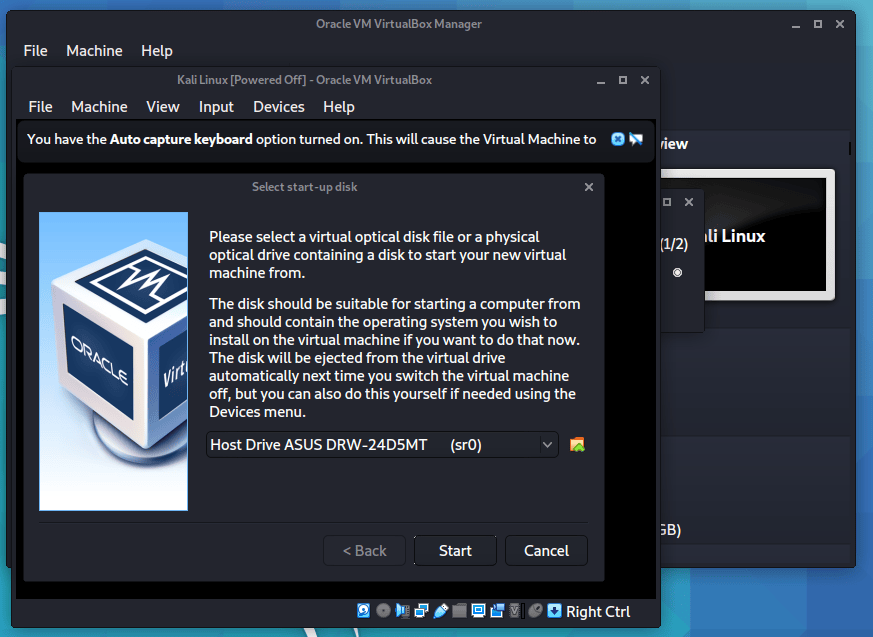
When we are ready to go, press “Start”.
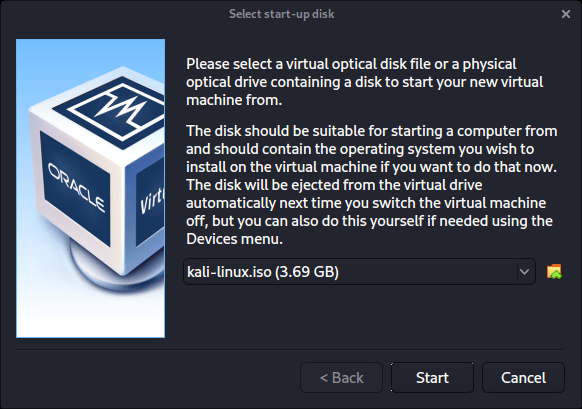
The first time we run it, we will get a prompt saying do we wish to mount an image to use as a “start-up disk”. We want to use our Kali image, rather than a physical drive, so we select the icon to the side of the drop down.
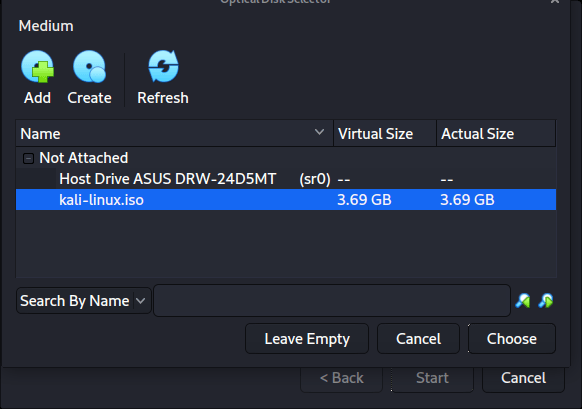
A new pop up will open, “Optical Disk Selector”. We will now press “Add”, then navigate to where our ISO is located.
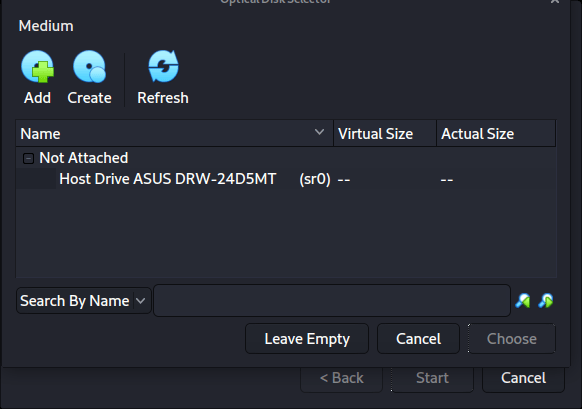
After pressing “Open”, we can see its been added, so we make sure its selected and press “Choose”.
All that is left now to do is press “Start”.
After all this is done, we save, start up the VM, and then continue installing Kali Linux as we normally would for a bare metal install.
During Kali Linux setup process, the install wizard should detect if its inside a VM. If it is, should then automatically install any additional tools (such as virtualbox-guest-x11 ) to give a better user experience. If you want to manually re-install it, you can see our VirtualBox Guest Guide.
Updated on: 2023-May-30
Author: g0tmi1k