- Obtain kernel config from currently running Linux system?
- 8 Answers 8
- Kernel Compilation and Installation
- Get Your kernel
- The Super .config file
- Get your .config file
- Make your customizations
- Final considerations about .config and tips
- Compile!
- Compilation Outputs
- Install new your custom kernel
- Install modules and headers
- Install new image (works on Debian)
- Arch Linux Installation
- Remove
- References
- Where can I get the 11.04 kernel .config file?
- 4 Answers 4
Obtain kernel config from currently running Linux system?
I accidentally deleted my .config for my kernel configuration on Linux, and seem to remember there was a way to retrieve the kernel configuration via the proc filesystem somehow. Is this still possible, and if so how would I do it?
@Hennes User has not been online since Jun 27 ’11 at 16:19 . Don’t think he’s going to be accepting anything.
8 Answers 8
Depending on your system, you’ll find it in any one of these:
On some distros (Fedora/Redhat) it’s /boot/config-2.6.18-194.el5 or similar, with the kernel release string appended.
@Phil I run a distro (Zenwalk) where those filenames are symlinked by the latest kernel package to /boot/config . I’ll go ahead and add these to the list — thanks for reminding me.
Note that you can use zgrep CONFIG_OPTION /proc/config.gz if you want to search for a specific option without unzipping a copy of the config file.
For an actual running kernel, one way to get the config file this is to
cat /proc/config.gz | gunzip > running.config zcat /proc/config.gz > running.config Then running.config will contain the configuration of the running linux kernel.
However this is only possible if your running linux kernel was configured to have /proc/config.gz . The configuration for this is found in
- General setup
- [*] Kernel .config support
- [*] Enable access to .config through /proc/config.gz
Most distributions do not have this configuration set. They provide kernel config files in their kernel packages and is usually found in /boot/ directory.
Kernel Compilation and Installation
Nowadays we have multiple options to play around with Linux Kernel. For simplicity sake, I classify the available approaches into three broad areas: virtualisation, Desktop/Laptop, and embedded device. The virtualisation technique is the safer way to conduct experiments with Linux kernel because any fatal mistake has a few consequences. For example, if you crash the entire system, you can create another virtual machine or take one of your backups (yes, make a backup of your running kernel images). Experiment on your computer is more fun, but also more risk. Any potential problem could break all your system. Finally, for the embedded device, you can make tests in a developing kit. In this section, we choose our weapons. We will work first with Qemu, followed by the local computer.
If you want to use Qemu for work, I recommend you to read my post about it in “Use Qemu to play with Linux Kernel”
Get Your kernel
Linux project has many subsystems and most of them keep their clone of the Kernel. Usually, the maintainer(s) of each subsystem is responsible for receiving patches, and decide to apply or not the change. Later, the maintainer says to Torvalds which branch to merge. This explanation is an oversimplification of the process; you can find more details in the documentation. It is important to realise that you have to figure out which system you intend to contribute, discover their repository, and work based on their branch. For example, if you want to contribute to RISC-V subsystem you have to work on Palmer Dabbelt repository; if you’re going to contribute to iio use Jonathan Cameron repository. You can quickly figure out the target branch by looking at the MAINTAINERS file. For this tutorial, we use the Torvalds repository.
git clone git://git.kernel.org/pub/scm/linux/kernel/git/torvalds/linux.gitThere are thousands of forks from Linux Kernel spread around the Internet. It is possible to find entire organisations that keep their branch of the Kernel with their specific changes. Also, you can find a mirror from Torvalds on Github. Few free to use it, but keep in mind that you may encounter some problems with non-official repositories. I prefer to use the git.kernel.org to use because it simplifies future works.
The Super .config file
The .config file keeps all the configurations used during the Kernel compilation. In this file, you can find which subsystem and configuration will be compiled or not. The .config file has three possible answers per target: (1) m, (2) y, and (3) n. The “m” character means that the target will be compiled as a module; the ‘y’ and ‘n’ designates if the target will be compiled or not as a part of the Kernel image.
Every Linux Distribution (e.g., Arch, Debian, and Fedora) usually maintain and distribute their own .config file. The distributions .config file; normally enables most of the available options (especially the device drivers) because they have to run in a large variety of hardware. It means that you may have various device driver on your computer that you do not need. Nonetheless, the important thing here is: the more options you have enabled in the .config file, more time will be taken by the compilation.
If it is your first attempt to use your own compiled kernel version, I strongly recommend you to use the .config file provided by your distribution to increase the chances of success. Later, you can expand the modification as we describe in this tutorial.
If it is your first attempt to use your own compiled kernel version, I strongly recommend you to use the .config file provided by your distribution to increase the chances of success. Later, you can customize things as we describe in this tutorial.
Attention: The .config file has Superpower, I recommend you to invest some time to understand it better. Also, save your working .config files, it will save time for you.
Get your .config file
Depending on the distribution which you use, there are two options to get .config file: from /proc , or /boot . Both cases produce the same results, but it is not all distribution that enables /proc option (e.g., Arch enable it, but Debian not). The command bellow makes the copy, notice that I suppose that you are in the Linux Kernel directory (previously cloned).
zcat /proc/config.gz > .configcp /boot/config-`uname -r` .configMake your customizations
Attention: There is a basic rule about .config file: NEVER CHANGE IT BY HAND, ALWAYS USE A TOOL
There are several options to change the .config manually file. I introduce two:

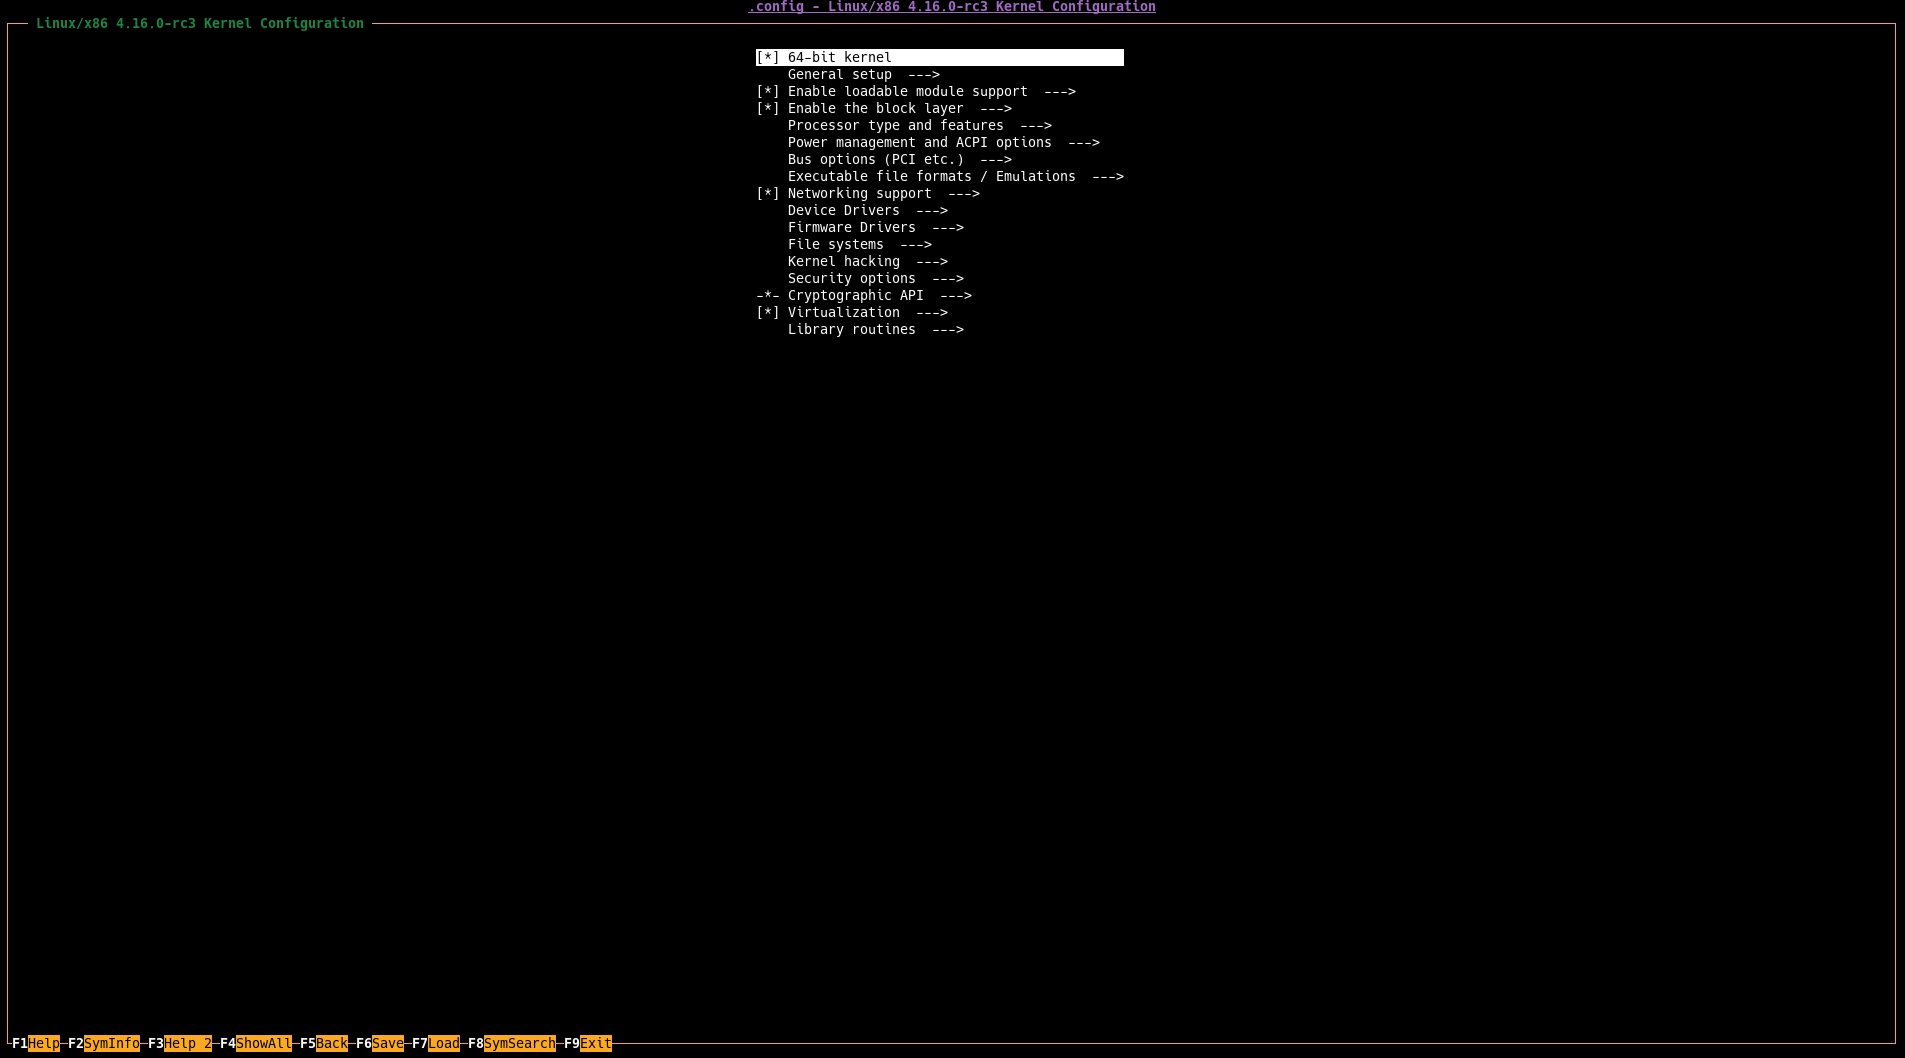
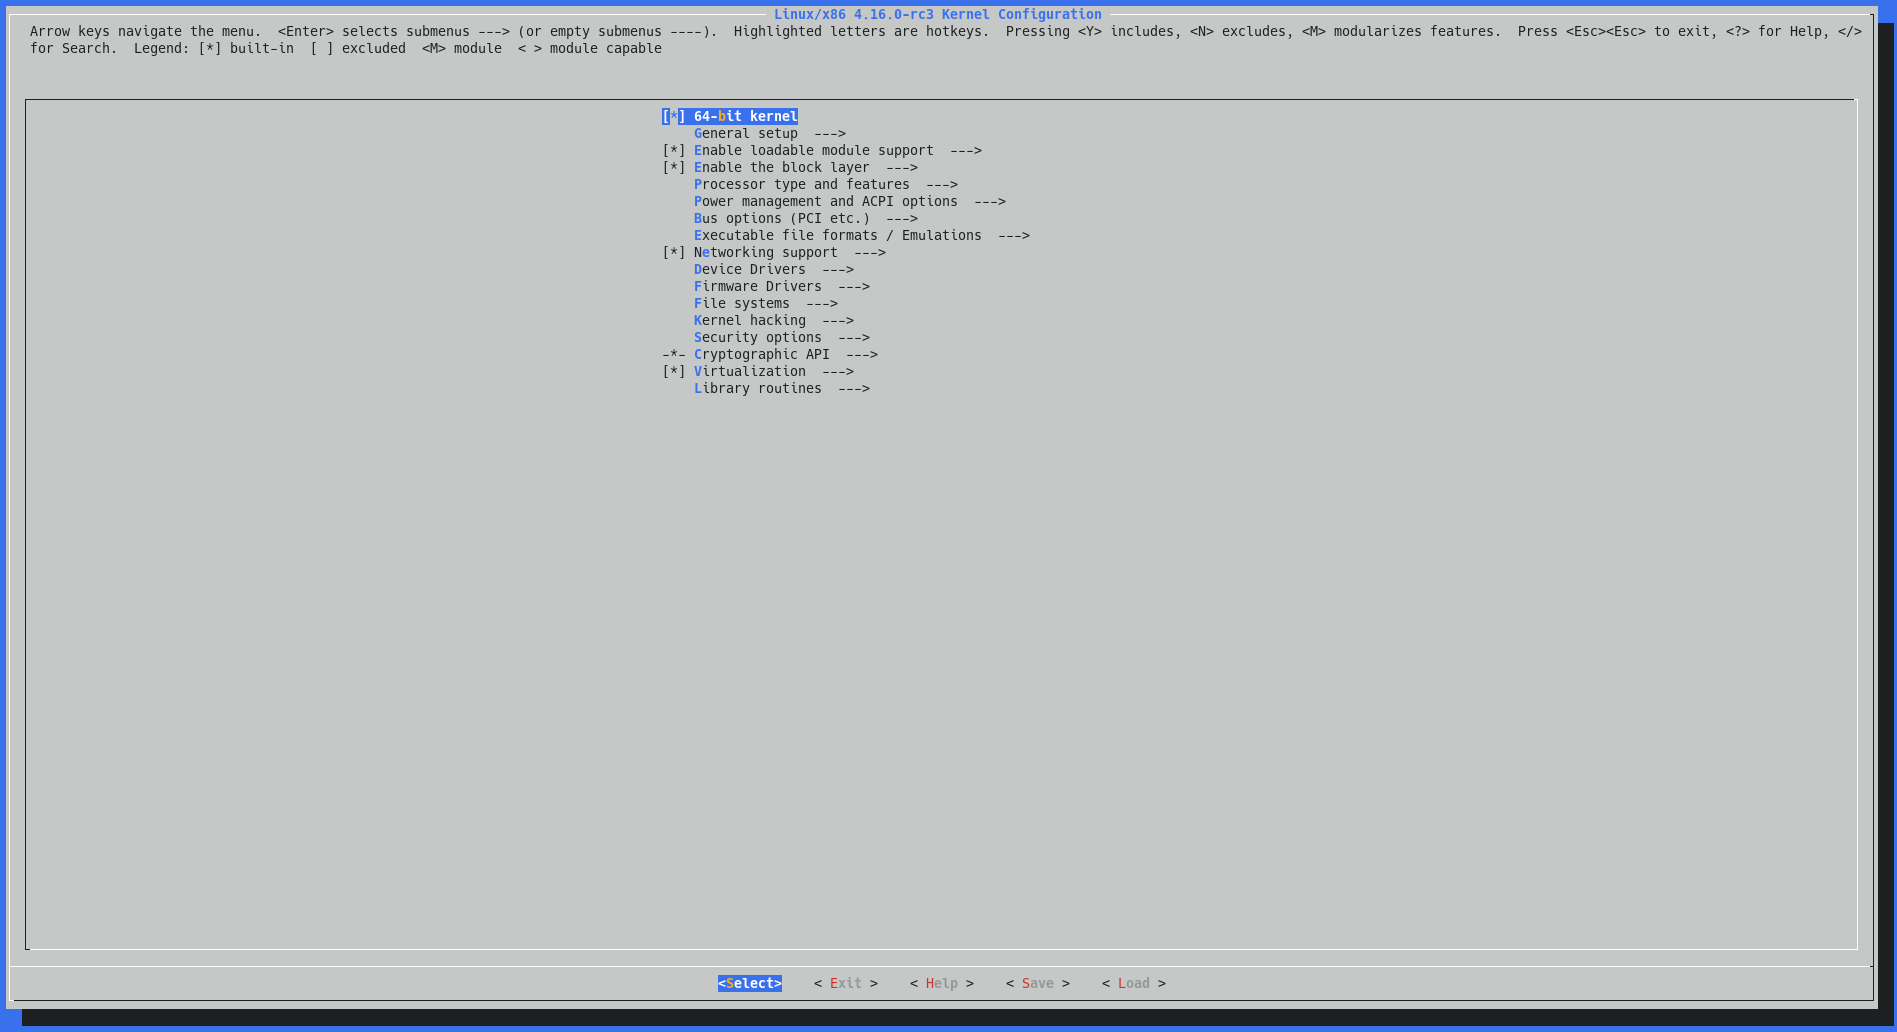
Finally, we have menuconfig :
menuconfig looks like this:
Final considerations about .config and tips
When you use a configuration file provided by a Linux Distribution, hundreds of device drivers are enabled; typically, you need a few drivers. All the enabled drivers will raise the compile time with no need for you; fortunately, there is an option that automatically changes the .config file to enable only required drivers. Nonetheless, before using the command, it is highly recommended to enable all the devices that you use with your computer to ensure that .config file have all the required driver for your machine enabled. In other words, plug all the devices that you usually use before executing the command:
Remember: Enables all the device
This command, basically uses lsmod to check the enables or disables devices drivers in the .config file.
Sometimes, when you rebase your local master branch with the remote you will notice when try to compile that some questions are raised related to the ativation or deactiavion of features. This happens, because during the evolution of the Kernel new features are added that was not in present in you .config file. As a result, you are asked to take a decision. Sometimes, there is a way to partially reduce the amount of asked question with the command:
Finally, one last tip is related for someone that make experiments in the Qemu with Kvm. There is an option that enables some important features for this scenario:
Compile!
Now, it timeeeeee! After a bunch of setup, I am quite sure that you anxious for this part. So, here we go… type:
make -j [two_times_the_number_of_core]Just replace the two_times_the_number_of_core for the number of cores you have by two. For example, if you have 8 cores you should add 16.
This command uses lsmod to check the enables or disables devices drivers in the .config file.
make ARCH=x86_64 -j [two_times_the_number_of_core]For compiling the kernel modules, type:
Compilation Outputs
Install new your custom kernel
It is important to pay attention in the installation order; we install modules as following:
- Install modules
- Install header
- Install Image
- Update bootloader (Grub)
Attention: Double your attention in the install steps. You can crash your system because you have executed all commands as a root user.
Install modules and headers
sudo make modules_installIf you want to check the changes, take a look at /lib/modules/$(uname -r)
sudo make headers_install INSTALL_HDR_PATH=/usrInstall new image (works on Debian)
Finally, it is time to install your Kernel image. This step does not work on Arch Linux, see next section if you are interested in Arch.
To install the Kernel module just type:
We are, reallyyyyy close to finishing the process. We have to update the bootloader, and here we suppose you are using Grub. Type:
Notice, that the command below is a wrapper to the following command:
sudo grub-mkconfig -o /boot/grub/grub.cfgSo… If the first command fails, try the last one.
Now, reboot your system and check if everything is ok.
Arch Linux Installation
If you use Arch Linux, we present the basics steps to install your custom image. You can find a detailed explanation of this processes in the Arch Linux wiki.
First, you have copied your kernel image to the /boot/ directory with the command:
sudo cp -v arch/x86_64/boot/bzImage /boot/vmlinuz-[name]Replace [name] by any name. It could be your name.
Second, you have to create a new mkinitcpio . Follow the steps below:
sudo cp /etc/mkinitcpio.d/linux.present /etc/mkinitcpio.d/linux-[name].present- Open the copied file, and look it line by line and replaces the old kernel name by the name you assigned. See the example:
Attention: Keep in mind that you have to adapt this file by yourself. There is no blind copy and paste here.
sudo mkinitcpio -p linux-[name].prensentRemove
Finally, you may want to remove an old Kernel version for space or organization reasons. First of all, boot in another version of the Kernel and follow the steps below:
rm -rf /boot/vmlinuz-[target] rm -rf /boot/initrd-[target] rm -rf /boot/System-map-[target] rm -rf /boot/config-[target] rm -rf /lib/modules/[target] rm -rf /var/lib/initramfs/[target]References
- Install customised kernel in Arch Linux
- Overview about Initramfs
- Practical stuffs about Initramfs
- Great explanation about initramfs
- More about initramfs
- Nice discussion in Stack Exchange about bzimage in qemu
- Kernel Readme
- Speedup kernel compilation
- Stack Overflow with some tips about speedup kernel compilation
- SYSTEMD-BOOT
- cpio tutorial
- Busybox, build system
Where can I get the 11.04 kernel .config file?
I’m using Maverick with the latest available kernels on kernel.org and building them myself. Until now I’ve been basing my configuration off the stock Maverick kernel and accepting the make oldconfig defaults. I’ve been doing this for 3 major releases now so I figure I’m starting to slip behind the current «standard». I would like to re-base my kernels off the new Natty .config file. Is this available somewhere online or do I have to download the whole kernel package and extract it? Edit: I’ve manually pulled in the config from the latest Natty kernel package and I can confirm that I propbably should have done this sooner. A lot of differences between my old «evolved» config and the Natty default. Now if I could just do this without 20 minutes of hunting and downloading the package so I can re-base in the future.
4 Answers 4
Each linux-image package contains the exact configuration file that it was built with in /boot/config-* . To see the configuration file for the currently running Linux kernel, do:
I have checked with the Ubuntu kernel people (on Freenode #ubuntu-kernel ) and they have confirmed my belief that there isn’t really «the config», but it is actually constructed at build/compile time by including a number of Kconfig files; these depend on the exact architecture and target (desktop/server/cloud). You should be able to read that (short) conversation at:
A list of that variety can be found using packages.ubuntu.com and the following search:
Hunting, around, it would appear that the .config is also included in the linux-headers-* packages. These are .deb files (which are simple .ar archives that will open with file-roller ) and only about 800 kB each. If you know the particular target, architecture and version you’re after, you can grab these straight from Launchpad or from the archive itself:
If you want to automate the whole process into one command, you could try the following; make sure you keep it all on one line!
- [*] Kernel .config support