- 4 Ways to Generate a Strong Pre-Shared Key (PSK) in Linux
- 1. Using OpenSSL Command
- 2. Using GPG Command
- 3. Using Pseudorandom Number Generators
- 4. Using date and sha256sum Commands
- Using ssh-keygen and sharing for key-based authentication in Linux
- Great Linux resources
- Process hardening
- ssh-keygen without a password
- ssh-keygen with a password
- Sharing keys
- Advantages and summary
- How to configure key-based authentication for SSH
- Training & certification
- The key pair
- Create the key pair
- Share the public key
4 Ways to Generate a Strong Pre-Shared Key (PSK) in Linux
A Pre-Shared Key (PSK) or also known as a shared secret is a string of characters that is used as an authentication key in cryptographic processes. A PSK is shared before being used and is held by both parties to the communication to authenticate each other, usually before other authentication methods such as usernames and passwords are applied.
It is commonly used in different types of Virtual Private Network (VPN) connections, wireless networks in a type of encryption known as WPA-PSK (Wi-Fi Protected Access Pre-Shared Key) and WPA2-PSK, and also in the EAP (Extensible Authentication Protocol Pre-Shared Key), and many others authentication mechanisms.
In this article, we will show you different ways to generate a strong Pre-Shared Key in Linux distributions.
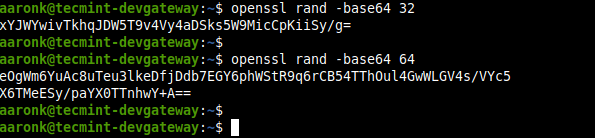
1. Using OpenSSL Command
OpenSSL is a well-known and widely-used command-line tool used to invoke the various cryptography functions of OpenSSL’s crypto library from the shell. To generate a strong PSK use its rand sub-command which generates pseudo-random bytes and filter it through base64 encodings as shown.
$ openssl rand -base64 32 $ openssl rand -base64 64
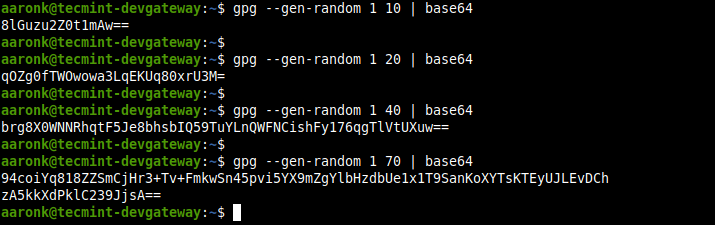
2. Using GPG Command
GPG is a command-line tool to provide digital encryption and signing services using the OpenPGP standard. You can use its —gen-random option to generate a strong PSK and filter it through base64 encoding as shown.
In the following commands, 1 or 2 is the quality level and 10, 20, 40, and 70 are the character counts.
$ gpg --gen-random 1 10 | base64 $ gpg --gen-random 2 20 | base64 $ gpg --gen-random 1 40 | base64 $ gpg --gen-random 2 70 | base64
3. Using Pseudorandom Number Generators
You can also use any of the pseudorandom number generators in Linux such as /dev/random or /dev/urandom, as follows. The -c option of the head command helps to generate the number of characters.
$ head -c 35 /dev/random | base64 $ head -c 60 /dev/random | base64

4. Using date and sha256sum Commands
The date and sha256sum command can be combined to create a strong PSK as follows.
$ date | sha256sum | base64 | head -c 45; echo $ date | sha256sum | base64 | head -c 50; echo $ date | sha256sum | base64 | head -c 60; echo

The above are some of the many ways of generating strong Pre-Shared Key in Linux. Do you know of any other methods? If yes, share it with us via the feedback form below.
Using ssh-keygen and sharing for key-based authentication in Linux
SSH key-based authentication is helpful for both security and convenience. See how to generate and share keys.

Great Linux resources
If you have ever worked as a sysadmin (or you want to in the future), you need a good grasp of SSH. I will not run you through the general concept as it has already been hashed out here at Enable Sysadmin. However, I do want to look at a potentially better way to use it. SSH is the single most used remote access protocol in the world. Therefore, it makes sense that we should try to improve its use as much as possible.
I used SSH to remotely connect to thousands of customer machines during my time as a support engineer, and I am sure that others have had a similar experience. With traditional SSH authentication, you need the username and password for the account you want to log in to every time that you wish to access a system. Doesn’t sound that bad, right? But, what happens when you need to jump back and forth between systems regularly? Or what if your responsibilities include remote sessions to the same 100 systems throughout the day for health checks? There is another way to accomplish the log in, and with a little upfront investment, it can be far more efficient overall.
Process hardening
It is objectively true that an encrypted key is a much harder target than a username and password for those with ill intentions. Although it can take a little learning, creating and using SSH key-based authentication is worth the investment for every sysadmin.
Here is how it works. You generate a public key and a matching private key. The private key file acts as a password and should be kept safe. However, the public key is copied to the target systems that you connect to regularly. You place the public key in your account home directory on the target server. When you try to log in, the keys are verified, and access is granted.
Now, there are two ways that you can do this. One is more convenient, and the other is a bit tedious but with added protection to you. The convenient way is not to specify a password along with the private key. The result is that you do not have to enter a password when you use your private key for authentication. This means that if someone gets their hands on your private key, they can use it to authenticate, as well. The other method is to password-protect your private key so that you are prompted for the password when authenticating (think two-factor authentication using both the private key and the password).
ssh-keygen without a password
To generate an SSH key pair, use the following command:
[user@host ~]$ ssh-keygen Generating public/private rsa key pair. Enter file in which to save the key (/home/user/.ssh/id_rsa): Enter Created directory '/home/user/.ssh'. Enter passphrase (empty for no passphrase): Enter Enter same passphrase again: Enter Your identification has been saved in /home/user/.ssh/id_rsa. Your public key has been saved in /home/user/.ssh/id_rsa.pub. The key fingerprint is: SHA256:veutUNPio3QDCyvkYm1oIx35hmMrHpPKWFdIYu3HV+w user@host.lab.example.com The key's randomart image is: +---[RSA 2048]----+ | | | . . | | o o o | | . = o o . | | o + = S E . | | ..O o + * + | |.+% O . + B . | |=*oO . . + * | |++. . +. | +----[SHA256]-----+ By default, your private and public keys are saved in your ~/.ssh/id_rsa and ~/.ssh/id_rsa.pub files, respectively.
ssh-keygen with a password
Creating a password-protected key looks something like this:
[user@host ~]$ ssh-keygen -f .ssh/key-with-password Generating public/private rsa key pair. Enter passphrase (empty for no passphrase): Enter same passphrase again: Your identification has been saved in .ssh/key-with-password. Your public key has been saved in .ssh/key-with-password.pub. The key fingerprint is: SHA256:s7GGB7EyHUry4aOcNPKmhNKS7dl1YsMVLvFZJ77VxAo user@host.lab.example.com The key's randomart image is: +---[RSA 2048]----+ | . + =.o . | | = B XEo o. | | . o O X =. | | = = = B = o. | |= + * * S . | |.+ = o + . | | + . | | | | | +----[SHA256]-----+Use the -f option to specify the file where the keys will be saved. In the example above, the private and public keys are stored in the /home/user/.ssh/key-with-pass and /home/user/.ssh/key-with-pass.pub files, respectively.
During further SSH key pair generation, if you do not specify a unique file name, you are prompted for permission to overwrite the existing id_rsa and id_rsa.pub files. If you overwrite the existing id_rsa and id_rsa.pub files, you must then replace the old public key with the new one on ALL of the SSH servers that have your old public key.
Once you have generated the keys, they are stored in the /user/home/.ssh/ directory with the following permissions:
You aren’t done yet. Let’s look at the final step in successful SSH key-based authentication.
Sharing keys
For all of this to work, you need to share your public key with the remote machines you are trying to SSH to. Use the ssh-copy-id command to copy your public key over to the destination system. By default, the file path is /home/user/.ssh/id_rsa.pub . You issue the command, specify the file you are sharing, then the user/host we are sharing it with. It should look like this:
[user@host ~] $ ssh-copy-id -i .ssh/key-with-pass.pub user@destination /usr/bin/ssh-copy-id: INFO: Source of key(s) to be installed: "/home/user/.ssh/id_rsa.pub" /usr/bin/ssh-copy-id: INFO: attempting to log in with the new key(s), to filter out any that are already installed /usr/bin/ssh-copy-id: INFO: 1 key(s) remain to be installed -- if you are prompted now it is to install the new keys user@destination password: changeme Number of key(s) added: 1Now that you have shared the public key with the destination host, you can authenticate to the remote server by passing the matching private key. If you specified a file path for your private key, you need to give it here. Otherwise, it defaults to /home/_user_/.ssh/id_rsa .
[user@host ~]$ ssh -i .ssh/key-with-password user@desination Enter passphrase for key '.ssh/key-with-password' : password here if you set one [user@destination ~] $Advantages and summary
The advantages of using SSH key-based authentication are clear. Passwords are stolen every day, mainly due to human error but also due to attacker skill and determination. An encrypted key, and more specifically, a password-protected encrypted key, makes your SSH authentication even more difficult to attack. You still need to strike a balance of availability and security, but that is handled differently in every environment.
How to configure key-based authentication for SSH
Use this advice when you want to avoid manually entering passwords in automated processes by using key-based authentication.

Remote connections to a server via Secure Shell (SSH) can be authenticated in two ways. The traditional and default method is to use password authentication. The second approach is key-based authentication, which is based on a private-public key pair.
Training & certification
Key-based authentication provides two primary benefits:
- Helps mitigate brute-force password attacks against SSH
- Prevents administrators from being required to manually type passwords in automated processes such as scripts or Ansible
Passwordless key-based authentication is often the assumed configuration on modern Linux systems.
The key pair
For key-based authentication, a matched pair of cryptographic key files is generated. The pair consists of a private key and a public key that uniquely identify the user. The private key usually has a permission of 600 and is kept on the local server. The public key is copied to the remote system where the user intends to log in. This public key is stored in the ~/.ssh/authorized_keys or ~/.ssh/authorized_keys2 file of the authenticating user. For example, if you log into a remote server with the user sadmin , the public key is added to the /home/sadmin/.ssh/authorized_keys file.
Create the key pair
The ssh-keygen command generates the private and public key pair. By default, the command saves these keys to the user’s ~/.ssh/id_rsa and ~/.ssh/id_rsa.pub files. The id_rsa is the private key, and id_rsa.pub is the public key. The OpenSSH suite also contains an ssh-copy-id command, which you can use to distribute the public keys to other systems.
To generate the keys, enter the following command:
Note: Press Enter for all questions because this is an interactive command.
By default, all files are stored in the /home/sysadmin/.ssh/ directory. You can enter a new file name when running the ssh-keygen command. The command also offers the option to add a passphrase to unlock the key file.
Share the public key
To share the public key with other systems the sadmin user will access, use:
[server]$ sudo ssh-copy-id remoteuser@remoteserverEnter the user’s password. The public key is shared with the remote server, and the user can log in without a password. There is also the ssh-agent command, which you can use to store private keys used for public key authentication. This is normally useful when a passphrase protects keys.
To add a private key stored in /home/sadmin/sshkeys/id_rsa to ssh-agent , use these commands:
[server]$ sudo eval $(ssh-agent) [server]$ sudo ssh-add