- Команда chmod Linux
- Команда chmod Linux
- Примеры использования chmod
- Выводы
- How to use chmod command in Linux
- What are file permissions in Linux
- How to check file permission in Linux
- What is chmod command in Linux
- Example 1: Setting “read by owner only” file permission using chmod command
- Example 2: Setting “read by group only” file permission using chmod command
- Example 3: Setting “write by owner only” file permission using chmod command
- Example 4: Setting “execute by owner only” file permission using chmod command
- Example 5: Setting “read by everyone” file permission using chmod command
- Example 6: Setting “execute by owner” file permission using chmod command
- Conclusion
- About the author
- Sharqa Hameed
Команда chmod Linux
Система полномочий в Linux имеет очень важное значение, поскольку благодаря ей можно разделять привилегии между пользователями, ограничить доступ к нежелательным файлам или возможностям, контролировать доступные действия для сервисов и многое другое. В Linux существует всего три вида прав — право на чтение, запись и выполнение, а также три категории пользователей, к которым они могут применяться — владелец файла, группа файла и все остальные.
Эти права применяются для каждого файла, а поскольку все в системе Linux, даже устройства, считаются файлами, то, получается что эти права применимы ко всему. Мы более подробно рассматривали как работают права доступа к файлам Linux в отдельной статье, а этой, я хочу остановиться на команде chmod, которая используется для установки прав.
Команда chmod Linux
Эта команда имеет типичный для команд linux синтаксис, сначала команда, затем опции, а в конце файл или папка, к которой ее нужно применить:
$ chmod опции права /путь/к/файлу
Сначала рассмотрим какими бывают права доступа linux и как они устанавливаются. Пред этим рекомендую прочитать статью про права, ссылка на которую есть выше. Есть три основных вида прав:
Также есть три категории пользователей, для которых вы можете установить эти права на файл linux:
Синтаксис настройки прав такой:
группа_пользователей действие в ид_прав
В качестве действий могут использоваться знаки «+» — включить или «-« — отключить. Рассмотрим несколько примеров:
- u+x — разрешить выполнение для владельца;
- ugo+x — разрешить выполнение для всех;
- ug+w — разрешить запись для владельца и группы;
- o-x — запретить выполнение для остальных пользователей;
- ugo+rwx — разрешить все для всех;
Но права можно записывать не только таким способом. Есть еще восьмеричный формат записи, он более сложен для понимания, но пишется короче и проще. Я не буду рассказывать как считать эти цифры, просто запомните какая цифра за что отвечает, так проще:
Права на папку linux такие же, как и для файла. Во время установки прав сначала укажите цифру прав для владельца, затем для группы, а потом для остальных. Например, :
- 744 — разрешить все для владельца, а остальным только чтение;
- 755 — все для владельца, остальным только чтение и выполнение;
- 764 — все для владельца, чтение и запись для группы, и только чтение для остальных;
- 777 — всем разрешено все.
Каждая из цифр не зависит от предыдущих, вы вбираете именно то, что вам нужно. Теперь давайте рассмотрим несколько опций команды, которые нам понадобятся во время работы:
- -c — выводить информацию обо всех изменениях;
- -f — не выводить сообщения об ошибках;
- -v — выводить максимум информации;
- —preserve-root — не выполнять рекурсивные операции для корня «/»;
- —reference — взять маску прав из указанного файла;
- -R — включить поддержку рекурсии;
- —version — вывести версию утилиты;
Теперь, когда вы знаете опции и как настраиваются права доступа chmod, давайте рассмотрим несколько примеров как работает команда chmod linux.
Примеры использования chmod
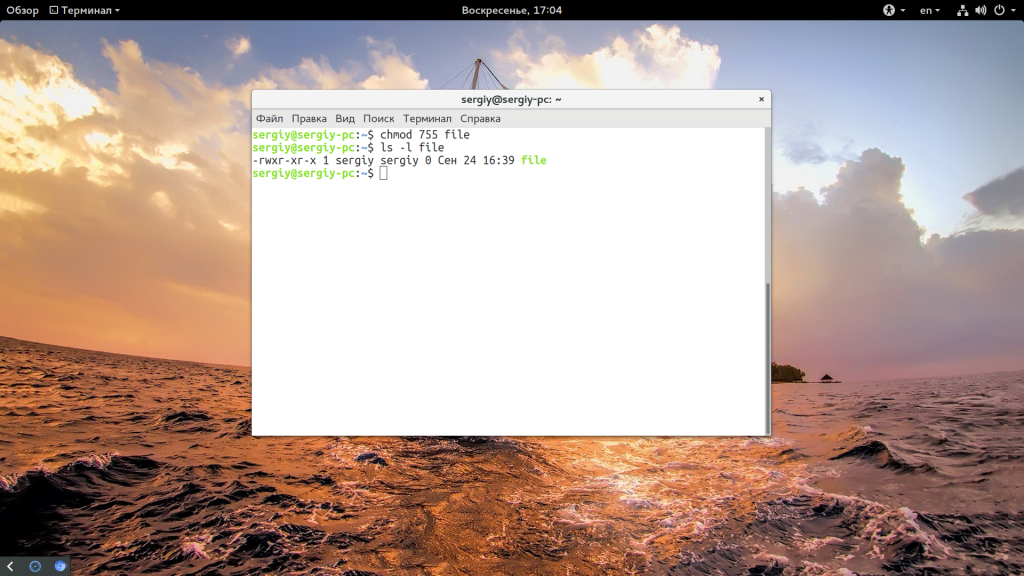
Я не буду приводить много примеров, так как там и так все более-менее понятно после пояснения правил создания выражений установки прав. Сначала самый частый случай — разрешить выполнения скрипта владельцу:

Или можно воспользоваться цифровой записью:
chmod 766 file
ls — l file

Недостаток цифровой записи в том, что вы не можете модифицировать уже существующие права доступа linux. Например, в первом варианте вы просто добавили флаг выполнения для владельца файла, а все остальные права оставили неизменными. В восьмеричном варианте мы полностью заменили текущие права новыми — все для владельца и чтение/запись для группы и остальных. Как видите, права установлены как и ожидалось. Теперь отключим выполнение владельцем:

Дальше разрешим только чтение всем, кроме владельца:


Файлы с правами 000 недоступны никаким пользователям, кроме суперпользователя и владельца. Вернем права обратно:
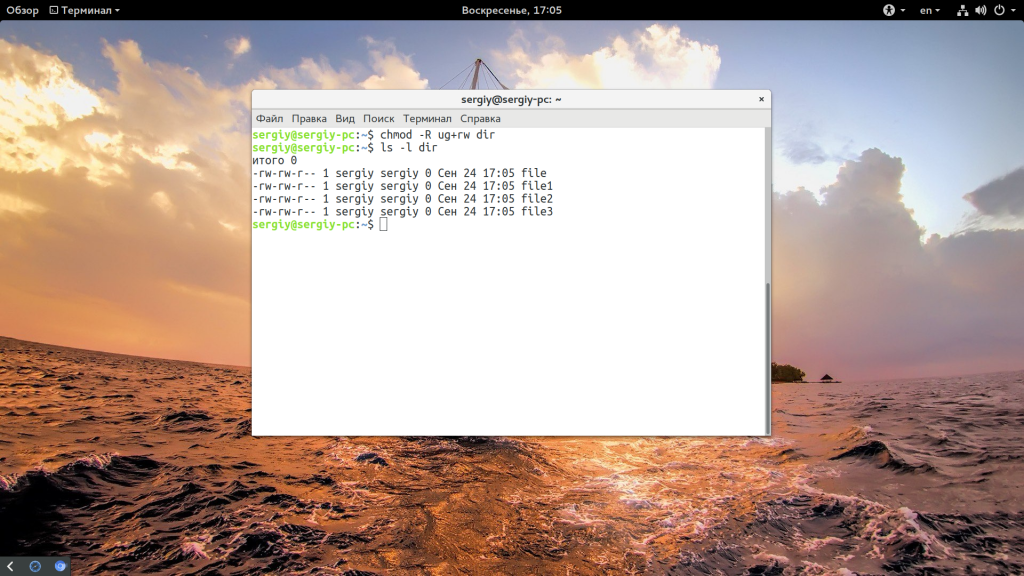
Такая же ситуация с файлами, владельцем которых вы не являетесь, если вы хотите изменить их права — используйте sudo. Из модификаторов прав вы можете конструировать любые последовательности, я думаю тут нет смысла разбирать их все. Для того чтобы поменять права на все файлы в папке используйте опцию -R:
chmod -R ug+rw dir
ls -l dir/
Также вы можете смотреть подробную информацию про вносимые изменения, например:

Выводы
В этой небольшой статье была рассмотрена команда chmod linux. Она очень часто используется наряду с такими командами, как chown и umask для управления правами. Надеюсь, эта информация была полезной для вас. Если у вас остались вопросы, спрашивайте в комментариях!

Обнаружили ошибку в тексте? Сообщите мне об этом. Выделите текст с ошибкой и нажмите Ctrl+Enter.
How to use chmod command in Linux
![]()
The “chmod” command in Linux enables you to control the access of scripts, directories, and your system files. This command is utilized to change the Linux file permissions, which seems a complicated method but is simple once you understand its functionality. Before discussing the chmod command, let’s go through the fundamentals of Linux file permission.
What are file permissions in Linux
File permission is the type of access associated with a file. Each file in Linux has its owner, a group, and permission access for three main types of users: the file owner, the group members, and others. Each of these user classes has three types of file permissions: read, write, and execute permissions. Knowing about the file permission helps you specify which users can execute, read, or write the file.
How to check file permission in Linux
The “ls” is used to check the permission of the files present on your system. To view permission of a single file, add its name to the “ls” command. For instance, we will execute the below-given command to check the file permissions of the “testfile”:
Here, the “-l” option is added to get the content of the “testfile” including its file permissions:
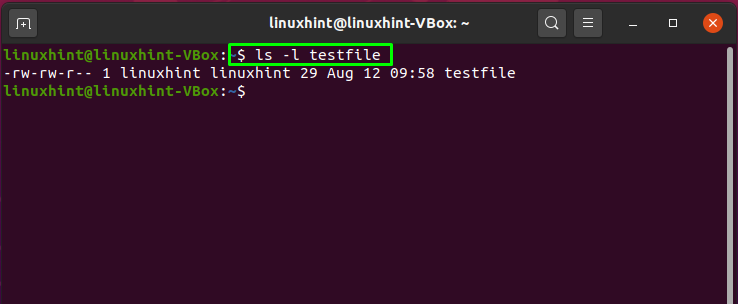
The first character in the output specifies the entry type where “–” represents a “file”, and “d” indicates a “directory”. Then we have, three sets of nine characters, where the first three characters set represent file owner permissions, the next characters set represent group permissions, and the last set represents permissions for other users that are not considered in the first two categories:

Each set of permissions contains three characters. If the character is a dash “–”, it indicates that access permissions are denied. Permission has been given to a user if the character is “r”, “w”, or “x”. The “r” in a permission set indicates that the user only has read permission which means that the file can be only opened and viewed, with “w,” you will have write permission for the specific file, and you will be able to edit, modify and delete the file. Lastly, the “x” letter represents the execute permissions; for instance, if your file is a C++ program or script, it will have the execute permission with the letter “x“.
If the “ls” command shows you “—” for any set, this means that no permission is granted. In another case, “rwx” indicates that all types of permission are granted, including reading, writing, and executing.
Now you have some background related to file permissions, and it will help you understand the chmod command working more efficiently.
What is chmod command in Linux
The “chmod” is an acronym for “change mode”. It modifies the access of your system directories, files, and scripts. The “chmod” command has specific modes that determine the permission for modification. These modes are represented by numerical form (letters) or symbolic form (octal numbers). When you use the chmod command with numerical form, it follows the below-given syntax:
In numerical representation, we have these options:
If you want to use the symbolic representation, then chmod command syntax will be written as follows:
We have the following options in the symbolic form:
Whereas the chmod command accepts the following operators:
- “+”: This operator is utilized to add specified permissions.
- “–”: This operator is utilized to remove specified permissions.
- “=”: This operator is utilized to define the exact file permission for any user.
Now, let’s check out some examples of using the chmod command with symbolic form in Linux:
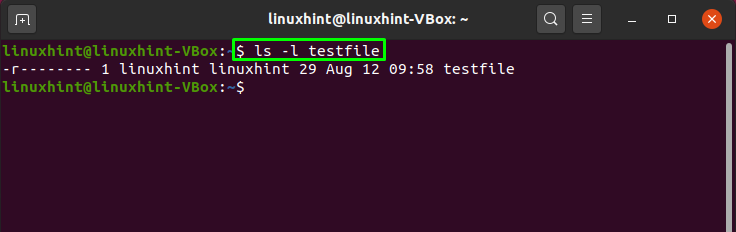
Example 1: Setting “read by owner only” file permission using chmod command
In this example, we will change the file permissions of “testfile” so that only the owner can read it. Other than this permission, no other group or user can read, write or execute this file. Even the owner will not have the access to execute and write something in the file. To do so, use “4” as a numerical representation of “read-only” and place it at the start of three character set, and adding “0” for the “groups” and “others” mode will not grant any permissions to those users:
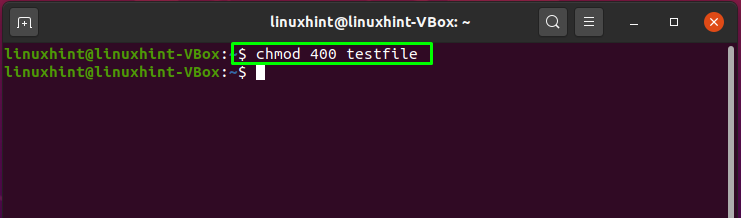
Now, list the file permission system by using the “-l” option in the “ls” command:
The first “–” indicates that “testfile” is a file, and “r” shows that only the file owner has permission to read the file. You can also check that groups and other users do not have any associated permissions:
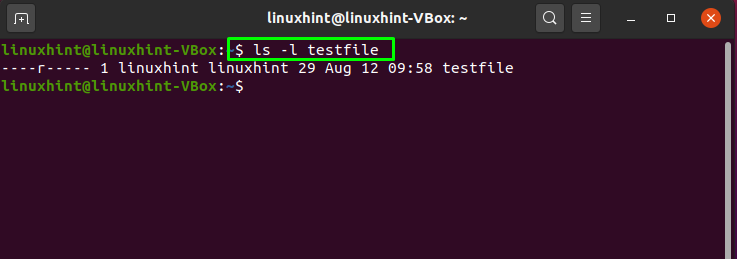
Example 2: Setting “read by group only” file permission using chmod command
Place the “4” as “group” mode between the zeroes of “owner” and “others” mode. This sequence will associate “ready by group only” permission to the file:

Again check out the changes we made into the “testfile” by using the below-given “ls” command:
Here “r” represents the “read” permission:
Similarly, you can allow the “read by others only” file permission by defining the “004” mode in the chmod command.
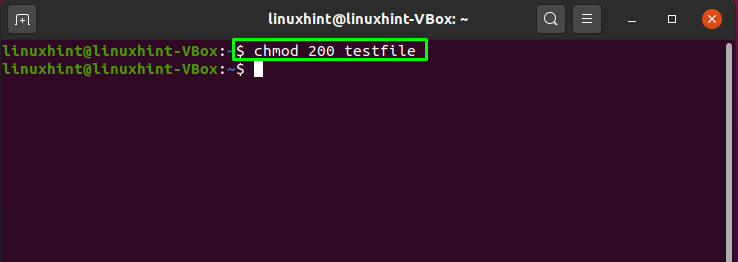
Example 3: Setting “write by owner only” file permission using chmod command
In numerical representation of the modes, “2” indicates the “write” permissions. Place the “2” at the start of the permission set, and add two zeros after that:
Execution of this command will only allow the file owner to write into the test file:
Confirm the changed file permission by using the “ls” command:
Here, “w” represents the “write” permission:
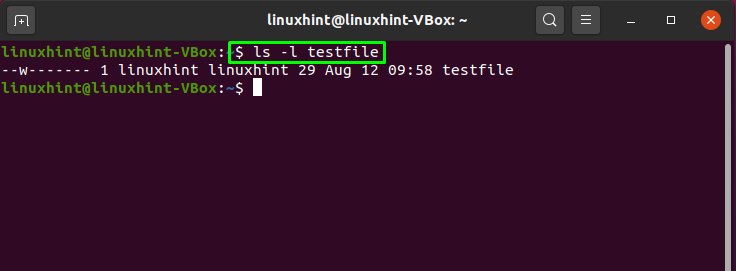
Similarly, you can define the “write by group only” permission with the “020” mode and “write by other only” using the “002” mode.
Example 4: Setting “execute by owner only” file permission using chmod command
In the chmod command, the “1” digit represents the execute mode. If you want to set the “execute by owner only” permission, then execute the below-given command in your terminal:

Again, list out the permission of the “testfile” by using the “ls” command:
Here, “x” represents the “execute permission”:

In the same manner, if you want to change the file permission to “execute by group only,” then define the mode as “010,” and for allowing other users to execute the file, add “001” as permission mode in the chmod command:
Example 5: Setting “read by everyone” file permission using chmod command
Using symbolic links, if you change the file permission to “read by everyone,” then execute the below-given command in your terminal:
Here “a” represents “all users”, “r” indicates “read” permissions, and the “+” operator is used to add the read permission to the specified users:

Check the changed file permission by utilizing the “ls” command:
Example 6: Setting “execute by owner” file permission using chmod command
The “u+x” permission mode indicates that “execute” permission will be granted to the file “owner”:

Now, execute the following to verify the file permission changes:
“x” in the set of owner permission shows that now the file owner has the permission to execute the file:

Conclusion
Setting file permission is a method to restrict the user’s access to a particular file for maintaining its security. In a Linux-based operating system, the chmod command is utilized to change the file permissions. You can easily set these file permissions by using the numeric and symbolic modes. In this article, we have demonstrated various examples of using the chmod command in Linux. We have shown you how to change file permission by utilizing the numerical and symbolic mode of the chmod command.
About the author
Sharqa Hameed
I am a Linux enthusiast, I love to read Every Linux blog on the internet. I hold masters degree in computer science and am passionate about learning and teaching.