- How can I launch the GNOME image viewer from the terminal?
- 4 Answers 4
- Explanation
- Usage
- View Images from the Terminal in Linux
- 1. Overview
- 2. feh
- 2.1. Installation
- 2.2. Using feh
- 3. sxiv
- 3.1. Installation
- 3.2. Using sxiv
- 4. ImageMagick
- 4.1. Installation
- 4.2. Using ImageMagick’s display Tool
- 5. Terminal Image Viewer
- 5.1. Installing tiv
- 5.2. Using tiv
- 6. ranger File Manager
- 6.1. Installing ranger
- 6.2. Using ranger
- 7. Using the Browser as Image Viewer
- 8. GUI Image Viewers
- 9. The xdg-open Tool
- 10. Conclusion
- How Do I Display an Image in a Linux Terminal?
- How to display images in terminal through FIM
- How to display images in terminal using ImageMagick
How can I launch the GNOME image viewer from the terminal?
It’s the default image viewer for Ubuntu, and apparently it’s called Eye of Gnome. I would like to be able to launch it from the command line, passing it a file name to open.
eog is so barebones it can’t display animated GIFs. I use XnViewMP, which on the other hand is a bit slower.
4 Answers 4
The command to use is eog (Eye of GNOME). And you call it like so:
which opens a file or URL in the user’s preferred application.
Explanation
As long as you use Gnome and eog is your default image viewer, you can use gnome-open :
If you want an alternative that is independent of the desktop environment, use xdg-open which is bash wrapper around environment-specific commands.
- Xfce ( exo-open «$1» ),
- Gnome ( gvfs-open «$1» , gnome-open «$1» with fallback to generic open),
- KDE ( kde-open «$1» with fallback to kfmclient exec «$1» ),
- Mate ( gvfs-open «$1» , mate-open $1 ),
- LXDE ( pcmanfm $1 with fallback to generic open),
- Enlightenment ( enlightenment_open $1 ),
- Cinnamon ( open_gnome3 $1 , which is gvfs-open «$1» with fallback to generic open),
- Cygwin ( cygstart «$1» ),
- Darwin ( open «$1» ).
and tries its luck with other desktop environments (called generics). $1 is your image filename.
Usage
If you want to figure out how xdg-open works, you can read bash source code:
$ locate xdg-open /usr/bin/xdg-open /usr/share/man/man1/xdg-open.1.gz $ less /usr/bin/xdg-open View Images from the Terminal in Linux
![]()
The Kubernetes ecosystem is huge and quite complex, so it’s easy to forget about costs when trying out all of the exciting tools.
To avoid overspending on your Kubernetes cluster, definitely have a look at the free K8s cost monitoring tool from the automation platform CAST AI. You can view your costs in real time, allocate them, calculate burn rates for projects, spot anomalies or spikes, and get insightful reports you can share with your team.
Connect your cluster and start monitoring your K8s costs right away:
1. Overview
The open-source community offers plenty of image viewers for both raster and vector graphics, ranging from lightweight image viewers to highly configurable graphics manipulation programs.
In this article, we’ll be going through several tools for the sole purpose of viewing images from the Linux command line.
2. feh
feh is a minimal tool for viewing raster images from the command line. We don’t need any fancy desktop environments or window managers for it to run because it only uses the X Window System. By default, it doesn’t ship with most Linux distributions, so we’ll need to install it ourselves.
2.1. Installation
The feh package should be available in our package repository, so we can install it through apt or yum. Once feh is installed, we can verify it through:
$ feh --version feh version 3.7 Compile-time switches: curl exif inotify help stat64 verscmp xinerama 2.2. Using feh
Using feh is dead simple. We merely type feh followed by a path(s):
Alternatively, we can also provide multiple paths or a directory:
Moreover, we can also view image(s) using a URL:
$ feh https://www.baeldung.com/wp-content/uploads/2018/02/photo-eugen.pngfeh doesn’t have any GUI controls, but we can use left and right arrow keys to navigate through images. For zooming in and out, we can use the up and down arrow keys.
3. sxiv
sxiv is a lightweight and extendable image viewer. It stands for Simple X Image Viewer.
3.1. Installation
The sxiv package is available in most official package repositories. As usual, we can install the package with apt or yum. Once installed, go ahead and verify that sxiv has been installed successfully:
3.2. Using sxiv
We can use sxiv the same way we use feh:
sxiv has built-in GIF support as well:
$ sxiv -A 10 ~/Pictures/flower.gifThe -A flag stands for animate, which expects the FPS value. Therefore, the above image will display 10 frames per second. Like feh, we can also feed a directory to sxiv:
- The -f flag will start sxiv in full-screen mode
- The -S argument will start the viewer in the slideshow mode with a five-second delay between images
Alternatively, we can use the mouse to navigate through images and + / – keys for zooming in and out.
4. ImageMagick
ImageMagick is a collection of tools for carrying out operations on raster images. It comes with a lot of handy utilities that we can use independently.
4.1. Installation
Some of the Linux distributions come with ImageMagick pre-installed. However, we can search and install the imagemagick package if it’s not installed using apt or yum. Let’s verify that imagemagick has been installed successfully:
$ display --version Version: ImageMagick 7.1.0-2 Q16 x86_64 2021-06-25 https://imagemagick.org Copyright: (C) 1999-2021 ImageMagick Studio LLC4.2. Using ImageMagick’s display Tool
ImageMagick comes with a display utility that we can use to display our images:
We can give display any number of image paths to display in sequence:
$ display ~/Downloads/img_1.png ~/Downloads/img_2.png 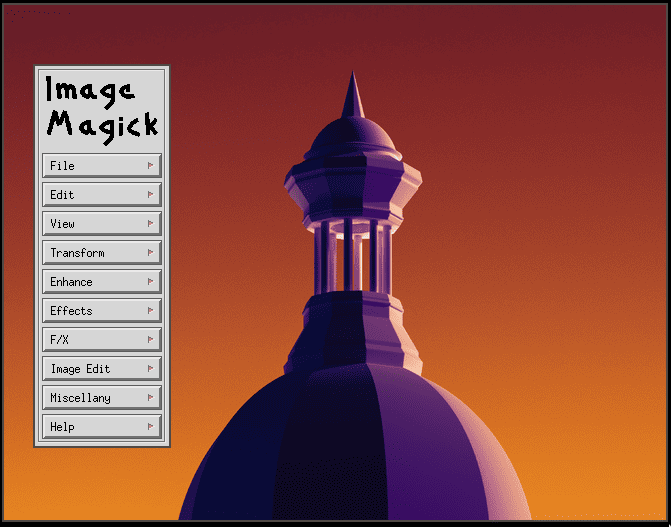
It also comes with a classic user interface that we can use to carry out a variety of image operations. For instance, if we want to rotate the image, we can simply press the mouse button over the image and select Transform > Rotate Right.
5. Terminal Image Viewer
Terminal Image Viewer is a fun tool that displays images inside modern terminals. While it’s not available in most package repositories, we can compile and install it ourselves using g++ and make.
5.1. Installing tiv
We’ll start by cloning the official repository using git:
$ git clone https://github.com/stefanhaustein/TerminalImageViewer.gitNext up, we’re going to compile it and then install it, which requires both g++ and make to be installed on our machine:
$ g++ --version g++ (GCC) 11.1.0 Copyright (C) 2021 Free Software Foundation, Inc. $ make --version GNU Make 4.3 Built for x86_64-pc-linux-gnu Copyright (C) 1988-2020 Free Software Foundation, Inc. $ cd TerminalImageViewer/src/main/cpp $ make $ sudo make install install -D tiv /usr/local/bin/tiv5.2. Using tiv
Once installed, we can view the images inside our terminal using the following syntax:
By default, it expects only a single file path. Nevertheless, we can specify multiple paths by providing the -f flag:
$ tiv -f ~/Downloads/flower1.jpg ~/Downloads/flower2.jpgFurthermore, we can also specify the line size and character size using the -h and -w flags, respectively:
$ tiv -w 64 -h 32 ~/Downloads/myimage.jpg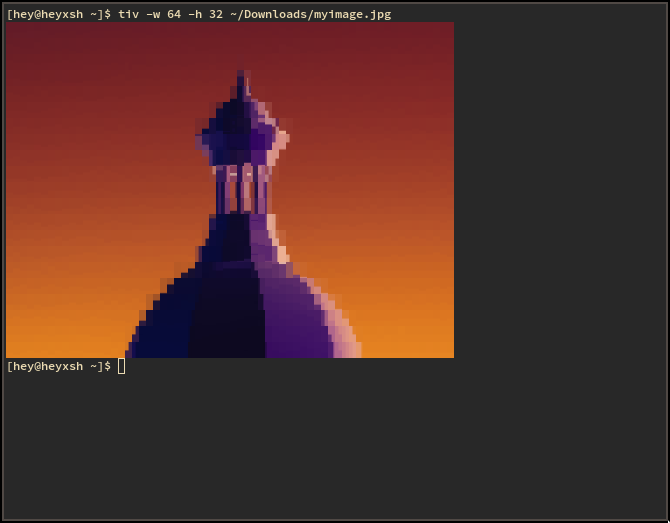
6. ranger File Manager
ranger is a powerful TUI file manager that is also capable of previewing images inside the terminal.
6.1. Installing ranger
The ranger package is available on most package repositories. However, we can use the pip tool to install it. Since Python is installed on most Linux machines, we’ll use pip to install the latest version of ranger:
$ sudo pip install ranger-fmOnce ranger is installed, verify it by running the following command:
$ ranger --version ranger version: ranger 1.9.3 Python version: 3.9.6 (default, Jun 30 2021, 10:22:16) [GCC 11.1.0] Locale: en_US.UTF-8Now that we have ranger installed, we need one more additional package called w3m for the image previews to work. The w3m package is available in most official repositories and can be installed with yum or apt.
6.2. Using ranger
To launch ranger, simply type the ranger command:
After it starts, we can navigate to our images directory with the h, j, k, and l keys. Once we highlight the image we want to preview, we can notice that it doesn’t quite work the way we expected. That’s because ranger has image previews disabled by default.
Like Vim, Ranger has a command-mode feature, through which we configure the behavior of the file manager. Simply press the “:” key to enter command mode, then type in the command to enable image previews:
If we’d like the configuration to persist, we can simply save it in the ~/.config/ranger/rc.conf file:
$ echo "set preview_images true" >> ~/.config/ranger/rc.confNow, we’ll be able to preview our images inside ranger.
Additionally, we can install the ueberzug package from the Python Package Index repository if we run into issues with w3m.
7. Using the Browser as Image Viewer
Modern browsers are capable of viewing images, though it consumes more resources if we want to view an image. Therefore, it should be our last resort. For Mozilla Firefox, type the firefox command followed by the image path:
$ firefox ~/Downloads/myimage.png In the same way, for other browsers, we can use the appropriate browser name followed by the image path:
$ opera ~/Downloads/myimage.png $ google-chrome ~/Downloads/myimage.png $ brave ~/Downloads/myimage.png $ chromium ~/Downloads/myimage.png 8. GUI Image Viewers
Most desktop environments such as GNOME, KDE, and XFCE come with image viewers as goodies. If we’re using a desktop environment, we can simply launch the image viewer package from the command line. For instance, on GNOME, we can use eog:
Similarly, for other desktop environments, we can enter the program name followed by image path(s) or directory:
$ gwenview ~/Downloads/ $ ristretto ~/Downloads/ $ eom ~/Downloads/9. The xdg-open Tool
Sometimes on Linux, we might not be sure what kind of image viewer is installed on our Linux system. For that reason, we can use the xdg-open tool, which will open the image in our preferred program:
$ xdg-open ~/Downloads/myimage.pngHowever, if it doesn’t find an appropriate program to process the file, it will exit with status code 3.
10. Conclusion
In this article, we looked at different tools we can use to open images from our command line.
We went through several tools, which are specifically designed for command-line. Next, we looked at using the ranger file manager and also using browsers to open image files. Finally, we got familiar with the helper utility xdg-open.
How Do I Display an Image in a Linux Terminal?
![]()
Did you know our brain interprets images much more swiftly compared to text? Well, Digital media is one of the key elements of computer systems now. Being a Linux user, I try to perform most of the operations through the terminal using commands. The majority of the tasks in the terminal are text-based; I can read, edit text files, but I had no idea how to display images in the terminal. Is it even possible to view images while using the terminal? Well, luckily, the answer is yes! Images can appear in the terminal using commands.
There are various GUI-based applications in Linux distributions to view images, but many Linux users prefer to work with the terminal. This guide is going to mention few techniques to display images in the terminal. These methods would be quite helpful for those who are searching for CLI (Command Line Interface) based applications to view images. So, let’s begin:
How to display images in terminal through FIM
The first method to view pictures in the terminal is FIM, an open-source, highly customizable image viewer application. FIM represents Fbi IMproved, and Fbi is “frame buffer image viewer” in Linux. FIM is lightweight compared to many GUI-based applications and comes with various shortcut keys to control images. Common file formats FIM supports are jpeg, png, gif, ppm, tiff, and xwd. To install it, use the commands mentioned below:
For Ubuntu and Debian based distros, FIM can be installed using:
The syntax to display image in terminal is:
Now, to display the image in the terminal, use:

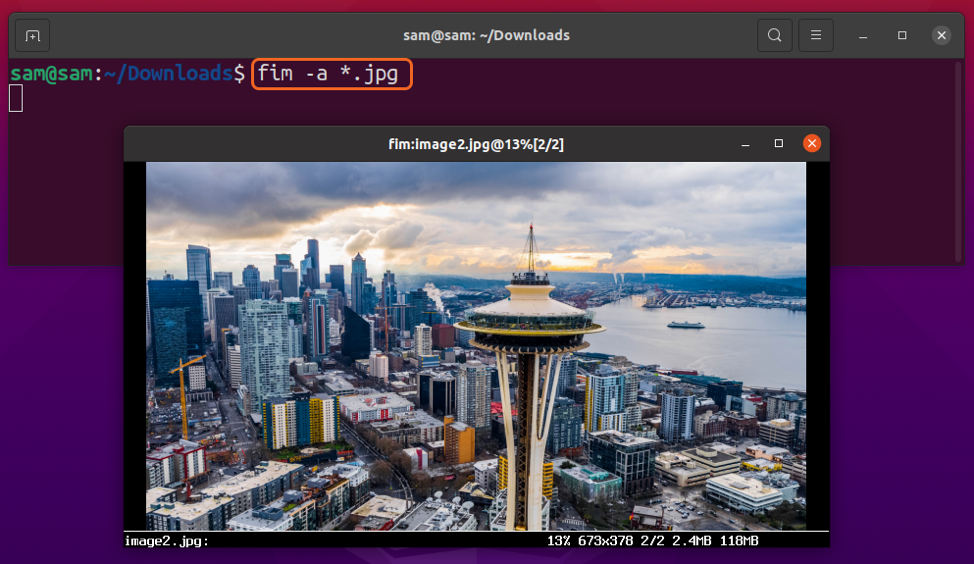
To display all the images of the same extension, use:
The keyboard shortcuts to control image are listed below:
How to display images in terminal using ImageMagick
Most Linux users are aware of the “ImageMagic” utility. It is a lightweight application to manipulate images of hundreds of formats, including jpeg, png, gif, pdf, svg, etc. It can even convert the images from one format to another.
But many of us don’t know that there is a command associated with this app called the “display” command. Using the “display” command, you can view the image in the terminal. To install it, use the below-mentioned commands:
For Ubuntu/Debian based distros:

For CentOS 8, Red Hat (RHEL), and Fedora: