- Установка и использование Legion на Kali Linux
- Что такое Legion
- Установка Legion на Kali Linux
- Использование Legion на Kali Linux
- Legion: The best all in one network mapping tool 💖
- Video:
- What is Legion tool 🤔
- Who developed the legion tool ❓
- Example2: Load Legion
- Example4: Scanning
- Conclusion
- Packages and Binaries:
- Legion — Test Web Application Vulnerability Automatically
Установка и использование Legion на Kali Linux
Помните популярную тулзу для пентестов Sparta? Раньше она была установлена в Kali Linux по умолчанию, но разработчики Kali удалили Sparta, из-за старой версии Python (Python2) и вместо нее появился форк Legion. Далее покажу, как установить и использовать Legion на Kali Linux.
Что такое Legion
Legion — это простой в использовании инструмент с GUI на основе Python, который предназначен для полуавтоматического тестирования на проникновение. Если коротко, то Legion — это улучшенная версия Sparta.
Возможности Legion:
- Разведка и сканирование с помощью популярных инструментов NMAP, whataweb, nikto, Vulners, Hydra, SMBenum, dirbuster, sslyzer, webslayer и т.д.
- Простой в использовании GUI с удобным контекстными меню и панелями, которые позволяют этичным хакерам быстро находить и использовать различные векторы атак.
- Модульность позволяет быстро настроить Legion под себя и автоматически вызывать свои скрипты и различные инструменты.
- Настройка сканирования для уклонения от IPS.
- Автоматическое обнаружение CPE и CVE.
- Связывает CVE с эксплойтами, как описано в Exploit-Database.
- Автосохранение результатов проекта и задач в реальном времени.
Установка Legion на Kali Linux
Legion по умолчанию установлен на Kali Linux, но если вы используете урезанную версию, то вот как его установить:
Использование Legion на Kali Linux
Теперь можно запустить Legion с помощью команды:

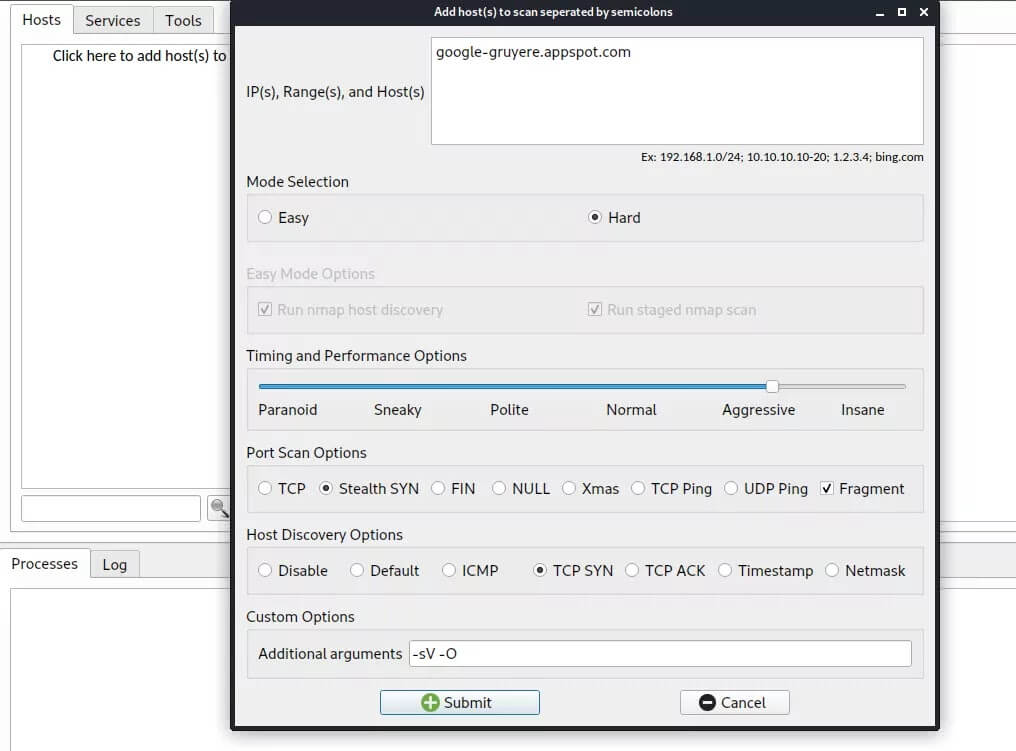
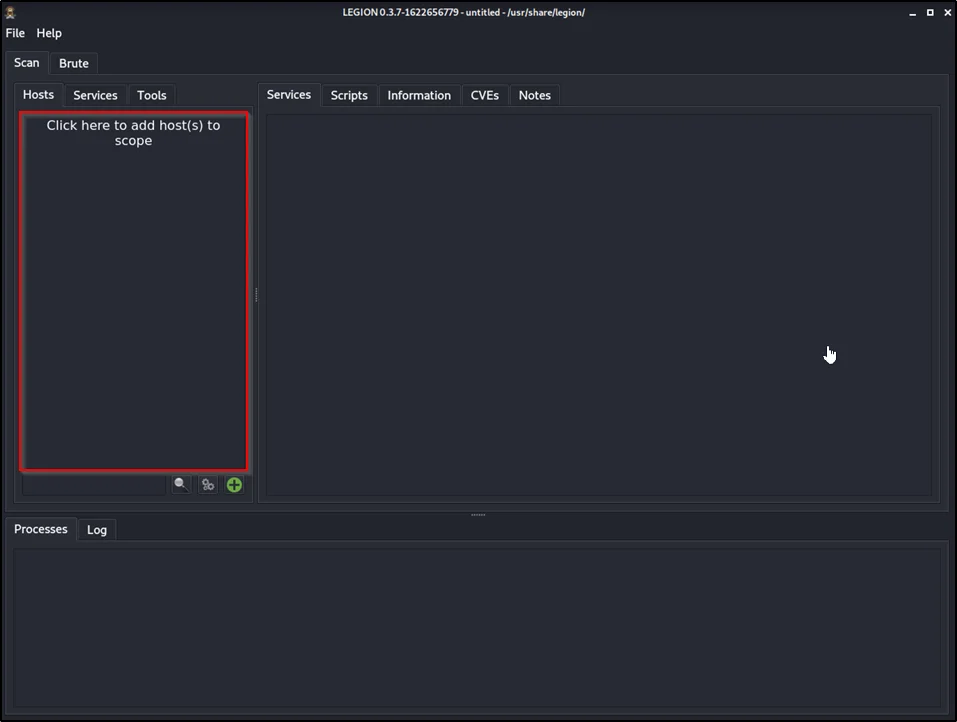
Добавить хосты (целевой IP-адрес или веб-адрес) можно на вкладке Hosts.
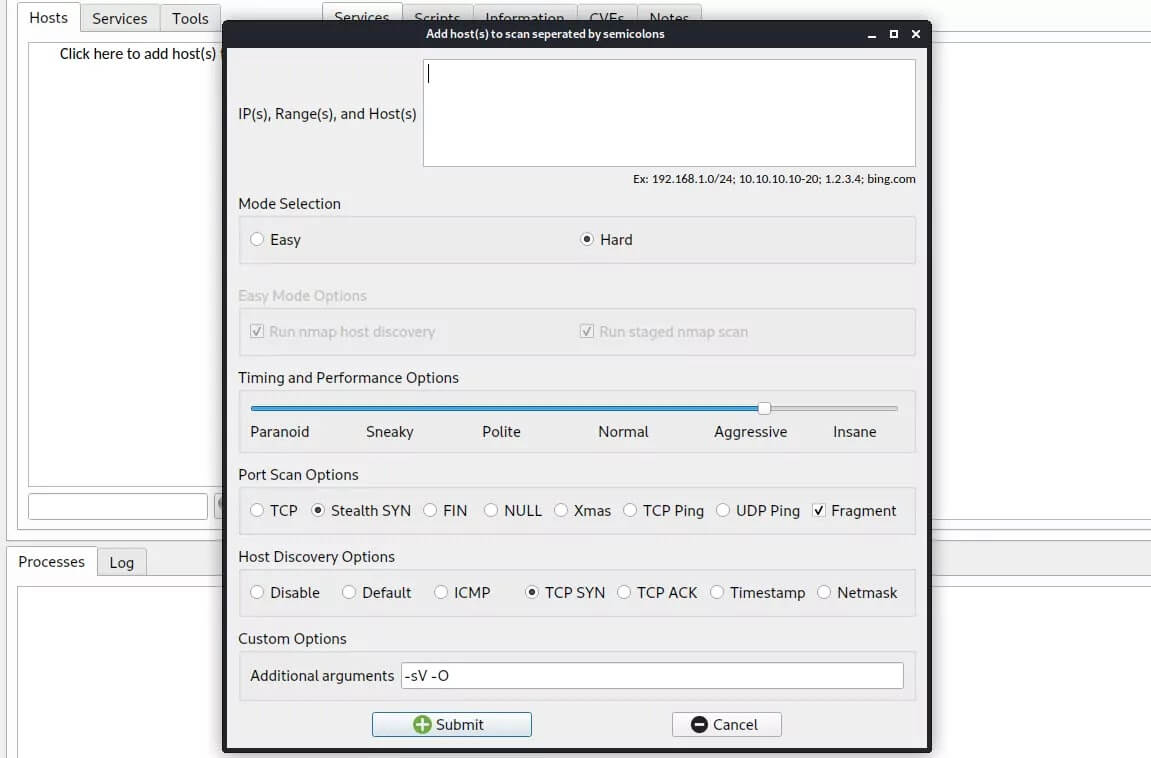
Можно добавить один или несколько хостов для сканирования. Один IP-адрес, диапазон IP-адресов или имена хостов. Чтобы добавить несколько целей, необходимо разделить их точкой с запятой.
В поле Mode Selection (Выбор режима), выберите способ сканирование Easy или Hard (легкий или сложный).
В режиме Easy доступна опция сканирования Nmap. Я буду использовать Hard. Здесь мы включаем обнаружение хоста Nmap и поэтапное сканирование.
В режиме Hard есть дополнительные параметры настройки, такие как настраиваемое сканирование портов, обнаружение хоста и настраиваемые параметры обнаружения.
Поле Timing and Performance Options (Параметры времени и производительности), отвечает за скорость сканирования. Соответственно чем выше производительность тем быстрее процесс.
Попробуем запустить сканирование IP-адреса пользовательским сканированием и обнаружением хоста. В дополнительных аргументах Custom Options, используем параметры:
Выбрав настройки, нажимаем Submit (Отправить). После чего Legion начнет сканирование IP-адреса или веб-адреса с помощью Nmap, а затем запустит Nikto. Тулза начнет проверку с помощью различных автоматизированных инструментов, таких как Shodan, whataweb, Vulners, Hydra, SMBenum, dirbuster, sslyzer, webslayer и других (почти 100 скриптов). Он также может найти уязвимости CVE.
Для каждого инструмента используемого Legion будет открыта своя вкладка.

Legion — отличный инструмент для тестирования на проникновение. Он позволяет выполнить автоматическое сканирование и найти уязвимости в веб-приложениях и хостах. Для дополнительной информации, посетите официальный репозиторий https://github.com/GoVanguard/legion.
ПОЛЕЗНЫЕ ССЫЛКИ:
Legion: The best all in one network mapping tool 💖
In this post, you will learn what is legion and a full tutorial on the legion tool and also below 👇 is the video format of the legion tool check it 🍻.
Video:
What is Legion tool 🤔
Legion is an OSINT tool used for mapping and information gathering and this is the best tool for beginners to do network mapping.
The favourite part is the tool is in GUI format and why not everyone will like to work with GUI format…
Who developed the legion tool ❓

Example2: Load Legion
To load the tool enter legion on terminal
Once you click you will see GUI like this 👇🏽

In the above image we are going with easy mode, Firstly enter IP or domain name on the target, Next, choose the mode I selected easy. Only if you select easy mode the easy mode option will be chosen.
Now select the host discovery and staged Nmap scan.
Next, select the time speed of the scan, I am going with normal use drag to set the time speed.
The scan will run and display the info 🔻

So, this is how to do a scan using legion tool and top you could find various features just go through it which are pretty simple.
Example4: Scanning
To do a hard scan just enter the target in the box, you can also enter multiple targets and then choose hard as the mode.

Once you select hard you can choose the scan you wanna scan, An amazing feature and also down below you can enter your custom nmap command.
This is how to do a hard scan in the legion tool
To learn more about the tool watch the video I made on Legion the video will be at the top of the post.
Conclusion
According to my knowledge, this is an amazing tool for beginners and this tool is dependent on others so, better learn here and move to advance tools like nmap. 🖐
I have already made a full tutorial on nmap [click here]
Packages and Binaries:
This package contains an open source, easy-to-use, super-extensible and semi-automated network penetration testing tool that aids in discovery, reconnaissance and exploitation of information systems.
Legion is a fork of SECFORCE’s Sparta.
Installed size: 3.12 MB
How to install: sudo apt install legion
- cutycapt
- figlet
- finger
- hping3
- hydra
- ldap-utils
- medusa
- nbtscan
- nfs-common
- nikto
- nmap
- python3
- python3-aiohttp
- python3-aioredis
- python3-apscheduler
- python3-colorama
- python3-impacket
- python3-pandas
- python3-pyexploitdb
- python3-pyfiglet
- python3-pyqt5
- python3-pyshodan
- python3-quamash
- python3-service-identity
- python3-six
- python3-sqlalchemy
- python3-termcolor
- rpcbind
- rwho
- smbclient
- sparta-scripts
- sqlmap
- sslscan
- wapiti
- whatweb
- x11-apps
- xauth
- xsltproc
- xvfb
legion
[email protected]:~# legion -h _ _____ ____ ___ ___ _ _ | | | ____/ ___|_ _/ _ \| \ | | | | | _|| | _ | | | | | \| | | |___| |__| |_| || | |_| | |\ | |_____|_____\____|___\___/|_| \_| Legion — Test Web Application Vulnerability Automatically
Legion is an Open-Source and easy to use python based GUI tool that can helps in network penetration testing. Legion is a upgraded version of Sparta. Previously Sparta comes pre-installed with Kali Linux, Now Kali removed Sparta because of it’s older Python version(Python2).
- Automatic recon and scanning with NMAP, whataweb, nikto, Vulners, Hydra, SMBenum, dirbuster, sslyzer, webslayer and more (with almost 100 auto-scheduled scripts).
- Easy to use graphical interface with rich context menus and panels that allow pentesters to quickly find and exploit attack vectors on hosts.
- Modular functionality allows users to easily customize Legion and automatically call their own scripts/tools.
- Highly customizable stage scanning for ninja-like IPS evasion.
- Automatic detection of CPEs (Common Platform Enumeration) and CVEs (Common Vulnerabilities and Exposures).
- Ties CVEs to Exploits as detailed in Exploit-Database.
- Realtime autosaving of project results and tasks.
sudo apt-get install legion -y
Now we can run Legion’s graphical interface by using following command:

Here in input section we have an option to add hosts (target IP or web address). When we click on it we got following window like the screenshot:
Here we can add single or multiple host(s) for scanning. We can add a single IP, range of IPs or host names in the section. To add multiple target we need to separate them with semicolon.
Then we need to choose the ‘Mode Selection’, Easy or Hard.
For this example we choose ‘Hard’, in the ‘Easy Mode’ we got the nmap scanning option. Here we turn on the nmap host discovery and staged scan.
In the ‘Timing and Performance Options’ if we choose a higher performance option takes more time in compared to lower performance options.
In ‘Hard Mode’ we get additional customizing options like custom port scanning, host discovery, and custom discovery options.
For this tutorial we have selected a IP with custom scanning & host discovery. In the additional arguments we are using -sV and -O options. -sV flag is used for service version and -O flag is for OS detection.
Then we just need to click on «Submit». Legion will do the rest. First it will scan the IP or web address with nmap then it run Nikto on the targeted IP or web address. Legion will test with various tools automated like Shodan, whataweb, Vulners, Hydra, SMBenum, dirbuster, sslyzer, webslayer and more (with almost 100 auto-scheduled scripts).
We got a Tab on Legion for every tool used and it is also able to find CVE. It will show us the CVE if available. So this Legion is GUI based very easy tool for every penetration tester.
| Legion scans using nikto after completing nmap scan |
Legion is a good tool for penetration testing. Using this we can do some automatic scanning and find vulnerabilities on web applications.
For more tutorials like this follow our website to get e-mail notification of our recent updates. We also update our tutorials on our social media as Twitter & Medium.