- How to Install Linux Mint 21 Xfce Edition Step-by-Step
- Linux Mint 21 Features & Updates
- System Requirements for Linux Mint 21
- Step 1) Download Linux Mint 21 Xfce Edition ISO file
- Step 2) Boot System using Bootable USB Stick
- Step 3) Choose Language for Installation
- Step 4) Select Keyboard Layout
- Step 5) Install Multimedia Codecs
- Step 6) Choose Installation Type
- Step 7) Choose Your Preferred Timezone
- Step 8) Enter Local User Details
- Step 8) Linux Mint 21 Installation Started
- Step 9) Login Screen and Desktop Environment
- Новые функции и установка Linux Mint 21 XFCE Edition
- Что нового в Linux Mint 21?
- Предпосылки
- Шаг 1. Загрузите ISO-образ Linux Mint 21 XFCE
- Шаг 2. Установка рабочего стола Linux Mint 21 XFCE
- Installation and Review of Linux Mint 20.3 XFCE
- Installation of Linux Mint XFCE Edition
- Configure System BIOS
- Installing Linux Mint XFCE
- Reviewing Linux Mint XFCE
- Takeaway
How to Install Linux Mint 21 Xfce Edition Step-by-Step
Are you looking for an easy guide for Linux Mint 21 Installation?
The step-by-step guide on this page will show you how to install Linux Mint 21 Xfce Edition along with screenshots.
The much-awaited Linux Mint 21 operating system has been released, this is a LTS release (Long Term Support) and will get support and updates until 2027. Vanessa is the code name for Linux Mint 21, it is based on Ubuntu 22.04 and comes with three different desktop environments like Cinnamon, Mate and Xfce.
Linux Mint 21 Features & Updates
- New Linux Kernel 5.15
- Introduction of Blueman for connecting Bluetooth devices
- Improved Thumbnails
- Artwork Improvements
- Sticky notes support duplicate notes
- Timeshift is maintained as XApp.
System Requirements for Linux Mint 21
- 2 GB RAM or more
- 20 GB free hard disk space or more
- 64-bit Dual core processor or more
- Bootable Media (USB Stick)
- Internet Connectivity (Optional)
Without any further delay, let’s jump into Linux Mint 21 Xfce Edition installation steps.
Step 1) Download Linux Mint 21 Xfce Edition ISO file
Use the following official web portal to download ISO file.
Once ISO file is downloaded, make a bootable USB stick using the ISO file. On Linux desktop use following to create bootable USB,
On windows system, use Rufus software to make bootable USB using ISO file.
Step 2) Boot System using Bootable USB Stick
Reboot the system on which you want to install Linux Mint 21, change the boot medium from hard disk to USB from it’s bios settings.
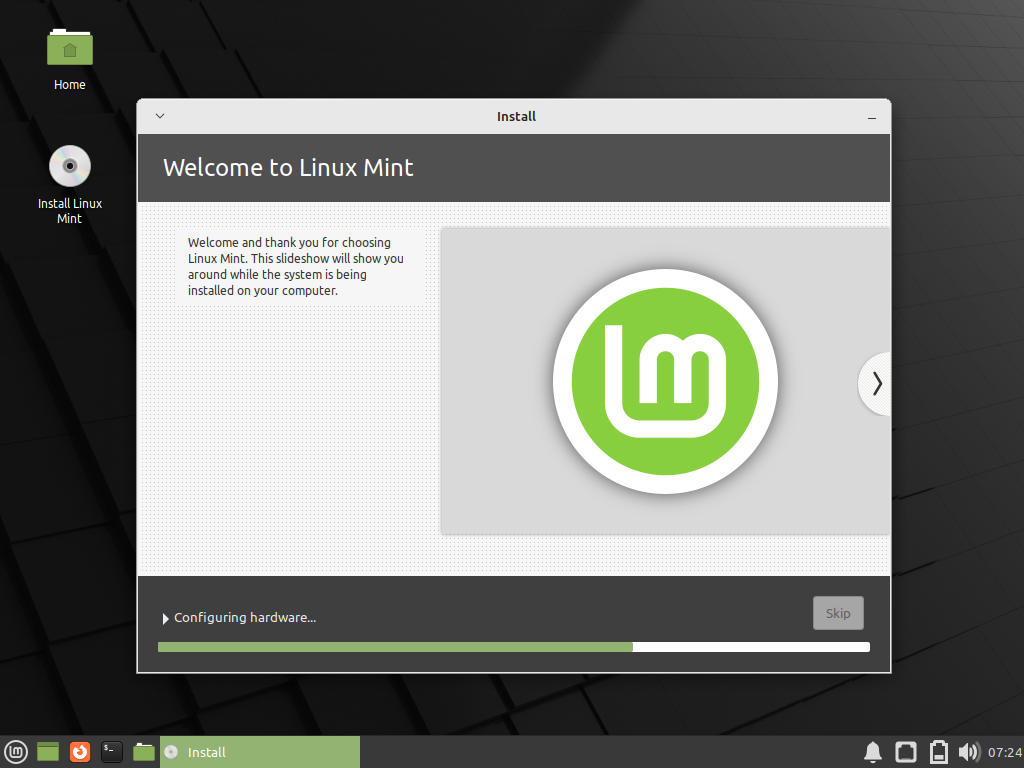
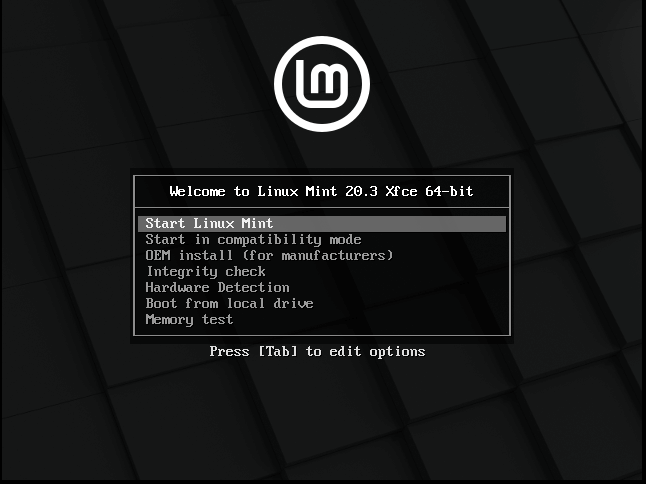
When the system boots up with bootable USB stick, we will get following beneath screen.
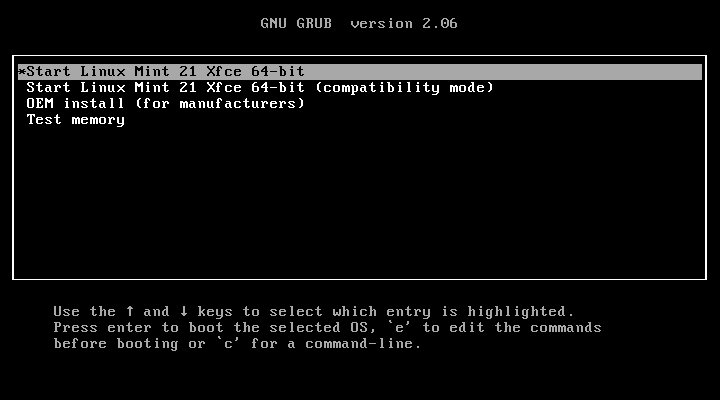
Select the first option ‘ Start Linux Mint 21 Xfce 64-bit ’ and press enter then we will be presented the following screen,
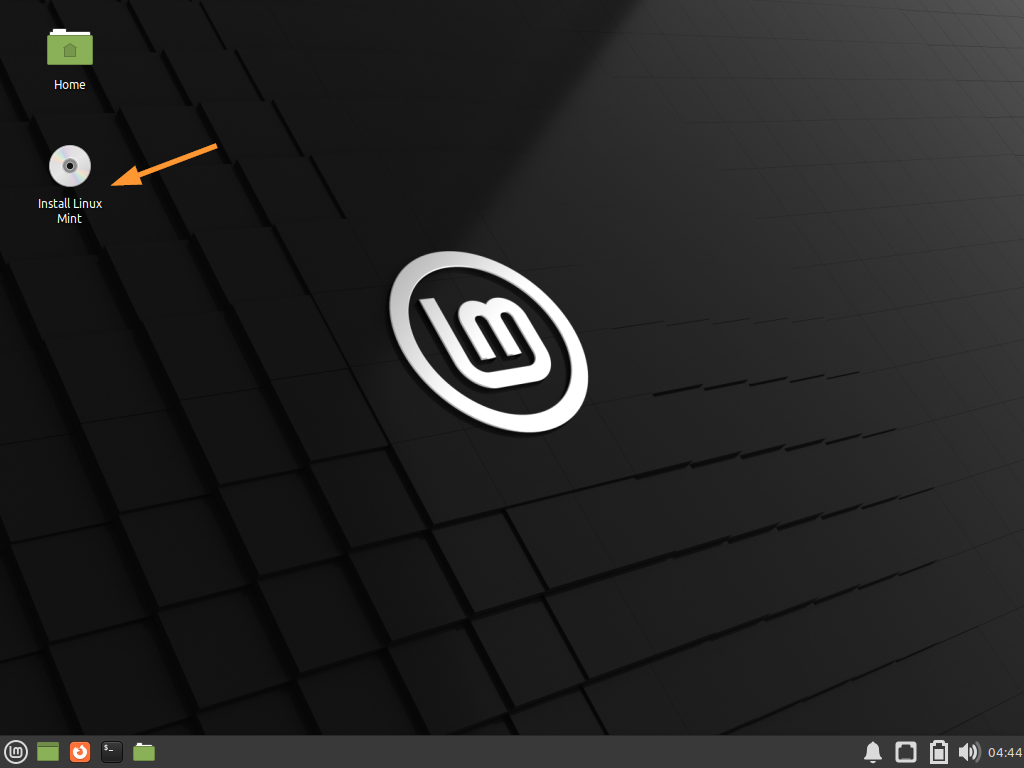
Double Click on ‘ Install Linux Mint ’
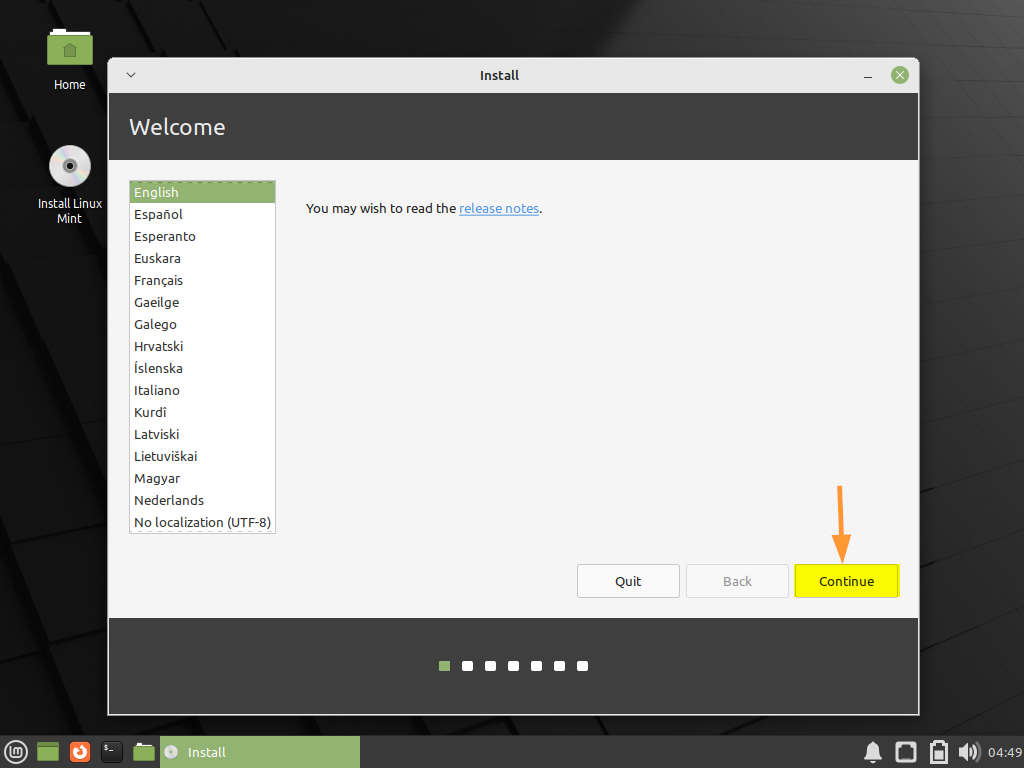
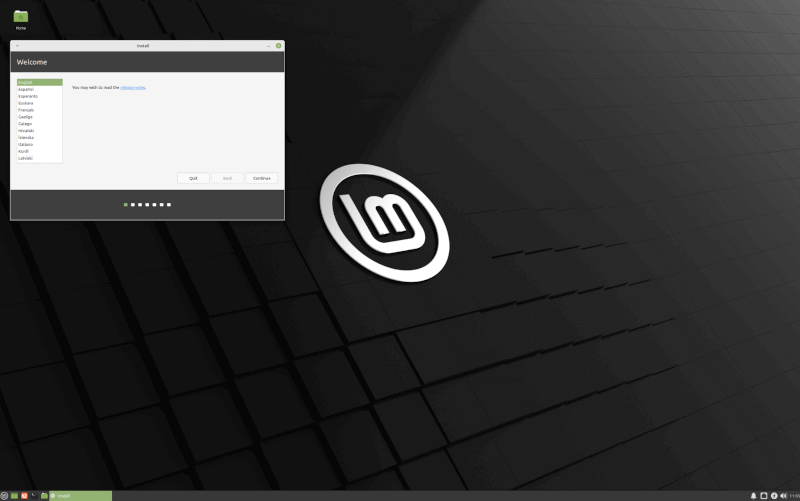
Step 3) Choose Language for Installation
Choose your preferred language and click Continue
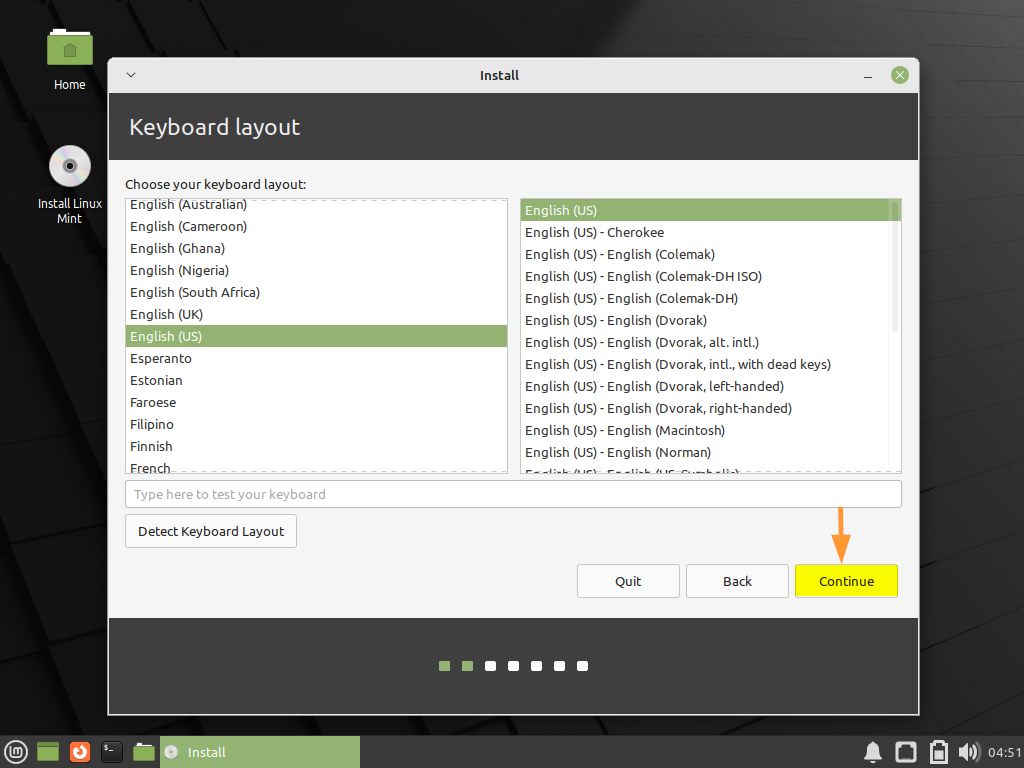
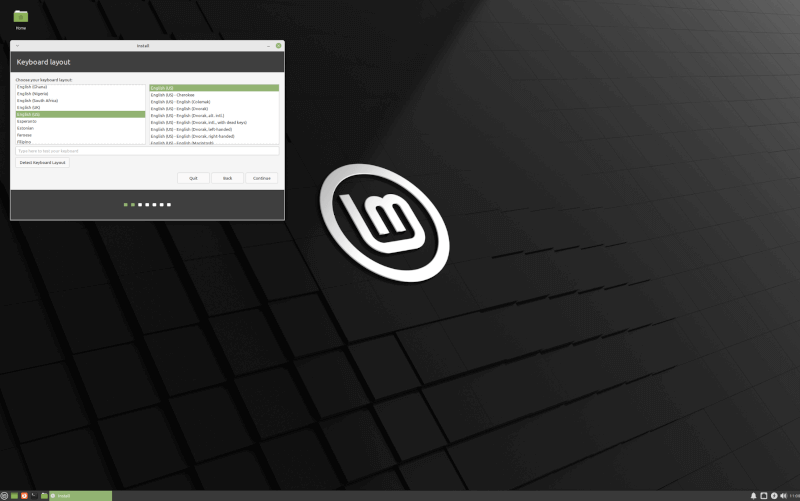
Step 4) Select Keyboard Layout
Select the keyboard layout as per your setup and then click on Continue
Step 5) Install Multimedia Codecs
This step is optional if you want to install multimedia codecs and system is connected to internet then click on the checkbox, else you can skip it.
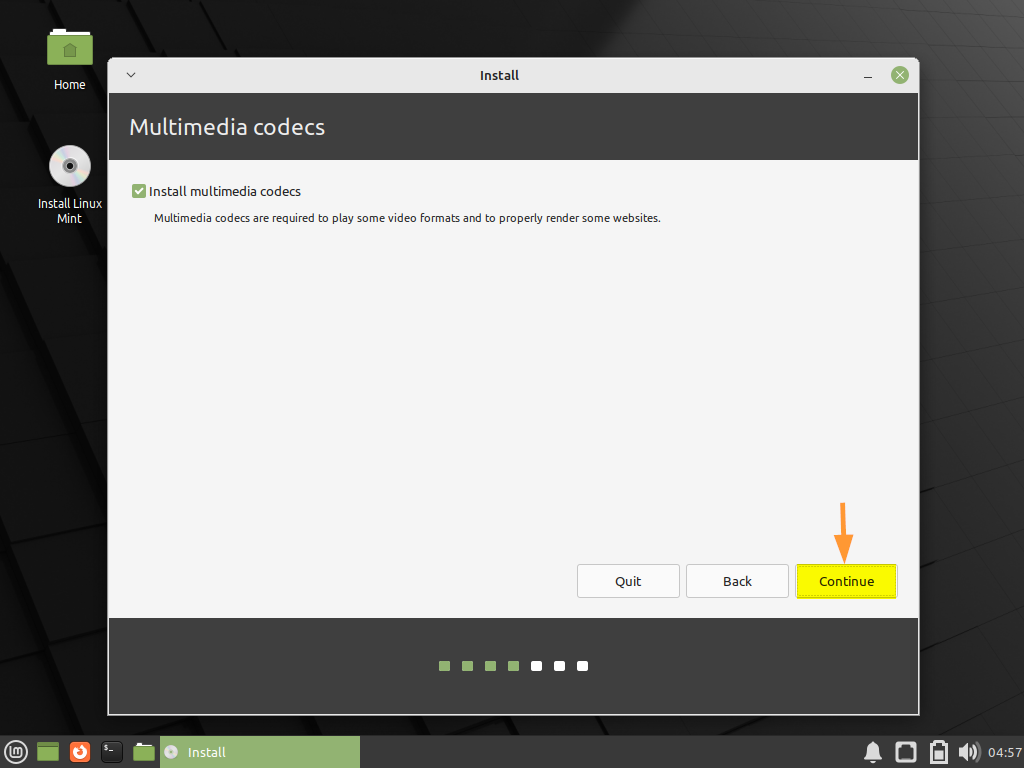
Click on Continue to proceed further
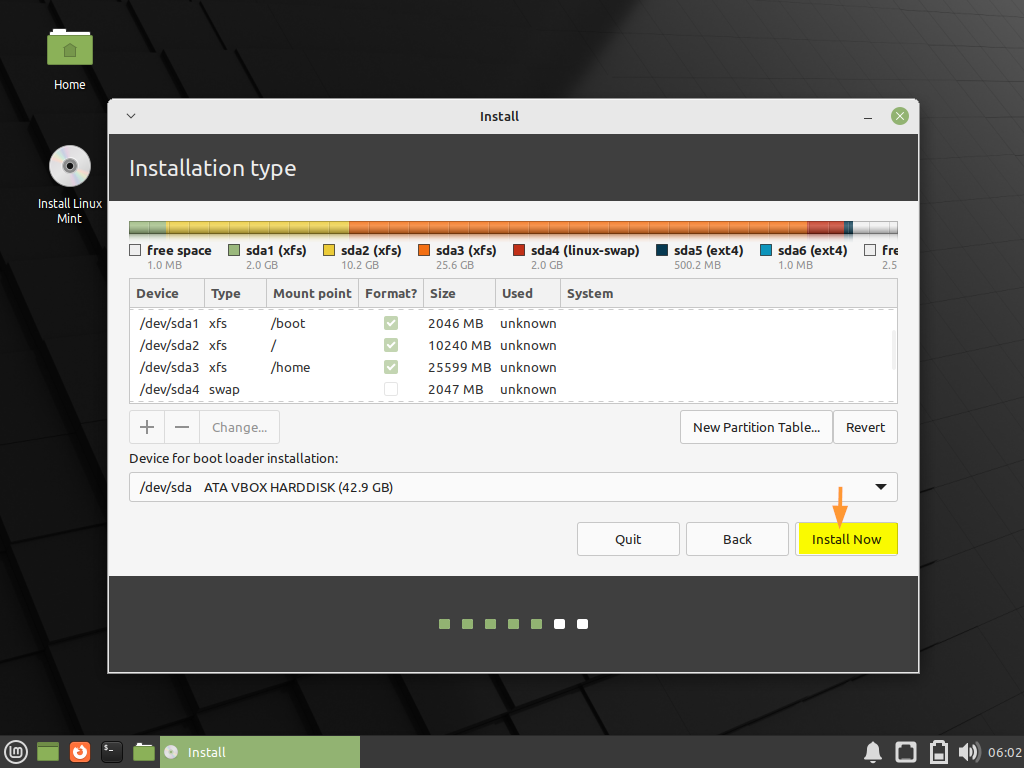
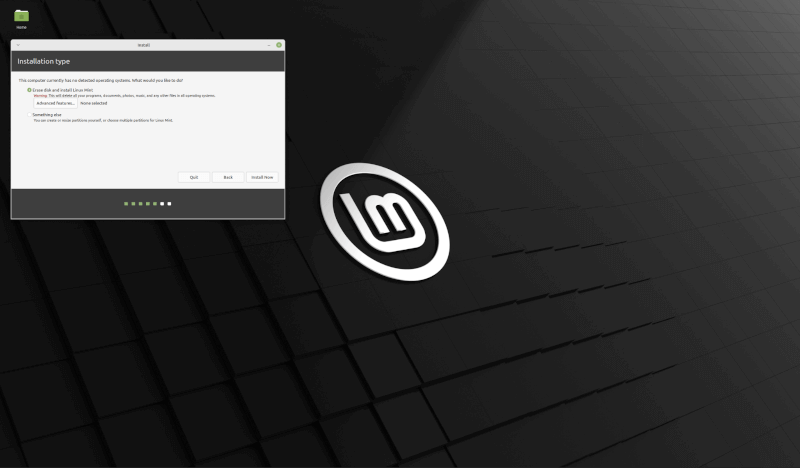
Step 6) Choose Installation Type
On this step, you are required to choose the installation type, basically there are two types,
- Erase disk and Install Linux Mint : In this type, installer will erase all the data on disk and will create partitions automatically for you.
- Something else : Using this, we can create manual partitions as per our need.

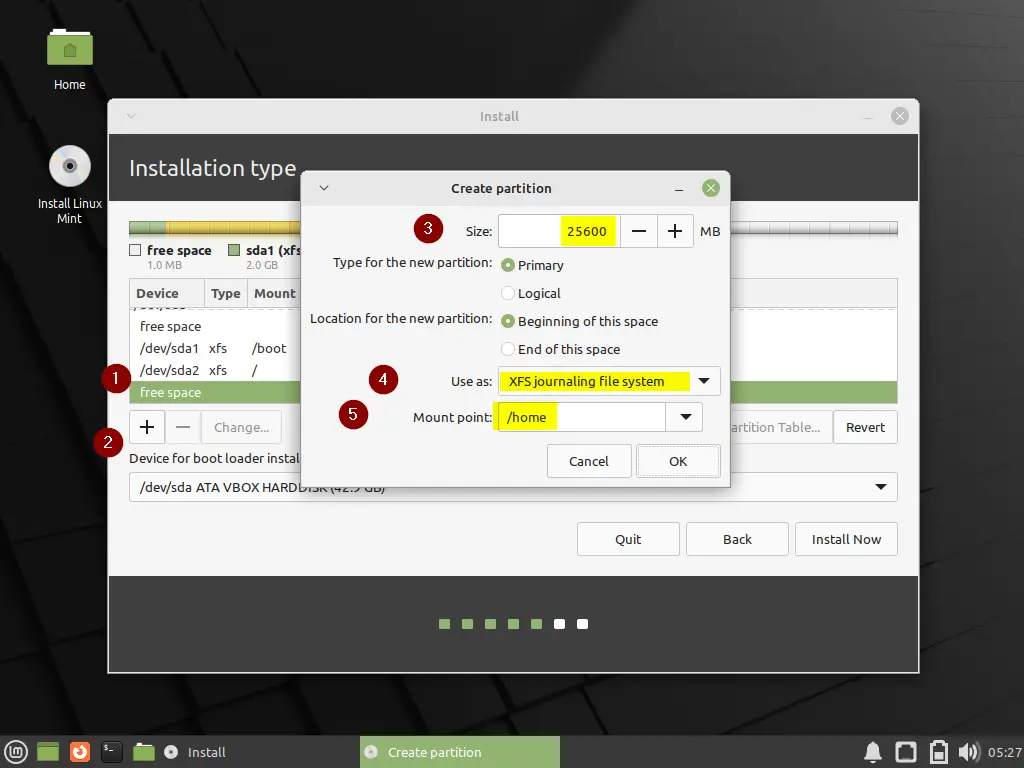
In this guide, we will go with something else option and will create following partitions on 40 GB hard disk.
- /boot : 2 GB (xfs file system)
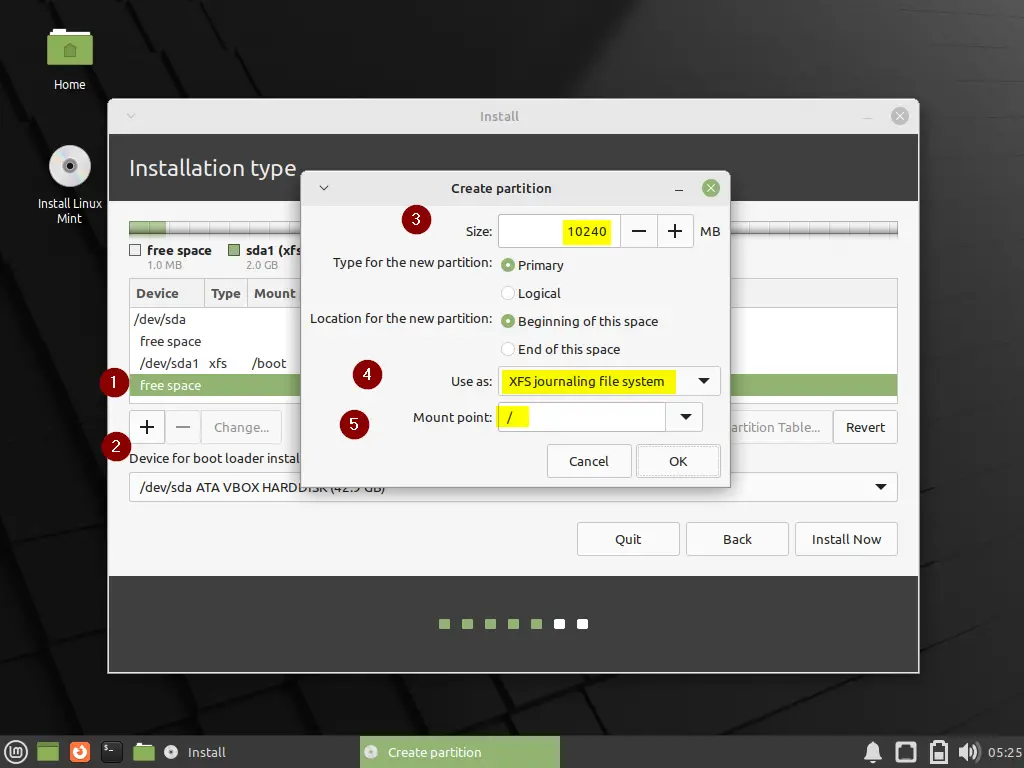
- / : 10 GB (xfs file system)
- /home : 25 GB (xfs file system)
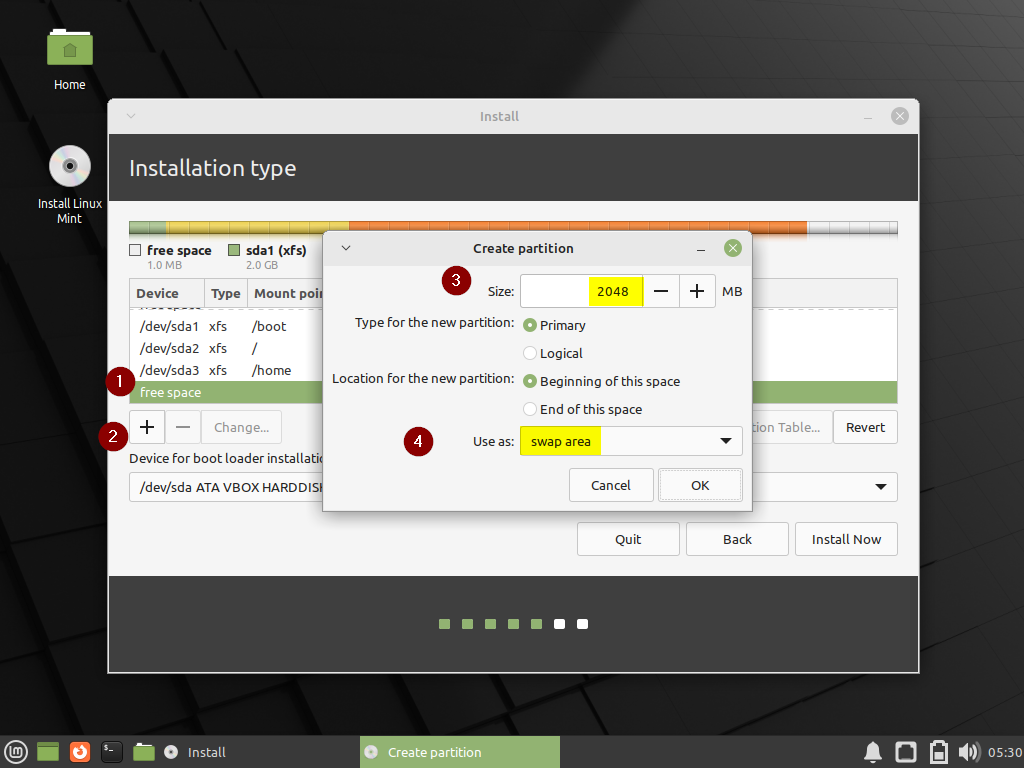
- Swap : 2 GB
Before start creating partitions, first create a partition table,
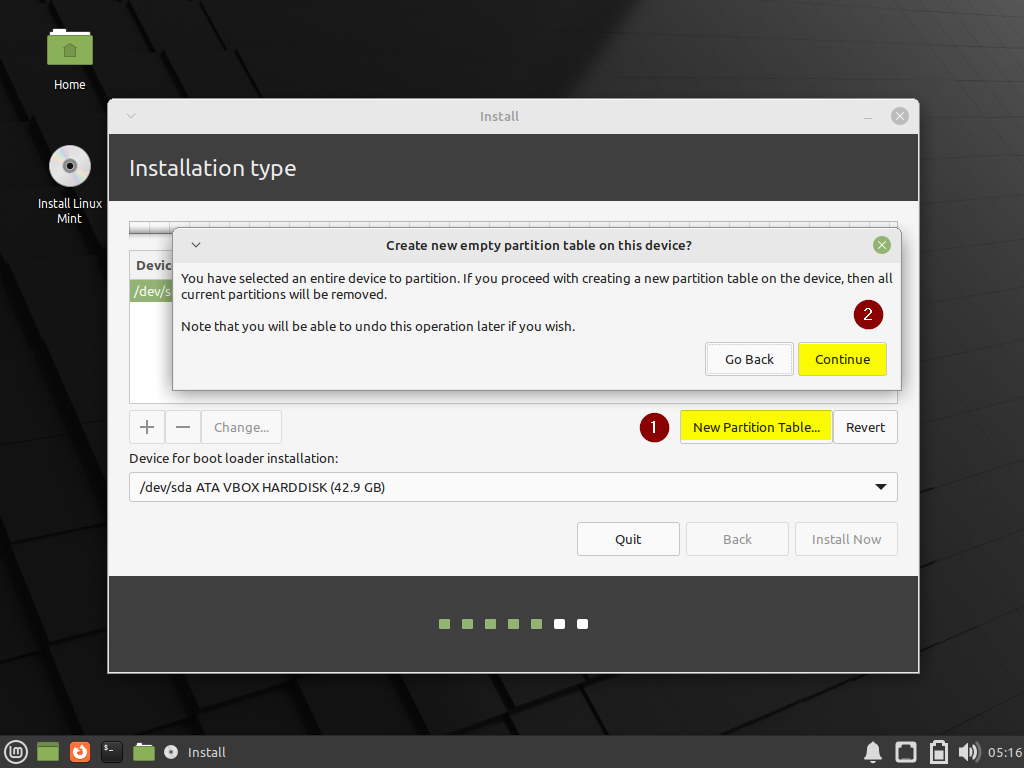
First click on ‘ New Partition Table ’ and then click Continue
Now start creating first partition as /boot, select the free space and then click on ‘+’ symbol.
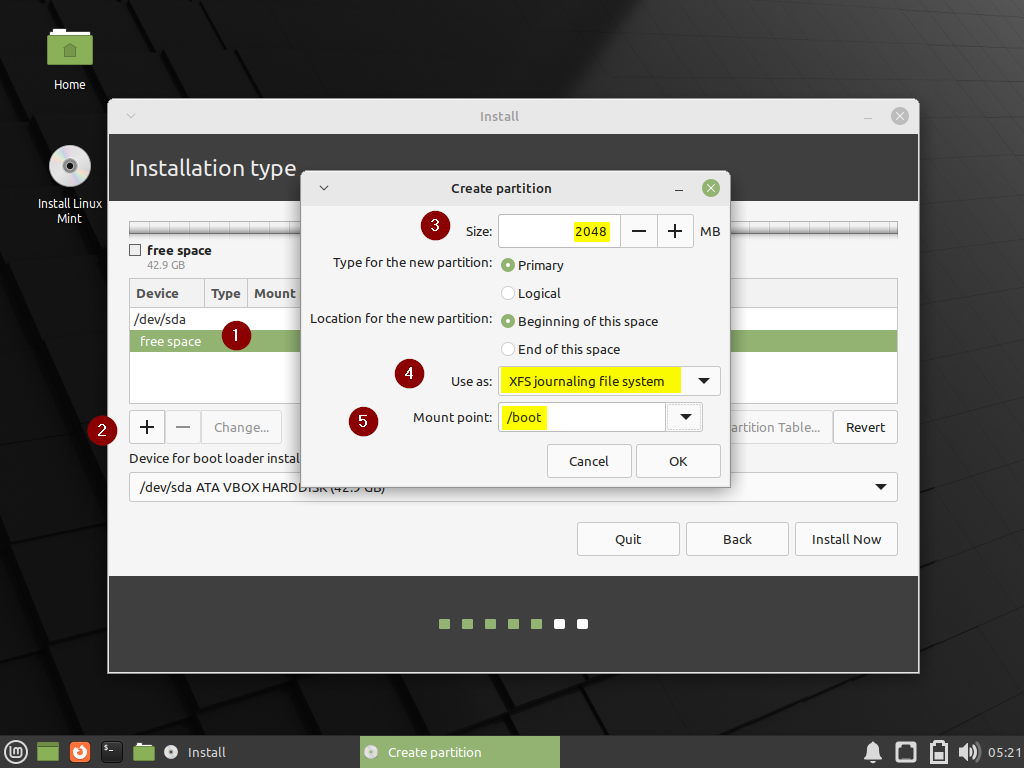
Click on OK to finish /boot partition creation.
In the same way, create next two partitions / and /home of 10G and 25G respectively.
Create Swap partition of size 2G
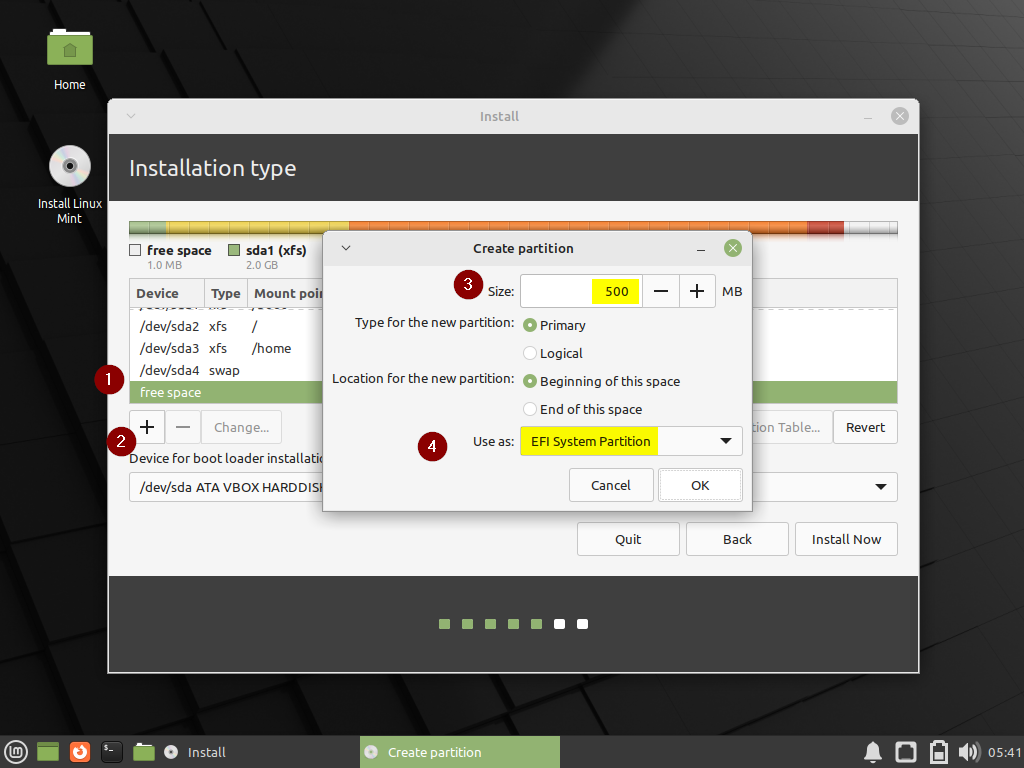
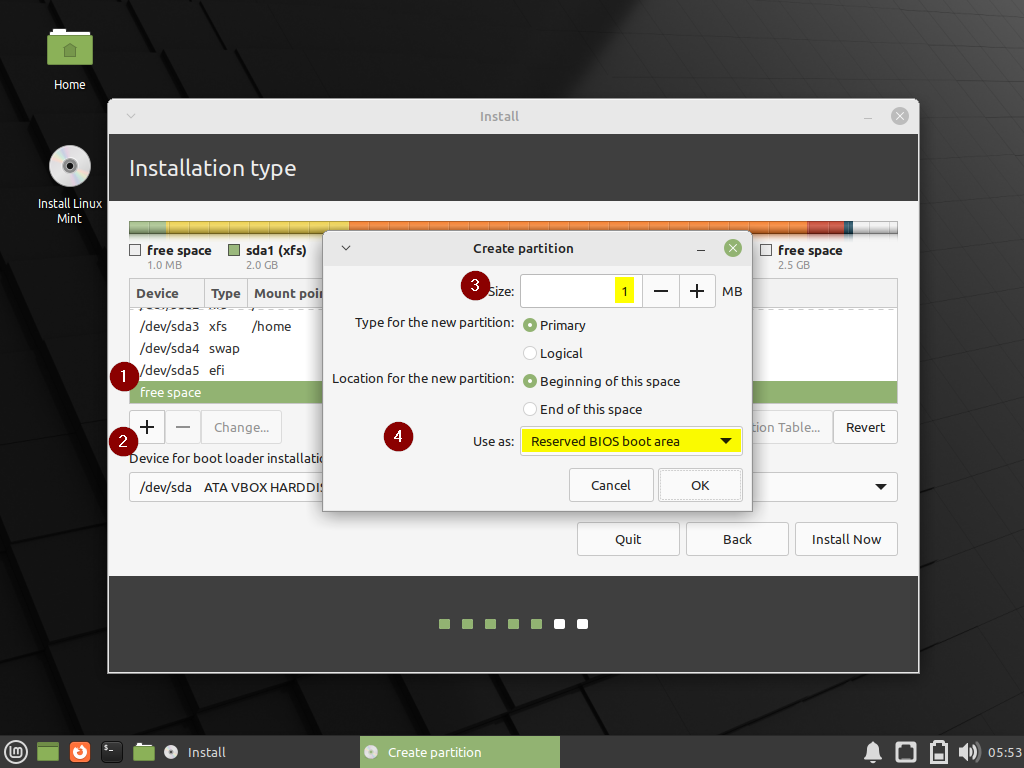
Note : When you are using UEFI mode then you must create following two additional partitions:
- EFI System Partition: 100 – 550 MB
- Reserved BIOS Boot Area: 1 MB (This is used to store bootloader code)
Once you are done with manual partitions then click on ‘ Install Now ’
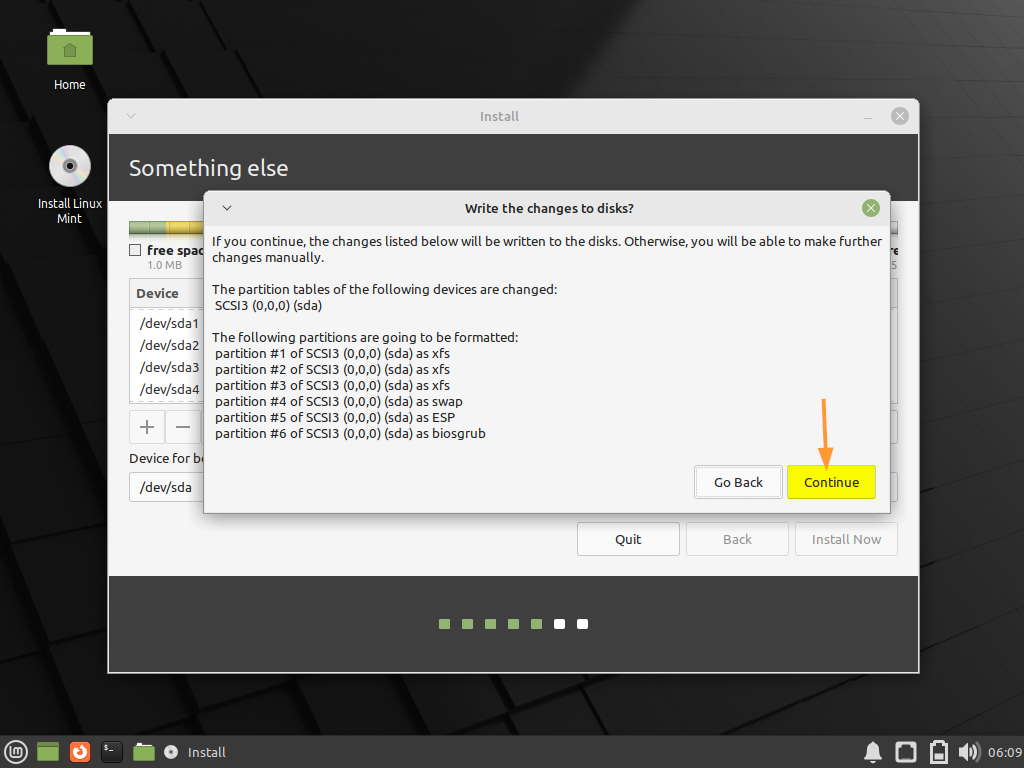
Click Continue to write changes to disk and to proceed further with installation.
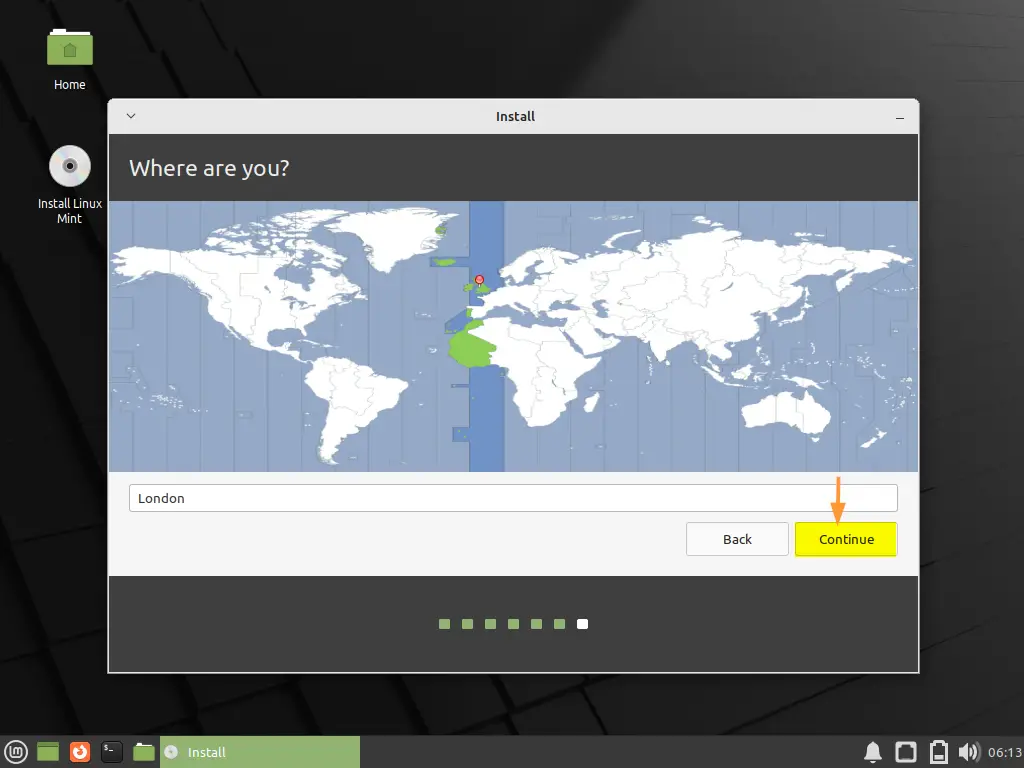
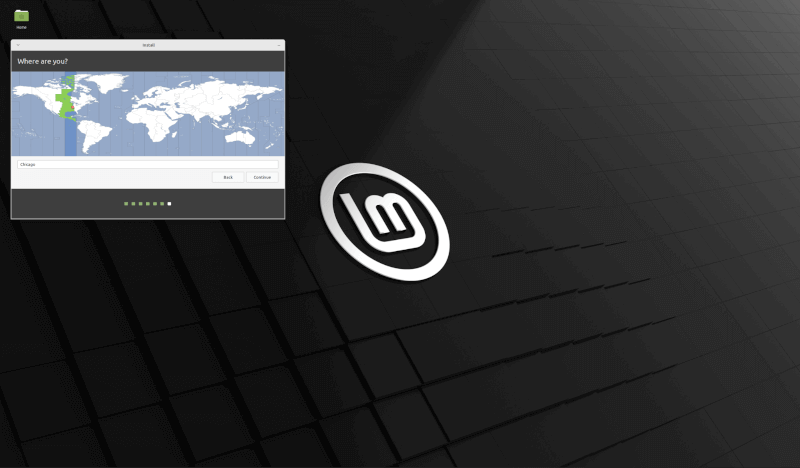
Step 7) Choose Your Preferred Timezone
As per geographical location of your system choose the location and click continue
Step 8) Enter Local User Details
In this step, you are requested to enter local user details along with hostname of your system. So, fill in the details as per requirements,
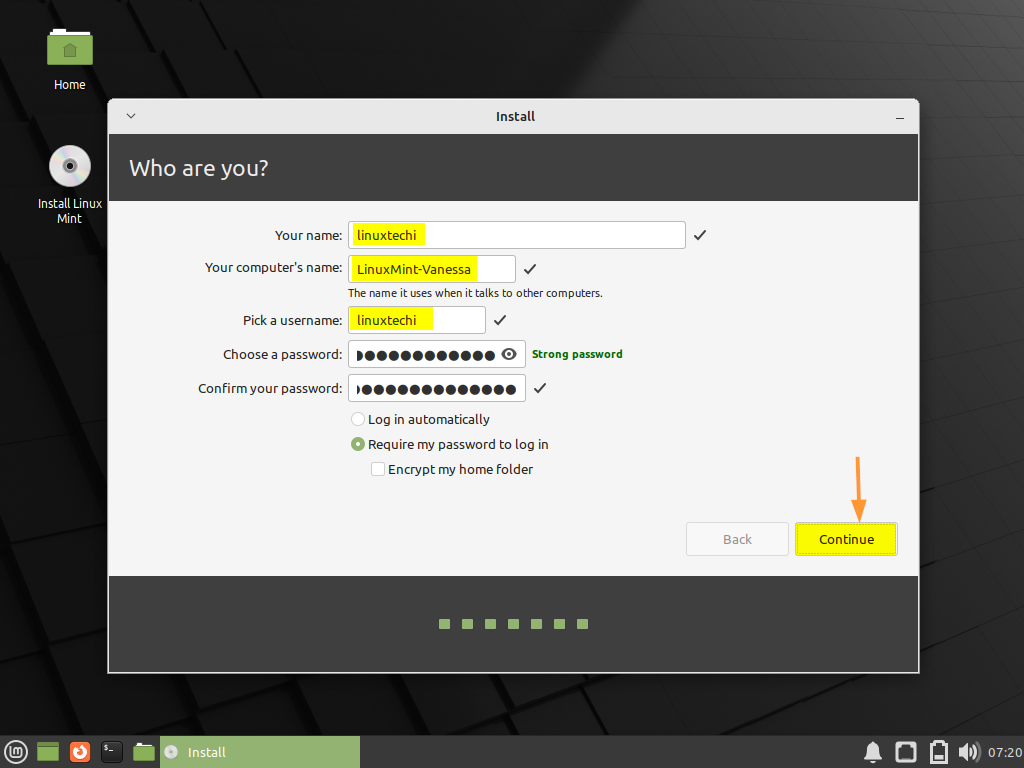
Click Continue to begin the actual installation.
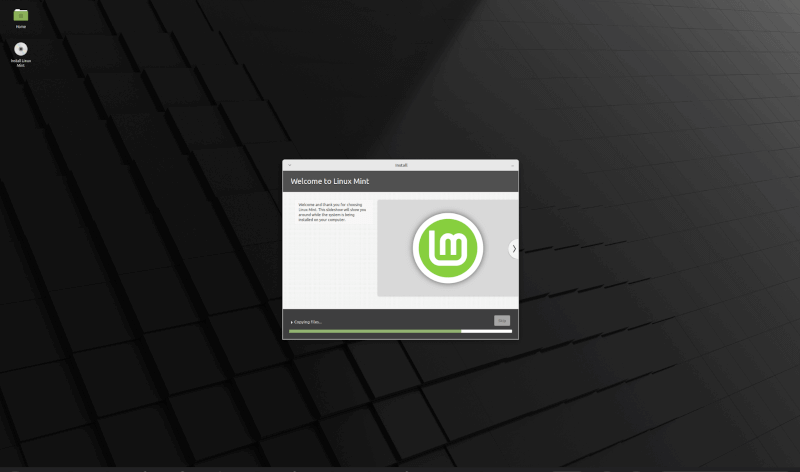
Step 8) Linux Mint 21 Installation Started
As we can see that Linux Mint 21 installation is started and is in progress,
Once the installation is completed then installer will instruct you to reboot the system.
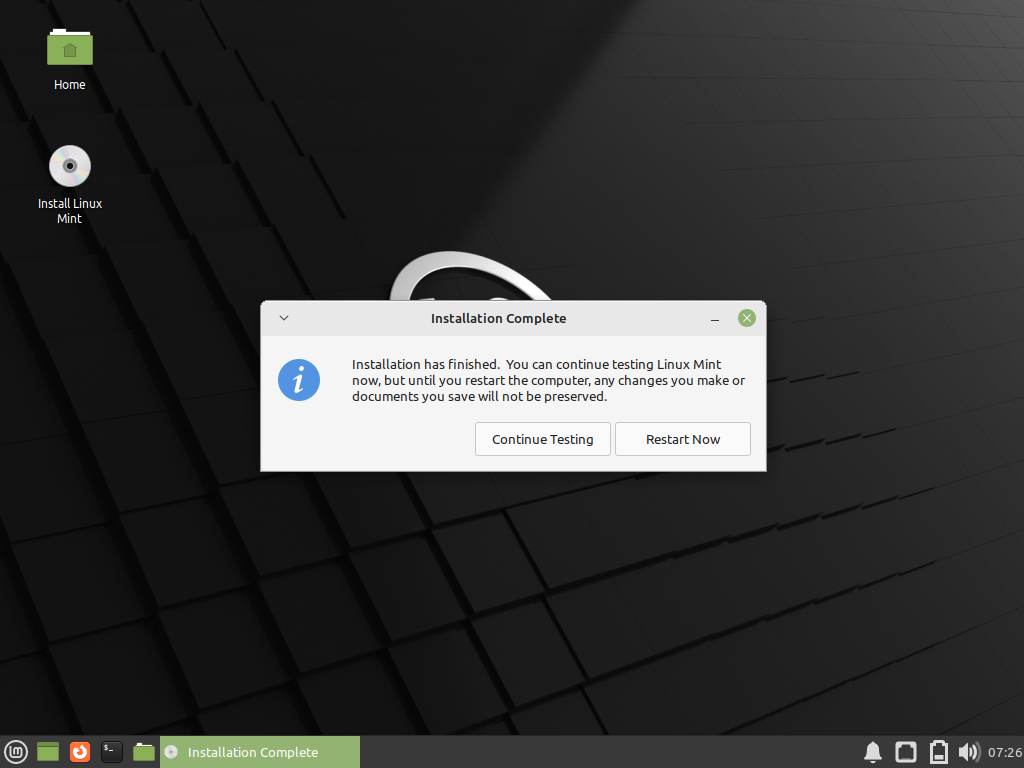
Note : During the reboot don’t forget to change boot medium from USB to hard disk via bios settings.
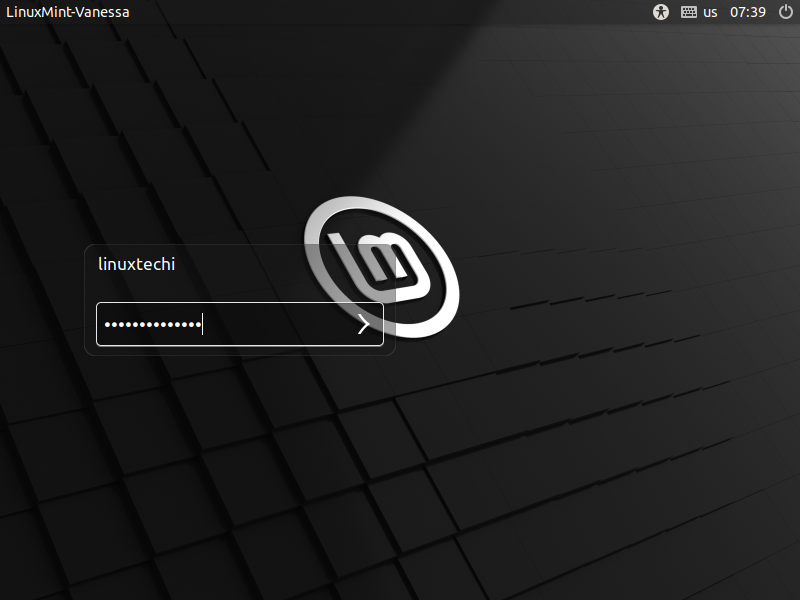
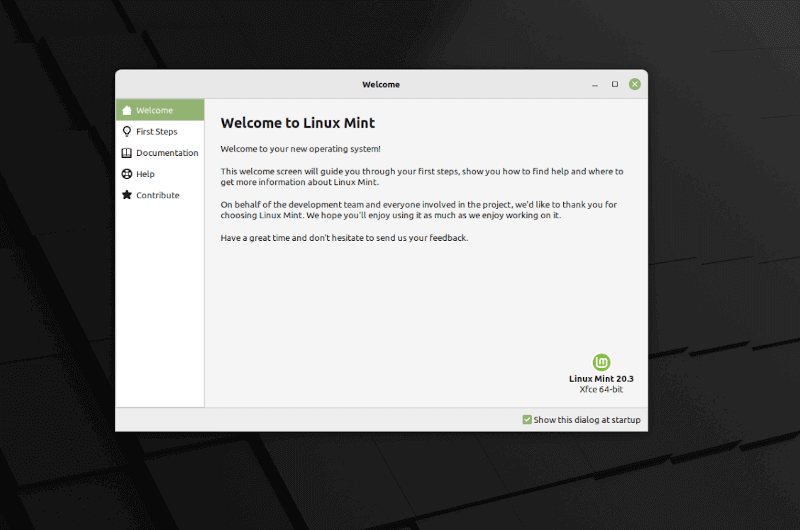
Step 9) Login Screen and Desktop Environment
When the system rebooted post installation then we will get following login screen. Use the same user credentials that you have created during the installation.
After entering the credentials, following desktop environment screen will appear,
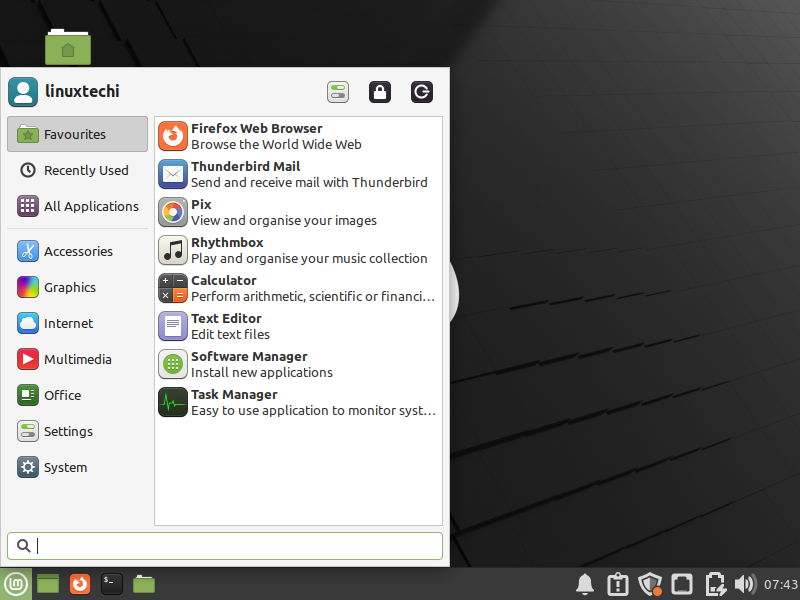
Open the terminal and run neofetch command to verify the installation.
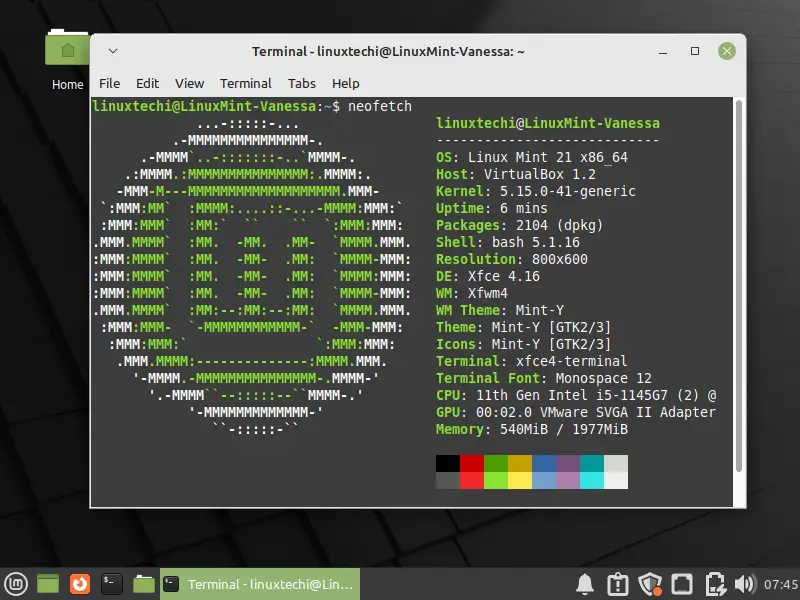
Great, above output confirms that we have successfully installed Linux Mint 21 Xfce Edition.
That’s all from this guide, kindly post your queries and feedback in below comments section.
Новые функции и установка Linux Mint 21 XFCE Edition
Linux Mint 21 под кодовым названием «Ванесса» был официально выпущен 31 июля 2022 г. Linux Mint 21 основан на Ubuntu. 22.04 и будет поддерживаться до апреля 2027 года. Linux Mint 21 поставляется в трех редакциях: MATE и XFCE.
В этом руководстве мы проведем вас через процесс установки Linux Mint 21 XFCE Edition.
Что нового в Linux Mint 21?
Linux Mint 21 содержит следующие улучшения.
- Расширенная поддержка заметок.
- Blueman Bluetooth Manager заменяет Blueberry.
- Улучшена поддержка эскизов. Благодаря проектам Xapp-thumbnailers поддерживаются дополнительные форматы файлов, включая форматы изображений AppImage, Webp, .ePub и RAW.
- Сканирование и печать без драйверов.
- Улучшения Xapp.
Предпосылки
Прежде чем приступить к установке редакции Linux Mint 21 XFCE, убедитесь, что у вас выполнены следующие требования:
- USB-накопитель емкостью 16 ГБ для установочного носителя.
- Широкополосное подключение к Интернету для загрузки образа ISO.
Кроме того, убедитесь, что ваша система соответствует следующим минимальным рекомендуемым требованиям.
- Минимум 2 ГБ оперативной памяти.
- Двухъядерный процессор с тактовой частотой не менее 1 ГГц.
- 30 ГБ свободного места на жестком диске.
- Графическая карта HD и монитор.
Шаг 1. Загрузите ISO-образ Linux Mint 21 XFCE
Чтобы начать установку, перейдите на страницу Официальное создание загрузочного USB-накопителя, чтобы создать загрузочный USB-накопитель с использованием образа ISO.
Имея под рукой загрузочный носитель USB, подключите его к компьютеру и перезагрузите компьютер. Обязательно установите загрузочный USB-носитель в качестве первого приоритета загрузки в настройках BIOS. Сохраните изменения и продолжите загрузку.
Шаг 2. Установка рабочего стола Linux Mint 21 XFCE
В меню GRUB выберите первую запись, как показано.

Это приведет вас прямо к среде рабочего стола Linux Mint 21 Live. Вы можете попробовать Linux Mint и открыть для себя новые функции. Поскольку наша цель — установить Linux Mint, щелкните значок Установить Linux Mint на рабочем столе.

Будет запущен установщик, который проведет вас через ряд шагов по установке Linux Mint. Сначала выберите предпочитаемый язык установки и нажмите «Продолжить».

Затем выберите предпочтительную раскладку клавиатуры и нажмите «Продолжить».

Далее вам будет предложено установить мультимедийные кодеки. Это настоятельно рекомендуется, поскольку кодеки обеспечивают поддержку различных видеоформатов и улучшают взаимодействие с пользователем.

На этом шаге вам потребуется настроить разбиение жесткого диска. Вам будут предложены следующие варианты: «Стереть диск и установить Linux Mint» и «Что-то еще». Давайте посмотрим, что делает каждый из них.
- Стереть диск и установить Linux Mint. Этот параметр полностью удаляет все содержимое вашего жесткого диска, включая любую существующую ОС. Кроме того, он автоматически разбивает ваш жесткий диск на разделы, и по этой причине это более предпочтительный вариант для новичков или тех, кто не может разбить жесткий диск вручную.
- Что-то еще. Этот вариант позволяет вручную разбивать жесткий диск на разделы и изменять его размер. Это особенно полезно, если вы хотите настроить двойную загрузку.
В этом руководстве мы выберем первый вариант: «Стереть диск и установить Linux Mint». Затем нажмите «Установить сейчас».

В появившемся всплывающем окне нажмите «Продолжить», чтобы изменения были записаны на ваш жесткий диск.

На следующем шаге выберите свое географическое положение на предоставленной карте мира и нажмите «Продолжить».

Затем создайте пользователя для входа и нажмите «Продолжить».

Отсюда программа установки скопирует все файлы из образа ISO на жесткий диск и сделает все необходимые настройки. Этот процесс занимает около 20 минут, и это отличный момент, чтобы не торопиться.

После завершения установки вы получите всплывающее окно с предложением перезагрузить компьютер. Поэтому нажмите «Перезагрузить сейчас», чтобы перезагрузить систему.

На экране входа введите свой пароль для входа и нажмите ENTER.

Это вводит вас в среду рабочего стола Linux Mint, как показано на рисунке. Вы можете запустить терминал и запустить утилиту neofetch, чтобы извлечь больше информации об ОС.

Вот и все. Мы провели вас через процесс установки Linux Mint 21 XFCE Edition. Веселиться!
Installation and Review of Linux Mint 20.3 XFCE
Treating yourself to a new Linux Mint ‘Una‘ installation or you’re seeking your first foray into the world of Ubuntu-based Linux, then you couldn’t possibly go wrong with this flavor of Linux Mint running XFCE with a slew of bundled applications and unique customizations running in a tight-knit but lightweight environment.
This version of Linux Mint is peculiar due to its introduction of dark mode and will be forever immortalized as a result.
Installation of Linux Mint XFCE Edition
To install Linux Mint XFCE Edition, go to the official page and download the Linux Mint XFCE Edition for your system architecture and follow the instructions as explained below.
Configure System BIOS
Use this portion of the tutorial to configure your system BIOS. Generally, you can get into this secure environment by using the function keys F2, and F10 to the Del key.
These options may, however, not work for your system. Use the reassuring method of Googling the specific model of your system plus the related keyword, BIOS or UEFI.
Once you’re done, use the options we have in this article for the best USB installers for iso configuration before proceeding to the next step in this tutorial.
Installing Linux Mint XFCE
With a generally straightforward install process, Linux Mint can be installed and configured with basic settings by anyone. Follow the screenshots below with short commentaries wherever applicable.
Once you’ve configured your USB as instructed above, insert the USB device into your host system and select “Start Linux Mint”. This will take you to the XFCE desktop where you will be able to continue the installation process. There will be a visible install Linux Mint icon at the top left corner.
Configure your multimedia codecs by installing them alongside your Linux Mint install. That way, you’ll be able to use it right after the installation is complete as opposed to delaying it till you hit a roadblock.

This point is where you select your timezone and you have multiple options across the continents.
You’ll arrive at the screenshot below after you’ve entered your system name. Essentially, this is where the actual installation process begins.
Reviewing Linux Mint XFCE
Once the installation process is done, you’re welcomed with the dialog below on restart. It basically gets you started with the most important things you may need.
From the first steps tab, you’re able to configure the color palette of your system. Right below that is a button to switch from light to dark and vice versa.
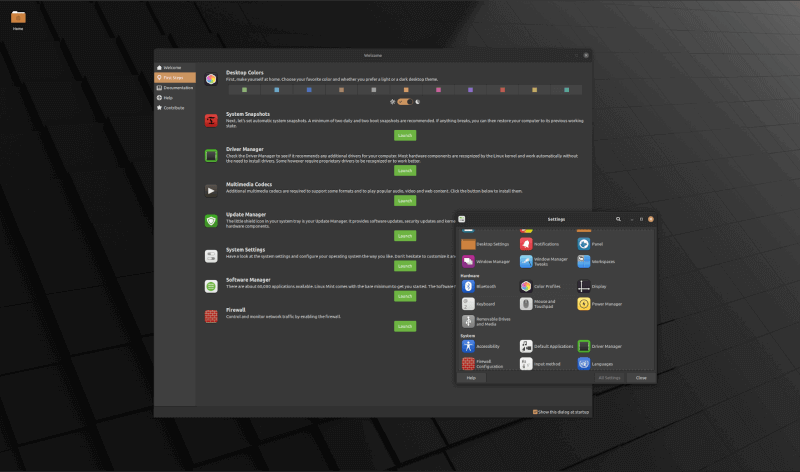
Perhaps my favorite thing to this day about Linux Mint is the update manager that’s pretty much easy to get acquainted with. You don’t have to mess around with the terminal. You can simply manage all your system updates via this little program.
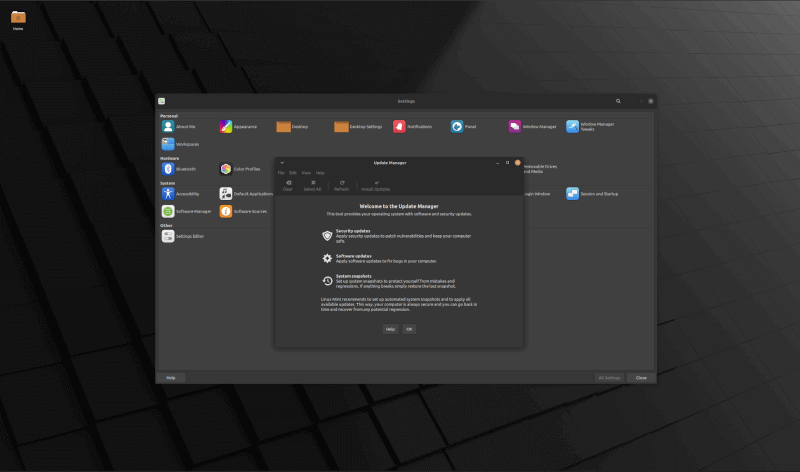
Once you’ve satisfied the installation requirement you can head on to the bundled app store that you can utilize to download a variety of applications. The next step, configure Timeshift under system snapshot to ensure the safety of your data at all times.
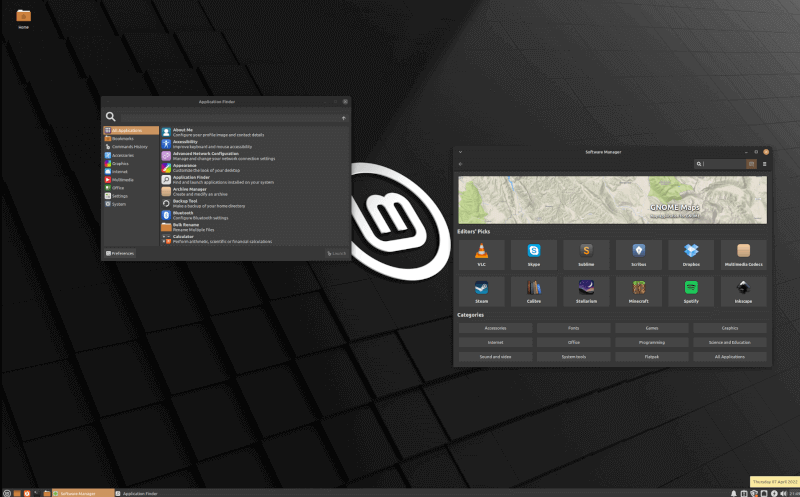
An alternative application to get apps from is the application finder which will enable you to shuffle through the options that have been made available via the system natively.
Takeaway
With an Ubuntu LTS release, we are actively enjoying the exploration of this Linux Mint 20.3 XFCE variant of the minty family of operating systems one of our systems here.
In the past, we covered some UI optimization recommendations that should be relatively okay to experiment with but we recommend against them as the default baked-in appearance customizer will do a much better job in terms of consistency.