- Configuring DNS servers on Linux and Windows
- DNS server setup for Linux and Windows
- How to have a Windows-PC registers it’s name on dns server automatically
- Manually register a Windows Server 2008 in DNS
- Force Windows DHCP to Update DNS for All Current Leases
- Setup Linux DNS Server for Windows Active Directory
Configuring DNS servers on Linux and Windows
To enable all hosts on your network (Windows, Linux, etc.) to register their names in a central «repository» and resolve names from it, a DNS server needs to be installed and configured accordingly. This involves setting up a DNS zone on the server, configuring DNS suffix on the hosts for that DNS zone, and enabling clients to register in DNS. To implement this, modifications are required in two areas — the DNS server and the DHCP server. For the DNS server, enable aging/scavenging for all zones by accessing the DNS server and opening the zones. Then, right-click and select «Properties» > «General Tab» > «Aging» and check the «Scavenge stale resource records» option. Change the «No-refresh interval» and «Refresh interval» from days to hours. Remember to change it back to an appropriate interval when the DNS is updated.
DNS server setup for Linux and Windows
In my environment, there is a mixture of Windows and Linux systems. Only static IP is used, and there is no need for DHCP SERVER. The Active Directory has been set up with integrated DNS (both secure and non-secure Secure dynamic update). However, I have discovered that only the Windows server can register DNS after joining the domain. I am wondering if there is a way for the domain to be auto-registered with a standalone Windows server and Linux server, even if I use ipconfig /registerdns. Any information that can help me in the right direction would be greatly appreciated.
Dear Steven, I managed to fix the issue with the Windows server by selecting «Use this connection’s address in DNS» and entering the «domain» in the DNS tab of TCPIP settings. However, I am still facing a problem with Linux box regarding DNS registration. Although I was able to register the forward zone using nsupdate, I cannot seem to register the reverse lookup zone which is quite unusual for a DNS server.
How do I register Linux server with Windows DNS server, If you want the Linux machines to update DNS themselves, then the DNS zone (s) must be configured for nonsecure dynamic updates. Then if you have the Samba client installed, you can update the record manually like this: net ads dns register -P. I’m not sure if this command requires you to be on the domain …
How to have a Windows-PC registers it’s name on dns server automatically
Assuming I am not mistaken, the name of a Windows-PC on a local network is published through WINS instead of DNS. Let’s consider a scenario where I have a network consisting of Windows workstations, and I plan to install a Linux server for DHCP setup.
Is it necessary to set up WINS on my Linux server in order to enable WINS name resolution for Windows-PCs? Alternatively, is there a way to publish the names of Windows-PCs on my network without installing or configuring any software on those Windows workstations?
I appreciate your assistance beforehand. Feel free to request further clarification if needed.
The utilization of WINS is outdated and not recommended. Enabling NBTNS name resolution on the client poses a significant security threat and should be avoided unless it is absolutely necessary.
In case the » register this connection’s addresses in dns » option is selected, Windows clients will make an automatic effort to record an A record in DNS through the network adapter.
If I’m correct (please correct me if I’m wrong), a Windows-PC’s name on a local network is not published via DNS but via WINS
Without a DNS or WINS server, registration is not possible. However, WINS is outdated and should be avoided, as Greg mentioned. To have all hosts’ names registered in a central repository and enable name resolution from that repository, a DNS server must be installed on the network. The clients and DNS server must be configured appropriately, including creating a DNS zone on the server, DNS suffix for the hosts in that zone, and configuring clients to register in DNS.
Registering linux hostnames on windows DNS, Open the «DHCP» desktop app. Select the DNS tab. Expand the node representing your domain. Right click on «IPv4». Select «Properties» from the context menu. Check «Enable DNS dynamic updates according to the settings below:» Select «Always dynamically update DNS records».
Manually register a Windows Server 2008 in DNS
I am in need of assistance and would appreciate it if someone could answer my query.
What are the steps to add a server’s hostname and IP to the DNS manually?
My W2k8 R2 DNS server is not linked with AD or a domain, while my other W2k8 servers only have a single static IP address and no DHCP. As a result, during the automated installation of these servers, I must register them manually in the DNS server since they are not part of the AD/domain and don’t register automatically.
Is there a way to register the servers in DNS using a command or script?
Go to the IPv4 properties of the NIC and make sure that it is set to use the correct DNS server. Click «Advanced» then click the DNS tab. Check the «Register this connection’s address in DNS».
This can also be accomplished through Command Prompt by utilizing the following method:
Wait a couple of minutes and verify if the DNS record has been saved.
It’s crucial to have a reverse DNS zone in place to avoid receiving the message from nslookup tool stating that the server name is unknown.
DNS server setup for Linux and Windows, Basically, I have setup the Active Directory with DNS integrate (Secure and none Secure dynamic update. However, I find out the only server can register DNS is the windows server after you joined the domain. I am curious if the DNS can auto register domain with Standalone Windows server and …
Force Windows DHCP to Update DNS for All Current Leases
Is it possible to compel the updating of all DNS entries for current leases on Windows 2008R2 DHCP server?
Can you determine the counterpart of ipconfig /registerdns on the server-side?
There was a problem with our dynamic DNS configuration that caused it to fall badly out of sync with the current leases. Even after fixing the original issue, it is still taking days for the DNS to catch up.
It’s necessary to address the issue from the client side, as adjusting the timeouts will only benefit clients during their next check-in, which typically occurs after half of the current lease time or during boot. To prompt the clients to check in, you could consider manually initiating the process. This could involve modifying certain group policy settings or executing a script to perform «ipconfig /registerdns» on multiple clients simultaneously.
To implement this from the server side, you could develop a personalized software that retrieves the records from a DHCP lease export and enrolls the addresses. Nevertheless, it’s crucial to execute the program under the same registration account used by DHCP to avert any issues with future entry updates.
Aging/scavenging is a technique that can be utilized to achieve this goal.
Take a moment to secure your DNS and DHCP by creating a backup.
Modifications will be required in two locations.
- Here are four points to consider: DNS SERVER [Enable aging/scavenging for all zones] -Open you DNS server and open your zones -Right Click > Properties > General Tab >Aging -Check the » Scavenge stage resource records » -Change the No-refresh interval and Refresh interval from days to hours
Remember to reset the interval to its appropriate value once the DNS is updated. Additionally, you need to perform an additional step in the DHCP server for this to take effect.
2. Verify the configuration settings for all scopes in the DHCP SERVER by checking DNS update.
- Open your DHCP server and click down to the scopes
- Right click on your scope > Click Properties > DNS Tab
- Take a note of your current settings and apply the highlighted settings from the image below
It is recommended to create a backup of your DNS and DHCP settings before making any changes. This will ensure that your DHCP and DNS are updated properly.
There exists a message type called DHCPFORCERENEW which was designed for the purpose of preventing rogue DHCPFORCERENEW messages from disconnecting clients. However, despite being described in RFC 3203, it has not been extensively integrated into clients. To prevent such disconnections, clients must implement DHCP authentication.
If you possess a suitable managed switch, you have the option to disable and re-enable ports. Alternatively, you can physically unplug and reconnect the clients at the switch.
Register A records for my Linux box on my Windows, I’ve a network which is mainly Windows: Windows 2008 server (with DNS/DHCP as well as AD), and various mainly Windows machines (servers, XP, 7). I know trying to add few Linux boxes, and can’t make them appear on the DNS server. I’m using Ubuntu 11.04 (both client and server). The Ubuntu boxes are NOT part of …
Setup Linux DNS Server for Windows Active Directory
Setup Linux BIND DNS server to work with Windows Active Directory. All you need to do is to allow updates from the active directory domain subnet and you’re good to go. Since this article involves more of Linux than Windows I’ve placed this article in the category Linux. First install a Windows Server OS and a Linux distribution, any Linux flavour will do. Install BIND DNS on the Linux server and do the necessary basic configurations.
BIND users open the following file
BIND chroot users open the following file
Add the following lines to the end of the file
zone «example.com» type master;
allow-query < any; >;
allow-update < 192.168.0.0/24; >;
file «slaves/ddns/example.com.zone»;
>;
zone «0.168.192.in-addr.arpa» type master;
allow-query < any; >;
allow-update < 192.168.0.0/24; >;
file «slaves/ddns/0-168-192.zone»;
>;
The IP prefix entered in the allow-update option represents the entire domain example.com, if your domain spans more than one subnet add those IP prefixes also. The same applies to the reverse DNS zone. In the above example my network part of the IP address is 192.168.0 hence the zone 0.168.192.in-addr.arpa Note that the zone files are stored in the slave folders. This is because when dynamic DNS updates are sent the named process creates temporary files in the directory of the zone file, so if you place the file in the usual location temporary files will not be created due to insufficient permissions. Our next step is to create the ddns directory inside the slaves directory to distinguish zone files acquiring dynamic DNS updates and create zone files inside them.
mkdir /var/named/slaves/ddns
chown named:named /var/named/slaves/ddns
chmod 755 /var/named/slaves/ddns
chcon -t named_cache_t /var/named/slaves/ddns
touch /var/named/slaves/ddns/example.com.zone
chown named:named /var/named/slaves/ddns/example.com.zone
touch /var/named/slaves/ddns/0-168-192.zone
chown named:named /var/named/slaves/ddns/0-168-192.zone
mkdir /var/named/chroot/var/named/slaves/ddns
chown named:named /var/named/chroot/var/named/slaves/ddns
chmod 755 /var/named/chroot/var/named/slaves/ddns
chcon -t named_cache_t /var/named/chroot/var/named/slaves/ddns
touch /var/named/chroot/var/named/slaves/ddns/example.com.zone
chown named:named /var/named/chroot/var/named/slaves/ddns/example.com.zone
touch /var/named/chroot/var/named/slaves/ddns/0-168-192.zone
chmod named:named /var/named/chroot/var/named/slaves/ddns/0-168-192.zone
Edit the zone files and just create SOA and NS records
BIND /var/named/slaves/ddns/example.com.zone
BIND chroot /var/named/chroot/var/named/slaves/ddns/example.com.zone
$TTL 86400
@ IN SOA ns1.example.com. dnsadmin.example.com. (
[serial]
[refresh]
[retry]
[expire]
[minimum-ttl]
)
@ IN NS ns1.example.com.
ns1 IN A [ip-of-dns-server]
BIND /var/named/slaves/ddns/0-168-192.zone
BIND chroot /var/named/chroot/var/named/slaves/ddns/0-168-192.zone
$TTL 86400
@ IN SOA ns1.example.com. dnsadmin.example.com. (
[serial]
[refresh]
[retry]
[expire]
[minimum-ttl]
)
@ IN NS ns1.example.com.
Replace [serial], [refresh], [retry], [expire], [minimum-ttl] with their respective values in seconds. Set proper SELinux booleans
setsebool -P named_write_master_zones 1
The boolean is set to allow named to write the DNS updates to the zone file. Allow port 53 through the Linux firewall
iptables -I INPUT -p tcp —dport 53 -j ACCEPT
iptables -I INPUT -p udp —dport 53 -j ACCEPT
service iptables save
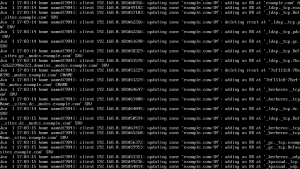
Go to the Windows Server, open your network connection properties and enter the preferred DNS address as the address of the Linux DNS server. Go to Start -> run, enter dcpromo and hit enter. Follow the steps in the wizard, if you’re using windows server 2008 just uncheck DNS installation option and continue installation of Active Directory. After the Windows server reboots check the /var/log/messages file in your Linux server you’ll see the updates that have taken place.
Just remember to set the preferred DNS server of the client computers to the IP address of the Linux DNS server before joining them to the domain.