- How to make a shared partition between dual-booted Windows 7 and Ubuntu?
- 3 Answers 3
- You must log in to answer this question.
- Related
- Hot Network Questions
- Subscribe to RSS
- How To Create a Shared Storage Drive For Dual-Boot Systems
- Before You Begin
- Creating Your Shared Drive
- Resizing Your Partitions
- Creating Your Partitions
- Accessing Your Shared Drive
- Share partition ubuntu and Windows
- 2 Answers 2
How to make a shared partition between dual-booted Windows 7 and Ubuntu?
I have a lot of files that I would like to access from both of my dual-booted OS’s. How do I make a shared folder? Is there a simpler method? (Like some kind of a shared folder, although I doubt that because of different filesystem formats and all that. )
3 Answers 3
You should create and NTFS partition and set up it to mount automatically on ubuntu start. You can edit the file /etc/fstab and include a line like this:
/dev/sda10 /media/Winbugs7/ ntfs-3g defaults,user,rw 0 0 Where /dev/sda10 is the partition and /media/Winbugs7 is the (existing!) directory where the partition will be mounted.
You just create seperated partition in NTFS format..you can easily access that from both ubuntu and windows.
While Ubuntu will automatically mount your windows NTFS partition so you can access the windows drive from Ubuntu. You can install Ext2Fsd on your windows install and that will allow you to access the ubuntu ext3/ext4 partition from windows explorer.
If you don’t want any extra software on your windows install to do this. You could either create a new NTFS partition as @aleo0317 has already answered or you can create a folder in your windows NTFS Partition that is already mounted. Why create a whole new partition when you have one for windows that can be accessed by both OS’s.
You must log in to answer this question.
Related
Hot Network Questions
Subscribe to RSS
To subscribe to this RSS feed, copy and paste this URL into your RSS reader.
Site design / logo © 2023 Stack Exchange Inc; user contributions licensed under CC BY-SA . rev 2023.7.14.43533
By clicking “Accept all cookies”, you agree Stack Exchange can store cookies on your device and disclose information in accordance with our Cookie Policy.
How To Create a Shared Storage Drive For Dual-Boot Systems
While it’s possible to access your Linux partitions in Windows, it’s a buggy solution at best. You can’t easily add or change your files without relying on software that’s no longer actively being developed.
Rather than risking your files, there’s an obvious solution for most users who need to share files on dual-boot PCs. Instead of relying on outdated software, you can create a shared “pooled” drive that both operating systems can safely access using the NTFS file system.
Before You Begin
While it’s true that you could use your existing Windows partition, this method has risks. You won’t be able to isolate your files if you need to erase that partition at a later date, which might be necessary if you end up infected with ransomware for instance.
With that in mind, it’s better to create a shared drive, isolated from the system files used by either operating systems.
Unless you already have space available, you’ll need to resize your existing partitions to create space for your shared drive. If you plan on creating this partition on another hard drive, and you plan on using all of the space on that drive, you won’t need to do this.
Before you start changing your drive partitions, you should consider the risks. Any alterations to your partition table could go wrong and result in data loss. Make sure that any critical files are backed up before you start.
Creating Your Shared Drive
There are two options for you when you’re looking to create your shared drive.
If you already have the space available to you on an existing hard drive, or if you’re using the entire space on a second hard drive, you can skip straight to our Creating Your Partitions section.
If you need to create space for your shared drive, whether it’s on the hard drive carrying on your system partitions or on an entirely separate drive, you’ll need to resize your partitions first.
Resizing Your Partitions
There are several tools for formatting and partitioning drives that you can use on Windows, but the easiest solution is to use one that’s already included – the Windows Disk Management tool.
If you’d prefer, you can create or resize your partitions with GParted instead. GParted can be run from removable media like a USB drive, or by installing it to your Linux system. It’s included as a package for installation in most Linux system repositories.
You will only be able to resize partitions that already use Windows-supported file systems like NTFS or FAT32 using the Disk Management Tool. If you need to resize Ext4 or other Linux file systems, switch to using GParted instead.
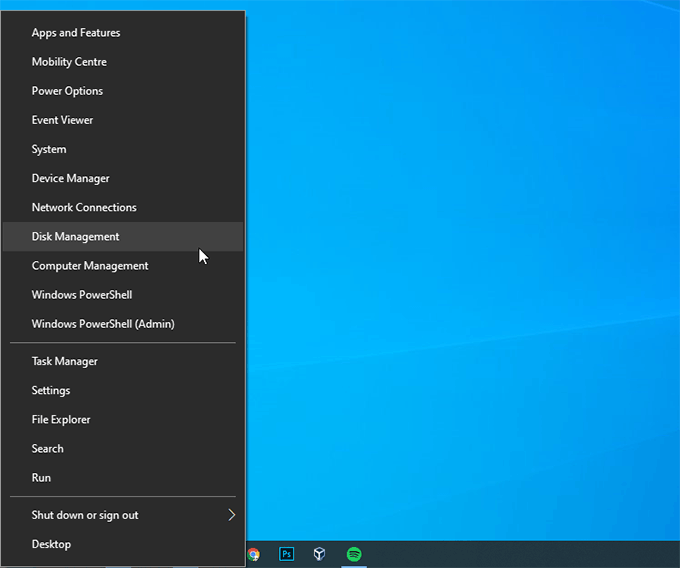
- You can access the Windows Disk Management tool by right-clicking the Windows Start button and clicking Disk Management.
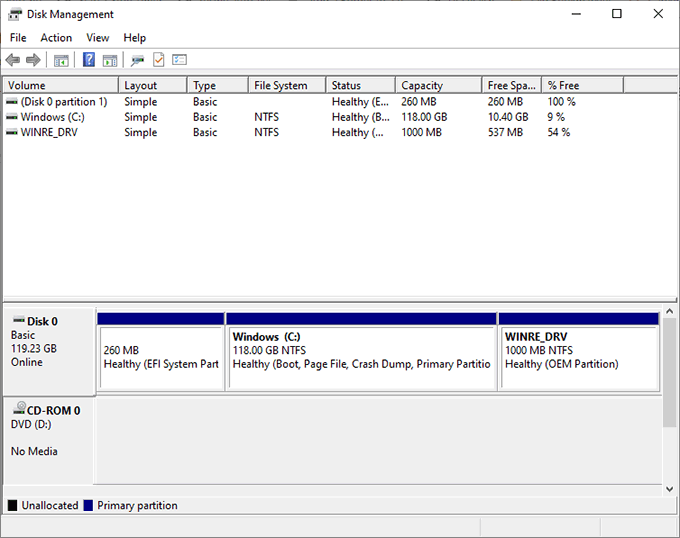
In Disk Management, you’ll see a split list of your drives. The top half will show the “volumes”, or partitions, available to you. The bottom half will show the partitions assigned to each drive in a more visual format.
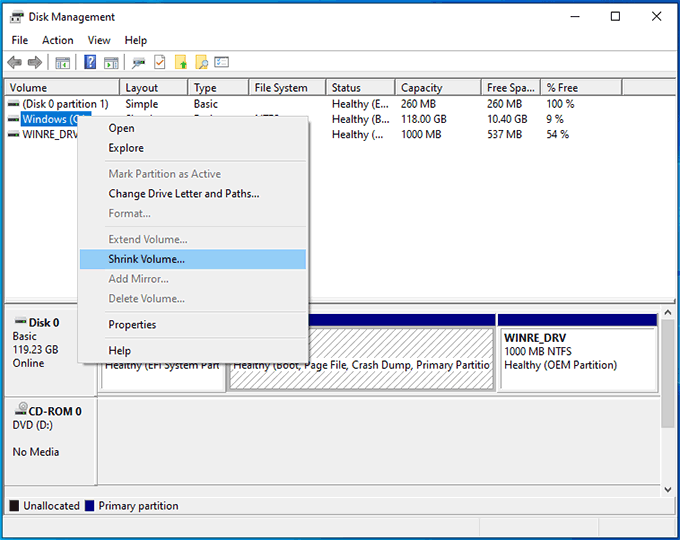
- To begin resizing, right-click on a large enough partition on your chosen drive. On a Windows partition, this is likely to be your Windows system (C:) drive.
- Click Shrink Volume.
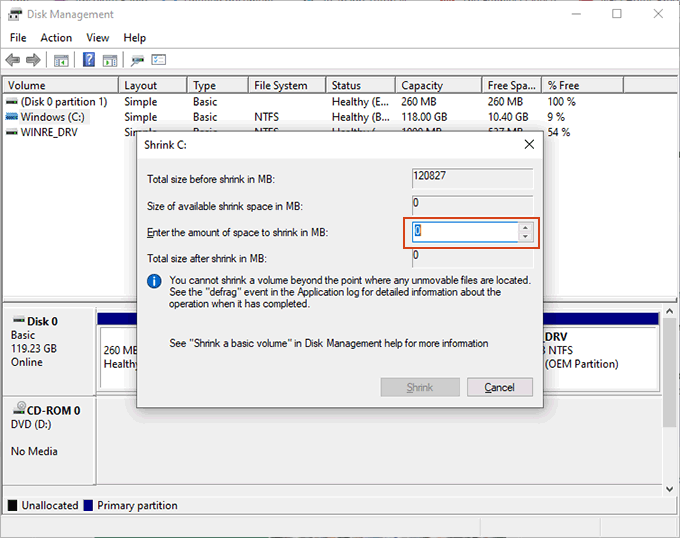
Windows will analyze the drive first, which may take a minute. Once it’s completed, you’ll see a window, asking you to enter the amount of space you wish to free up in megabytes.
- Type in a suitable amount for your storage needs. Storage memory sizes are a little unusual, so remember that 1GB doesn’t equal 1000MB, but rather 1024MB.
- Once you’ve selected the amount of storage you’d like to free up, click Shrink.
If you’re having trouble shrinking your partition (for instance, if the Shrink button is greyed out), you may need to temporarily disable hibernation. This is due to how Windows stores certain system files.
Creating Your Partitions
Once your hard drive has the necessary space, you can move to create your new shared drive partition.
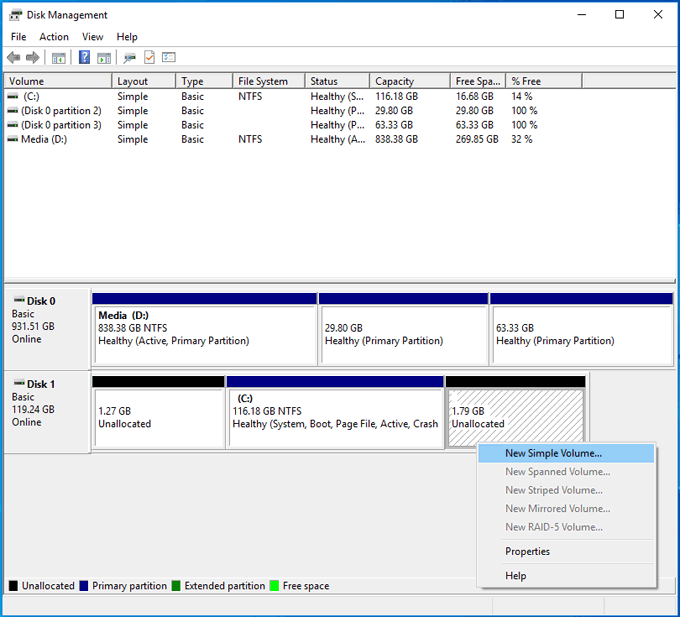
- In Disk Management, you should see your available space labeled as “Unallocated”. Right-click it and, in the menu that appears, click New Simple Volume.
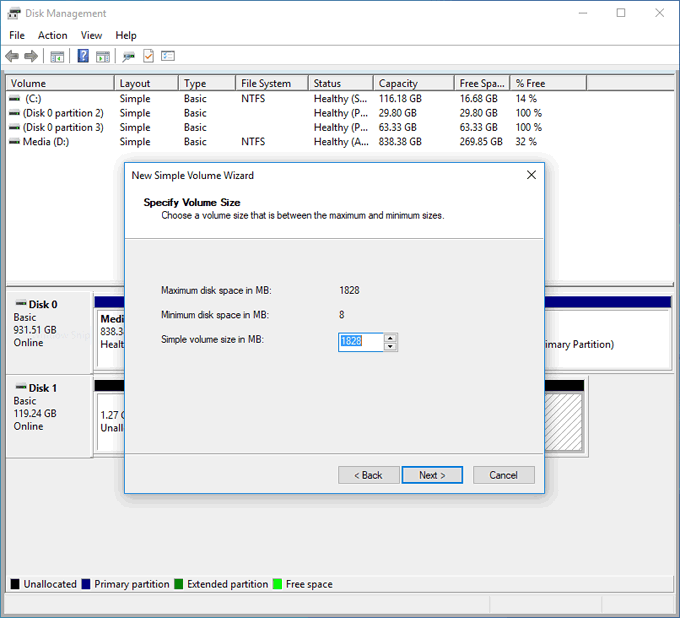
- Click Next to start. Insert the size of your new partition, using megabytes, before clicking Next.
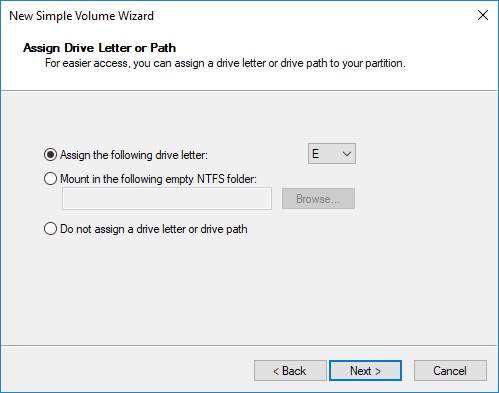
- The next stage will confirm the settings you need to format the partition once it’s created. The default settings should be fine, but make sure that NTFS is selected. Give the partition a name under the Volume Label section, and click Next to continue.
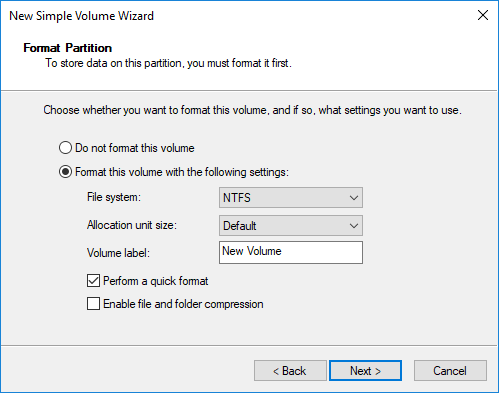
- At the final stage, click Finish to begin the process of creating and formatting your new drive partition.
If you’re using another hard drive, and need to delete or format any existing partitions, Disk Management will allow you to do so.
You can either right-click any existing partitions, click Delete Volume and then create a new partition in the “Unallocated” space, or you can choose Format to format an existing partition to the NTFS file system.
Accessing Your Shared Drive
Once you’ve created your new partition and formatted it, you should be able to access it in Windows File Explorer.
Most modern Linux distributions will be able to read partitions with NTFS file systems, thanks to the ntfs-3g driver package. This is pre-installed with recent Ubuntu and Debian releases, but you may need to install it yourself in other distributions like Arch Linux.
In most cases, you may need to give your distribution a “nudge” to mount the drive and allow you access. In Ubuntu, for instance, open your file manager and click Other Locations. Locate your partition by the label you gave it when you formatted it, then tap it.
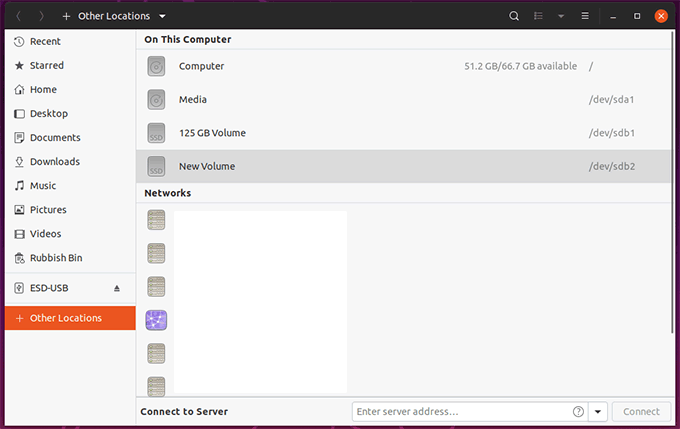
It should then mount and open, allowing you to access any files within, as well as add or delete them. Any files you add will then be accessible from within Windows the next time you switch systems.
Ben Stockton is a freelance technology writer based in the United Kingdom. In a past life, Ben was a college lecturer in the UK, training teens and adults. Since leaving the classroom, Ben has taken his teaching experience and applied it to writing tech how-to guides and tutorials, specialising in Linux, Windows, and Android. He has a degree in History and a postgraduate qualification in Computing. Read Ben’s Full Bio
Did you enjoy this tip? If so, check out our YouTube channel from our sister site Online Tech Tips. We cover Windows, Mac, software and apps, and have a bunch of troubleshooting tips and how-to videos. Click the button below to subscribe!
Share partition ubuntu and Windows
In order to have a partition accessible in both Ubuntu and Windows I had a drive formatted as fat32(or vfat) I just found out that it does not hold single files that are more than ~4.3Gb in size. Is there any other fs that is supported in both windows and linux? I would like to read and write from both OS.
2 Answers 2
Have you tried NTFS? It should work on both. Although you obviously will not have Unix permissions on that file system. But you should be able to mount it on both windows and Linux.
Here’s a page with info on mounting an NTFS partition in Ubuntu: help.ubuntu.com/community/MountingWindowsPartitions
If you’re running Windows 7 (or 8), sharing ntfs partitions between Windows and Linux (ESPECIALLY subdirectories of c:\Users) will cause endless pain and misery, courtesy of Explorer’s refusal to allow administrators to touch files with unknown/mangled/ambiguous/alien ACL data unless you explicitly «take ownership» of them first. The shell (usually) doesn’t care, but Explorer will stop you dead in your tracks every time, and Win32 apps will (usually) fail if they throw up a file dialog that enforces Explorer’s new rules.
Also, every time you boot into Linux, the next time you boot into Windows, you’ll be forced to run chkdisk. If you have 2-6 terabytes of data spread across multiple drives and partitions, you can EASILY spend 10-20 minutes waiting for chkdisk to finish. And. if you create a brand new ntfs filesystem under Linux, and populate it with files copied under Linux, but created under Windows (with Windows ACL info for an installation that no longer exists), may $