- Install Apache 2 from Source on Linux
- 1. Download Apache
- 2. Install Apache
- 3. Start Apache and verify installation
- 4. Start Apache automatically during system startup
- How to enable or disable Apache modules
- Steps to enable or disable Apache modules:
- How to enable or disable Apache2 Modules
- 1. Enable Apache2 Module
- 2. Disable Apache2 Module
- 3. Check Modules Status
- 4. List Apache2 Modules
- Apache2 won’t start after upgrade to Ubuntu 22.04 LTS — Cannot load /usr/lib/apache2/moduleslibphp8.0.so [closed]
- 6 Answers 6
Install Apache 2 from Source on Linux
All Linux distributions comes with Apache. However, it is recommended to download latest Apache source code, compile and install on Linux. This will make it easier to upgrade Apache on a ongoing basis immediately after a new patch or release is available for download from Apache. This article explains how to install Apache2 from source on Linux.
1. Download Apache
Download the latest version from Apache HTTP Server Project . Current stable release of Apache is 2.2.9. Move the source to /usr/local/src and extract it as shown below.
# cd /usr/local/src # gzip -d httpd-2.2.9.tar.gz # tar xvf httpd-2.2.9.tar
2. Install Apache
View all configuration options available for Apache using ./configure –help (two hyphen in front of help). The most commonly used option is –prefix=
# cd httpd-2.2.9 # ./configure --help
In the following example, Apache will be compiled and installed to the default location /usr/local/apache2 with the DSO capability. Using the –enable-so option, you can load modules to Apache at runtime via the Dynamic Shared Object (DSO) mechanism, rather than requiring a recompilation.
# ./configure --enable-so # make # make install
# ./configure --enable-so configure: error: no acceptable C compiler found in $PATH See `config.log' for more details. configure failed for srclib/apr
Install the gcc and the dependent modules as shown below and try ./configure again to fix the above issue.
# rpm -ivh gcc-4.1.2-14.el5.i386.rpm glibc-devel-2.5-18.i386.rpm glibc-headers-2.5-18.i38 6.rpm kernel-headers-2.6.18-53.el5.i386.rpm Preparing. ########################################### [100%] 1:kernel-headers ########################################### [ 25%] 2:glibc-headers ########################################### [ 50%] 3:glibc-devel ########################################### [ 75%] 4:gcc ########################################### [100%]
3. Start Apache and verify installation
# cd /usr/local/apache2/bin # ./apachectl start
4. Start Apache automatically during system startup
Modify the /etc/rc.d/init.d/httpd script and change apachectl and httpd variable to point to the appropriate new location as shown below. Please note that this httpd script was originally installed as part of the default Apache from the Linux distribution.
apachectl=/usr/local/apache2/bin/apachectl httpd=$
# service httpd stop # service httpd start
# chkconfig --list httpd httpd 0:off 1:off 2:off 3:off 4:off 5:off 6:off # chkconfig --level 2345 httpd on # chkconfig --list httpd httpd 0:off 1:off 2:on 3:on 4:on 5:on 6:off
How to enable or disable Apache modules
Apache is a modular system where its modules extend the functionality of the main program. A module could be installed into the system, and Apache would then be configured to load and use the module during its startup.
Some of the most used Apache modules, for example, are PHP and SSL. They enable the hosting of PHP applications and provide encrypted web traffic.
Apache modules could be enabled using the LoadModule directive in the configuration files.
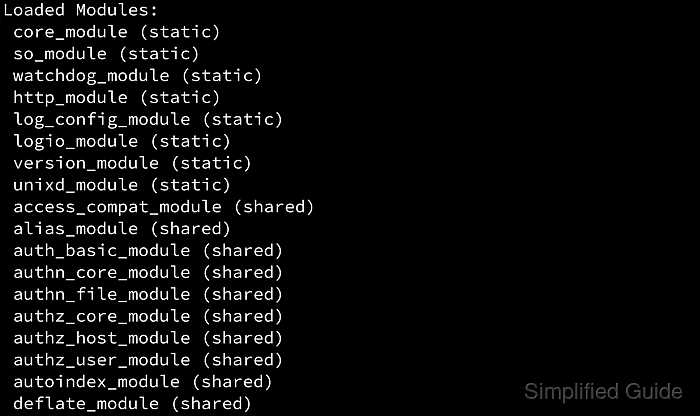
Steps to enable or disable Apache modules:
$ apachectl -t -D DUMP_MODULES Loaded Modules: core_module (static) so_module (static) watchdog_module (static) http_module (static) log_config_module (static) logio_module (static) version_module (static) unixd_module (static) access_compat_module (shared) alias_module (shared) auth_basic_module (shared) authn_core_module (shared) authn_file_module (shared) authz_core_module (shared) authz_host_module (shared) authz_user_module (shared) autoindex_module (shared) deflate_module (shared) dir_module (shared) env_module (shared) filter_module (shared) mime_module (shared) mpm_event_module (shared) negotiation_module (shared) reqtimeout_module (shared) setenvif_module (shared) socache_shmcb_module (shared) status_module (shared)
LoadModule ssl_module /usr/lib/apache2/modules/mod_ssl.so
Ubuntu and other Debian derivatives along with openSUSE and SLES has a2enmod utility installed and could be used to easily load Apache modules without having to manually configure the LoadModule directive.
$ sudo a2enmod ssl [sudo] password for user: Considering dependency setenvif for ssl: Module setenvif already enabled Considering dependency mime for ssl: Module mime already enabled Considering dependency socache_shmcb for ssl: Module socache_shmcb already enabled Enabling module ssl. See /usr/share/doc/apache2/README.Debian.gz on how to configure SSL and create self-signed certificates. To activate the new configuration, you need to run: systemctl restart apache2
CentOS, Fedora and Red Hat distributions will automatically load the module so no further action is required.
| Options | Debian, Ubuntu | openSUSE and SLES | Fedora Core, CentOS, RHEL | macOS | homebrew | xampp |
|---|---|---|---|---|---|---|
| a2enmod support | yes | yes | no | no | no | no |
| Loadmodule directive | n/a | LoadModule _module /mod_.so | ||||
$ apachectl -M Loaded Modules: core_module (static) so_module (static) watchdog_module (static) http_module (static) log_config_module (static) logio_module (static) version_module (static) unixd_module (static) access_compat_module (shared) alias_module (shared) auth_basic_module (shared) authn_core_module (shared) authn_file_module (shared) authz_core_module (shared) authz_host_module (shared) authz_user_module (shared) autoindex_module (shared) deflate_module (shared) dir_module (shared) env_module (shared) filter_module (shared) mime_module (shared) mpm_event_module (shared) negotiation_module (shared) reqtimeout_module (shared) setenvif_module (shared) socache_shmcb_module (shared) ssl_module (shared) status_module (shared)
Remove the added LoadModule directive or comment out the line by adding # at the beginning to disable loading the module.
#LoadModule ssl_module /usr/lib/apache2/modules/mod_ssl.so
Users of Ubuntu and other Debian derivatives along with openSUSE and SLES can use a2dismod utility to disable Apache modules.
$ sudo a2dismod ssl [sudo] password for user: Module ssl disabled. To activate the new configuration, you need to run: systemctl restart apache2
How to enable or disable Apache2 Modules
Apache2 is a most popular web server used in Linux operating systems. Apache is a modular web server where each functionality is served by specific modules. To add or remove any specific functionality to the Apache server we can simply enable or disable the corresponding module.
All the Apache2 modules are stored under /etc/apache2/mods-available/ directory. Once we enable any module it makes a soft link to /etc/apache2/mods-enabled/ directory. The same process reverses, once we disable any module.
In this tutorial, you will learn about enabling and disabling Apache2 modules on Debian-based systems.
1. Enable Apache2 Module
We use a2enmod command to enable modules in Apache2 web server. For example, if we need to enable the Apache rewrite module use the following command.
Then reload the Apache configuration.
sudo systemctl relaod apache2 2. Disable Apache2 Module
Similarly to disable module we use a2dismod command. For example, if we need to disable the Apache rewrite module use the following command.
Then reload the Apache configuration.
sudo systemctl relaod apache2 3. Check Modules Status
Check the status of the specific module using the a2query command. For example to find the current status of the rewrite module run the below command.
Outputrewrite (enabled by site administrator)
4. List Apache2 Modules
To list all available Apache2 modules with the status, use the following command. The output will differ system to system.
Outputautoindex (enabled by maintainer script) mpm_prefork (enabled by maintainer script) authn_file (enabled by maintainer script) proxy (enabled by site administrator) authz_svn (enabled by maintainer script) dav (enabled by maintainer script) . . dav_svn (enabled by maintainer script) proxy_http (enabled by site administrator) authz_user (enabled by maintainer script) filter (enabled by maintainer script) access_compat (enabled by maintainer script) setenvif (enabled by maintainer script)
That’s it. Assuming this tutorial gives you little understanding about modules management in Apache2 web server.
Apache2 won’t start after upgrade to Ubuntu 22.04 LTS — Cannot load /usr/lib/apache2/moduleslibphp8.0.so [closed]
Closed. This question is not about programming or software development. It is not currently accepting answers.
This question does not appear to be about a specific programming problem, a software algorithm, or software tools primarily used by programmers. If you believe the question would be on-topic on another Stack Exchange site, you can leave a comment to explain where the question may be able to be answered.
I am a bit stuck as to how to fix this. I did a distro upgrade a server running Apache2. Since the upgrade it has not worked. I ran a config test and below is the error. I had no issues with my configuration on the previous version of Ubuntu (21.10)
$ apache2ctl configtest apache2: Syntax error on line 146 of /etc/apache2/apache2.conf: Syntax error on line 3 of /etc/apache2/mods-enabled/php8.0.load: Cannot load /usr/lib/apache2/modules/libphp8.0.so into server: /usr/lib/apache2/modules/libphp8.0.so: cannot open shared object file: No such file or directory Action 'configtest' failed. The Apache error log may have more information. I sure did. Thank you. Not sure why the mod config didn’t just update itself. Pretty sure it normally does right?
no all the time, some are disabled depending on how you upgrade. We have alot of php 5.3 stuff so we have it disabled so we can continue running. But some packages don’t support it or won’t. Its a bit of a maze unfortunately but the easiest way is to check what has been updated
6 Answers 6
While you’ve figured this out, others will come (like myself) to see how you did this.
# perhaps you did the following to see what modules were present > apache2ctl -M # the result of the above command may have returned an error such as: apache2: Syntax error on line 146 of /etc/apache2/apache2.conf: Syntax error on line 2 of /etc/apache2/mods-enabled/php8.0.load: Cannot load /usr/lib/apache2/modules/libphp8.0.so into server: /usr/lib/apache2/modules/libphp8.0.so: cannot open shared object file: No such file or directory Action '-M' failed. # so you removed the problematic module that was no longer installed # by doing the following (as appropriate given the error above) > sudo a2dismod php8.0 # you needed to restart your server after that > sudo systemctl restart apache2 # if you tested the server in a browser html should function. # however you perhaps desired the use of another php module # and added another one (8.1) that is install by default in Ubuntu 22.04 > sudo a2enmod php8.1 # you restarted apache again and it worked? > sudo systemctl restart apache2 Perhaps you were using mod_userdir and also needed to update the apache php module configuration file:
By commenting out the following lines:
php_admin_flag engine Off So that they looked like this:
# # # php_admin_flag engine Off # # # finally you restarted apache2 again: sudo systemctl restart apache2 # and everything was back to normal? Did you do something like this?