How To Install Linux, Apache, MariaDB, PHP (LAMP Stack) on Ubuntu 20.04
LAMP stack ( Linux, Apache, MariaDB / MySQL, and PHP) is the widely used tech stack to host websites and blogs. This stack is mainly used to host content management software such as WordPress, Drupal, Joomla, etc.
Here, we will see how to install LAMP stack on Ubuntu 20.04.
Install LAMP Stack
Install Linux
Install AMP Stack
In other Linux environments, you need to install the required packages manually. But, in Ubuntu, you can install the whole stack with a single command.
You would get MySQL 8.0 as the database server when you install the LAMP stack using the single command. But, at the same time, if you choose to install the LAMP stack manually, you will get MariaDB 10.3 as the database.
Method 1: Install LAMP Stack Manually (One by one)
Now, we will proceed to install AMP (Apache v2.4, PHP v7.4, and MariaDB v10.3) on Ubuntu 20.04.
Install Apache
Update the package repository index.
Install the apache2 package using the apt command.
sudo apt -y install apache2 apache2-utils Apache’s default document root is /var/www/html and the main configuration file is /etc/apache2/apache2.conf . Additional configurations like Virtual hosts and modules can be found in /etc/apache2/*-enabled directory.
Install MariaDB
MariaDB has replaced MySQL as a default database server in Ubuntu. To install MariaDB v10.3, run the following command.
sudo apt install -y mariadb-server mariadb-client Run the mysql_secure_installation command to secure the MySQL installation.
sudo mysql_secure_installation NOTE: RUNNING ALL PARTS OF THIS SCRIPT IS RECOMMENDED FOR ALL MariaDB SERVERS IN PRODUCTION USE! PLEASE READ EACH STEP CAREFULLY! In order to log into MariaDB to secure it, we'll need the current password for the root user. If you've just installed MariaDB, and you haven't set the root password yet, the password will be blank, so you should just press enter here. Enter current password for root (enter for none): OK, successfully used password, moving on. Setting the root password ensures that nobody can log into the MariaDB root user without the proper authorisation. Set root password? [Y/n] Y New password: xxx Re-enter new password: xxx Password updated successfully! Reloading privilege tables.. . Success! By default, a MariaDB installation has an anonymous user, allowing anyone to log into MariaDB without having to have a user account created for them. This is intended only for testing, and to make the installation go a bit smoother. You should remove them before moving into a production environment. Remove anonymous users? [Y/n] Y . Success! Normally, root should only be allowed to connect from 'localhost'. This ensures that someone cannot guess at the root password from the network. Disallow root login remotely? [Y/n] Y . Success! By default, MariaDB comes with a database named 'test' that anyone can access. This is also intended only for testing, and should be removed before moving into a production environment. Remove test database and access to it? [Y/n] Y - Dropping test database. . Success! - Removing privileges on test database. . Success! Reloading the privilege tables will ensure that all changes made so far will take effect immediately. Reload privilege tables now? [Y/n] Y . Success! Cleaning up. All done! If you've completed all of the above steps, your MariaDB installation should now be secure. Thanks for using MariaDB! MariaDB uses the Unix Socket authentication mechanism for MariaDB root user, which allows MariaDB root user to log in only from the Unix socket (# prompt or sudo). To disable Unix Socket authentication and enable native password, follow the below steps.
Login as MariaDB root user.
use mysql; update user set plugin='mysql_native_password' where user='root'; flush privileges; quit; Install PHP
By default Apache server supports serving of static HTML files only, not PHP. To have a PHP support, you would need to install PHP and the PHP extension package for MariaDB/MySQL.
Here, we will install PHP 7.4 on Ubuntu 20.04.
sudo apt install -y php php-mysql libapache2-mod-php Restart the Apache webserver.
sudo systemctl restart apache2 Method 2: Install LAMP Stack In Single Command
Now, we will proceed to install AMP (Apache v2.4, PHP v7.4, and MySQL v8.0) on Ubuntu 20.04.
Update the repository cache using the apt command.
Paste below the line in the terminal and hit enter.
sudo apt install -y lamp-server^ The above command will search and install the required packages for the LAMP server. Wait for few minutes to let the installation of the LAMP stack complete.
Apache’s default document root is /var/www/html and the main configuration file is /etc/apache2/apache2.conf . Additional configurations like Virtual hosts and modules can be found in /etc/apache2/*-enabled directory.
Run the mysql_secure_installation command to secure the MySQL installation.
sudo mysql_secure_installation Securing the MySQL server deployment. Connecting to MySQL using a blank password. VALIDATE PASSWORD COMPONENT can be used to test passwords and improve security. It checks the strength of password and allows the users to set only those passwords which are secure enough. Would you like to setup VALIDATE PASSWORD component? Press y|Y for Yes, any other key for No: Y There are three levels of password validation policy: LOW Length >= 8 MEDIUM Length >= 8, numeric, mixed case, and special characters STRONG Length >= 8, numeric, mixed case, special characters and dictionary file Please enter 0 = LOW, 1 = MEDIUM and 2 = STRONG: 2 Please set the password for root here. New password: xxx Re-enter new password: xxx Estimated strength of the password: 100 Do you wish to continue with the password provided?(Press y|Y for Yes, any other key for No) : Y By default, a MySQL installation has an anonymous user, allowing anyone to log into MySQL without having to have a user account created for them. This is intended only for testing, and to make the installation go a bit smoother. You should remove them before moving into a production environment. Remove anonymous users? (Press y|Y for Yes, any other key for No) : Y Success. Normally, root should only be allowed to connect from 'localhost'. This ensures that someone cannot guess at the root password from the network. Disallow root login remotely? (Press y|Y for Yes, any other key for No) : Y Success. By default, MySQL comes with a database named 'test' that anyone can access. This is also intended only for testing, and should be removed before moving into a production environment. Remove test database and access to it? (Press y|Y for Yes, any other key for No) : Y - Dropping test database. Success. - Removing privileges on test database. Success. Reloading the privilege tables will ensure that all changes made so far will take effect immediately. Reload privilege tables now? (Press y|Y for Yes, any other key for No) : Y Success. All done!
MySQL uses the Unix Socket authentication mechanism for MySQL root user when installed from the Ubuntu repository. This allows MySQL root user to log in only from the Unix socket (# prompt or sudo). To disable Unix Socket authentication and enable native password, follow the below steps.
Login as MariaDB root user.
use mysql; update user set plugin='mysql_native_password' where user='root'; flush privileges; quit; Test LAMP Stack
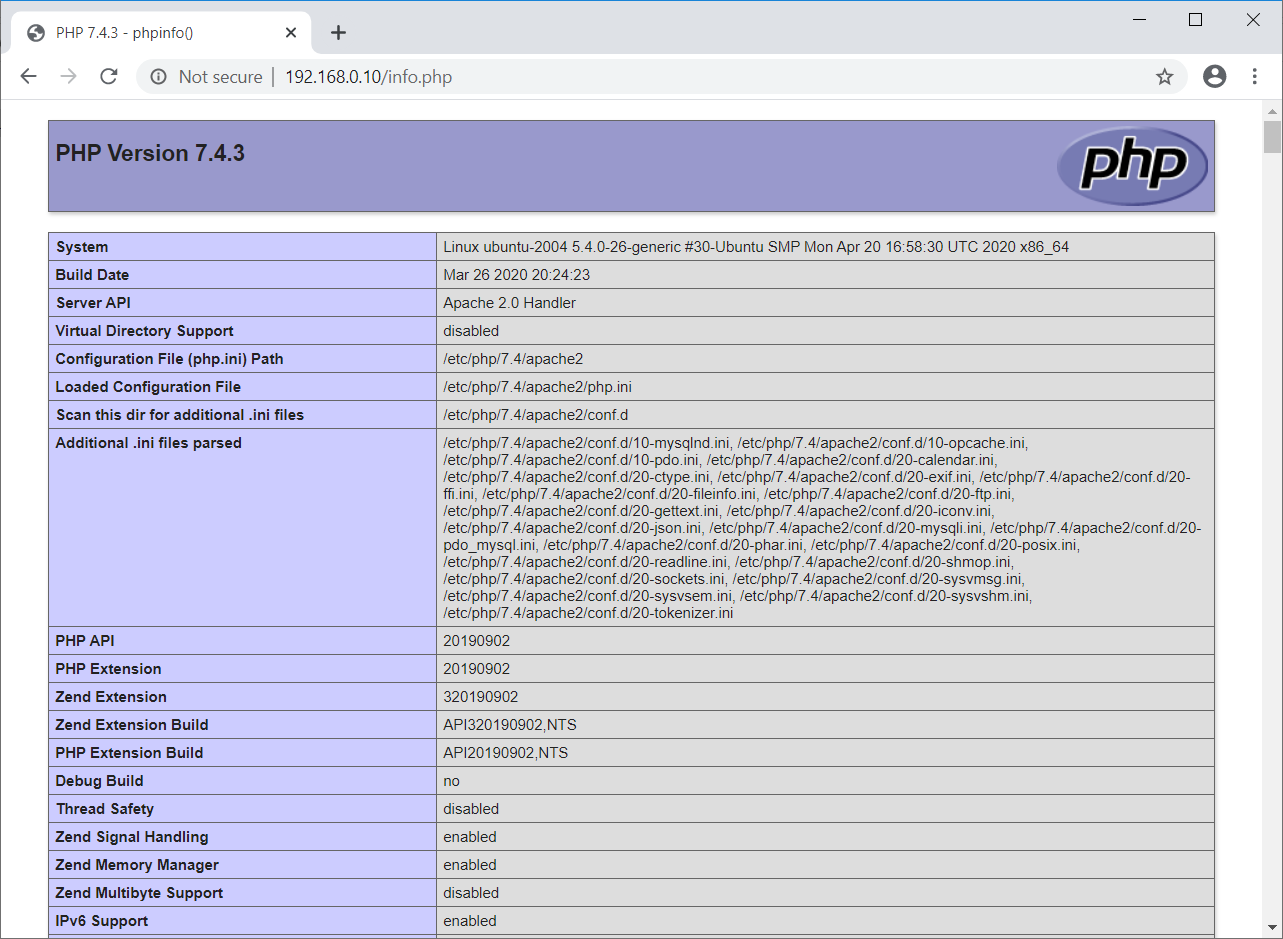
For testing the PHP, we will place one PHP file on to the default document root of Apache.
echo "" | sudo tee /var/www/html/info.php Now open a web browser and type the following into the web address to access the test page:
The page will look like below.
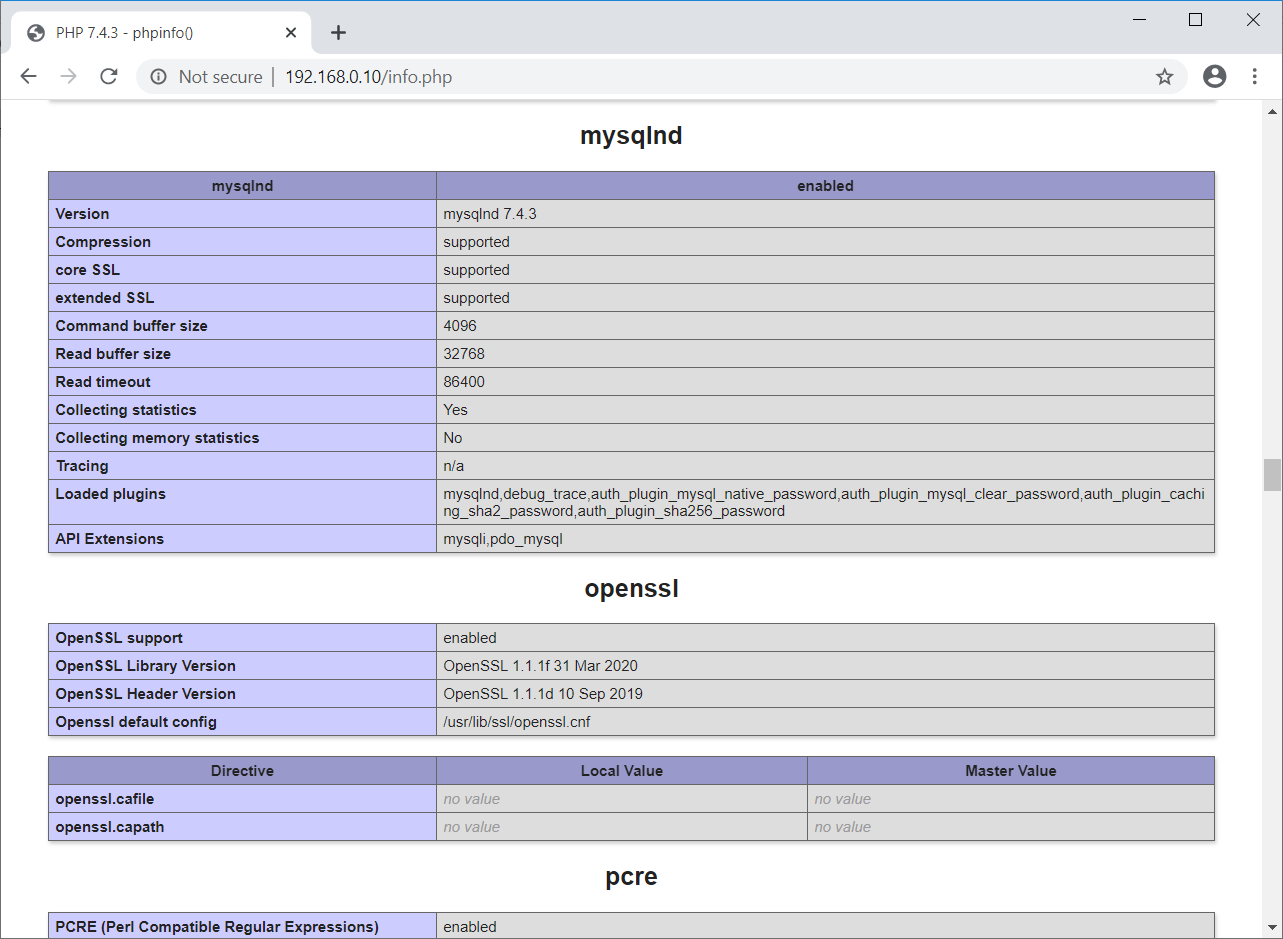
Scroll the page down to see the PHP extensions for MySQL/MariaDB.
Conclusion
That’s All. I hope, by now, you have LAMP stack on Ubuntu 20.04. Please share your feedback in the comments section.