- Как пользоваться apt
- Синтаксис и опции apt
- Как пользоваться apt
- 1. Обновление пакетов
- Package management with APT
- Introduction
- Commands
- Installation commands
- auto-apt
- Maintenance commands
- Removal commands
- Search commands
- Typical usage example
- Setting up apt-get to use a http-proxy
- Temporary proxy session
- APT configuration file method
- BASH rc method
- How to login a proxy user
- Useful additional packages
- Additional links
- Troubleshooting
Как пользоваться apt
Пакетный менеджер Apt или Advanced Package Tool используется во множестве дистрибутивов, основанных на Debian или Ubuntu, а таких дистрибутивов сейчас очень много. Этот пакетный менеджер поддерживает все необходимые функции, вы можете устанавливать и удалять пакеты, обновлять то, что было уже установлено, искать пакеты, устанавливать их из файла или загружать без установки. При этом все зависимости будут разрешаться автоматически.
Утилита apt ничем не уступает пакетному менеджеру yum, используемому в RPM дистрибутивах, да, здесь все ещё не поддерживается частичное обновление пакетов, как в Zypper, но в целом всё выглядит очень неплохо. В этой статье мы подробно рассмотрим как пользоваться apt в Linux для решения задач работы с программами.
Синтаксис и опции apt
Синтаксис команды apt очень простой и похож на другие команды Linux:
$ apt опции команда параметры_команды
Опции указывают общее поведение утилиты, команда — действие, которое надо выполнить, а в параметрах команды обычно передается имя пакета, с которым следует работать, например, установить или удалить. Вот основные опции утилиты:
- -v, —version — выводит версию утилиты;
- -h, —help — выводит справку по использованию утилиты;
- -y, —yes — автоматически отвечать «да» на все возникающие вопросы;
- —assume-no — автоматически отвечать «нет» на все возникающие вопросы;
- -d, —download-only — только скачать пакеты и больше ничего не делать;
- -f, —fix-broken — исправить недостающие зависимости;
- —no-download — ничего не загружать, использовать только пакеты из кэша;
- -s, —simulate — режим симуляции, никакие операции не выполняются, только выводится информация на экран;
- —allow-unauthenticated — позволяет установить пакеты, из репозиториев, для которых нет GPG подписи;
- —no-install-recommends — не устанавливать рекомендованные пакеты, по умолчанию будут установлены;
- -m, —ignore-missing — игнорировать пакеты, которые существует;
- -q, —quiet — выводить минимум информации, не показывать прогресс бар;
- -V, —verbose-versions — показывать полные версии обновленных пакетов;
- —only-upgrade — не устанавливать новые пакеты, только обновлять;
- —allow-downgrades — разрешить откатывать версию пакетов;
- —reinstall — переустановить пакет если он уже установлен;
А теперь давайте пройдёмся по командам apt, которые вы можете использовать:
- install — установить пакет;
- remove — удалить пакет, конфигурационные файлы, которые были изменены в вашей системе удалены не будут;
- purge — полностью удалить пакет, вместе со всеми его конфигурационными файлами;
- autoremove — очистить ненужные пакеты;
- autoclean — очистить кэш пакетов;
- update — обновить списки пакетов из репозиториев;
- upgrade — обновить версию пакета до последней, если пакет не указан будут обновлены все пакеты;
- full-upgrade — полное обновление системы, включая удаление несовместимых или больше ненужных пакетов;
- list — список установленных пакетов;
- search — поиск пакетов;
- show — посмотреть информацию о пакете;
- download — скачать пакет в текущую папку;
- edit-sources — открыть с настройками репозиториев в текстовом редакторе.
- source — скачать исходный код пакета в текущую папку;
- build-dep — установить зависимости необходимые для сборки выбранного пакета;
Дальше рассмотрим несколько примеров работы с apt, которые пригодятся как начинающим, так и более опытным пользователям.
Как пользоваться apt
1. Обновление пакетов
Сначала давайте обновим список пакетов apt из репозиториев. Репозитории находятся на удалённых серверах и когда утилита apt ищет пакет для установки, естественно, что она не обращается ко всем репозиториям подряд чтобы узнать где он находится. В системе уже есть сохранённых кэш информации о том, какие пакеты вообще есть и где их можно скачать. Для обновления этого кэша используйте команду update:
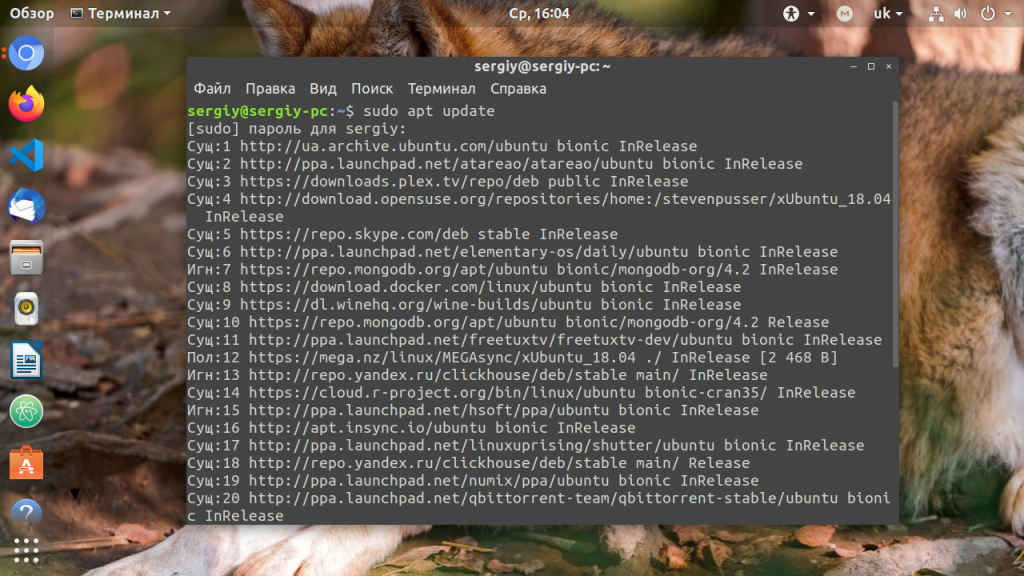
Во время загрузки URL репозиториев обозначаются специальными префиксами, вот что они означают:
- Hit (Сущ) — список не изменился с момента предыдущей загрузки;
- Ign (Игн) — репозиторий игнорируется, либо он слишком новый, либо произошла незначительная ошибка во время загрузки;
- Get(Пол) — доступна новая версия и она будет загружена.
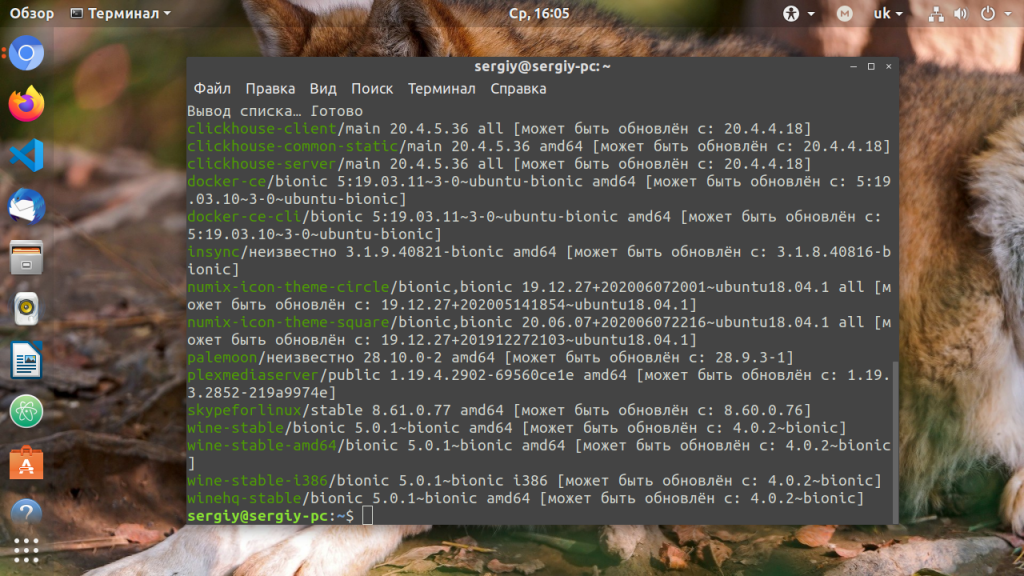
Когда кэш обновлен вы можете посмотреть для каких пакетов доступны обновления:
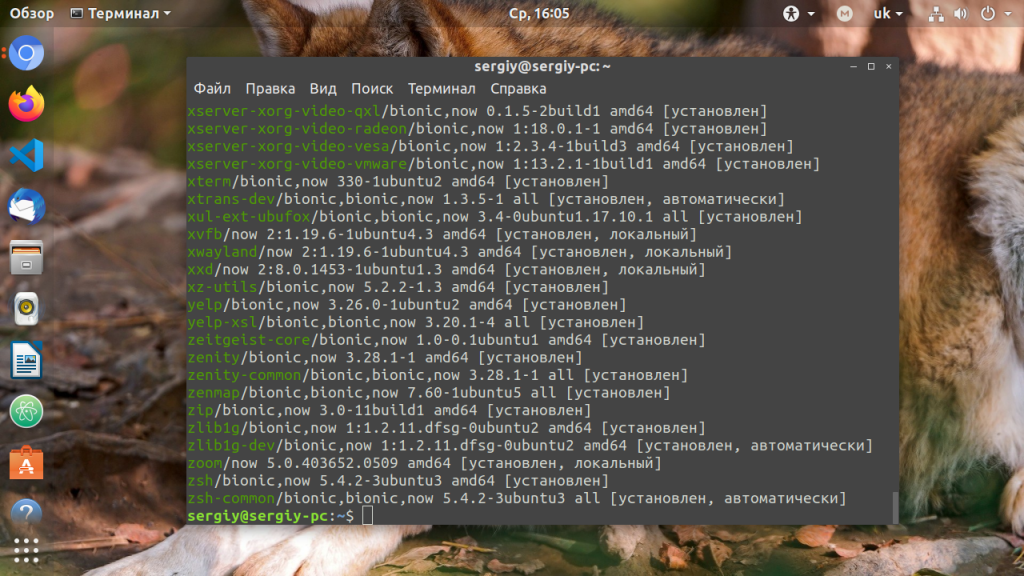
Аналогично можно посмотреть установленные пакеты apt:
sudo apt list —all-versions
Затем можно обновить все пакеты в системе:
Package management with APT

Package management via apt-get runs hand-in-hand with the /etc/apt/sources.list file. For information on editing or updating your sources list see SourcesList.
Introduction
This page describes how to handle the packages on your system using apt-get and related commands. For example, you can install a new package, remove an installed package, or update all installed packages to the latest versions.
Commands

- Example:
sudo apt-get install ubuntu-desktop
Installation commands
 Use the -s flag to simulate an action. For example: «apt-get -s install » will simulate installing the package, showing you what packages will be installed and configured. Use the -s flag to simulate an action. For example: «apt-get -s install » will simulate installing the package, showing you what packages will be installed and configured. |
auto-apt
This command runs
- You’re compiling a program and, all of a sudden, there’s an error because it needs a file you don’t have. The program auto-apt asks you to install packages if they’re needed, stopping the relevant process and continuing once the package is installed.
Maintenance commands
The same as the above, except add the «smart upgrade» checkbox. It tells APT to use «smart» conflict resolution system, and it will attempt to upgrade the most important packages at the expense of less important ones if necessary.
| «apt-get dist-upgrade» does not upgrade from a previous version of Ubuntu. For more information of upgrading from a previous version of Ubuntu see http://www.ubuntu.com/getubuntu/upgrading . |
du -sh /var/cache/apt/archives
Reconfigure the named package. With many packages, you’ll be prompted with some configuration questions you may not have known were there.
- For example:
dpkg-reconfigure fontconfig-config
echo " hold" | dpkg --set-selections
 This command may have the unintended side effect of preventing upgrades to packages that depend on updated versions of the pinned package. apt-get dist-upgrade will override this, but will warn you first. If you want to use this command with sudo, you need to use echo " hold" | sudo dpkg --set-selections not sudo echo " hold" | dpkg --set-selections. This command may have the unintended side effect of preventing upgrades to packages that depend on updated versions of the pinned package. apt-get dist-upgrade will override this, but will warn you first. If you want to use this command with sudo, you need to use echo " hold" | sudo dpkg --set-selections not sudo echo " hold" | dpkg --set-selections. |
echo " install" | dpkg --set-selections
Removal commands
This command completely removes a package and the associated configuration files. Configuration files residing in ~ are not usually affected by this command.
- + operator
- If you want to remove package1 and install package2 in one step:
dpkg -l | grep '^rc' | awk '' | xargs dpkg --purge
Search commands
This command determines which installed package owns
. It shows files from installed packages that match , with the name of the package they came from. Consider this to be a «reverse lookup» utility.  In order to use this command, the package dlocate must be installed on your system.
dpkg -L package | grep /usr/bin
For more information on apt-get, apt-cache and dpkg consult their manual pages by using the man command. These manuals will provide a wider scope of information in addition to all of the options that you can use with each program.
- Example:
Typical usage example
I want to feel the wind in my hair, I want the adrenaline of speed. So let’s install a racing game. But what racing games are available?
apt-cache search racing game
It gives me a lot of answers. I see a game named «torcs». Let’s get some more information on this game.
Hmmm. it seems interesting. But is this game not already installed on my computer? And what is the available version? Which repository is it from (Universe or Main)?
Ok, so now, let’s install it!
What is the command I must type in the console to launch this game? In this example, it’s straightforward («torcs»), but that’s not always the case. One way of finding the name of the binary is to look at what files the package has installed in «/usr/bin». For games, the binary will be in «/usr/games». For administrative programs, it’s in «/usr/sbin».
dpkg -L torcs | grep /usr/games/
The first part of the command display all files installed by the package «torcs» (try it). With the second part, we ask to only display lines containing «/usr/games/».
Hmmm, that game is cool. Maybe there are some extra tracks?
But I’m running out of space. I will delete the apt cache!
Oh no, my mother asked me to remove all games from this computer. But I want to keep the configuration files so I can simply re-install it later.
If I want to also remove config files :
Setting up apt-get to use a http-proxy
These are three methods of using apt-get with a http-proxy.
Temporary proxy session
This is a temporary method that you can manually use each time you want to use apt-get through a http-proxy. This method is useful if you only want to temporarily use a http-proxy.
Enter this line in the terminal prior to using apt-get (substitute your details for yourproxyaddress and proxyport).
export http_proxy=http://yourproxyaddress:proxyport
If you normally use sudo to run apt-get you will need to login as root first for this to work unless you also add some explicit environment settings to /etc/sudoers, e.g.
Defaults env_keep = "http_proxy https_proxy ftp_proxy"
APT configuration file method
This method uses the apt.conf file which is found in your /etc/apt/ directory. This method is useful if you only want apt-get (and not other applications) to use a http-proxy permanently.
gksudo gedit /etc/apt/apt.conf
Add this line to your /etc/apt/apt.conf file (substitute your details for yourproxyaddress and proxyport).
Acquire::http::Proxy "http://yourproxyaddress:proxyport";
BASH rc method
This method adds a two lines to your .bashrc file in your $HOME directory. This method is useful if you would like apt-get and other applications for instance wget, to use a http-proxy.
Add these lines to the bottom of your ~/.bashrc file (substitute your details for yourproxyaddress and proxyport)
http_proxy=http://yourproxyaddress:proxyport export http_proxy
Save the file. Close your terminal window and then open another terminal window or source the ~/.bashrc file:
Test your proxy with sudo apt-get update and whatever networking tool you desire. You can use firestarter or conky to see active connections.
If you make a mistake and go back to edit the file again, you can close the terminal and reopen it or you can source ~/.bashrc as shown above.
How to login a proxy user
If you need to login to the Proxy server this can be achieved in most cases by using the following layout in specifying the proxy address in http-proxy. (substitute your details for username, password, yourproxyaddress and proxyport)
http_proxy=http://username:password@yourproxyaddress:proxyport
Useful additional packages
Additional links
Troubleshooting