- Заводим GNU/Linux на ARM-плате с нуля (на примере Kali и iMX.6)
- Сборка корневой файловой системы
- Сборка Linux
- Das U-Boot
- Вместо заключения
- Linux arm operating system
- Optimized
- Up to Date
- Hosting Sponsors
- Hardware Sponsors
- Perfect for server and IOT
- Excellent for desktop
- Simple for compiling
- Armbian Leaflet #9
- Popular downloads
- Khadas VIM3
- Khadas Edge 2
- Generic ARM64
- Simple
- Lightweight
- Optimised
- Fast
- Secure
- Supported
- How to start with Armbian?
- Testimonials
Заводим GNU/Linux на ARM-плате с нуля (на примере Kali и iMX.6)
tl;dr: собираю образ Kali Linux для ARM-компьютера, в программе debootstrap , linux и u-boot .

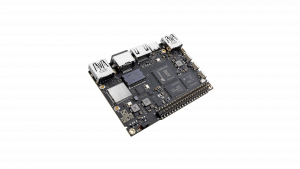
Если вы покупали какой-нибудь не очень популярный одноплатник, то могли столкнуться с отсутствием для него образа любимого дистрибутива. Приблизительно то же самое случилось с планируемым Flipper One. Kali Linux под IMX6 просто нету (я готовлю), поэтому собирать приходится самостоятельно.
Процесс загрузки достаточно простой:
- Инициализируется железо.
- Из некоторой области на запоминающем устройства (SD-карта/eMMC/etc) считывается и выполняется загрузчик.
- Загрузчик ищет ядро операционной системы и загружает его в некоторую область памяти и выполняет.
- Ядро загружает всю остальную ОС.
Сборка корневой файловой системы
Для начала нужно подготовить разделы. Das U-Boot поддерживает разные ФС, я выбрал FAT32 для /boot и ext3 для корня, это стандартная разметка образов для Kali под ARM. Я воспользуюсь GNU Parted, но вы можете сделать то же самое более привычным fdisk . Также понадобятся dosfstools и e2fsprogs для создания ФС: apt install parted dosfstools e2fsprogs .
- Отмечаем SD-карту как использующую MBR-разметку: parted -s /dev/mmcblk0 mklabel msdos
- Создаём раздел под /boot на 128 мегабайт: parted -s /dev/mmcblk0 mkpart primary fat32 1MiB 128MiB . Первый пропущенный мегабайт необходимо оставить под саму разметку и под загрузчик.
- Создаём корневую ФС на всю оставшуюся ёмкость: parted -s /dev/mmcblk0 mkpart primary ext4 128MiB 100%
- Если вдруг у вас не создались или не изменились файлы разделов, надо выполнить `partprobe`, тогда таблица разделов будет перечитана.
- Создаём файловую систему загрузочного раздела с меткой BOOT : mkfs.vfat -n BOOT -F 32 -v /dev/mmcblk0p1
- Создаём корневую ФС с меткой ROOTFS : mkfs.ext3 -L ROOTFS /dev/mmcblk0p2
- Монтируем раздел в /mnt/ (используйте более удобную для себя точку монтирования): mount /dev/mmcblk0p2 /mnt
- Собственно заполняем файловую систему: debootstrap —foreign —include=qemu-user-static —arch armhf kali-rolling /mnt/ http://http.kali.org/kali . Параметр —include указывает дополнительно установить некоторые пакеты, я указал статически собранный эмулятор QEMU. Он позволяет выполнять chroot в ARM-окружение. Смысл остальных опций можно посмотреть в man debootstrap . Не забудьте, что не любая ARM-плата поддерживает архитектуру armhf .
- Из-за разницы архитектур debootstrap выполняется в два этапа, второй выполняется так: chroot /mnt/ /debootstrap/debootstrap —second-stage
- Теперь нужно зачрутиться: chroot /mnt /bin/bash
- Заполняем /etc/hosts и /etc/hostname целевой ФС. Заполните по аналогии с содержимым на вашем локальном компьютере, не забудьте только заменить имя хоста.
- Можно донастроить всё остальное. В частности я доустанавливаю locales (ключи репозитория), перенастраиваю локали и часовой пояс ( dpkg-reconfigure locales tzdata ). Не забудьте задать пароль командой passwd .
- Задаём пароль для root командой passwd .
- Приготовления образа для меня завершаются заполнением /etc/fstab внутри /mnt/ .
Наконец, можно примонтировать загрузочный раздел, он нам понадобится для ядра: `mount /dev/mmcblk0p1 /mnt/boot/`
Сборка Linux
Для сборки ядра (и загрузчика потом) на Debian Testing надо установить стандартный набор из GCC, GNU Make и заголовочных файлов GNU C Library для целевой архитектуры (у меня armhf ), а также заголовки OpenSSL, консольный калькулятор bc , bison и flex : apt install crossbuild-essential-armhf bison flex libssl-dev bc . Так как загрузчик по умолчанию ищет файл zImage на файловой системе загрузочного раздела, пора разбивать флешку.
- Клонировать ядро слишком долго, поэтому просто скачаю: wget https://cdn.kernel.org/pub/linux/kernel/v5.x/linux-5.9.1.tar.xz . Распакуем и перейдём в директорию с исходниками: tar -xf linux-5.9.1.tar.xz && cd linux-5.9.1
- Конфигурируем перед компиляцией: make ARCH=arm KBUILD_DEFCONFIG=imx_v6_v7_defconfig defconfig . Конфиг находится в директории arch/arm/configs/ . Если такового нет, вы можете попробовать найти и скачать готовый и передать название файла в этой директории в параметр KBUILD_DEFCONFIG . В крайнем случае сразу переходите к следующему пункту.
- Опционально можно докрутить настройки: make ARCH=arm CROSS_COMPILE=arm-linux-gnueabihf- menuconfig
- И кроскомпилируем образ: make ARCH=arm CROSS_COMPILE=arm-linux-gnueabihf-
- Теперь можно скопировать файлик с ядром: cp arch/arm/boot/zImage /mnt/boot/
- И файлы с DeviceTree (описание имеющегося на плате железа): cp arch/arm/boot/dts/*.dtb /mnt/boot/
- И доустановить собранные в виде отдельных файлов модули: make ARCH=arm CROSS_COMPILE=arm-linux-gnueabi- INSTALL_MOD_PATH=/mnt/ modules_install
Das U-Boot
Так как загрузчик интерактивный, для проверки его работы достаточно самой платы, запоминающего устройства и опционально устройства USB-to-UART. То есть, можно ядро и ОС отложить на потом.
Абсолютное большинство производителей предлагают использовать Das U-Boot для первичной загрузки. Полноценная поддержка обычно обеспечивается в собственном форке, но и в апстрим контрибьютить не забывают. В моём случае плата поддерживается в мейнлайне, поэтому форк я проигнорировал.
- Клонируем стабильную ветку репозитория: git clone https://gitlab.denx.de/u-boot/u-boot.git -b v2020.10
- Переходим в саму директорию: cd u-boot
- Готовим конфигурацию сборки: make mx6ull_14x14_evk_defconfig . Это работает только если конфигурация есть в самом Das U-Boot, в ином случае вам потребуется найти конфиг производителя и положить его в корень репозитория в файл .config , или собрать иным рекомендованным производителем образом.
- Собираем сам образ загрузчика кросс-компилятором armhf : make CROSS_COMPILE=arm-linux-gnueabihf- u-boot.imx
Готово, можно загрузиться. Загрузчик должен сообщить собственную версию, некоторую информацию о плате и попытаться найти образ ядра на разделе. В случае неудачи будет пытаться загрузиться по сети. В целом вывод довольно подробный, можно найти ошибку в случае проблемы.
Вместо заключения
А вы знали, что лоб у дельфина не костистый? Это буквально третий глаз, жировая линза для эхолокации!
Linux arm operating system
We are a port of Arch Linux, which aims for simplicity and full control to the end user. We provide a light-weight base structure that allows you to shape the system to your needs.
Optimized
We build optimized packages for hard-float ARMv7 with NEON and ARMv8 AArch64 instruction sets to use each platform to its full potential.
Up to Date
New software versions are packaged as they are released, ensuring you are always on the leading edge of stable software releases.
Arch Linux ARM is a distribution of Linux for ARM computers. We provide targeted kernel and software support for hard-float ARMv7 with NEON and ARMv8 AArch64 instruction sets on a variety of consumer devices and development platforms. Our collaboration with Arch Linux brings users the best platform, newest packages, and installation support.
Arch Linux ARM carries forward the Arch Linux philosophy of simplicity and user-centrism, targeting and accommodating competent Linux users by giving them complete control and responsibility over the system. Instructions are provided to assist in navigating the nuances of installation on the various ARM platforms; however, the system itself will offer little assistance to the user.
The entire distribution is on a rolling-release cycle that can be updated daily through small packages instead of huge updates on a defined release schedule. Most packages are unmodified from what the upstream developer originally released.
Hosting Sponsors
Arch Linux ARM is grateful to our hosting sponsors who help keep the lights on and allow us to concentrate on development.
Hardware Sponsors
And a big thanks to the individuals and companies that provide us with the hardware and resources to continue development.
Copyright ©2009-2022 Arch Linux ARM
The registered trademark Linux® is used pursuant to a sublicense from LMI, the exclusive licensee of Linus Torvalds, owner of the mark on a world-wide basis.
The Arch Linux™ name and logo are used under permission of the Arch Linux Project Lead.
Perfect for server and IOT

Ultralight Linux optimized for custom ARM / RISC-V or Intel hardware
Comes with powerful ZSH or standard BASH shell.
For production: Jammy, Bullseye. For development: Bookworm, Lunar, Sid

Excellent for desktop
Fully featured XFCE, Gnome or Cinnamon based desktop. 3D and video acceleration support where possible.
Community support for: Budgie, i3, KDE plasma, Mate, Xmonad

Simple for compiling
Extensive armhf / aarch64 / riscv64 / x86 cross-compilation development framework with native or containerized build support.
Runs on Linux, Windows or Mac
Armbian Leaflet #9
Dear Armbian Community, We are pleased to announce the official support for the Bigtreetech CB1 board on Armbian! The Bigtreetech CB1, developed by the respected Bigtreetech company, one of the most popular 3D printer brands among global creators, is a remarkable addition to our lineup. We are delighted to them as a Platinum partner, and …
Popular downloads
Khadas VIM3
Khadas Edge 2
Generic ARM64
Simple
Powerful menu driven configuration tool along with stock Debian utilities. BASH shell and lightweight XFCE based desktop.
Lightweight
Standard boot, config and update methods with minimal user-space footprint. Special config utilities are optional.
Optimised
A distributed image is compressed to its real data size which starts below 1G. Login is possible via serial, HDMI/VGA or SSH.
Fast
Boot loader and kernel optimisations, memory caching, ZRAM swap and video acceleration where applicable.
Secure
Images are made fully automatised from sources. Releases are PGP signed and code is regularly inspected by community.
Supported
How to start with Armbian?
Find your board and download one of the available images. Archives can be written with Etcher or USBimager (all OS).
Make sure you have a good & reliable SD card and a proper power supply. Insert SD card into a slot and power the board. First boot takes up to 30 seconds with an average SD Card and on the cheapest board.
First root login on HDMI or serial console is automatic. If you connect via SSH login as root password 1234. You will be prompted to change the password. Next, you will be asked to create a normal user account that is sudo enabled (beware of QWERTY keyboard settings at this stage).
Type sudo armbian-config and change timezone, reconfigure language, locales, network. Manage OpenSSHD settings, freeze kernel upgrades, toggle hardware settings. Install Armbian to internal or external memory, a desktop, 3rd party software, .
Testimonials
Just a quick note to say thank you to the Developers for all that you do and have done to make our favorite Arm Linux Distro a success!
I just want to post a thank you to the developers and contributors who have built one nice distribution. Over a year ago I bought a few OPi PC as a possible replacement for Raspberry Pi based HAM radio projects I support. Last night I downloaded and installed Jessie server from Armbian. What a pleasure. Small, clean and a giant plus for me, HEADERS. I am so tired of having to build the headers for a kernel so I can compile the out of tree modules I need. I just ordered a few NanoPi NEO and I look forward to being able to run Armbian. Thank you VERY much! My next stop is the donate button.
All the Tinkerboard OS’s looked to me more like compromise solutions to make the board work, rather than real OS’s I could trust. Until I came across Armbian, that appeared to be more like the real Linux distros I was used to in the past. I saw committed people who really knew what they were doing, and it gave me a feeling of reliability.
The new image worked perfectly and I am really impressed. When using the images for Raspbian or Debian, the screen output was very blurry using the converter. With armbian, it is razor sharp, right from the beginning. Wow!
After some interesting weeks, I could successfully install eight Odroid C2 together with dedicated FPGA hardware now, and prepare them now for deep sea operation. Just wanted to express a big «THANK YOU» to all here in the forum which was involved in helping me to get the beast working.
mboehmer
One of the good things about Armbian is that it provides a very easy to use kernel config tool. I had no experience in kernel development, and I was able to work with it just in a couple hours.
teacupx
I have switched to Armbian, and what a difference. Downloads are faster, programs open faster, and T-bird and Firefox work with no problem.
Great job guys, userpatches concept is just great. Working firmware for the new board in 2 days — that took me 6 months before with Buildroot.
Alexey