- Linux backup to usb
- 💙 Как сделать резервную копию настроек Linux на флешку
- Метод 1 — Резервное копирование с Tar
- Резервное копирование других папок настроек с помощью Tar
- Шифрование резервной копии Tar
- Восстановить резервную копию Tar
- Метод 2 — Резервное копирование с Deja Dup
- Ubuntu
- Debian
- Arch Linux
- Fedora
- OpenSUSE
- Добавить папки для сохранения
- Запустите резервное копирование
- Восстановите резервную копию Deja Dup
- How to Auto Backup Files to USB Media When Connected
- How to Configuring Udev Rules for Removable Media
- Create an Auto Backup Script
- If You Appreciate What We Do Here On TecMint, You Should Consider:
- How to Auto Backup Files to USB Media When Connected
- How to Configuring Udev Rules for Removable Media
Linux backup to usb
💙 Как сделать резервную копию настроек Linux на флешку
У вас есть флешка и вы хотите сделать резервную копию ваших файлов конфигурации и настроек Linux? Если так, мы можем помочь! Проделайте эти два простых способа дабы сделать резервную копию настроек и файлов конфигурации Linux на флэш-накопитель!
Примечание. Для достижения наилучших результатов используйте флэш-накопитель USB объемом не менее 4 ГБ. Папки конфигурации часто содержат много данных, и небольшая флешка, скорее всего, не сможет обрабатывать все файлы.
Метод 1 — Резервное копирование с Tar
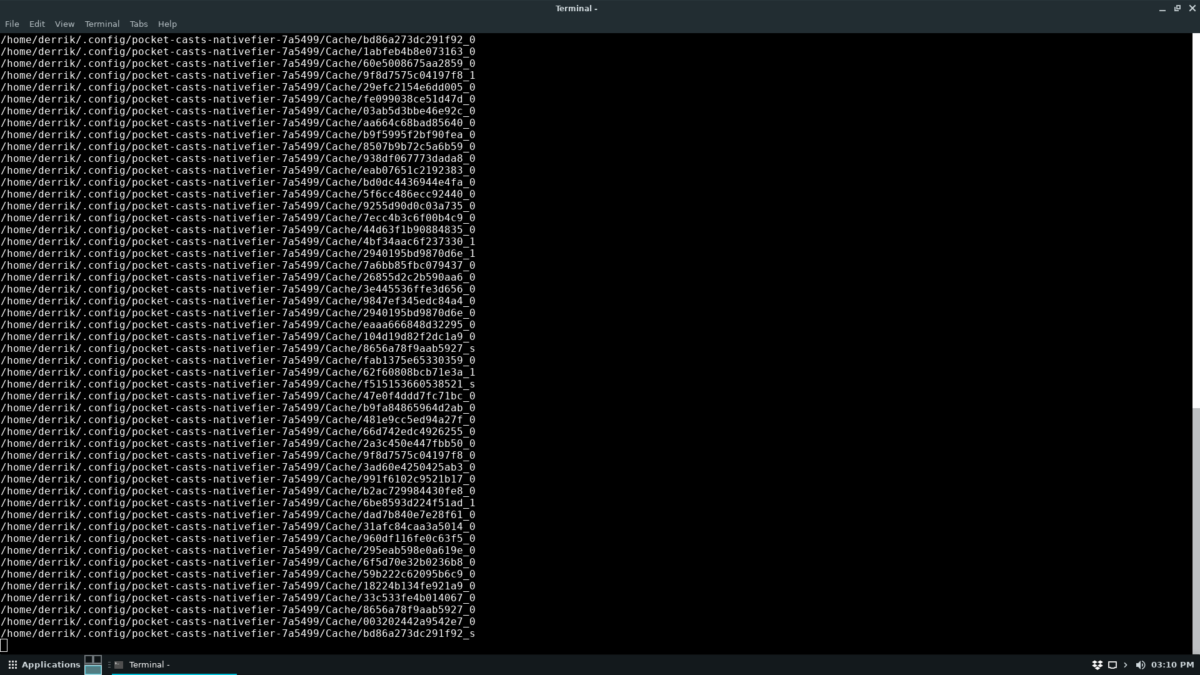
Резервное копирование настроек Linux с помощью команды Tar — хорошая идея, если вы спешите, так как это быстрый процесс. Чтобы создать резервную копию, начните с открытия окна терминала. Вы можете сделать это, нажав Ctrl + Alt + T или Ctrl + Shift + T на клавиатуре. Открыв окно терминала, используйте команду Tar, чтобы сжать папку /.config/, так как это каталог, в котором большинство приложений хранят свои настройки. Выполнение вышеуказанной команды выдаст архивный файл TarGZ с большинством ваших конфигураций Linux.
Далее подключите флэш-накопитель к USB-порту на компьютере с Linux. Затем откройте файловый менеджер и поместите в него файл linux-settings.targ.gz.
Резервное копирование других папок настроек с помощью Tar
Резервное копирование папки /.config/ в архив TarGZ — хороший способ обеспечить резервное копирование большинства настроек Linux. Тем не менее, не каждая программа хранит свои файлы настроек там. Некоторые просто используют каталог Итак, если первая резервная копия затронула не все, попробуйте вместо этого следующую команду:
Шифрование резервной копии Tar
Настройки Linux часто содержат конфиденциальную информацию, в том числе пароли, закладки и т. д. Если вы выполняете резервное копирование настроек Linux через Tar на флэш-диск, вы можете также зашифровать резервную копию. Самый простой способ создать резервную копию в Linux — использовать инструмент GPG. Чтобы запустить процесс шифрования, используйте следующую команду gpg ниже. С зашифрованным архивом в файловой системе, удалите незашифрованный файл.
Восстановить резервную копию Tar
Чтобы восстановить резервную копию Tar, следуйте пошаговым инструкциям ниже. Шаг 1. Подключите флэш-накопитель к USB-порту и перетащите архив «linux-settings.tar.gz» в свой домашний каталог (/home/username/).
Метод 2 — Резервное копирование с Deja Dup
Deja Dup — отличный инструмент для тех, кто хочет создать резервную копию на флэш-накопителе, но не хочет иметь дело с терминалом. Это простое в использовании приложение, которое сохраняет ваши настройки в пару кликов. Для использования инструмента резервного копирования Deja Dup необходимо установить программу.
Ubuntu
Debian
Arch Linux
Fedora
OpenSUSE
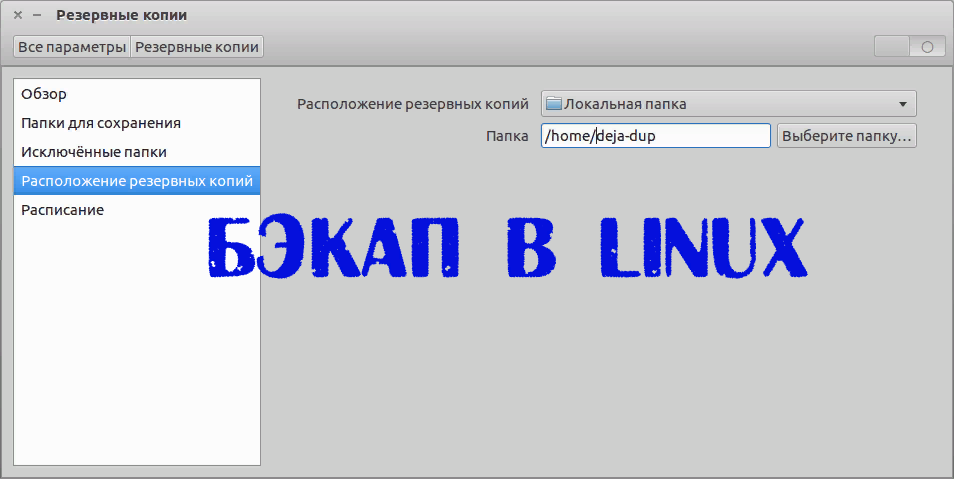
Затем, как только оно заработает, подключите флешку. После подключения флэш-накопителя USB нажмите «Расположение резервных копий» в приложении Deja Dup.
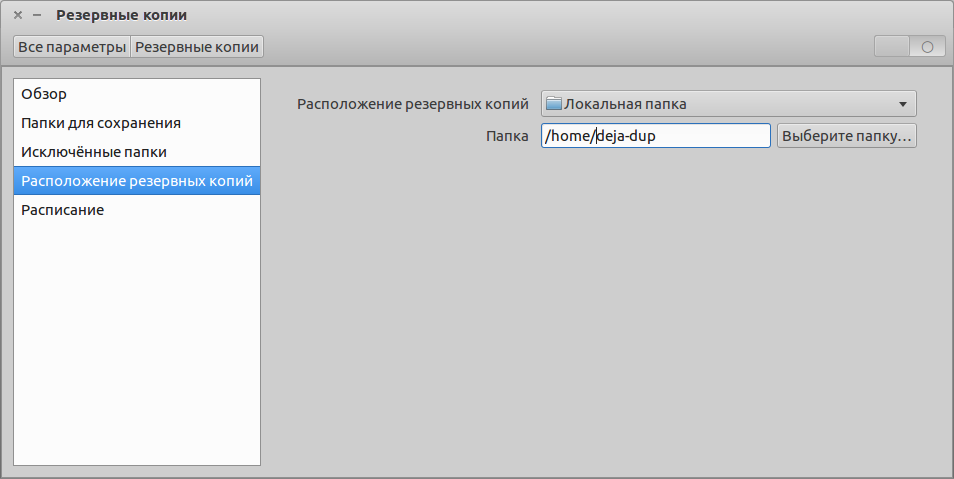
Затем найдите раскрывающееся меню и выберите пункт «Локальная папка». При нажатии на опцию «Локальная папка» появится окно файлового браузера. Используйте ее, чтобы перейти в основную папку вашей флешки. Затем нажмите OK, чтобы добавить его в Deja Dup в качестве места хранения.
Добавить папки для сохранения
С местом хранения, установленным на флешку, самое время настроить папку для резервного копирования. В приложении найдите «Папки для сохранения» и щелкните по нему мышью.
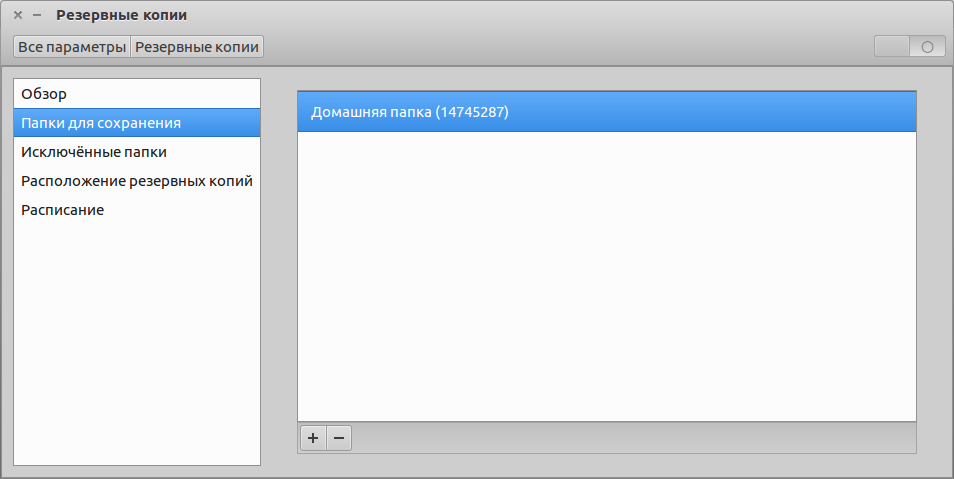
Оказавшись там, нажмите знак «+», чтобы открыть браузер файлов. В браузере файлов убедитесь, что у вас включены скрытые папки, и добавьте В качестве альтернативы, если вы не можете включить скрытые файлы или хотите сделать резервную копию больше, чем просто /.config /, не стесняйтесь добавить
Запустите резервное копирование
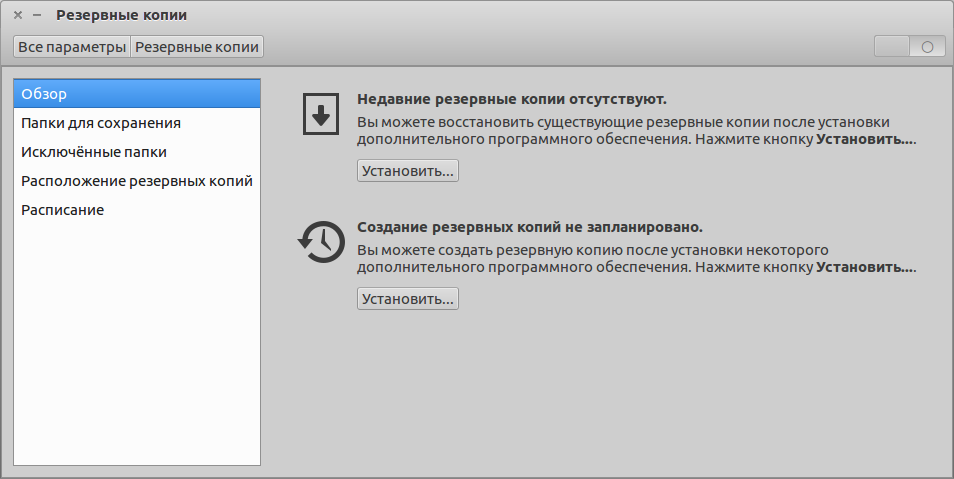
Резервное копирование на флэш-диск с помощью Deja Dup очень простое. Для этого нажмите «Обзор». Затем найдите кнопку «Создать резервную копию сейчас» и нажмите на нее, чтобы начать резервное копирование.
Обязательно установите флажок «зашифровать», если хотите сохранить резервную копию.
Восстановите резервную копию Deja Dup
Чтобы восстановить резервную копию с флешки, подключите устройство к USB-порту. Затем откройте Deja Dup. Открыв приложение Deja Dup на ПК с Linux, нажмите «Расположение резервных копий». Используя раскрывающееся меню, настройте Deja Dup на использование флэш-накопителя USB в качестве хранилища. После настройки приложения Deja Dup на распознавание флэш-накопителя USB перейдите в область «Обзор». Затем нажмите кнопку «Восстановить», чтобы восстановить файлы конфигурации в их исходное местоположение.
How to Auto Backup Files to USB Media When Connected
A backup is the last defense against data loss, offering a means to restore original data. You can use either a removable media such as an external hard drive or USB flash disk or a shared network folder, or a remote host to back up your data. It’s very easy (and equally essential) to automatically backup your important files without you having to remember to do so. In this article, we will learn how to auto backup data to a removable media after connecting it to your Linux machine. We will test with an external disk. This is a basic guide to get you started with using udev for real-life solutions. For the purpose of this article, we need a modern Linux system with:
How to Configuring Udev Rules for Removable Media
Udev is a device manager that enables you to define rules that can among others, trigger execution of a program or script when a device is added to or removed from a running system, as part of the device event handling. We can use this feature to execute a backup script after adding a removable media to the running system. Before we configure the actual rule for device event handling, we need to provide udev some attributes of the removable media that will be used for the backup. Connect the external disk to the running system and run the following lsusb command to identify its vendor and product ID. For the testing purpose, we will be using 1TB external hard disk as shown.
- «==» : is an operator to compare for equality.
- «+=» : is an operator to add the value to a key that holds a list of entries.
- SUBSYSTEM: matches the subsystem of the event device.
- ACTION: matches the name of the event action.
- ATTRS : matches sysfs attribute values of the event device, which is the device vendor ID.
- RUN: specifies a program or script to execute as part of the event handling.
Save the file and close it.
Create an Auto Backup Script
Now create an auto backup script that will auto backup files to removable USB when connected to the system.
Now copy and paste the following script, make sure to replace values of BACKUP_SOURCE, BACKUP_DEVICE, and MOUNT_POINT in the script.
Then make the script executable with the following command.
Next, reload udev rules using the following command.
The next time you connect your external hard disk or whatever device you configured to the system, all your documents from the specified location should be auto backed up to it.
Note: How effectively this works may be influenced by the filesystem on your removable media and the udev rules you write, especially capturing the device attributes.
For more information, see the udev, mount and rsync man pages.
You might also like to read these following Linux backup related articles.
That’s all for now! In this article, we have explained how to auto backup data to a removable media after connecting it to your Linux machine. We would like to hear from you via the feedback form below.
If You Appreciate What We Do Here On TecMint, You Should Consider:
TecMint is the fastest growing and most trusted community site for any kind of Linux Articles, Guides and Books on the web. Millions of people visit TecMint! to search or browse the thousands of published articles available FREELY to all.
If you like what you are reading, please consider buying us a coffee ( or 2 ) as a token of appreciation.

We are thankful for your never ending support.
How to Auto Backup Files to USB Media When Connected
A backup is the last defense against data loss, offering a means to restore original data. You can use either a removable media such as an external hard drive or USB flash disk or a shared network folder, or a remote host to back up your data. It’s very easy (and equally essential) to automatically backup your important files without you having to remember to do so.
In this article, we will learn how to auto backup data to a removable media after connecting it to your Linux machine. We will test with an external disk. This is a basic guide to get you started with using udev for real-life solutions.
For the purpose of this article, we need a modern Linux system with:
How to Configuring Udev Rules for Removable Media
Udev is a device manager that enables you to define rules that can among others, trigger execution of a program or script when a device is added to or removed from a running system, as part of the device event handling. We can use this feature to execute a backup script after adding a removable media to the running system.
Before we configure the actual rule for device event handling, we need to provide udev some attributes of the removable media that will be used for the backup. Connect the external disk to the running system and run the following lsusb command to identify its vendor and product ID.
For the testing purpose, we will be using 1TB external hard disk as shown.
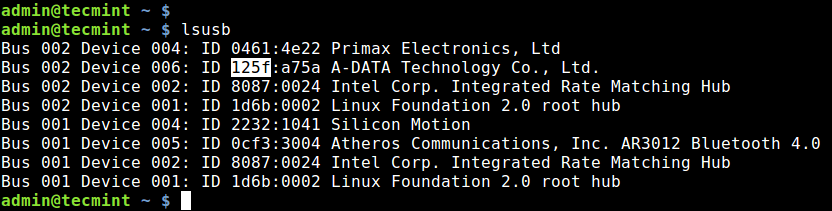
From the output of the above command, our device vendor ID is 125f , which we will specify in the udev rules as explained below.
First, remove the connected media from the system and create a new udev rules file called 10.autobackup.rules under the directory /etc/udev/rules.d/.
The 10 in the filename specifies the order of rules execution. The order in which rules are parsed is important; you should always create custom rules to be parsed before the defaults.
$ sudo vim /etc/udev/rules.d/10.autobackup.rules
Then add the following rule in it:
SUBSYSTEM=="block", ACTION=="add", ATTRS= SYMLINK+="external%n", RUN+="/bin/autobackup.sh"
Let’s briefly explain the above rule:
- «= + /home/admin/important»BACKUP_DEVICE=»/dev/external1″MOUNT_POINT=»/mnt/external» #check if mount point directory exists, if not create it if [ ! -d “MOUNT_POINT” ] ; then /bin/mkdir “$MOUNT_POINT”; fi /bin/mount -t auto “$BACKUP_DEVICE” “$MOUNT_POINT” #run a differential backup of files /usr/bin/rsync -auz «$MOUNT_POINT» «$BACKUP_SOURCE» && /bin/umount «$BACKUP_DEVICE» exit
Then make the script executable with the following command.
$ sudo chmod +x /bin/autobackup.sh
The next time you connect your external hard disk or whatever device you configured to the system, all your documents from the specified location should be auto backed up to it. Note: How effectively this works may be influenced by the filesystem on your removable media and the udev rules you write, especially capturing the device attributes. For more information, see the udev, mount and rsync man pages.
$ man udev $ man mount $ man rsync
That’s all for now! In this article, we have explained how to auto backup data to a removable media after connecting it to your Linux machine. We would like to hear from you via the feedback form below.