- Boot-Repair
- Getting Boot-Repair
- 1st option : get a disk including Boot-Repair
- 2nd option : install Boot-Repair in Ubuntu
- Using Boot-Repair
- Advanced options
- External Links
- Linux boot repair iso
- Boot repair disk
- Create a Boot Repair Live USB disk drive in Linux
- Create a Bootable Boot-Repair USB disk drive in Ubuntu, Linux Mint, and elementary OS
- boot-repair-disk
- User Ratings
- User Reviews
- Additional Project Details
- Registered
Boot-Repair
Boot-Repair is a simple tool to repair frequent boot issues you may encounter in Ubuntu like when you can’t boot Ubuntu after installing Windows or another Linux distribution, or when you can’t boot Windows after installing Ubuntu, or when GRUB is not displayed anymore, some upgrade breaks GRUB, etc.
Boot-Repair lets you fix these issues with a simple click, which (generally reinstalls GRUB and) restores access to the operating systems you had installed before the issue.
Boot-Repair also has advanced options to back up table partitions, back up bootsectors, create a Boot-Info (to get help by email or forum), or change the default repair parameters: configure GRUB, add kernel options (acpi=off . ), purge GRUB, change the default OS, restore a Windows-compatible MBR, repair a broken filesystem, specify the disk where GRUB should be installed, etc.
This tool is aimed entirely at those new to Ubuntu who want to get past their booting issues and enjoy using Linux. For the purpose of helping the forum and IRC members help you diagnose issues with your boot setup, Boot-Repair creates a Boot-Info diagnosis for you to share that allows experienced members to see what’s wrong with your boot. The tool systematically asks if you want to upload this diagnosis to a pastebin or keep it local. The Pastebin is not easily searchable and automatically expires after some days, but for confidentiality purpose you may prefer to keep the report local.
Boot-Repair is a free software, licensed under GNU-GPL.

Getting Boot-Repair
1st option : get a disk including Boot-Repair
The easiest way to use Boot-Repair is to create a live-USB disk of Boot-Repair-Disk (a disc starting Boot-Repair automatically), and boot on it.
Remark : it is recommended to install the ISO on a live-USB (eg via UnetBootin or LiliUSB or Universal USB Installer). Do not burn it on a DVD if your boot is in EFI mode.
2nd option : install Boot-Repair in Ubuntu
— either from an Ubuntu live-session (boot your computer on a Ubuntu live-USB then choose «Try Ubuntu») or from your installed Ubuntu session (if you can access it)
— open a new Terminal, then type the following commands (press Enter after each line):
sudo add-apt-repository ppa:yannubuntu/boot-repair && sudo apt update sudo apt install -y boot-repair && boot-repair
Using Boot-Repair
- — First click the Create a Boot-Info Summary button. This will simply create a Boot-Info diagnosis. A pop-up will ask if you want to upload the report online in order to share it more easily.

- — Check the diagnosis contents. If any doubt, you can share it on Ubuntu Forums (here) along with a description of your boot issue, so that experienced forum members can advise. — Once you get green light from experienced forum members, click the Recommended repair button. When repair is finished, note the new URL (paste.ubuntu.com/XXXXX) that appeared on a paper, then reboot and check if you recovered access to your OSs. — If the repair did not succeed, indicate the URL to people who help you by email or forum.
Advanced options
Warning: the default settings are the ones used by the «Recommended Repair». Changing them in the Advanced options may worsen your problem. Don’t change them unless requested by experienced helpers.
External Links
Boot-Repair (последним исправлял пользователь yannubuntu 2022-01-18 23:30:53)
The material on this wiki is available under a free license, see Copyright / License for details
You can contribute to this wiki, see Wiki Guide for details
Linux boot repair iso
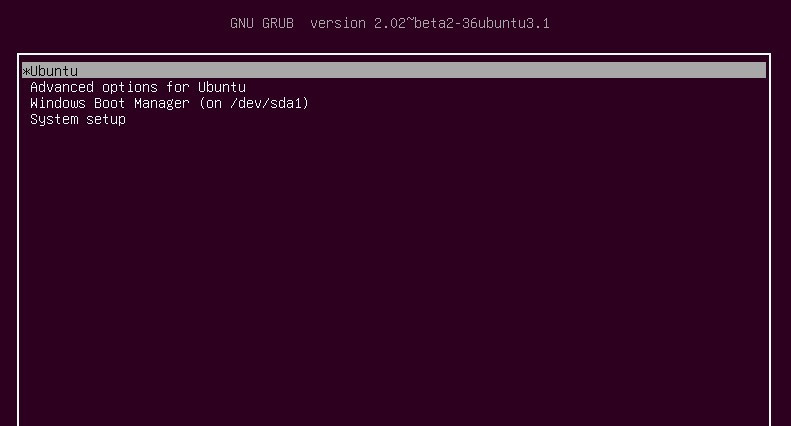
Случайно снес свой загрузочный сектор у себя на компьютере и пошел восставливать. Загрузчик также часто теряется, если ставить Windows на машину где уже живет Linux. Каждый раз забываю как правильно восстанавливать, и в разных ситуациях нужен разный подход, но тут наткнулся на прекрасный live-cd, который все за меня сделал по нажатию кнопки.
Boot repair disk
У меня Ubuntu 18.04, но этот способ подойдет для любого дистрибутива.
Записал на флешку (здесь инструкция в разделе “Установка Raspbian”) и загрузился с нее.
Там обычный Linux с тулзой для восстановления загрузчика:
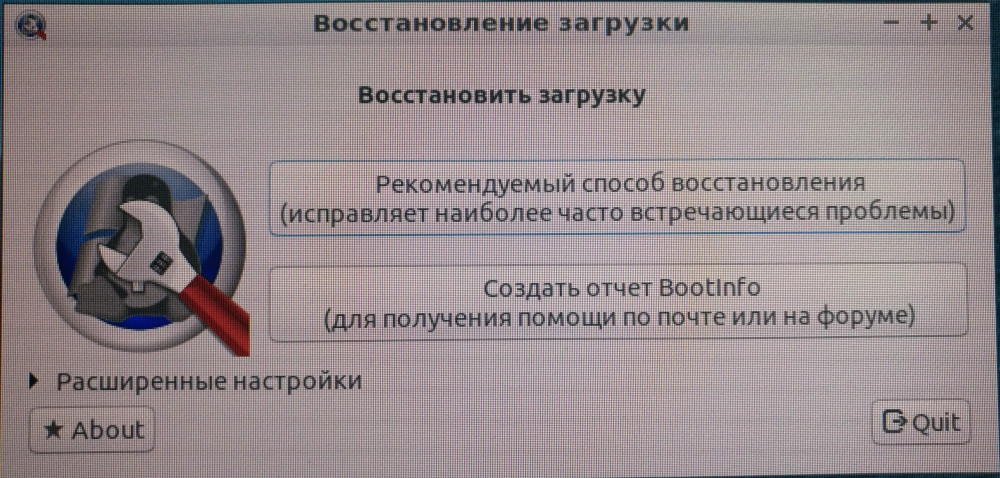
Одной кнопкой она диагностирует что не так и помогает исправить. Наверно какие-то сложные случаи ей будут не по зубам, но 90% кейсов эта утилита сможет починить.
GPT обнаружена. Пожалуйста создайте раздел BIOS-Boot (>1MB, файловая система неотформатирована, флаг bios_grub). Выполнить это вы можете с помощью инструмента Gparted. Затем попробуйте снова Запускаю Gparted в терминале:

Создаю нужный раздел, возвращаюсь в эту утилиту, и выполняю все шаги копипастя команды в терминал
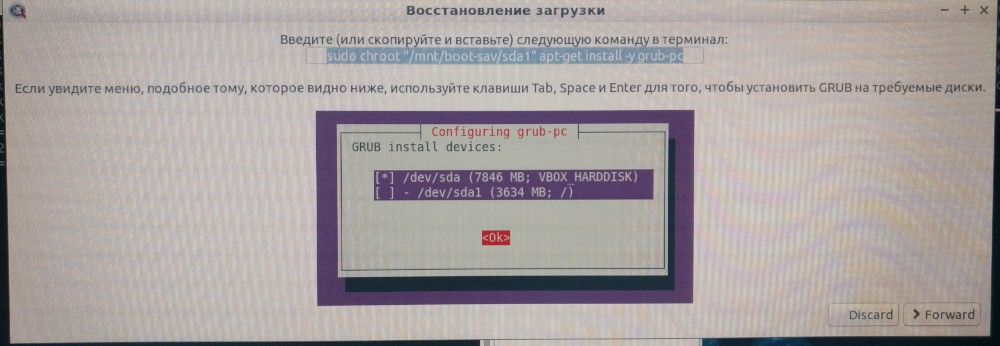
Удобно и быстро
Все. Загрузчик восстановлен.
Create a Boot Repair Live USB disk drive in Linux

B oot-Repair utility is a free & open-source utility that lets you fix and recover the GRUB bootloader. It can reinstate those lost operating systems for you. Earlier, we published a detailed post on the utility and how to install it on Ubuntu, Linux Mint, and elementary OS.
Now, we shall see more options to use Boot Repair. You can run it in two ways:
In this article, we shall look into option two on creating a bootable Boot Repair Live USB flash drive. I recommend to create a disk and keep one readily available just in case you have it when you need it the most. You never know when disaster strikes.
There is more to it than just a Boot Repair. The live USB desktop comes loaded with not only the Boot-Repair utility, but also other handy utilities like GParted, OS-Uninstaller, Synaptic Package Manager, Firefox web browser, LX Terminal, and File Manager. It’s a customized version of Lubuntu OS running in your USB flash drive! Since there is the Synaptic Package Manager, you also open to those thousands of other utilities.
Create a Bootable Boot-Repair USB disk drive in Ubuntu, Linux Mint, and elementary OS
STEP 1: Plug in a blank USB flash drive of at least 1 GB capacity to the PC.
STEP 2: Download Boot-Repair ISO image.
STEP 3: I recommend to use ‘GNOME Disks’ utility to write the bootable image to the USB flash drive. Ubuntu and Linux Mint ships with this utility pre-installed. Elementary OS users first need to enable PPA and then use the following commands in terminal to install the gnome-disks utility.
sudo apt-get install gnome-disk-utility
STEP 4: After installation is complete, right-click on the downloaded boot-repair-disk-64bit.iso file and select ‘Open With’ > ‘Disk Image Writer.’

STEP 5: Make sure to select the USB flash drive in the ‘Destination.’

Select the USB drive in the Destination field
STEP 6: Click ‘Start Restoring…’ and wait for the process to finish.
Your Boot Repair Live USB flash drive should be ready!

Boot-Repair USB Flash Drive is Ready!
You can plug in this USB flash drive to your computer at startup and boot into it. You will have to enable UEFI mode in BIOS settings. You will have to search in your computer manufacturer website to know how to boot into BIOS and enable the UEFI mode.
Once you boot into the flash drive, you should be taken to the Boot Repair live desktop, where you can fix your GRUB 2 boot problems. It reinstalls the GRUB bootloader.

Boot-Repair Live USB Desktop
boot-repair-disk

Quant offers a wide range of solutions for retail. Within one integrated software system, it allows you to efficiently combine the management of retail space, shelf labels and marketing materials with task management, reporting and automatic replenishment.
User Ratings
User Reviews
This will NOT run in my 64-bit PC! It keeps saying it is for 32-bit computers ONLY! . And even the install is named «boot-repair-disk-32bit.iso» WTF.
Should be called «Catch 22». The USB will absolutely not boot in EUFI mode, but to get it to do anything, it says I must be in EUFI Mode. Catch 22
Additional Project Details
Registered
Userback is a user feedback platform that automates the feedback lifecycle for websites and applications to improve product fit and speed development cycles. Userback empowers more than 20,000 software teams to collect, manage, and resolve visual feedback directly from their users. Built.
Noodle is the all-in-one enterprise platform that removes the stress of working across emails, file servers, task managers, spreadsheets, chats, meetings, etc. Teams that use their Noodle communicate better and are more productive. Your people will see where everything is, understand what.
Qrvey is the embedded analytics platform built for SaaS providers. It dramatically reduces cost and complexity while speeding up deployment time, getting powerful analytics applications into the hands of your users as fast as possible. Product managers choose Qrvey because we’re built for the.