- 10 Useful Tools to Create Bootable USB from an ISO Image
- 1. Rufus
- 2. UNetbootin
- 3. Balena Etcher
- 4. Ventoy
- 5. Universal USB Installer
- 6. Yumi
- 7. PowerISO
- 8. GNOME Multiwriter
- 9. MultiBootUSB
- 10. ImageUSB Writer
- Make a bootable USB drive on any Linux distro
- Make a bootable USB drive in Linux
- Options explained:
- Restore the USB drive
- Conclusion
10 Useful Tools to Create Bootable USB from an ISO Image
CD and DVD writers are a thing of the past. You are not likely to find them in modern-day laptops. If your goal is to create a bootable medium, then creating a bootable USB drive from an ISO file remains your best option.
There are quite a number of tools that can help you create a bootable USB drive. Some will even go further and let you create a multi-boot USB drive where you get to choose the OS that you want to install.
Here are some of the widely-used utilities for creating a bootable USB drive from an ISO file in Linux desktop systems.
1. Rufus
We start off our list with Rufus which is arguably one of the most popular bootable USB creation utilities. It’s a free tool that you can download and create bootable USB pen drives, memory sticks, etc. It is particularly helpful when you want to create a USB installation medium from an ISO image or work on a system with no OS installed.
Rufus is a portable utility that comes with a small footprint – 1.3MB only. No installation is required. You just need to double-click on the executable file to launch the UI and start creating your USB bootable medium from an ISO image of your choice (both Windows and Linux).
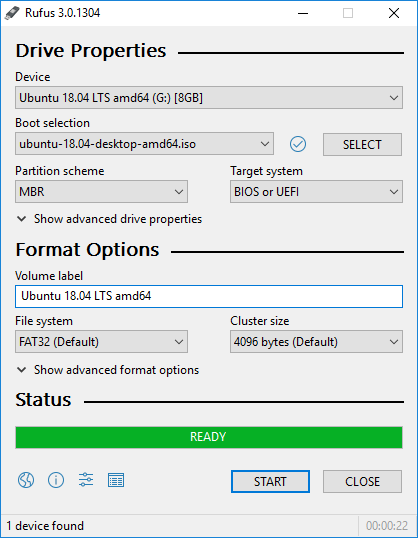
Unfortunately, Rufus is only supported on Windows and the developer has not yet ported it to Linux as yet. If you are looking for an alternative that works on Linux, read on.
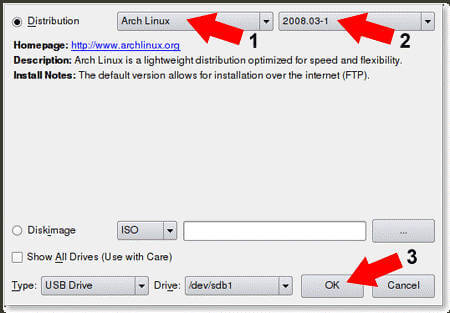
2. UNetbootin
UNetbootin is a free and cross-platform utility for creating live bootable USB drives using an ISO image from all the major Linux distributions, even the lesser-known ones such as Tails, and AntiX.
It doesn’t employ distribution-specific rules for creating bootable USB drives, and therefore, most of the Linux ISO images should load without a problem.
Apart from creating a Live bootable medium, you get other system repair tools and utilities for example:
- Parted Magic
- SystemRescueCD
- Smart Boot Manager
- Dr.Web AntivirusF-Secure Rescue CD
- Super Grub Disk
- Backtrack
- Ophcrack
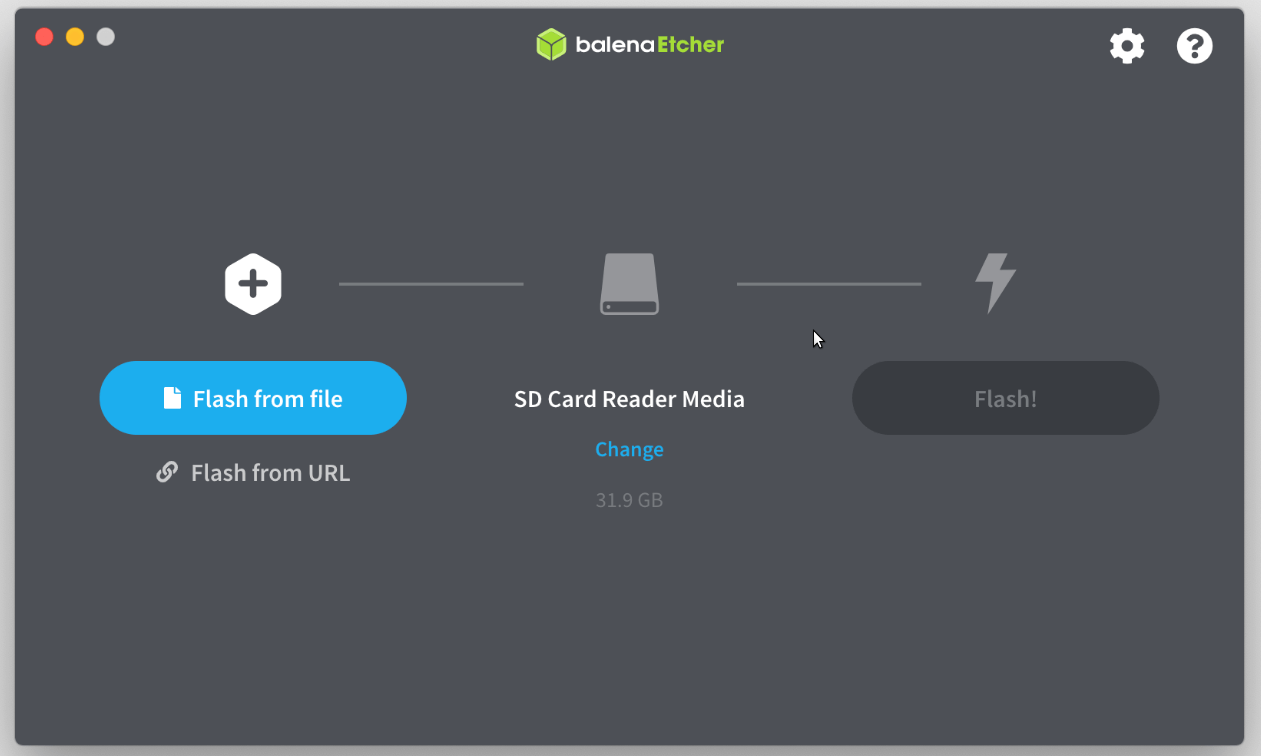
3. Balena Etcher
Developed & Maintained by the Balena team, Balena Etcher is a free and open source for writing image files such as .img and .iso onto USB drives and creating Live bootable pen drives and SD cards.
Etcher is a cross-platform tool and is available for download on Windows, macOS, and Linux (both 32-bit and 64-bit). It provides a very elegant yet simple UI that provides a smooth experience while writing your image files.
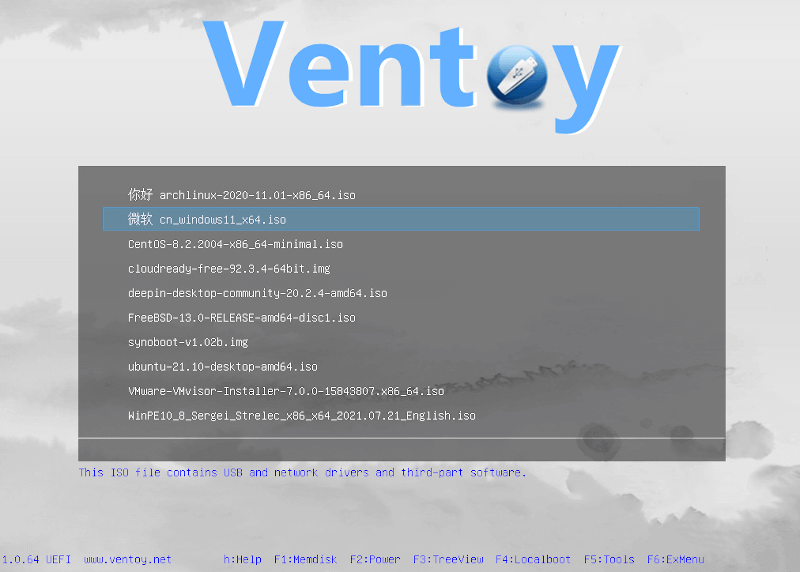
4. Ventoy
Ventoy is yet another utility that lets you not only create an ordinary USB bootable medium but also allows you to create a multiboot USB drive with several OS options.
In fact, Ventoy takes away the need to format your USB drive over and over again. Simply copy the ISO file to your Pendrive drive and boot it. You can copy multiple ISO files concurrently and Ventoy will provide a boot menu to select your preferred image to boot from. Ventoy supports over 420 ISO files.
- Cross-platform (Windows, Linux).
- Support for both Legacy and UEFI BIOS modes.
- Support for ISO images larger than 4GB.
- MBR and GPT partition style supported (1.0.15+).
- USB drive write-protected support.
- You can directly boot from ISO/WIM/IMG/VHD(x)/EFI files. No extraction is required.
And many more. Check out Ventoy’s additional features.
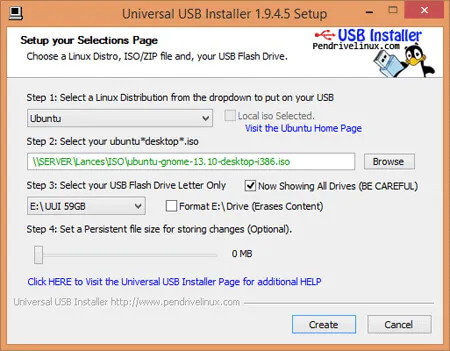
5. Universal USB Installer
Abbreviated as UUI, Universal USB Installer is a Live Linux Bootable USB Creator Software that allows you to easily create a bootable USB from your favorite Linux distribution or Windows installer. It runs only on the Windows operating system.
In addition to that, you also get additional tools such as USB Boot Rescue tools such as Comodo and BitDefender Rescue CD, and bootable software such as Hirens Boot CD.
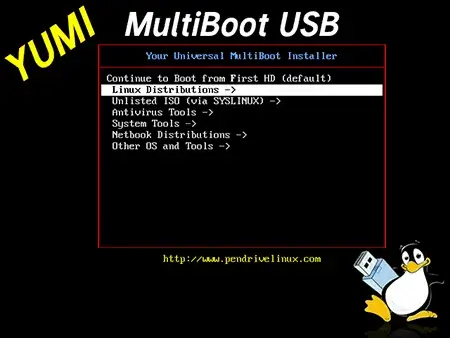
6. Yumi
Yumi – short for ‘Your Universal Multiboot Installer’ – is another tool that you can leverage to create a multiboot USB drive. It’s the predecessor of the Universal USB installer and allows you to create a Multiboot USB Flash Drive containing multiple ISO files on the fly and start using it to boot your preferred Live Linux OS.
Key features of Yumi USB creator include:
- Runs only on the Windows operating system.
- An option to reformat your USB drive.
- Support for both Legacy and UEFI BIOS modes.
- Affinity for Ubuntu-derived Distributions.
- Download links to make it easy to get the related ISO files.
- A website link to help you learn more about the YUMI.
- A feature to remove installed items on the USB drive to facilitate cleanup.
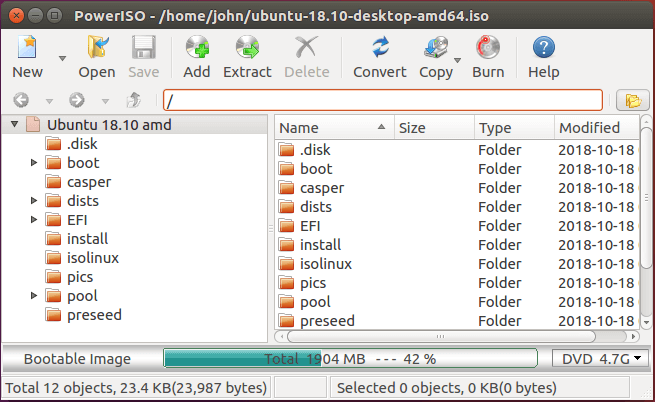
7. PowerISO
PowerISO is a robust and fully-featured application for burning CDs/DVDs. In addition, It allows you to extract, burn, create, encrypt, compress, and convert ISO images and mount them on an external drive.
It provides an all-in-one solution allowing you to do whatever you want with your files.
At a glance, PowerISO allows you to:
- Supports Windows, Linux, and macOS.
- Create a bootable USB drive from an ISO image.
- Create bootable ISO files and create bootable CDs and DVDs.
- Open and extract ISO files with a single click.
- Rip multimedia files including audio files such as MP3, WMA FLAC.
- Burn audio files from MP3, and WMA FLAC to CDs / DVDs.
- Ability to edit ISO files directly.
- Create ISO or BIN files from CDs / DVDs.
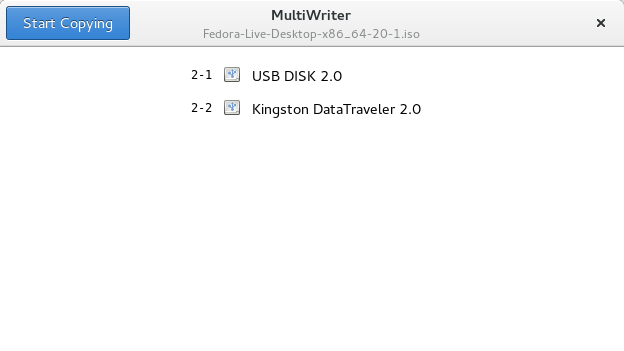
8. GNOME Multiwriter
GNOME Multi-writer is a utility for Linux systems that is used to write an ISO file to multiple USB devices at a go.
It supports USB drives of up to 32GB in size. It was originally written as part of the ColorHug project, but later on, shifted direction and became an independent application in 2015.
9. MultiBootUSB
MultiBootUSB is a free and open-source cross-platform tool that also allows users to install multiple Live Linux distributions on a USB drive and boot from it. It provides a simple and user-friendly UI that enhances the seamless creation of the bootable USB drive.
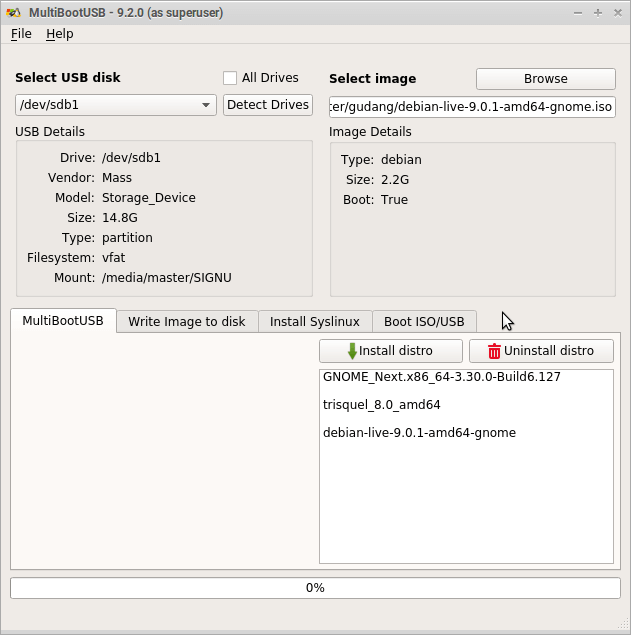
- Supports Windows, Linux, and macOS.
- Automatic detection of ISO files.
- Works on both USB and external hard drives.
- Preservation of files on the USB drive without deletion.
- Installed images can be uninstalled without affecting other files in the drive.
- Ability to install multiple distributions at a time on the command line.
- The list of supported distributions is constantly updating.
10. ImageUSB Writer
Last on the list is the ImageUSB Writer. Just like GNOME multi-writer and multi-boot USB, this is a free utility for Windows systems only that allows you to write an ISO file concurrently to several USB devices. It also supports direct imaging between the devices.
ImageUSB writer is also a perfect tool for mass duplication of USB flash drives. The application is also capable of reformatting a USB device, as well as MBR and GPT entries for wider disk space.

That was a roundup of some of the utilities that you can leverage to create a bootable USB drive from an ISO image in Linux. We have compiled tools that work on both Linux and Windows in case you are working on either system. That is all for now. Your feedback is highly welcome.
Make a bootable USB drive on any Linux distro
I know that many of you are scared of the Linux command line. Of course, you can use graphical programs to make a bootable USB in Linux. But believe me, you will benefit so much if learn the Linux command line tools. For example, if you need to make a bootable USB drive in Linux, different distributions provide different graphical programs to do that, but every Linux distribution has the same built-in tool to do the same job. So, you will benefit for it long-term.
Make a bootable USB drive in Linux
To make a bootable USB drive in Linux, you just need to learn one simple command. The command is dd .
sudo dd bs=4M if=path-to-the-ISO of=/dev/sdX status=progress && sync Options explained:
sudo means to give admin privileges to this command.
dd is the program name.
bs=4M means to use a block size of 4M, so the system will read and write the data in chunks of 4M. This option is simply meant to speed up the process.
if specifies the source to read. Simply put, this is an ISO file of the Linux image you download from the Linux distribution website.
path-to-the-ISO — path to the ISO file. For example, ~/Downloads/archlinux.iso
of specified the destination or where to write this ISO file. In other words, it is your USB drive. This is the most important part of the command, If you do mistake here, you can screw up your whole system. So, be very-very careful.
/dev/sdX means the name assigned to a device by your Linux system. It is some kind of analogy of disks C, D, E in Windows systems.
To find out the name Linux assigned to your flash drive, run this command:
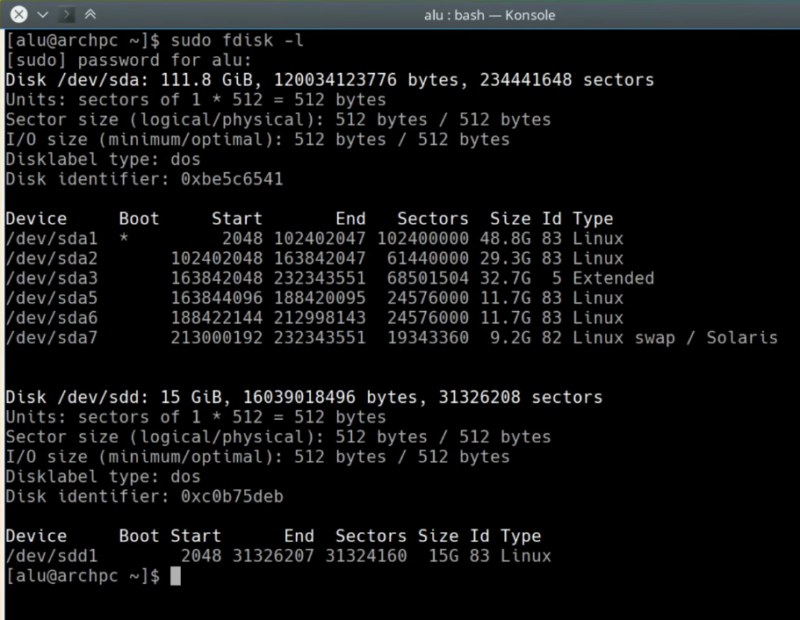
Then you need to analyze the output like the one above. Usually, the USB devices are listed at the end. You find your flash drive by its size. It usually has only one partition. I know that my flash drive is 15Gb. So, its name is sdd. This name is not permanent and it depends on the order the drives are mounted to the system. So, you need to check your USB drive name every time you insert it into the computer
status=progress is not necessary. However, it is helpful because it will show you the progress during the writing process. Without this option, nothing will be printed on the terminal screen.
sync is actually another command, not an option. Sync clears the cache. Thanks to the && signs it will be executed as a chain with dd. This will make sure that all the data is written to the flash drive and nothing is left in the cache.
NOTE: I also need to WARN you that this procedure will wipe all the data from your USB flash drive. So, if you have any important data on it, copy it somewhere else before you run this command. I also recommend to back up the data from other hard drives, so you do not destroy them accidentally.
So, when you are sure that there is no valuable data on the flash drive and you specified all the names correctly, especially the of option, press Enter.
It usually takes several minutes to complete. When the process is finished, you can reboot your system and boot from a newly created bootable USB.
That is the way you can make a bootable USB drive in Linux.
Restore the USB drive
After you have used the bootable USB flash drive, you need to restore it back to its normal not-bootable state. So, to do that, you need to remove the bootable system from it. Run this command:
Then, where again sdX is your flash drive name without any number (in my case it is sdd). You can check it with:
After that create a new partition on it:
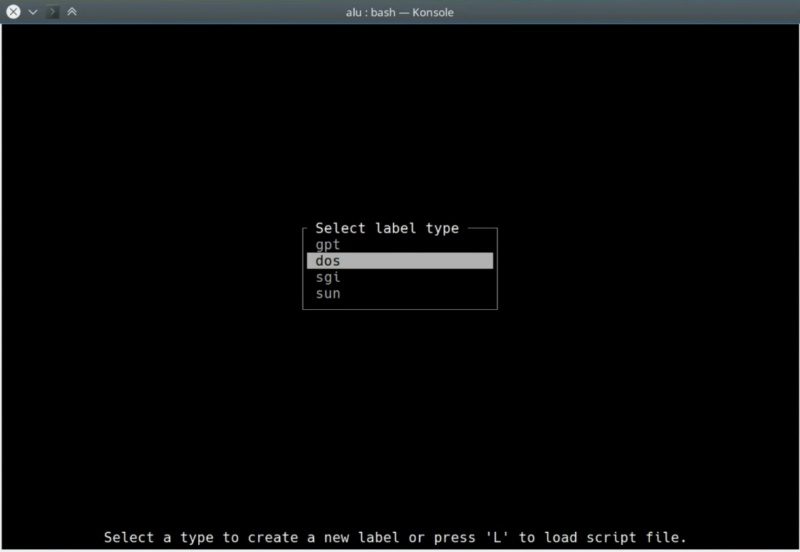
And press enter to create a new partition.
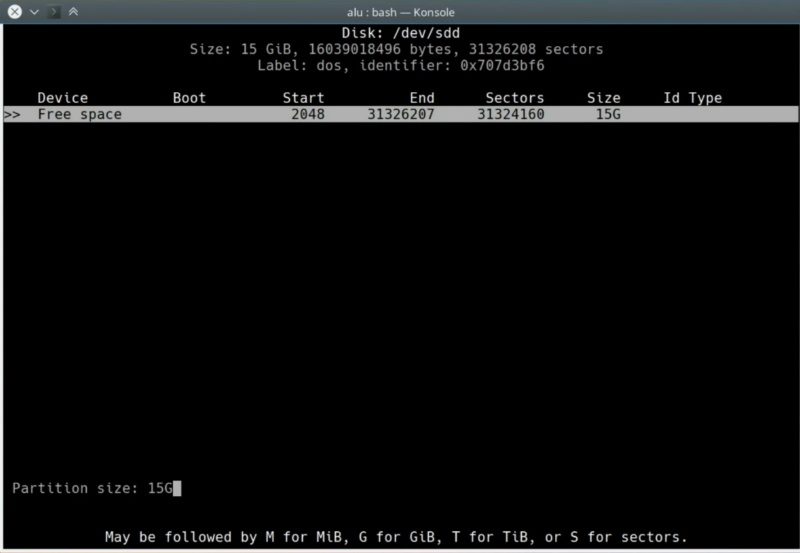
Keep it at its maximum size. So, press enter.
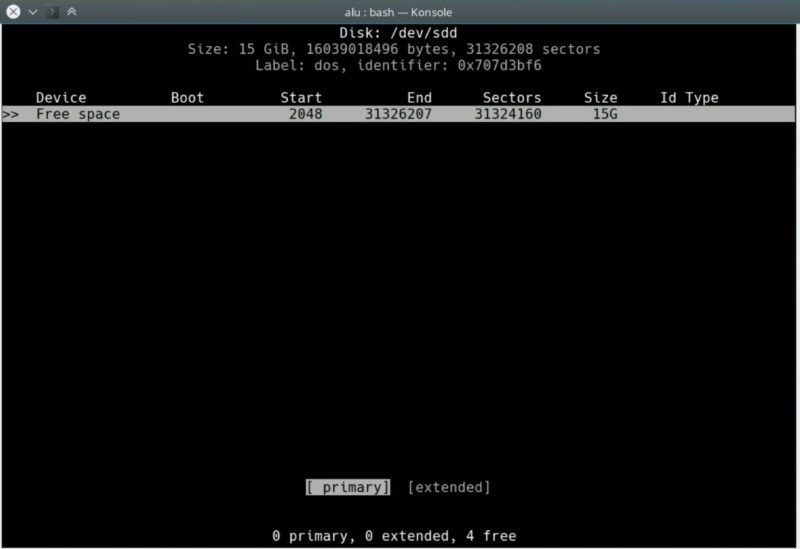
Next, press enter again to make it primary. Navigate with the arrow keys to write and press Enter to write the changes.
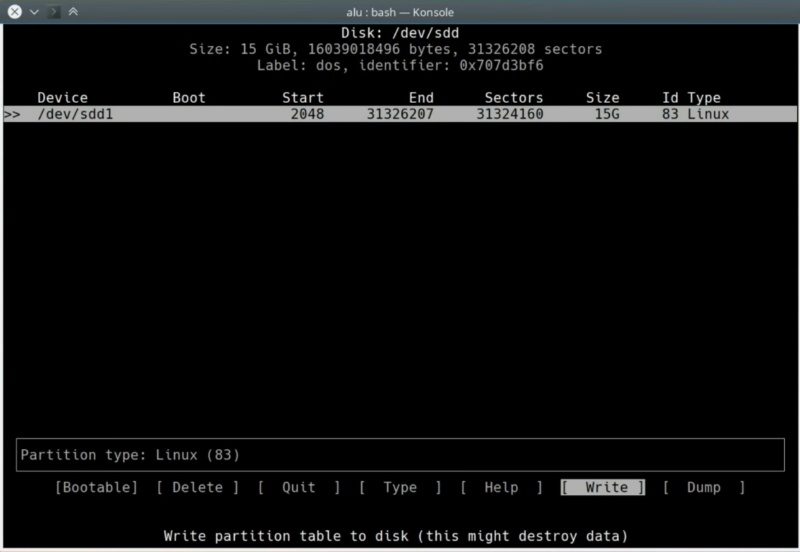
Finally, type yes to confirm and quit the program.

Then, run this command, to check if a new partition has been created:
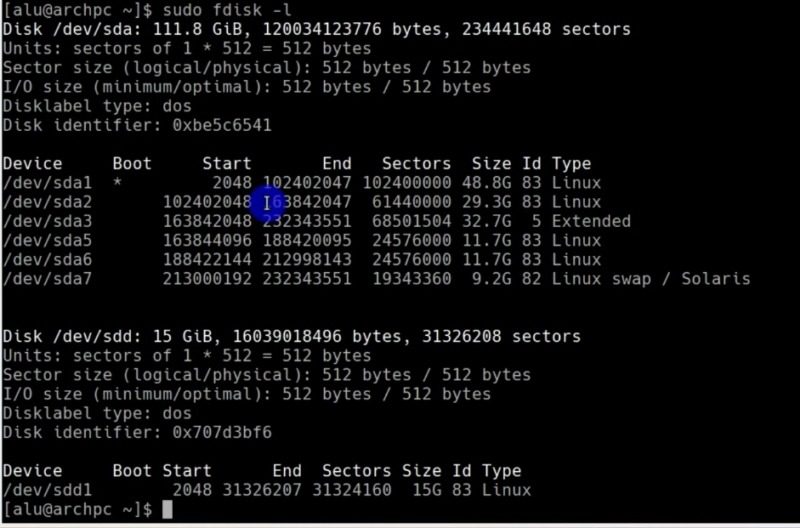
As you can see, the new partition has been created. It is named sdd1 in my example.
Then, format this partition as FAT file system:
sudo mkfs.vfat -n 'ALU' /dev/sdd1 
Where ‘ALU’ is the label I give to this drive, you can use your name instead. And sdd1 is the partition name. Unlike in all the previous steps, where you used the device names, in this command you need to specify the partition name which ends with the number.
After these uncomplicated steps, your flash drive is like new and you can use it to store files.
Conclusion
Now you know how to make a bootable USB drive in Linux. You can now proceed to the installation process or test Linux live distributions.
So, leave your comment and give your opinion about this tutorial. Did you like it? Did you know about this tool?
Average Linux UserFollow I am the founder of the Average Linux User project, which is a hobby I work on at night. During the day I am a scientist who uses computers to analyze genetic data.