How to Install Kernel Headers in Ubuntu and Debian
In our last article, we have explained how to install kernel headers in CentOS 7. Kernel Headers contain the C header files for the Linux kernel, which offers the various function and structure definitions required when compiling any code that interfaces with the kernel, such as kernel modules or device drivers and some user programs.
It is very important to note that the kernel headers package you install should match with the currently installed kernel version on your system. If your kernel version ships with the default distribution installation or you have upgraded your Kernel using dpkg or apt package manager from the Ubuntu or Debian base repositories, then you must install matching kernel headers using package manager only. And if you’ve compiled kernel from sources, you must also install kernel headers from sources.
In this article, we will explain how to install Kernel Headers in Ubuntu and Debian Linux distributions using default package manager.
Install Kernel Headers in Ubuntu and Debian
First check your installed kernel version as well as kernel header package that matches your kernel version using following commands.
$ uname -r $ apt search linux-headers-$(uname -r)
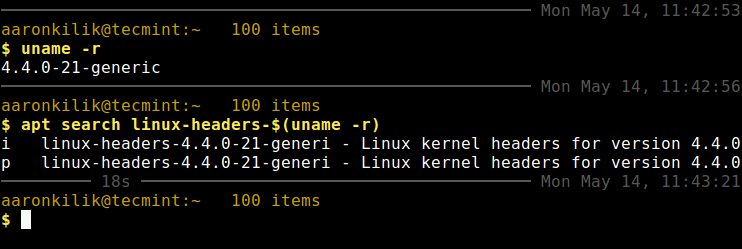
On Debian, Ubuntu and their derivatives, all kernel header files can be found under /usr/src directory. You can check if the matching kernel headers for your kernel version are already installed on your system using the following command.
$ ls -l /usr/src/linux-headers-$(uname -r)

From the above output, it’s clear that the matching kernel header directory doesn’t exist, meaning the package is not yet installed.
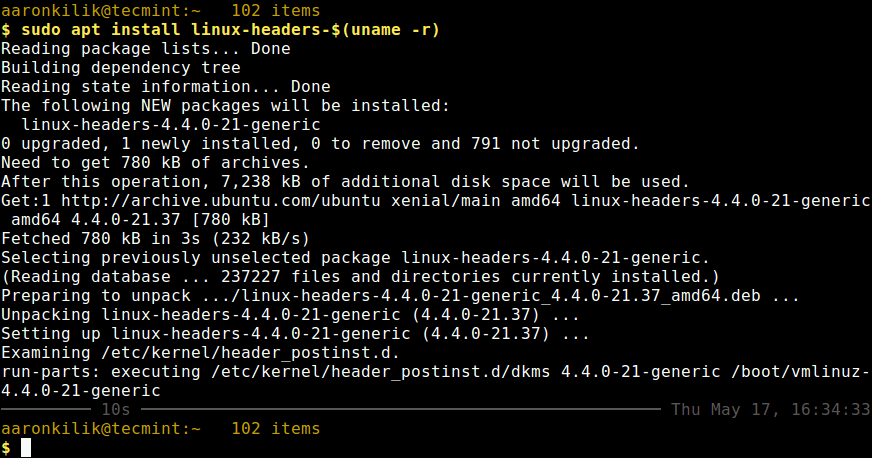
Before you can install the appropriate kernel headers, update your packages index, in order to grab information about the latest package releases, using the following command.
Then run the following command that follows to install the Linux Kernel headers package for your kernel version.
$ sudo apt install linux-headers-$(uname -r)
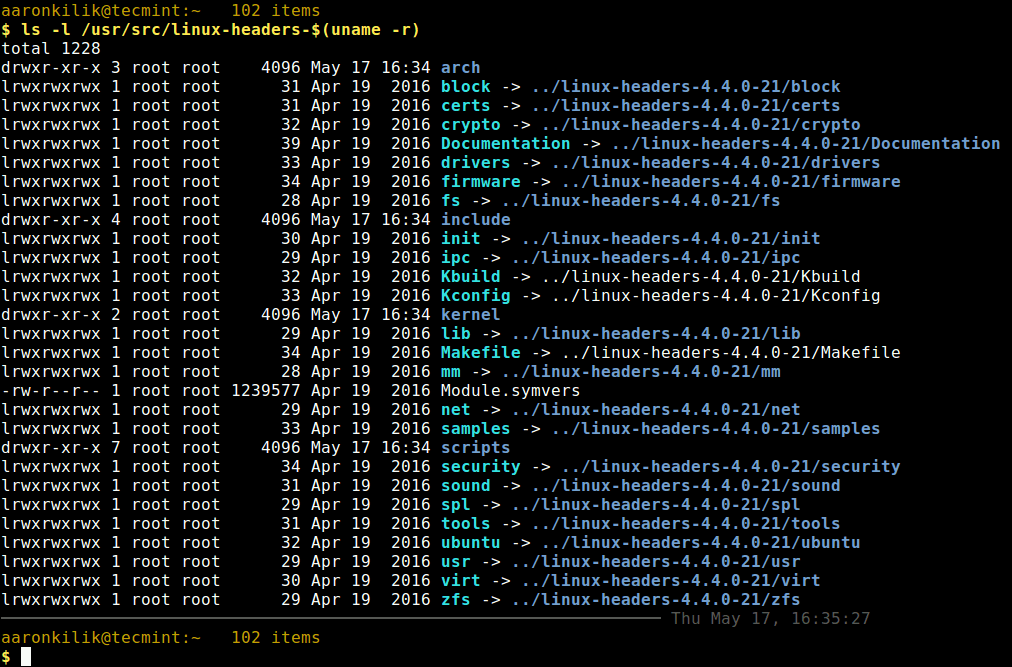
Next, check if the matching kernel headers have been installed on your system using the following command
$ ls -l /usr/src/linux-headers-$(uname -r)
That’s all! In this article, we have explained how to install kernel headers in Ubuntu and Debian Linux and other distributions in the Debian family tree.
Always keep in mind that to compile a kernel module, you will need the Linux kernel headers. If you have any quires, or thoughts to share, use the comment form below to reach us.
Rand/eng works
Although relatively straightforward, compiling and selecting the Linux headers is too manual and is only partially explained at several different documents in the codebase. This entry provides some guidelines and also scripts to automate a bit the process. Find the complete script at the bottom.
Building
First of all, move to the list of kernel sources. Browse through it to find the desired version of the headers. You may download the sources and uncompress them into the disk. In this sample script the kernel 4.14.151 is used.
1 2 3 4 5 6 7 8 9 10 11 12 13header_version=4.14.151 header_dir=linux-$header_version> mkdir -p ~/linux-headers cd ~/linux-headers current=$PWD # Download sources if [[ ! -d $header_dir ]]; then wget https://cdn.kernel.org/pub/linux/kernel/v4.x/$header_dir.tar.gz tar xvzf $header_dir.tar.gz cd ~/linux-headers/$header_dir fiHave a look at the Documentation/process/changes.rst file to understand the expected versions of the third-party libraries required for the compilation. Follow the process manually, then head to Documentation/admin-guide/README.rst .
First, the configuration must be defined. In this example we don’t tailor anything, so it will take a considerable amount of space (not being accurate, you should probably make sure you have 10GB+ of available disk).
# Note: before continue, perform all checks on the versions for the packages cd ~/linux-headers/$header_dir # Create configuration file (here, a sample one; not tailored) ## Note: the kernel will be larger when using a sample configuration ## For instance, you may consider saving 10-15 GB for this cp /boot/config-$(uname -r) .configIt is now time to compile the headers and the kernel modules. The first command will prompt a lot of questions. After that, both commands will take a good amount of time to finish. In the example we are dedicating the full computing power (all the CPUs) to speed up the building process.
# Compile headers make -j$cores> # Compile kernel modules ## Note: "make -j$ would compile using all CPUs" sudo make -j$cores> modules_installInstalling
After the compilation it is now time to install the headers in the system and make them available for use. You may find issues with configurations such as the locales. Just fix it and retry as needed.
# Install headers ## Note: be sure to properly setup the locales to correct values ## (e.g., everything to "en_US.UTF-8" did work) sudo make -j$cores> install ## Note: after this, the kernel will be available under /lib/modulesEnabling
After the installation, the system must know that this kernel is available for booting.
# Enable it for booting sudo update-initramfs -c -k $header_version> sudo update-grubIf you would wish to select this version of the kernel for the next boot, you can either:
- Enable the GRUB menu and select it manually
- Modify manually the configuration flags under etc/default/grub , then set the flags as desired. For instance, set something like GRUB_DEFAULT=”Advanced options for Ubuntu>Ubuntu, with Linux 4.14.151”
- Use some tool like grub-customizer. This one is handy when your VM is not able to show the GRUB menu. When running it, move to the “General settings” tab, then choose “default entry > predefined” and pick the specific version from the list
The latter option can be installed and run as follows:
# Install grub-customizer sudo add-apt-repository ppa:danielrichter2007/grub-customizer apt-get update sudo apt-get install grub-customizer ## Note: only needed for the usage of grub-customizer when connecting by xterm sudo apt install x11-xserver-utils -y # Run it (will require X11 previously installed in the system) sudo grub-customizer
Altogether
All the script put together, for convenience. Note that this works for building kernel 4.14.151 on an Ubuntu 16.04.4 LTS.
1 2 3 4 5 6 7 8 9 10 11 12 13 14 15 16 17 18 19 20 21 22 23 24 25 26 27 28 29 30 31 32 33 34 35 36 37 38 39 40 41 42 43 44 45 46 47 48 49 50 51 52 53 54 55 56 57 58 59 60 61 62 63 64 65 66 67 68 69 70 71 72 73 74 75 76 77 78 79 80 81 82 83 84 85 86 87 88 89 90 91 92 93 94 95 96 97 98 99 100 101 102 103#!/bin/bash header_version=4.14.151 header_dir=linux-$header_version> cores=$(nproc --all) mkdir -p ~/linux-headers cd ~/linux-headers current=$PWD # Download sources if [[ ! -d $header_dir ]]; then wget https://cdn.kernel.org/pub/linux/kernel/v4.x/$header_dir.tar.gz tar xvzf $header_dir.tar.gz cd ~/linux-headers/$header_dir fi # Install make sudo apt install -y build-essential cd ~ # Install third-party requirements if [[ ! -d ~/mcelog ]]; then git clone git://git.kernel.org/pub/scm/utils/cpu/mce/mcelog.git cd mcelog make sudo make install fi cd $PWD # Install third-party requirements sudo apt install -y jfsutils reiserfsprogs xfsprogs btrfs-progs pcmciautils quota ppp nfs-common procps oprofile udev grub iptables openssl bc sudo apt install -y libelf-dev libssl-dev # Check versions to fit those in Documentation/process/changes.rst gcc --version make --version ld -v fdformat --version depmod -V e2fsck -V fsck.jfs -V fsck.jfs -V reiserfsck -V xfs_db -V mksquashfs -version dpkg -l | grep btrfsck pccardctl -V dpkg -l | grep quota pppd --version showmount --version ps --version dpkg -l | grep oprofile dpkg -l | grep udev grub --version || grub-install --version dpkg -l | grep mcelog iptables -V openssl version bc --version perl --version perldoc -l Getopt::Long perl -MGetopt::Long -le 'print $INC' perl -MGetopt::Std -le 'print $INC' perl -MFile::Basename -le 'print $INC' perl -MFile::Find -le 'print $INC' # Create configuration file (here, a sample one; not tailored) ## Note: the kernel will be larger when using a sample configuration ## For instance, you may consider saving 10-15 GB for this cd ~/linux-headers/$header_dir cp /boot/config-$(uname -r) .config df -h # Compile headers make -j$cores> # Compile kernel modules ## Note: "make -j$ would compile using all CPUs" sudo make -j$cores> modules_install # Install headers ## Note: be sure to properly setup the locales to correct values ## (e.g., everything to "en_US.UTF-8" did work) sudo make -j$cores> install ## Note: after this, the kernel will be available under /lib/modules df -h # Enable it for booting sudo update-initramfs -c -k $header_version> sudo update-grub # Install grub-customizer sudo add-apt-repository ppa:danielrichter2007/grub-customizer apt-get update sudo apt-get install grub-customizer ## Note: only needed for the usage of grub-customizer when connecting by xterm sudo apt install x11-xserver-utils -y # Run it (will require X11 previously installed in the system) sudo grub-customizer df -h