- How do I increase console-mode resolution?
- 10 Answers 10
- Set the graphics mode with GRUB_GFXPAYLOAD_LINUX
- Как изменить размер терминала пользователя Ubuntu
- Изменяем размер терминала одной командой в bash
- Как узнать текущий размер терминала
- Change the number of rows and columns in the TTY [duplicate]
- 1 Answer 1
How do I increase console-mode resolution?
When my computer goes to console mode (booting up, shutting down or Ctrl + Alt + F1) ), the text is super big. I can’t take a screenshot of it, but it looks like a 640 x 480 resolution. My monitor normally works at 1440 x 900. I remember that the console text that appeared while installing from the CD was nice and small. How can I make the console text look like it looked while booting from the CD?
10 Answers 10
I’ve found a solution that works from this forum post
Open /etc/default/grub with your favorite editor as root.
Localize the line that says GRUB_GFXMODE= . and change it to the resolution you want. Add another line for a new variable called GRUB_GFXPAYLOAD with the same resolution. It should look similar to this:
GRUB_GFXMODE=1440x900x32 GRUB_GFXPAYLOAD=1440x900x32 Save and exit. Then edit as root /etc/grub.d/00_header
Localize the line that says if [ «x$» = «x» ] ; then GRUB_GFXMODE=. . As before, change the resolution there to the one you want and add another line for payload:
if [ "x$" = "x" ] ; then GRUB_GFXMODE=1440x900x32 ; fi if [ "x$" = "x" ] ; then GRUB_GFXPAYLOAD=1440x900x32 ; fi Finally, locate the line that says set gfxmode=$ and add a line for payload below it. It should look like this:
set gfxmode=$ set gfxpayload=$
Still as root, refresh grub with
Reboot, and both the grub menu and the console should have nicer resolutions.
My solution will only work for grub2, I think. Are you using grub 1, maybe? If yes, try with a lower resolution first — for example 1024x768x32. Regards!
Looks like that at the moment grub2 doesn’t use ‘GRUB_GFXPAYLOAD’ option, only ‘GRUB_GFXPAYLOAD_LINUX’. See the official documentation on grub2: gnu.org/software/grub/manual/grub.html#gfxpayload
It would be more interesting to see a response that is more generic, that will work with most resolutions.
This answer is depreciated and did not work for me on Ubuntu Server 12.04 LTS. Furthermore, it involves editing a file named 00_header which really should not be edited.
This helped me on Ubuntu 14.04 with ESXi 5.5 :
GRUB_CMDLINE_LINUX_DEFAULT="splash vga=792" sudo update-grub sudo reboot -r now Use 795 or 799 for higher resolution (More details here).
This solutions worked for me. The splash option froze the login screen and it is unnecessary in my opinion. Btw I really don’t like the cryptic options like 792!
- Start in the GRUB menu
- Press C to go to the GRUB command line
- Run vbeinfo and make a decision (e.g. 1920x1200x32).
- Start your system again
- sudo nano /etc/default/grub
- Change GRUB_GFXMODE= (e.g. GRUB_GFXMODE=1920x1200x32 )
- Set GRUB_GFXPAYLOAD_LINUX to GRUB_GFXPAYLOAD_LINUX=keep
- sudo update-grub
- reboot your system
among all the answers on this question, this is the one that worked for me with Ubuntu 16.04 server (and it’s the simplest one)
Set the graphics mode with GRUB_GFXPAYLOAD_LINUX
First, install xrandr and run it:
$ sudo apt-get install xrandr $ xrandr The available screen modes are listed.
Assuming a previously unedited file, make the following changes:
The variable GRUB_CMDLINE_LINUX_DEFAULT should contain at least nomodeset , perhaps in addition to quiet and splash on desktop systems.
GRUB_CMDLINE_LINUX_DEFAULT="nomodeset" On server systems, uncomment GRUB_TERMINAL=console to see more messages passing during boot before entering in the graphics console.
Leave this line as a comment:
At the end of the file, add a line:
GRUB_GFXPAYLOAD_LINUX=1280x1024x16 or replace the value by any other (comma separated) mode(s) that is(are) supported by your hardware. The values text , keep , auto , vga and ask should also work.
Finally, after saving the edited /etc/default/grub with Ctrl + O and exiting it with Ctrl + X , issue the following commands:
$ sudo update-grub $ sudo reboot This answer will also work to decrease the resolution and/or refresh rate or frame buffer frequency on down-clocked systems. CRT monitors typically show flickering stripes when the refresh frequency is too high.
Just some personal background: in my other computer I have no problem with that fancy mode (it’s 160 cols x 60 rows, but it has a 4:3 CRT monitor). It’s equipped with a TNT2 (yes, I swear), and that mode was promptly displayed on first boot. Problem is, it does this by loading the nouveau driver, and this guy is still a bit faulty (in my case, it hangs the whole system when trying to move windows). So, to have an usable system, I had to downgrade to the old and stable nv driver, and also disabling mode-setting (’cause the kernel would always load nouveau when enabled). Note that I’m not using nVidia proprietary drivers, but like you, I was switched back to 80×25 in console mode.
This is because the nv driver doesn’t use kernel mode-setting. Now, I don’t know about the proprietary drivers, but I’m guessing they might have changed your configuration in order to be usable, and possibly that’s why you’re seeing that «big» mode. Possibly they disabled mode-setting when installed. That’s why you see the «small» text mode when booting from the Live CD.
You could try booting up with a different VESA mode, but that depends a lot on your hardware. For that, please check http://en.wikipedia.org/wiki/VESA_BIOS_Extensions#Linux_video_mode_numbers. For example, if you’d like to try booting your text mode on 1024×640, you’ll find that the mode ID is 877.
So, when booting, hold the SHIFT key (in case you don’t have a GRUB timeout) to bring up GRUB’s menu. Select the mode which you wish to boot and press ‘e’ (to edit the commands). At the end of the «kernel» command, add vga=877 . The number is the mode ID, if you want to try other modes, replace it with the desired number.
Also, at that same Wikipedia page, you could also try the helpful «Universal format» right below the modes table. That hwinfo command is quite useful.
Как изменить размер терминала пользователя Ubuntu
Изменить размер терминала BASH скриптом бывает нужно для того чтобы Desktop приложение правильно отрабатывало и отображалось на экране пользователя. Задать необходимый размер можно в качестве условия продолжения программы.
Изменяем размер терминала одной командой в bash
Сделать это можно следующей командой:
Параметры задаются в количестве строк и столбцов. Первое значение относится к высоте терминала, второе к его ширине.
resize -s будет гарантировано корректно работать на рабочих станциях, использующих графическую оболочку GNOME. При использовании других сред рабочего стола положительный результат не гарантирован.
Варьируя значения параметров можно изменять размер терминала в режиме реального времени.
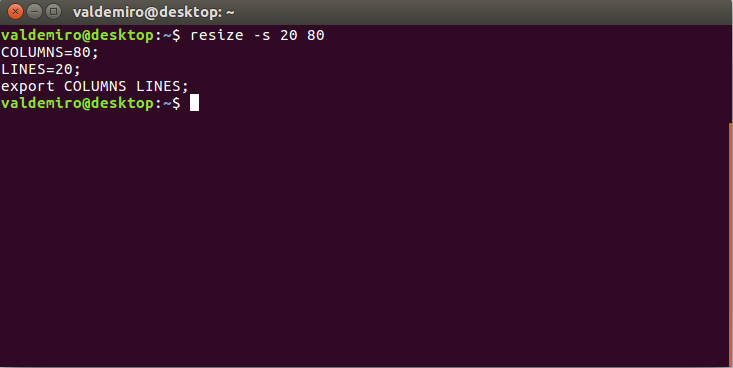
При выполнении команды определяется значение переменных, затем они экспортируются.
Если на рабочей станции пользователя используется какая-либо другая среда рабочего стола — можно обойтись без использования resize -s, а непосредственно передавать необходимые значения переменных, затем экспортируя их.
Код скрипта при этом становится несколько объёмнее, однако никаких трудностей при его написании также возникнуть не должно.
Как узнать текущий размер терминала
В системе хранится ряд определенных переменных, посмотреть их все можно введя в консоли символ $
Среди них будут переменные
$COLUMNS
$LINES
Именно в них задаются значения ширины и высоты окна терминала, и именно значения этих переменных переопределяются командой resize -s.
Значения параметров можно вывести следующим образом
Размер рядов и колонок неодинаков, поэтому ввод одинаковых численных значений квадратного терминала не даст.
Использоваться данные переменные могут в выражениях if; then в скриптах в тех случаях когда важно получить размер терминала, не меньше определенного размера для того чтобы информация отображалась корректно.
Рационально установить минимальный размер терминала пользователя при котором информация отображается верно в качестве необходимого условия выполнения программы, в противном случае можно либо принудительно изменять размер терминала либо выдавать предупреждение и рекомендацию сделать это самостоятельно.
Основное применение изменения размера терминала — пользовательские интерфейсы, любой из них представляет собой скрипт и определенный алгоритм, и используется функции и операторы (такие как case).
Change the number of rows and columns in the TTY [duplicate]
I want to resize the terminal which comes up when you press Ctrl Alt F1 (or F2 , F3 . ). 25×80 is small for a 24″ screen. Tried using stty, but the commands stty columns 200 and stty rows 50 does not work directly. Am I missing something OR is this a wrong approach. Ideally looking for a generalized solution, but would be content with something that works in RHEL5 and Ubuntu. It would be better if its possible using some commands which I can put in a script file rather than changing some boot-level stuff.
@jasonwryan, I checked that solution, but it involves modification of grub.conf . As I mentioned, I would prefer something which does not involve tinkering with boot-time files.
yes, you probably can—but that other answer doesn’t tell you how, and that’s what I was looking for, too. I don’t mind my console coming up with a tiny font most of the time, but right now, I want it bigger!
1 Answer 1
There are two major types of glass console on Linux: graphical and text modes.
You get graphical consoles if your video subsystem is supported by the Linux kernel directly, and you have enabled this / have not disabled this (depends on the distribution). If there’s a driver, your screen will be autodetected and you’ll get (by default) 9×16 pixel text at its native resolution. Then you’ll have the opposite problem: tiny text. If CONFIG_FONTS and CONFIG_FONTS_* is enabled in the kernel, you can change the boot-time font to something larger, or you can just load a larger font after the system boots. There are two ways to change the resolution itself if it fails to autodetect:
- The ‘gods, I feel so old’ way, with the kernel command line argument vga= , as detailed in this forum post. You’d need to reconfigure your boot loader for this, of course. The vga= option can get you both text (modes < 256) and VESA-compatible graphics modes (modes ≥ 256). The latter will be graphical but unaccelerated, so scrolling a very large framebuffer may look interesting, for slow values of ‘interesting’.
- The new way, using Kernel Mode Setting. If you learn one of these, learn this one unless you’re doing a lot of embedded or retro work. The vga= method may go away at some point.
If your video card isn’t supported, its driver isn’t loaded, etc, you’ll find yourself with a text mode console. Text mode consoles are limited by the range of text modes of your graphics card. 80×25, 80×43 and 80×50 are the standard VGA ones. The original non-IBM VGA and SVGA cards always had nice additional text modes, but modern cards generally don’t (‘who’d ever want text?’). There’s a solution here: you can manipulate the VGA registers directly to reprogram the CRTC part of the chip to get higher resolutions. A 90s program called SVGATextMode could do this for you without kernel reconfiguration. It was a tiny bit like xrandr , but for text consoles, and may still work for you. I loved it: I could get something bizarre like 100×37 on my crappy 14″ CRT. It made it decent for development back in 1994. To set a mode at boot time, your only recourse is to use vga= and use a VESA mode.
About the stty command: it tells the kernel about your terminal, but can’t change the terminal itself. stty rows 200 will tell the kernel your remotely attached glass terminal has 200 lines per screen. Why this is the case is explained in the answers to this question.