- Change DNS Servers (IPv4, IPv6) on Linux
- Backup DNS Configuration
- Change DNS Servers
- Commonly Used DNS Servers
- Prevent DNS Settings From Being Changed
- Comments
- More Posts
- Disable Direct IP Address Access in Nginx on Linux
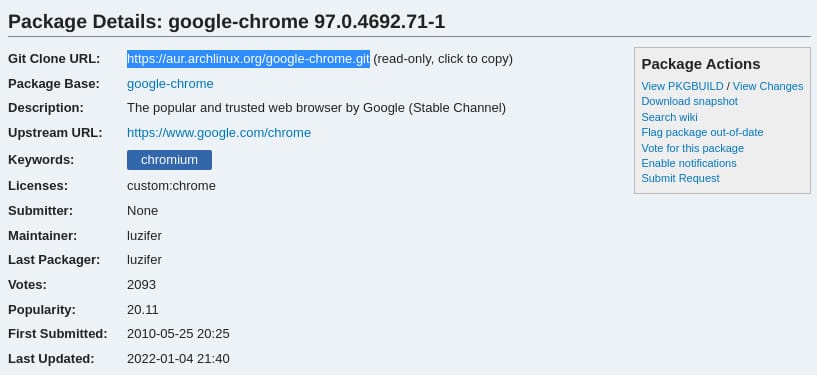
- Two Ways to Install Packages from AUR on Arch Linux/Manjaro
- Configure PPPoE DSL Connection on Arch Linux/Manjaro with pppoe-setup
- Auto-Renew Let’s Encrypt Free Certificates for Nginx on Linux
- How to set DNS Nameserver on Ubuntu 22.04 LTS Jammy
- Steps to change the DNS Nameserver on Ubuntu 22.04 LTS Linux
- 1. Open Ubuntu Settings
- 2. Go to Network Settings
- 3. Set DNS Server on Ubuntu 22.04
- 4. Open Command terminal
- 5. Edit Netplan Confgiuration file
- how to change DNS server permanently on Ubuntu 20.04?
Change DNS Servers (IPv4, IPv6) on Linux
When I set up a new machine, the first thing to do is probably change my DNS (Domain Name System) server to Google’s 8.8.8.8 , since the DNS servers of my ISP (Internet Service Provider) is unbearably slow. Nowadays, there are even more options like Cloudflare’s 1.1.1.1 , and IPv6 adoption is working its way up too.
In my opinion, changing DNS servers on Linux is even easier than in Windows. As you only need to do it once and it applies to all the network interfaces. In this guide we’ll be covering how to configure DNS servers on all Linux distros and prevent DNS settings from changing by other services.
Backup DNS Configuration
Backup the current DNS configuration to /etc/resolv.conf.backup , in case something goes wrong:
$ sudo cp /etc/resolv.conf /etc/resolv.conf.backup Change DNS Servers
Remove the immutable flag on DNS configuration /etc/resolv.conf so we can edit it:
$ sudo chattr -i /etc/resolv.conf Open /etc/resolv.conf with the text editor of your choice:
- vim (command-line editor for advanced user)
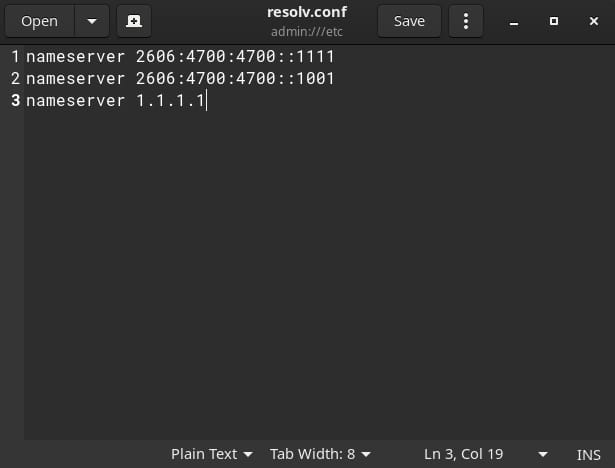
Then add or edit your desired DNS servers (be aware, maximum of 3 nameserver are allowed):
/etc/resolv.confnameserver 2606:4700:4700::1111 nameserver 2606:4700:4700::1001 nameserver 1.1.1.1 Plain text DNS servers are used in the original order in /etc/resolv.conf . Make sure to put the IPv6 servers in the front if it’s preferred.
Commonly Used DNS Servers
Here are some commonly used DNS servers for your reference:
- Cloudflare DNS
- IPv4
- 1.1.1.1
- 1.0.0.1
- 2606:4700:4700::1111
- 2606:4700:4700::1001
- IPv4
- 8.8.8.8
- 8.8.4.4
- 2001:4860:4860::8888
- 2001:4860:4860::8844
Prevent DNS Settings From Being Changed
/etc/resolv.conf is often maintained by services like NetworkManager , so when rebooted it will all reset to default. To make the changes permanent, we can make the DNS configuration file immutable:
$ sudo chattr +i /etc/resolv.conf$ sudo chattr -i /etc/resolv.confComments
More Posts

Disable Direct IP Address Access in Nginx on Linux
Nginx’s server_name directive indicates the domain name it’s listening on. But if none of the server blocks match the incoming request, it will still fall back to the last HTTP/HTTPS server block. So direct access by IP address will probably be caught by some route instead of being dropped, which is often not ideal.

Two Ways to Install Packages from AUR on Arch Linux/Manjaro
Just like Debian/Ubuntu’s package manager apt, Arch Linux/Manjaro has its own package manager called pacman to help you install packages. But the story doesn’t end there. On Arch-based Linux you can even install community-maintained packages from AUR (Arch User Repository), which is a lot like PPA (Personal Package Archive) of Ubuntu.

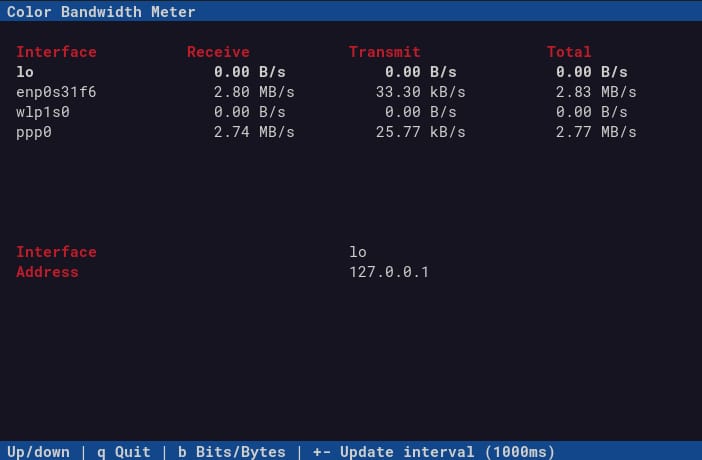
Configure PPPoE DSL Connection on Arch Linux/Manjaro with pppoe-setup
Most ISPs (Internet Service Providers) offer multiple dynamic IP addresses and even come with a static one. To take advantage of that, we’ll be setting up a PPPoE (Point-to-Point Protocol over Ethernet) DSL (Digital Subscriber Line) connection on our own machine to obtain an independent IP address.

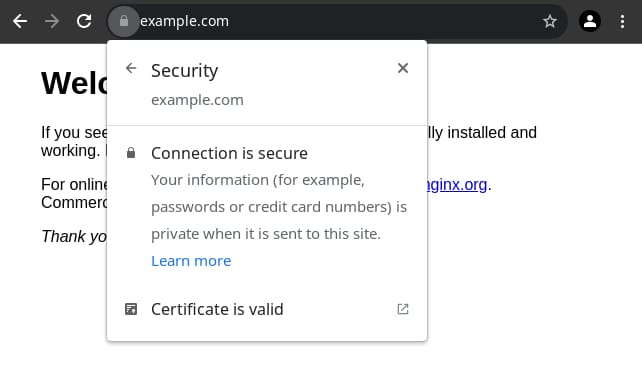
Auto-Renew Let’s Encrypt Free Certificates for Nginx on Linux
More than 75% of all websites use HTTPS nowadays. Serving content over HTTPS is not only good practice for search engine optimization (SEO), but essential for security reasons, especially for those requests containing sensitive information.
How to set DNS Nameserver on Ubuntu 22.04 LTS Jammy
Well, whenever we visit some website such as how2shout.com in a browser, to find the website the browser needs the Ip-address of it. Here, the DNS comes into the picture. The Domain Name System, or DNS for short, is a system that converts Internet addresses or computer names into IP addresses and vice versa.
A browser request for the IP address will be sent to the DNS server. For private individuals, this is usually the case with the associated Internet provider. The DNS server then returns the IP address.
There are numerous DNS servers connected and always inform each other about changes. If a DNS server does not find a name or an IP address, it asks the other DNS server.
The DNS is therefore responsible and necessary for us to be able to access websites via Internet addresses or IP addresses.
Steps to change the DNS Nameserver on Ubuntu 22.04 LTS Linux
Although the DNS server address supplied by your internet service provider automatically gets configured, however, if you want to change it manually then follow this guide.
#1st Method Using GUI
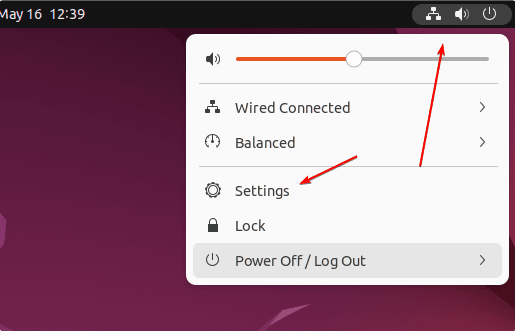
1. Open Ubuntu Settings
On your Ubuntu 22.04, click on the Power icon given on the right top side of the Taskbar. A pop-up will appear there select the “Settings” option to open it.

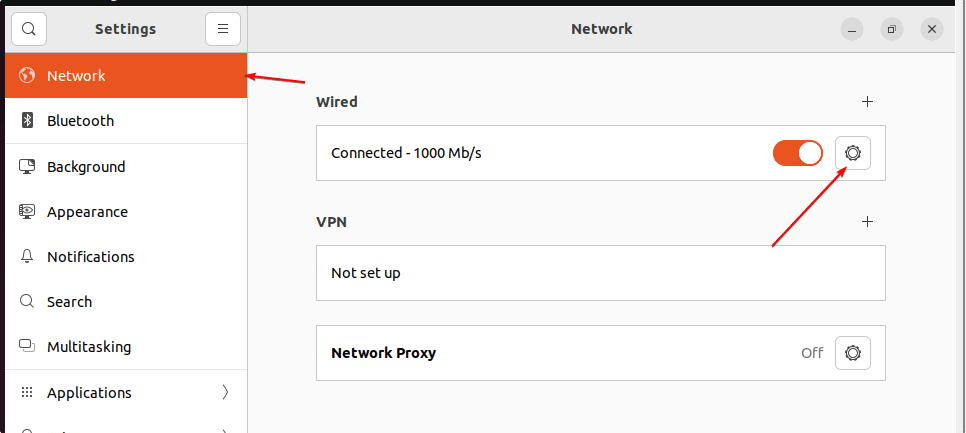
2. Go to Network Settings
Once you are on the Settings page, go to the Network menu given on the left sidebar and then click on the Gear icon given for Wired or Wireless connection.

3. Set DNS Server on Ubuntu 22.04
Now, you will have a window to configure IP addresses and other settings related to the network. However, to configure DNS Server Ip-address, select IPV4 Tab and then click on the Toggle button given in front of DNS. This will disable the automatic fetching of DNS Server addresses from your Internet provider. After that enter the IP address of the DNS server you want to set on your Ubuntu 22.04. Here we are using the address of the Google DNS server to perform this tutorial, you can set whatever you want to. After that click on the “Apply” button to save the configuration.

From now onwards to resolve some domain names, the system will check it with the Google DNS server or the one you have set.
Note: Don’t forget to Turn the Network Off and On to get the immediate effect or else the same will reflect on your next system boot-up.
#2nd method using CLI
4. Open Command terminal
Those who are not using the GUI Desktop of Ubuntu 22.04 or prefer to use the command line, can go for the Netplan configuration file. First, open the command terminal, those who are on the server version already have terminal access, whereas the Desktop user can use the keyboard shortcut – Ctrl+Alt+T.
5. Edit Netplan Confgiuration file
Ubuntu has a command-line Netplan tool that uses a YAML configuration file; we can use it to set our network configuration.
Switch to Netplan directory:
List the available file:
Before editing the file, find out your ethernet adapter name and also the IP address of the PC in your network range. To find it, you can use the command ip a
sudo nano 01-network-manager.yaml
Add the following lines, however, make sure the space should be as given in the block of code because YAML is an indent-sensitive language. And don’t forget to replace ens160 with your adapter and Ip-address + Gateway as well. After that move to the nameservers section and set whatever DNS server address you want on your system to use for resolving domain names.
network: version: 2 renderer: NetworkManager ethernets: ens160: dhcp4: no addresses: - 192.168.17.100/24 gateway4: 192.168.17.2 nameservers: addresses: [1.1.1.1, 8.8.8.8, 4.4.4.4]
Save the file by pressing Ctlr+O, hitting the Enter key, and then exiting using Ctrl+X.
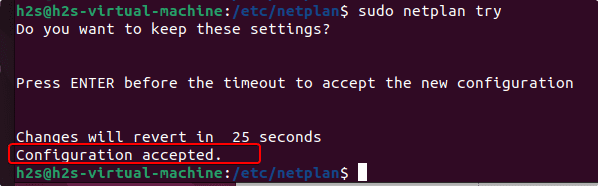
Before applying your Netplan configuration file, let’s test it by issuing the following command:
Hit the Enter key, if the Configuration you have done in the Netplan file is valid, you will have an output saying- Configuration accepted.

Now, Apply the configuration:
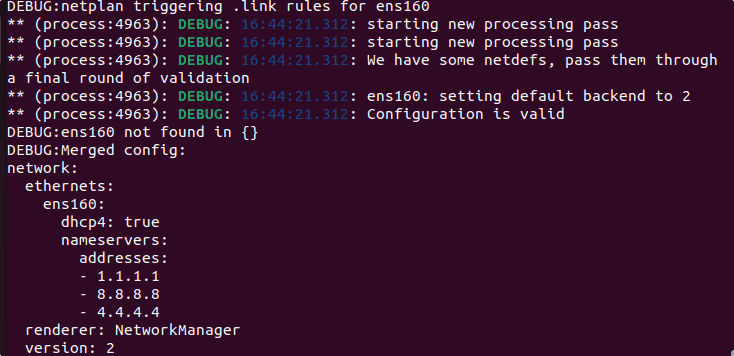
If you want also want to see what is happening while applying the new Netplan configuration, use:

With the help of the Domain Name System, the assignments between IP addresses and domain names can be resolved in the outward and backward directions. Since DNS is very important for the functioning of an IP network, there are numerous security extensions such as DNSSEC, DNS over TLS, or DNS over HTTPS.
Other Articles:
how to change DNS server permanently on Ubuntu 20.04?
I know there are other posts here asking this, but those suggestions do not help, the configuration keeps changing and I simply cannot get my own changes to persist. I have the Google 8.8.8.8 and 8.8.4.4 servers in my Network Manager configuration in the GUI, and systemd-resolv —status returns
Link 2 (enp38s0f1) Current Scopes: DNS DefaultRoute setting: yes LLMNR setting: yes MulticastDNS setting: no DNSOverTLS setting: no DNSSEC setting: no DNSSEC supported: no Current DNS Server: 8.8.8.8 DNS Servers: 8.8.8.8 8.8.4.4 DNS Domain: ~.;; Query time: 0 msec ;; SERVER: 192.168.1.1#53(192.168.1.1) ;; WHEN: Mon Oct 05 11:08:26 EDT 2020 ;; MSG SIZE rcvd: 83so my default route 192.168.1.1 as DNS . Furthermore, /etc/resolv.conf is a symlink to /run/systemd/resolve/resolv.conf , which in turn reads
# Generated by dhcpcd from enp38s0f1.dhcp, wlp0s20f3.dhcp # /etc/resolv.conf.head can replace this line domain fios-router.home nameserver 192.168.1.1 # /etc/resolv.conf.tail can replace this lineThe only enp38s0f1.dhcp file on this system (I’ve searched / ) is /run/dhcpcd/resolv.conf/enp38s0f1.dhcp , which reads
# Generated by dhcpcd from enp38s0f1.dhcp domain fios-router.home search fios-router.home nameserver 192.168.1.1I have tried to write in other nameservers there, but they do not persist. In the past I’ve made the changes persistent by making the file immutable with chattr +i , but
lsattr /run/dhcpcd/resolv.conf/enp38s0f1.dhcplsattr: Inappropriate ioctl for device While reading flags on /run/dhcpcd/resolv.conf/enp38s0f1.dhcpso that attribute is not available here. And besides, I shouldn’t have to make the file immutable anyway: there should presumably be some way I can control the DNS server.. Edit: In response to comments below:
$ dpkg -l *dnsmasq* --- Desired=Unknown/Install/Remove/Purge/Hold | Status=Not/Inst/Conf-files/Unpacked/halF-conf/Half-inst/trig-aWait/Trig-pend |/ Err?=(none)/Reinst-required (Status,Err: uppercase=bad) ||/ Name Version Architecture Description +++-================-===============-============-============================================ un dnsmasq (no description available) ii dnsmasq-base 2.80-1.1ubuntu1 amd64 Small caching DNS proxy and DHCP/TFTP server un dnsmasq-base-lua (no description available)
- IPv4