- How to change NPM version in Linux, Windows or macOS?
- Step 1: Check the current NPM version
- Step 2: Install a new version of NPM
- Step 3: Verify the new NPM version
- Step 4: Switch back to the previous NPM version
- NVM Usage to switch Node version.
- Conclusion
- Linux change npm version
- # How to change the version of NPM using NVM
- # Installing a specific version of npm
- # Installing the latest version of Node.js
- Try the latest stable version of npm
How to change NPM version in Linux, Windows or macOS?
Working on different Node.js projects and the version of dependencies required by them; you may often need to switch between different versions of the Node Package Manager (NPM). However, for beginners, it can be a tricky task but don’t worry. In this tutorial, we will discuss simple steps to change the NPM version with ease. So, that anybody could perform them.
Before we begin, let us first understand what NPM is and why version switching is necessary. NPM is a package manager for Node.js, which allows developers to easily manage and install packages and dependencies for their projects. However, some projects may require a specific version of NPM, and that is where version switching comes into play.
Now, let’s go through the key steps to change the NPM version:
Step 1: Check the current NPM version
You should know the current version of NPM installed on your system before issuing any command to change it. To do that on your PC – Windows, Linux, or macOS; open the command terminal, and after that run the given command.
The above command will display the current NPM version installed on your system.
Step 2: Install a new version of NPM
If you want to have some other version of NPM than the one currently installed on your system then you need to install it manually, here is the command syntax to do that.
In the above-given syntax, replace the ‘version_number‘ text with the exact version of NPM you want to install on your system.
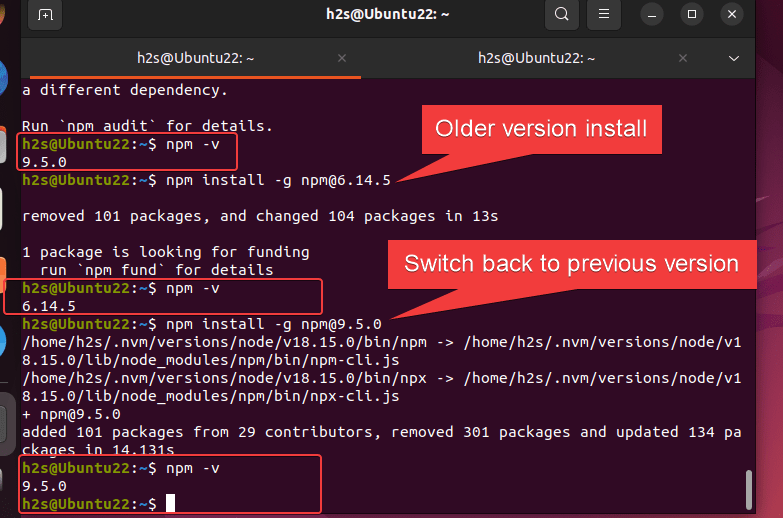
For example, our current version is 9.5.0 but we need 6.14.5 for our project then to install it, we can use the “NPM Install” command in this way:
Note : -g stands for global, if you want to install the new version only for your current project then switch to its directory and run the command but without -g
Step 3: Verify the new NPM version
After successfully installing the NPM required version, we can check whether it has been set as the default current version or not. For that run:
This will display the newly installed version of NPM.
Step 4: Switch back to the previous NPM version
You can see in the previous step we have successfully changed the current NPM version to what want. Now, if we want to get back the previous version that we have changed, we need to install it using the same command.
For example, we switch to NPM 6.14.5 and now want to go back to 9.5.0, then we use:
NVM Usage to switch Node version.
Those who want to switch the Node version and use the corresponding version of NPM available for it can use the NVM (Node Version Manager) tool that facilitates us with a command to switch between different versions of Node.js and NPM.
However, by default NVM will not be on your system, to install it run:
curl https://raw.githubusercontent.com/creationix/nvm/master/install.sh | bashLet’s check first our system Node version:
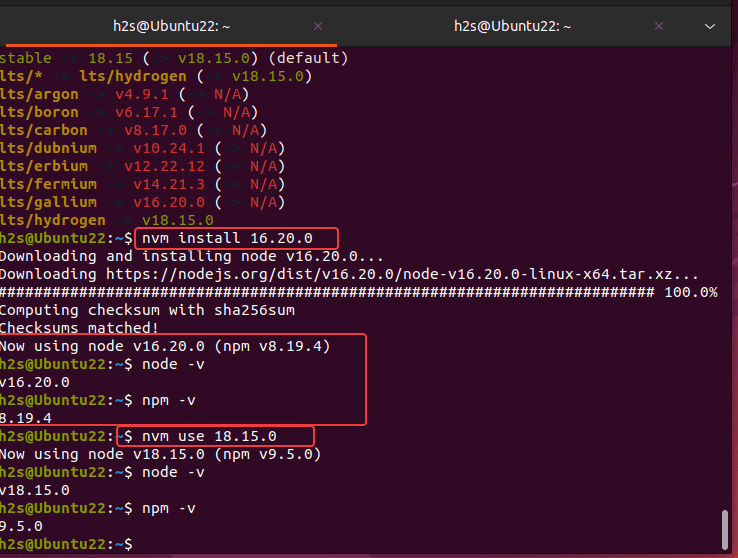
Now, you can list available LTS versions to use with NVM
The versions in the red color of Node are not on your system, so if you want to use any of them on your system then you first need to install the same.
Note: To list all the Node versions even those are not compliant with LTS, the command will be nvm ls-remote
For example, to get the node version – 16.20.0,
Once you have installed multiple versions of Node.js you can use the following command to switch between them.
the command syntax is:
Here, ‘version_number‘ refers to the version of the Node version you want to use. For example, if you want to switch to Node version 16.20.0 from the current one then the command will be:
This will switch not only the Node but also the NPM version as well.
Conclusion
Changing NPM and Nodejs versions would be seem difficult to do at first sight but as you get familiar with its command line and NVM, it can be done easily. By following these steps, you can install a new version of NPM, verify the installation, and switch between different versions using NVM. This helps you to work on projects that require specific versions of NPM.
Remember, always check the compatibility of NPM versions before installing or switching to avoid any issues. We hope this article has been helpful to you.
Linux change npm version
Last updated: Jan 19, 2023
Reading time · 2 min
# How to change the version of NPM using NVM
Use the nvm install-latest-npm command to change the version of npm using nvm .
The command updates your npm version to the latest supported npm version by the current Node.js version.
Copied!nvm install-latest-npm # 👇️ same as above nvm install --latest-npm
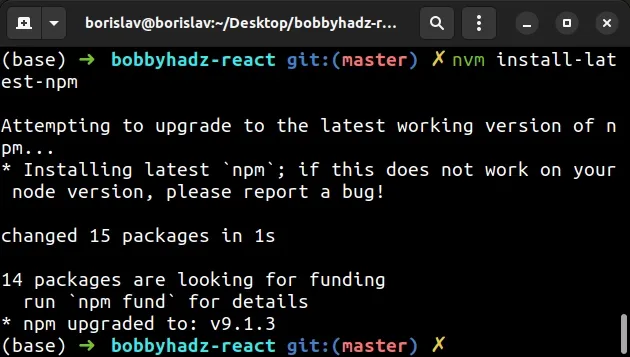
The nvm install-latest-npm updates your npm version to the latest supported npm version by the current Node.js version.
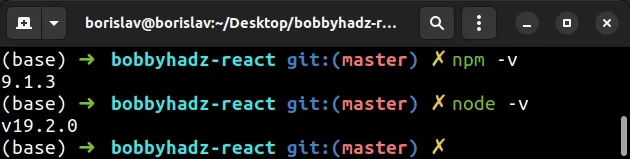
You can use the npm -v command to check your version of npm.
Copied!# 👇️ check version of npm npm -v # 👇️ check version of Node.js node -v
# Installing a specific version of npm
If you want to install a specific version of npm , you have to use the npm install command with a version modifier.
Copied!npm install -g npm@7.7.2 npm install -g npm@8.11.0
You can use the npm view npm versions command to list all versions of npm .
Copied!npm view npm versions
If you want to show the latest npm version, use the npm view npm version command.
Copied!npm view npm version
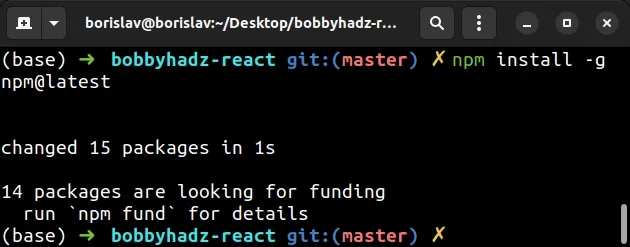
Alternatively, you can update npm to the latest version with the following command.
Copied!npm install -g npm@latest
You might have to prefix the command with sudo (macOS and Linux) or open CMD as an administrator (Windows) if you get a permissions error.
# Installing the latest version of Node.js
If you want to install the latest version of Node.js, use the nvm install node command.
Copied!# 👇️ for macOS and Linux nvm install node # 👇️ for Windows nvm install latest
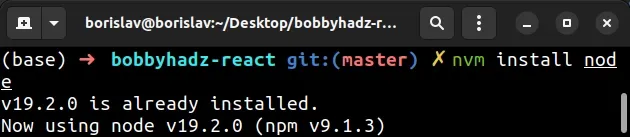
node is an alias for the latest version.
If you want to use this version, issue the nvm use node command, or the command from the end of your installation message.
Copied!# 👇️ for macOS and Linux nvm use node # 👇️ for Windows nvm use latest

If you want to install the long-term supported version or another version, first use the nvm ls-remote or nvm list available command.
Copied!# 👇️ for macOS and Linux nvm ls-remote # 👇️ for Windows nvm list available
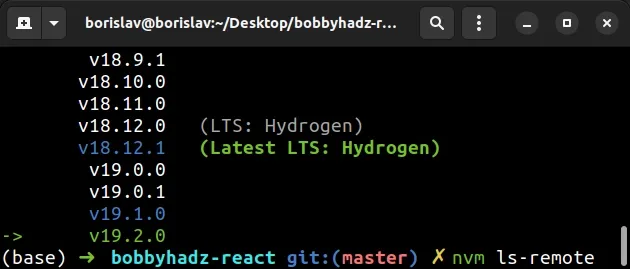
Currently the long-term supported version is 18.12.1 , so I can install the specific version with the following command.
Copied!# 👇️ install specific version nvm install 18.12.1
To use the specific version, issue the nvm use command.
Copied!# 👇️ use specific version nvm use 18.12.1
You can use the nvm ls command to check which nvm versions you have installed and which is the currently active version.
Copied!nvm ls node --version npm --version

If you get a permissions error when issuing an nvm command, you have to prefix the command with sudo (macOS and Linux) or start PowerShell or CMD as an administrator (Windows) and rerun the command.
You can view all of the available nvm commands in this section of the package’s GitHub repository.
I wrote a book in which I share everything I know about how to become a better, more efficient programmer.
Try the latest stable version of npm
on your PATH , it will always use the version of npm installed with node instead of the version of npm you installed using npm -g install npm@ .
To get around this, you can do one of the following:
- Option 1: edit your Windows installation’s PATH to put %appdata%\npm before %ProgramFiles%\nodejs . Remember that you’ll need to restart cmd.exe (and potentially restart Windows) when you make changes to PATH or how npm is installed.
- Option 2: remove both of
- %ProgramFiles%\nodejs\npm
- %ProgramFiles%\nodejs\npm.cmd
cd %ProgramFiles%\nodejsnpm install npm@latestIf you installed npm with the node.js installer, after doing one of the previous steps, do the following.
- Option 1 or 2
- Go into %ProgramFiles%\nodejs\node_modules\npm and copy the file named npmrc in the new npm folder, which should be %appdata%\npm\node_modules\npm . This will tell the new npm where the global installed packages are.
- Copy the npmrc file back into %ProgramFiles%\nodejs\node_modules\npm
(See also the point below if you’re running Windows 7 and don’t have the directory %appdata%\npm .)
A brief note on the built-in Windows configuration
The Node installer installs, directly into the npm folder, a special piece of Windows-specific configuration that tells npm where to install global packages. When npm is used to install itself, it is supposed to copy this special builtin configuration into the new install. There was a bug in some versions of npm that kept this from working, so you may need to go in and fix that up by hand. Run the following command to see where npm will install global packages to verify it is correct.
If it isn’t set to :\Users\\AppData\Roaming\npm , you can run the below command to correct it:
npm config set prefix %APPDATA%\npm -gIncidentally, if you would prefer that packages not be installed to your roaming profile (because you have a quota on your shared network, or it makes logging in or out from a domain sluggish), you can put it in your local app data instead:
npm config set prefix %LOCALAPPDATA%\npm -g. as well as copying %APPDATA%\npm to %LOCALAPPDATA%\npm (and updating your %PATH% , of course).
Everyone who works on npm knows that this process is complicated and fraught, and we’re working on making it simpler. Stay tuned.