- Change folder permissions and ownership
- 9 Answers 9
- How do I change the owner of a directory in Linux?
- chown command syntax
- Changing the owner of a directory
- Changing the ownership of all sub-directories
- Changing the owner of a file
- Changing the owners of multiple files
- Changing the owner of directory and file at once
- Changing the owner using wildcards
- Conclusion
- About the author
- Talha Saif Malik
- How to change file and folder ownership in Linux
- Steps to change user and group owner for files and folders in Linux:
Change folder permissions and ownership
I would like the user to have full rights on this folder (as well as all sub-directories and files in it):
currently owned by root. I have found numerous posts (in this forum and elsewhere) on how to do this for files but I can’t find a way to do it for whole folders.
9 Answers 9
Use chown to change ownership and chmod to change rights.
As Paweł Karpiński said, use the -R option to apply the rights for all files inside of a directory too.
Note that both these commands just work for directories too. The -R option makes them also change the permissions for all files and directories inside of the directory.
sudo chown -R username:group directory will change ownership (both user and group) of all files and directories inside of directory and directory itself.
sudo chown username:group directory will only change the permission of the folder directory but will leave the files and folders inside the directory alone.
As enzotib mentioned, you need to use sudo to change the ownership from root to yourself.
Note that if you use chown : (Note the left-out group), it will use the default group for that user.
If you want to change only the group, you can use:
BEWARE of recursively taking ownership of ANY directory. Think before you leap. Don’t be chown copypastin’ from the internet, kids. Just because you want to install a node package and it won’t let you, don’t sudo chown -R just because the fist hit from googling the error message says to. Reckless sudo chown -R -ing can kill your OS.
It needs to be said that using the -R option only applies to files and folders that exist in the directory already. It does NOT apply to future creations. For example, if you create another folder or file as root within the folder you’ve already changed permissions on, you will have the same experiences you’re having now until you chmod\chown them again.
Make the current user own everything inside the folder (and the folder itself):
very helpful for newbies (like me) when don’t know what to type in ‘usergroup’ for sudo chown
If you prefer, this can be done with a GUI as well. You will need to open Nautilus as root to do so. Press Alt + F2 to access the «Run Applications» dialog and enter gksu nautilus
Next, browse to and right click on the folder you would like to modify. Then, select «Properties» from the context menu. You can now select the user or group that you would like to be the «Owner» of the folder as well as the permissions you would like to grant them. Finally, press «Apply Permissions to Enclosed Files» to apply the changes recursively.
Though it seems this does not always work for some operations in a deep folder tree. If it does not work use the appropriate terminal command.
How do I change the owner of a directory in Linux?
![]()
All files and directories that exist on your Linux system have an owner, a group, and permission access rights that are granted to the file owners, its group members, or others. The chown command permits a Linux user to change any directory or file’s ownership. In this post, we will demonstrate the usage of the chown command for changing ownership through practical examples. But firstly, you should understand why you would want to change the ownership of any directory or file?
Here is the list of few scenarios in which you want to do this:
- For example, you want an already created directory or file to be accessible to a particular user.
- When a user leaves an organization, all of his data comes under the responsibility of another employee. Therefore, you want to change the ownership of the new team member.
- Changing directory or file ownership is also necessary when you are writing a script that has to be used by only a specific person.
- Transferring files between different Linux systems also requires changes in files and directories ownership.
Now let’s check out the syntax of the chown command.
chown command syntax
Utilize the “User” for the username or replace it using the user ID, also known as UID. Add the group name in the “Group” part of the GID (group ID). At the end of the chown command, add files or directories for which you want to change the ownership.
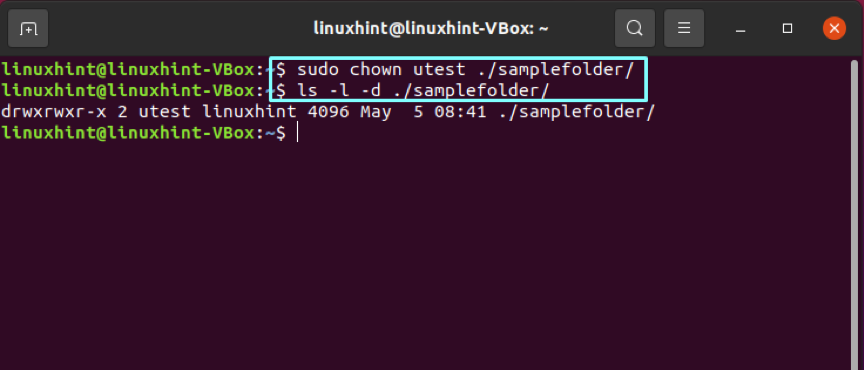
Changing the owner of a directory
We have created a separate user named “utest” and a group “ugroup” for demonstrating the examples. To change the ownership of any directory, utilize the chown command with the username and path of the directory.
Now, write out the “ls” command and check if your directory ownership is updated or not.
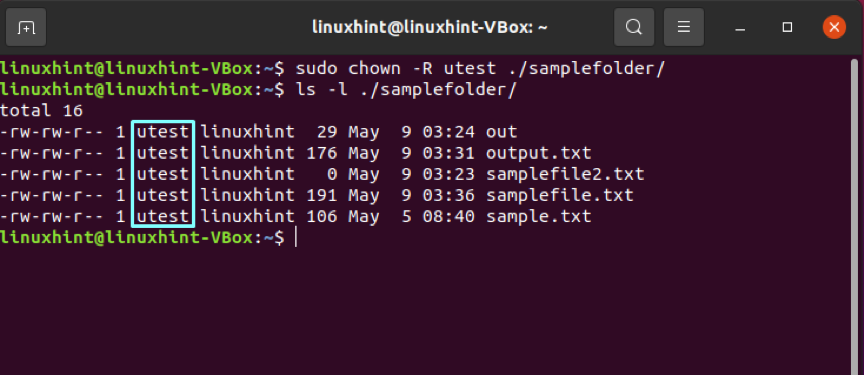
Changing the ownership of all sub-directories
Utilize the “-R” option of the chown command for changing the owners of all the files or folders present in a directory.
List out the directory content to view the results.
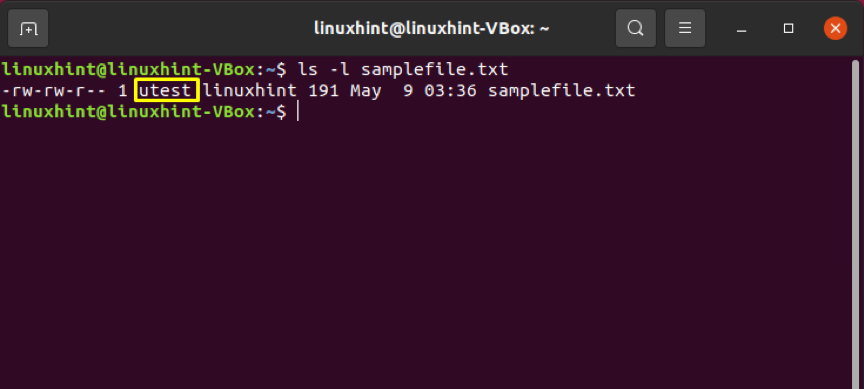
Changing the owner of a file
First of all, list out the file content to know about its ownership.
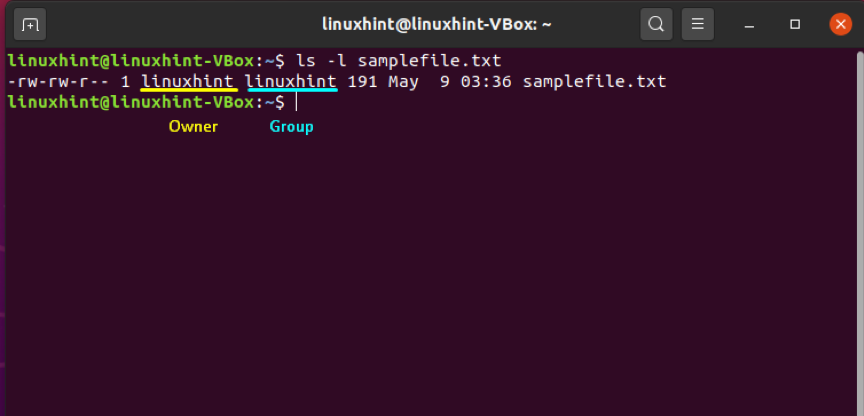
After that, specify the name of the user who you want to be the new owner of this file. In our case, we have chosen “utest” to avail the ownership of “samplefile.txt.”
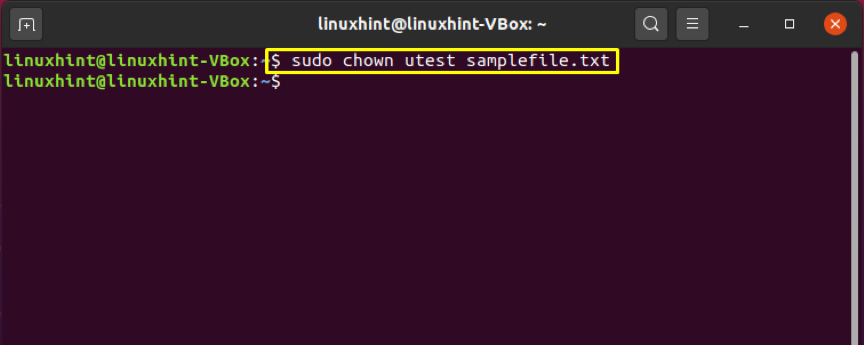
Again, verify the updated ownership changes.
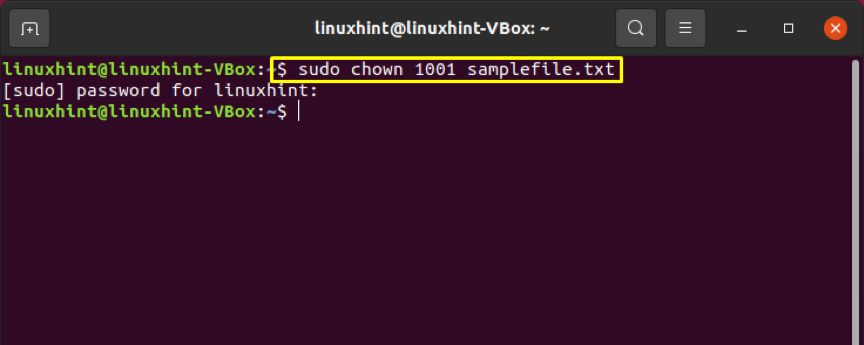
You can also use the “User ID” or “UID” of any user for this purpose. For that, retrieve the user ID of the new user by utilizing the “id” command with the “-u” option.
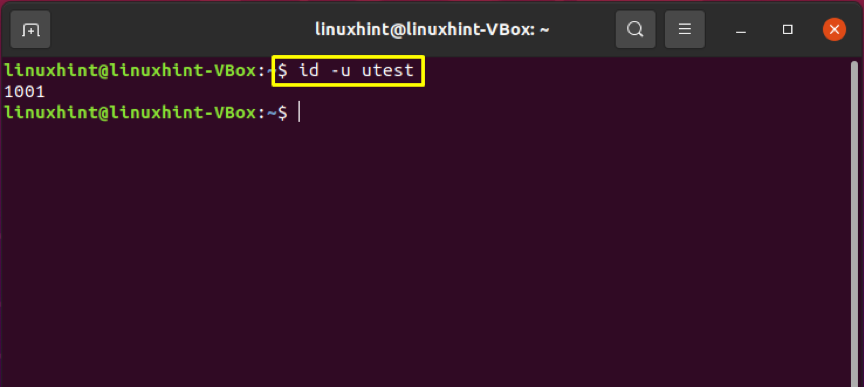
Add the User ID instead of the username to make the ownership changes.
Changing the owners of multiple files
Specify the file names at the end of the chown command to change the ownership of multiple files at once.
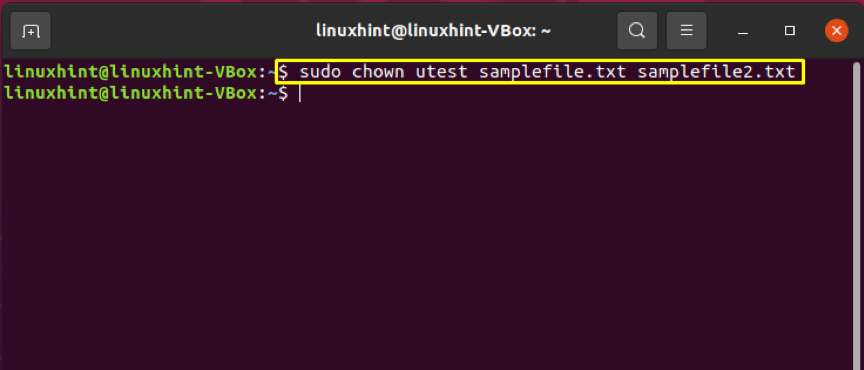
Write out the below-given command to confirm the changes.

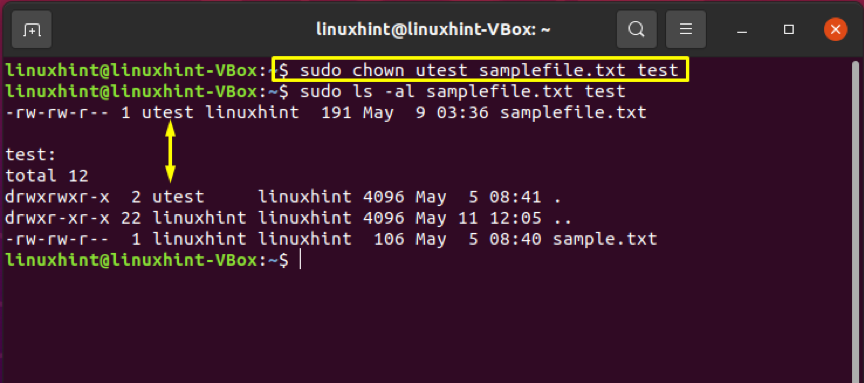
Changing the owner of directory and file at once
Follow the below-given method for changing the owners of the file and directory instantly.
This command will make “utest” the new owner of the “test directory” and the “samplefile.txt.”
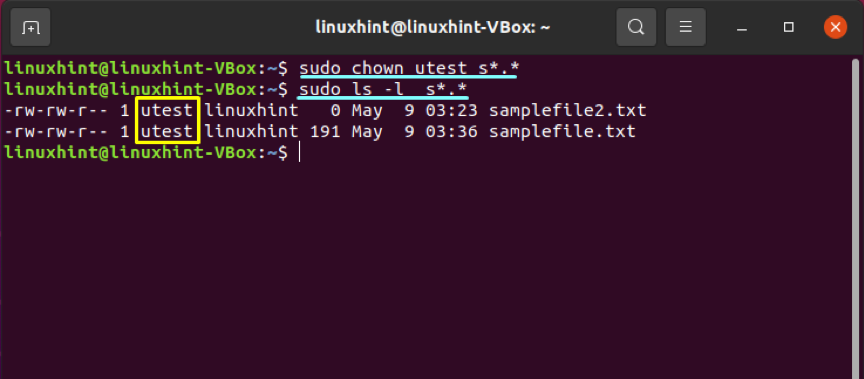
Changing the owner using wildcards
Wildcards are used to select a specific file group according to the given pattern. The chown command will then change the owner of the files after retrieving them from the wildcard execution.
Conclusion
For data security concerns, you may want to specify the ownership of files and directories. In Linux, we use the chown command-line utility for changing the ownership of directories or files. You can also utilize this command for changing directories and multiple file ownership at once. In this post, all of these statements are justified by providing practical examples.
About the author
Talha Saif Malik
Talha is a contributor at Linux Hint with a vision to bring value and do useful things for the world. He loves to read, write and speak about Linux, Data, Computers and Technology.
How to change file and folder ownership in Linux
In Linux, files and folders are associated with an owner, a group, and other users. You can modify the access permissions for these files and folders by altering the permissions for each category or by changing their ownership. To reassign the ownership of files and folders, you need to assign them to a new owner or group.
The chown and chgrp commands are the most widely used methods for altering file and folder ownership in Linux. These tools can be found in all Linux and Unix-based operating systems, such as macOS and BSDs. As command-line tools, they offer a convenient way to manage ownership in Linux.
It’s important to note that changing the ownership of files and folders requires administrative privileges. Consequently, it is recommended to use these commands cautiously, as they can lead to unintended outcomes if used improperly.
Steps to change user and group owner for files and folders in Linux:
$ getent passwd root:x:0:0:root:/root:/bin/bash daemon:x:1:1:daemon:/usr/sbin:/usr/sbin/nologin bin:x:2:2:bin:/bin:/usr/sbin/nologin sys:x:3:3:sys:/dev:/usr/sbin/nologin sync:x:4:65534:sync:/bin:/bin/sync games:x:5:60:games:/usr/games:/usr/sbin/nologin man:x:6:12:man:/var/cache/man:/usr/sbin/nologin lp:x:7:7:lp:/var/spool/lpd:/usr/sbin/nologin mail:x:8:8:mail:/var/mail:/usr/sbin/nologin news:x:9:9:news:/var/spool/news:/usr/sbin/nologin uucp:x:10:10:uucp:/var/spool/uucp:/usr/sbin/nologin proxy:x:13:13:proxy:/bin:/usr/sbin/nologin www-data:x:33:33:www-data:/var/www:/usr/sbin/nologin backup:x:34:34:backup:/var/backups:/usr/sbin/nologin list:x:38:38:Mailing List Manager:/var/list:/usr/sbin/nologin irc:x:39:39:ircd:/var/run/ircd:/usr/sbin/nologin gnats:x:41:41:Gnats Bug-Reporting System (admin):/var/lib/gnats:/usr/sbin/nologin nobody:x:65534:65534:nobody:/nonexistent:/usr/sbin/nologin systemd-timesync:x:100:101:systemd Time Synchronization. /run/systemd:/usr/sbin/nologin systemd-network:x:101:103:systemd Network Management. /run/systemd:/usr/sbin/nologin systemd-resolve:x:102:104:systemd Resolver. /run/systemd:/usr/sbin/nologin messagebus:x:103:106::/nonexistent:/usr/sbin/nologin syslog:x:104:110::/home/syslog:/usr/sbin/nologin _apt:x:105:65534::/nonexistent:/usr/sbin/nologin tss:x:106:111:TPM software stack. /var/lib/tpm:/bin/false uuidd:x:107:114::/run/uuidd:/usr/sbin/nologin tcpdump:x:108:115::/nonexistent:/usr/sbin/nologin avahi-autoipd:x:109:117:Avahi autoip daemon. /var/lib/avahi-autoipd:/usr/sbin/nologin usbmux:x:110:46:usbmux daemon. /var/lib/usbmux:/usr/sbin/nologin rtkit:x:111:118:RealtimeKit. /proc:/usr/sbin/nologin dnsmasq:x:112:65534:dnsmasq. /var/lib/misc:/usr/sbin/nologin avahi:x:113:120:Avahi mDNS daemon. /run/avahi-daemon:/usr/sbin/nologin cups-pk-helper:x:114:121:user for cups-pk-helper service. /home/cups-pk-helper:/usr/sbin/nologin speech-dispatcher:x:115:29:Speech Dispatcher. /run/speech-dispatcher:/bin/false kernoops:x:116:65534:Kernel Oops Tracking Daemon. /:/usr/sbin/nologin saned:x:117:123::/var/lib/saned:/usr/sbin/nologin nm-openvpn:x:118:124:NetworkManager OpenVPN. /var/lib/openvpn/chroot:/usr/sbin/nologin whoopsie:x:119:125::/nonexistent:/bin/false colord:x:120:126:colord colour management daemon. /var/lib/colord:/usr/sbin/nologin sssd:x:121:127:SSSD system user. /var/lib/sss:/usr/sbin/nologin geoclue:x:122:128::/var/lib/geoclue:/usr/sbin/nologin pulse:x:123:129:PulseAudio daemon. /var/run/pulse:/usr/sbin/nologin hplip:x:124:7:HPLIP system user. /run/hplip:/bin/false gnome-initial-setup:x:125:65534::/run/gnome-initial-setup/:/bin/false gdm:x:126:131:Gnome Display Manager:/var/lib/gdm3:/bin/false user:x:1000:1000:user. /home/user:/bin/bash systemd-coredump:x:999:999:systemd Core Dumper:/:/usr/sbin/nologin sshd:x:127:65534::/run/sshd:/usr/sbin/nologin shakir:x:1001:1001:shakir. /home/shakir:/bin/bash
$ getent group root:x:0: daemon:x:1: bin:x:2: sys:x:3: adm:x:4:syslog,user tty:x:5: disk:x:6: lp:x:7: mail:x:8: news:x:9: uucp:x:10: man:x:12: proxy:x:13: kmem:x:15: dialout:x:20: fax:x:21: voice:x:22: cdrom:x:24:user floppy:x:25: tape:x:26: sudo:x:27:user,shakir audio:x:29:pulse dip:x:30:user www-data:x:33: backup:x:34: operator:x:37: list:x:38: irc:x:39: src:x:40: gnats:x:41: shadow:x:42: utmp:x:43: video:x:44: sasl:x:45: plugdev:x:46:user staff:x:50: games:x:60: users:x:100: nogroup:x:65534: systemd-timesync:x:101: systemd-journal:x:102: systemd-network:x:103: systemd-resolve:x:104: crontab:x:105: messagebus:x:106: input:x:107: kvm:x:108: render:x:109: syslog:x:110: tss:x:111: bluetooth:x:112: ssl-cert:x:113: uuidd:x:114: tcpdump:x:115: ssh:x:116: avahi-autoipd:x:117: rtkit:x:118: netdev:x:119: avahi:x:120: lpadmin:x:121:user scanner:x:122:saned saned:x:123: nm-openvpn:x:124: whoopsie:x:125: colord:x:126: sssd:x:127: geoclue:x:128: pulse:x:129: pulse-access:x:130: gdm:x:131: lxd:x:132:user user:x:1000: sambashare:x:133:user systemd-coredump:x:999: shakir:x:1001:
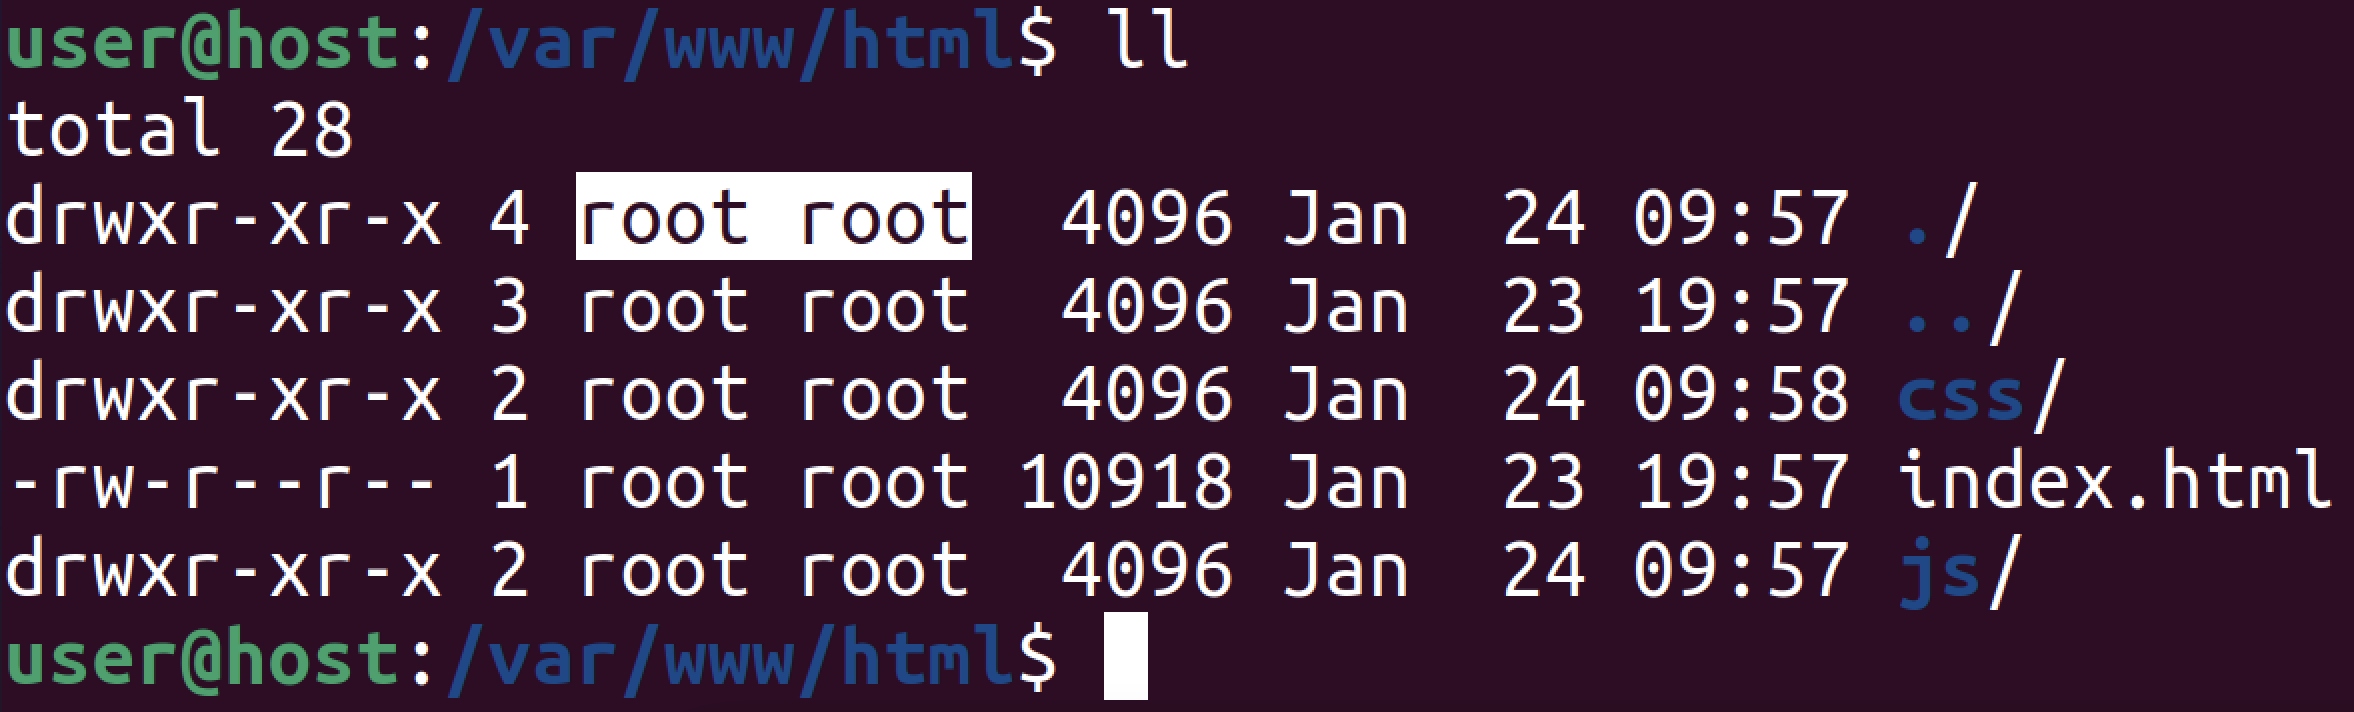
$ stat -c "%U:%G" /var/www/html/index.html root:root
$ sudo chown www-data /var/www/html/index.html
$ stat -c "%U:%G" /var/www/html/index.html www-data:root