- 3 Ways to Change a Users Default Shell in Linux
- 1. usermod Utility
- 2. chsh Utility
- 3. Change User Shell in /etc/passwd File
- How to Change Default Applications in Ubuntu
- Changing default applications in Ubuntu
- 2. Change default applications in Ubuntu from right-click menu
- Troubleshoot: Application not available in ‘open with’ list
- Explanation
- How to Change Your Ubuntu’s Default Applications
- Change Default Apps Through the Command Line
- Example: Changing the default text editor
- Searching for alternatives all at once
- Change Default Apps Through the GUI
- Through the Settings Utility
- Changing Default Application for Removable Media
- Changing Default Application for Opening a Certain File Type
- Example: Setting all .png files to be opened in Shotwell Viewer
3 Ways to Change a Users Default Shell in Linux
In this article, we will describe how to change a user’s shell in Linux. The shell is a program that accepts and interprets commands; there are several shells such as bash, sh, ksh, zsh, fish and many other lesser known shells available on Linux.
Bash (/bin/bash) is a popular shell on most if not all Linux systems, and it’s normally the default shell for user accounts.
There are several reasons for changing a user’s shell in Linux including the following:
- To block or disable normal user logins in Linux using a nologin shell.
- Use a shell wrapper script or program to login user commands before they are sent to a shell for execution. Here, you specify the shell wrapper as a user’s login shell.
- To meet a user’s demands (wants to use a specific shell), especially those with administrative rights.
When creating user accounts with the useradd or adduser utilities, the —shell flag can be used to specify the name of a user’s login shell other than that specified in the respective configuration files.
A login shell can be accessed from a text based interface or via a SSH from remote Linux machine. However, if you login via a graphical user interface (GUI), you can access the shell from a terminal emulators like xterm, konsole and many more.
Let’s first list all available shells on your Linux system, type.
# cat /etc/shells /bin/sh /bin/bash /sbin/nologin /bin/tcsh /bin/csh /bin/dash
Before you proceed any further, note that:
- A user can change their own shell to any thing: which, however must be listed in the /etc/shells file.
- Only root can run a shell not listed in /etc/shells file.
- If an account has a restricted login shell, then only root can change that user’s shell.
Now let’s discuss three different ways to change Linux user shell.
1. usermod Utility
usermod is a utility for modifying a user’s account details, stored in the /etc/passwd file and the -s or —shell option is used to change the user’s login shell.
In this example, we’ll first check user tecmint’s account information to view his default login shell and then change its login shell from /bin/sh to /bin/bash as follows.
# grep tecmint /etc/passwd # usermod --shell /bin/bash tecmint # grep tecmint /etc/passwd

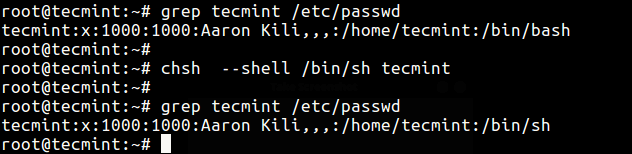
2. chsh Utility
chsh is a command line utility for changing a login shell with the -s or –shell option like this.
# grep tecmint /etc/passwd # chsh --shell /bin/sh tecmint # grep tecmint /etc/passwd
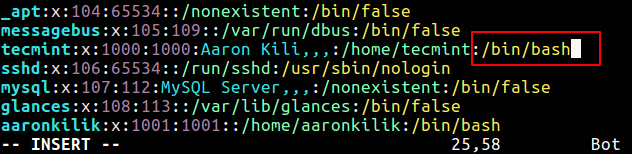
The two methods above all modify the shell specified in /etc/passwd file which you can edit manually as in the third method below.
3. Change User Shell in /etc/passwd File
In this method, simply open the /etc/passwd file using any of your favorite command line text editors and change a specific users shell.
When your done editing, save and close the file.
Do not forget to read these related topics:
In this article, we described various ways of changing a user’s shell in Linux. To share any thoughts with us, use the comment section below.
How to Change Default Applications in Ubuntu
Installing VLC media player is one of the first few things to do after installing Ubuntu 18.04/19.10 for me. One thing I do after installing VLC is to make it the default application so that I can open a video file with VLC when I double click it.
As a beginner, you may need to know how to change any default application in Ubuntu and this is what I am going to show you in this tutorial.
But before we do that, I recommend that you also read my guide on how to install/remove software in Ubuntu – in case you’re still confused about that.
Changing default applications in Ubuntu
There are basically two ways you can change the default applications in Ubuntu:
- via system settings (valid for changing the default web browser, email client, calendar, music application, video player and image viewer)
- via right-click menu (valid for applications other than the above mentioned ones)
If you prefer videos, you can watch the video below:
In the System Settings, click on the Details option:
Now, click on the “Default Applications” option as highlighted in the screenshot below:
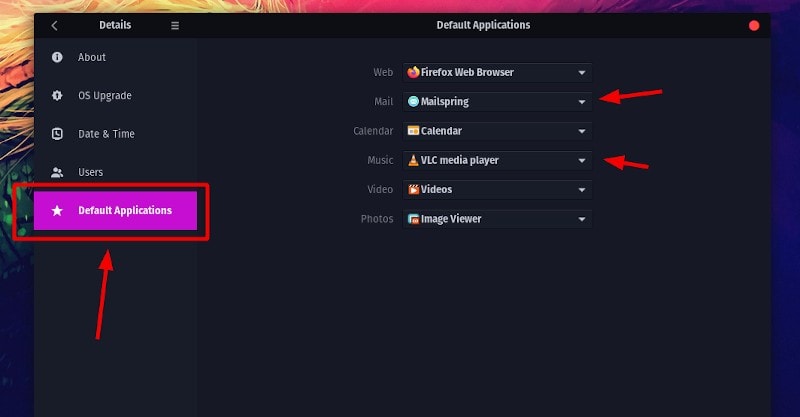
As you can see, there are only a few kinds of default applications that can be changed here. You can change the default applications for web browsers, email clients, calendar apps, music, videos and photo here. What about other kinds of applications?
Don’t worry. To change the default applications not listed here (for instance – text editor), we’ll use the option in the right-click menu.
2. Change default applications in Ubuntu from right-click menu
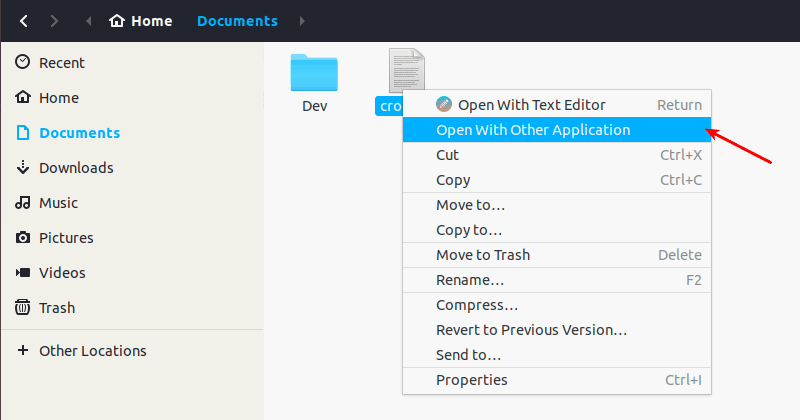
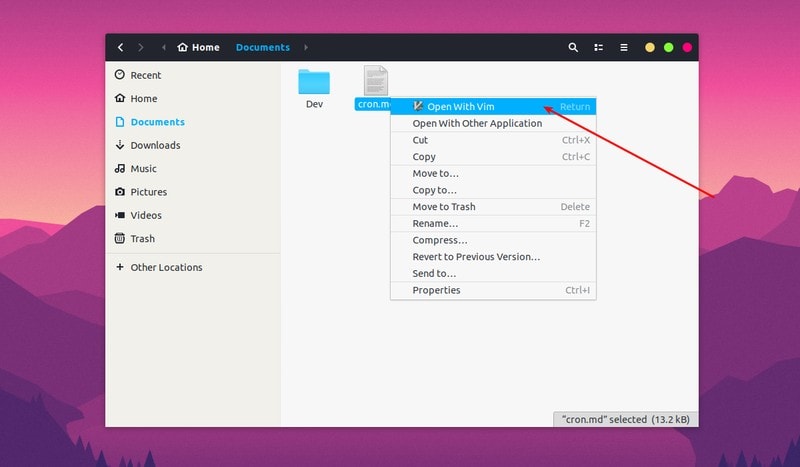
Let’s say you have a markdown file (.md) which opens in Gedit text editor by default. But you want to use some other applications to open markdown files. Here’s what you need to do.
Right click on the file and then select Open with Other Application:
If you don’t see your choice of application, click on the View All Applications:
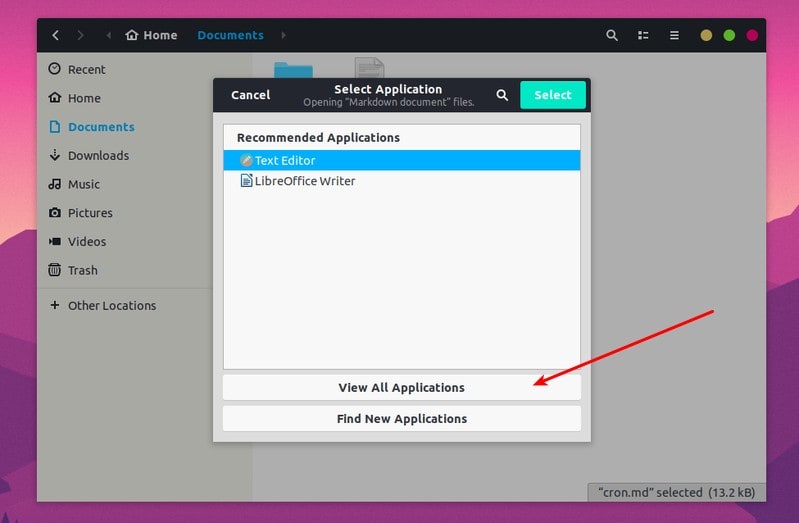
Locate the desire application and select it:
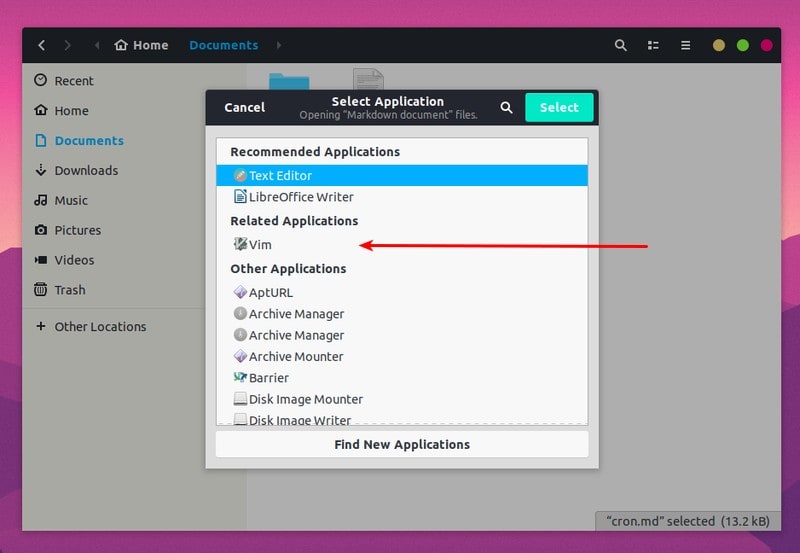
This will open the file in your chosen application.
The thing here is that the file manager automatically recognizes your choice and the next time you double click on the file to open it, it will open it with the application you last chose.
Keep in mind that this behavior is not applicable to web browsers, music players, video players, email clients, calendars and photo viewer. For that you need to use the first method described here.
Troubleshoot: Application not available in ‘open with’ list
In some rare cases, the application may not even be available in the list of open with applications.
I encountered this issue with Pinta a few years back and here’s what I did to fix it.
To add any program in the list of the open with applications, open a terminal and use the following command:
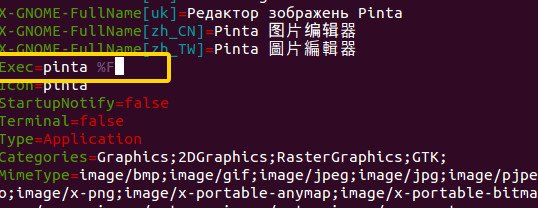
sudo gedit /usr/share/applications/XXX.desktopPlease note two things. In XXX.desktop, XXX is the name of your application. And then use of gedit. You can use any other editor. I used Vim. If you use Gedit, it will dispaly some warning messages in the terminal but will open the file in a GUI.
In this desktop file, look for a line that looks like this:
If you have something like this, replace this line with:
Save it and exit/close the desktop file. No need to restart or anything. It should be working instantly.

Explanation
Now to explain what this %F means. %F is actually an Exec Key. It means the program will be supplied with multiple file inputs at the same time (arguments). So if I have this %F set in Pinta, I can open multiple images in the same instance of Pinta (think it like tabs in a web browser). But the program must support this feature.
The question which you might be wondering why it was not showing in the list of applications before and why after adding %F, it is working. The reason is that when there is no such Exec Key, the program will not accept any argument, which means you can not “open with” a file with this application as “open with” supplies the file as the argument.
You can read more about Exec Key here.
I hope you found this beginner’s tutorial to change default applications in Ubuntu helpful. If you have any questions or suggestions, feel free to drop a comment below.
How to Change Your Ubuntu’s Default Applications

We all have our preferences when it comes to the application we want to use for opening and working with a certain file type. For example, whenever I start using a new version of an operating system, I install and switch to the VLC media player for playing music and videos. In Ubuntu, you can change your default applications both through the command line and the graphical user interface through the simple steps described in this tutorial. We have performed the commands and procedure described in this tutorial on the latest Ubuntu 18.
Change Default Apps Through the Command Line
When you access any application through the command line by a generic name, such as ‘editor’, it looks for the default application set in the system and points to the exact default application and opens it. For example when I enter the following command:
It opens the Nano editor on my system as it is the default text editor for Ubuntu 18.04 (Bionic Beaver).
If you want to change the default editor or any other program for that matter, you can use the update-alternatives utility for this purpose.
$ sudo update-alternatives --config [applicationname]
Example: Changing the default text editor
In this example I will change my default Nano editor to another preferable alternative through the following command:
$ sudo update-alternatives --config editor
This command will give me an entire list of alternatives for the text editor along with the one with auto mode status as follows:

By entering a selection number associated with my choice and then pressing Enter, I can switch to a new default text editor that will be used to open my text files next time by default.
If you use this command to look up for alternatives but none exists, you will get the following message. You will then require downloading an alternative and then switching to it.

Searching for alternatives all at once
The following command will list, and let you choose from, an available list of alternatives for all your default applications.
$ sudo update-alternatives --all
The following output is displayed for my system, representing that there are alternatives available only for the editor applications. By specifying a selection number and hitting Enter, I can change the default editor for my Ubuntu.

Change Default Apps Through the GUI
A more user-friendly alternative to changing your default applications is through the user interface. We will represent the following two ways to do so:
- Through the Settings utility
- By specifying default application for opening a certain file
Through the Settings Utility
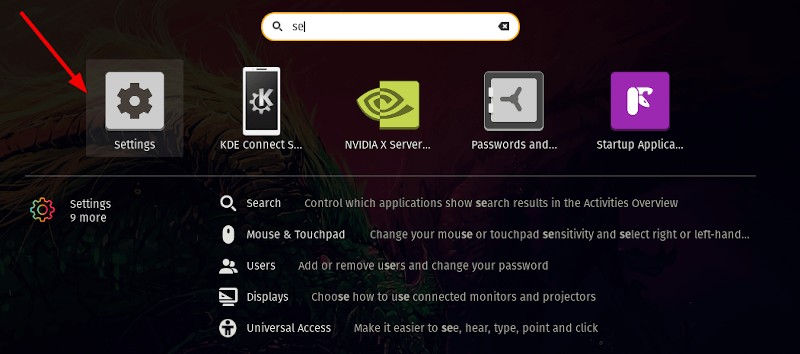
Click the downward arrow located at the top right corner of your Ubuntu desktop and then click the settings icon located at the bottom left corner:

Type Settings in the Ubuntu Dash as follows:

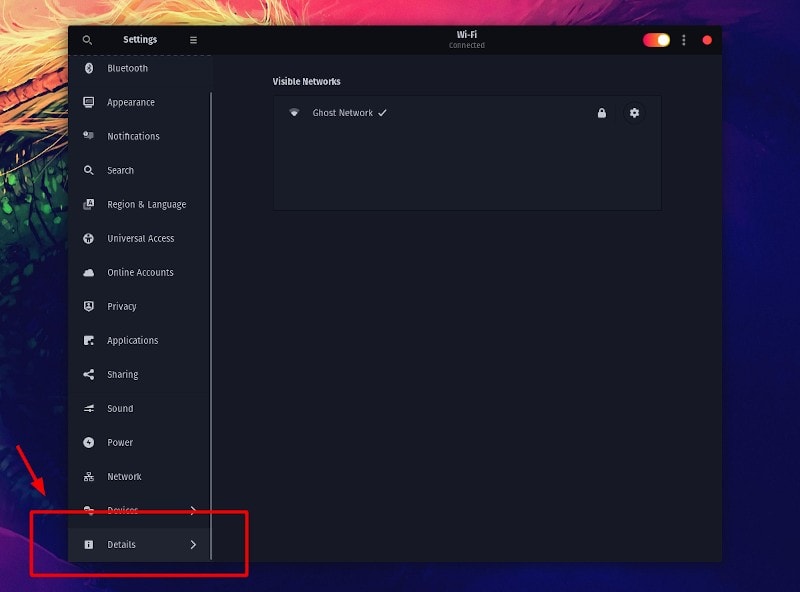
The Settings utility will open displaying the Wi-Fi tab as default.
Then click on the Details tab and then the Default Applications tab.
The following view will list all the default applications of your system.

In order to choose a different application than the default one, click the downward arrow and make a new selection against a category as follows:

In this image, I have selected Shotwell Viewer to open my photos instead of the default Image Viewer application.
Changing Default Application for Removable Media
Through the Devices tab in System Settings, select the Removable Media tab. The list of removable media and the default program to open the media will be displayed.
In order to change the default application, click the down-arrow beside the Other Application drop-down and select the application from the Select Application dialog as follows:

Your newly selected application will now be used for opening the removable media from then on.
Changing Default Application for Opening a Certain File Type
By setting the default application for opening a certain file, you can select the default application for opening all files of the same type. Here is an example:
Example: Setting all .png files to be opened in Shotwell Viewer
Through the file viewer, right-click a file with the .png extension and then select Properties as follows:

The Properties window will open.
Click on the Image tab and select Shotwell Viewer (or any other preferable applications) and then click Reset.

Your newly selected application will not only open this .png file in the future but also all other files with .png extension.
In this tutorial, you have learned several ways to change the default application used to open a file on your Ubuntu system. You can use both the command line or the two ways described in this tutorial for the GUI to select new applications that will be used to open your files.