- How to Check Hard Drive for Bad Sectors or Blocks in Linux
- Step 1) Use fdisk command to identify hard drive info
- Step 2) Scan hard drive for Bad Sectors or Bad Blocks
- Step 3) Inform OS not to use bad blocks for storing data
- 8 thoughts on “How to Check Hard Drive for Bad Sectors or Blocks in Linux”
- How to check disk errors in Linux
- Steps to scan for disk error and bad sector in Linux:
- Проверяем диск на битые секторы в Linux
- Что такое битый сектор?
- Зачем нужна проверка диска?
- Программы для проверки диска
- Badblocks
- SMARTMONTOOLS
- Gparted
- Заключение
How to Check Hard Drive for Bad Sectors or Blocks in Linux
Badblocks is the command-line utility in Linux like operating systems which can scan or test the hard disk and external drive for bad sectors. Bad sectors or bad blocks is the space of the disk which can’t be used due to the permanent damage or OS is unable to access it.
Badblocks command will detect all bad blocks(or bad sectors) of a hard disk and save them in a text file. Later we can use it with e2fsck to instruct Operating System(OS) not to store any data on these damaged sectors or blocks.
In this article, we will learn how to check or scan hard drive for bad sectors using badblocks command.
Step 1) Use fdisk command to identify hard drive info
Run fdisk command to list all available hard disks to Linux operating system. Identify the disk which you want to scan for bad blocks.
Step 2) Scan hard drive for Bad Sectors or Bad Blocks
Once you identify the hard disk then run badblocks command. Example is shown below
$ sudo badblocks -v /dev/sdb > /tmp/bad-blocks.txt
Just replace “/dev/sdb” with your own hard disk / partition. When we execute above command a text file “bad-blocks” will be created under /tmp , which will contains all bad blocks.

Step 3) Inform OS not to use bad blocks for storing data
Once the scanning is completed, if the bad sectors are reported then use file “bad-blocks.txt” with e2fsck command and force OS not to use these bad blocks for storing data. Run the following e2fsck command
$ sudo e2fsck -l /tmp/bad-blocks.txt /dev/sdb or $ sudo e2fsck -c /dev/sdb
Note : Before running e2fsck command, you just make sure the drive is not mounted.
For any further help on badblocks & e2fsck command , read their respective man pages
$ man badblocks $ man e2fsck
8 thoughts on “How to Check Hard Drive for Bad Sectors or Blocks in Linux”
Don’t modern harddrives already have all this already — as built in functionality? (access via smartctl) $ apropos smartctl
smartctl (8) – Control and Monitor Utility for SMART Disks Reply
From time to time, it is a good practice to check your hard drive for errors using Windows CHKDSK or Check Disk. Reply
This has given me an idea of creating this script #!/bin/sh
minsize=0
target=”/tmp/bad-blocks.txt”
for disc in `fdisk -l | grep ‘^/’ | awk ‘< print $1 >’`; do
badblocks -v $disc > “$target”
tam=$(du -k “$target” | cut -f 1)
if [ $tam -eq $minsize ]; then
echo “no badblocks on $disc”
else
echo “badblock(s) found(s) on $disc”
fi
done Reply
You don’t need to run badblocks first. That’s a waste of time. Just use the e2fsck executable to run it for you with the -c option… # sudo e2fsck -c /dev/sdb This lets you avoid creating an unnecessary file, especially when you’re booting to an optical drive and don’t want to write to the hard drive you’re testing. Reply
DO NOT DO THIS! The ONLY reason you should ever create a bad blocks table is to send commands to the drivbe to tell it to repair the sectors ATA and scsi drives are supposed to map out bad blocks. You can force the issue by wirting 0x00 to the sector (or use hdparm–repair-sector) Take note of smartctl -A /dev/drive returns – in particular the bad sector (mapped out sectors) and pending sectors (probably bad but not mapped out) values – if the bad sector normalised value (not the raw value) is below the threshold then you need to replace the drive – NOW. If you have large numbers of pending bad sectors then you’ll need to identify them and write zeros to them to allow the drive to fix or map them out (perfectly sectors can get marked as pending due to vibration issues, amongst other things). Badblocks -svn will do this (unmount the partition first!), or if the partition is trashable/part of a raidset, hdparm –repair-sector and then rescan/reformat afterwards. If bad sectors are not being mapped out then the drive needs to be replaced immediately. It’s probably out of spares (you’ll see this with smartctl -A) or about to fail. Reply
What command just to report sectors or drive health.
Using an old pata drive that has not been used in some time to run Linux
peppermint 64x.
From my experience with windows os’s and smart, one bad sector can trash
a program or even the entire drive. Reply
Most filesystems these days use 4096 byte blocks. Using the commands as directed here will make a hash of your filesystem. As advised in the current man page for badblocks
“Important note: If the output of badblocks is going to be fed to the
e2fsck or mke2fs programs, it is important that the block size is prop‐
erly specified, since the block numbers which are generated are very
dependent on the block size in use by the filesystem. For this reason,
it is strongly recommended that users not run badblocks directly, but
rather use the -c option of the e2fsck and mke2fs programs” Following the example on this page the command would be: es2fsck -c /dev/sdb Reply
How to check disk errors in Linux
Common disk errors include physical failures, bad sectors or blocks, and inconsistent filesystems, which can lead to various problems. Diagnosing these issues in Linux can be done using built-in command line tools.

The disk must not be mounted when performing these tests. If it’s necessary to check the root filesystem and it cannot be unmounted due to logged-in users, you can boot into a live Linux system, such as the Ubuntu installer disk. This method is also helpful for recovering partition tables.
Steps to scan for disk error and bad sector in Linux:
$ lsblk NAME MAJ:MIN RM SIZE RO TYPE MOUNTPOINT loop0 7:0 0 55.4M 1 loop /snap/core18/1997 loop1 7:1 0 219M 1 loop /snap/gnome-3-34-1804/66 loop2 7:2 0 64.8M 1 loop /snap/gtk-common-themes/1514 loop3 7:3 0 32.3M 1 loop /snap/snapd/11588 loop4 7:4 0 51M 1 loop /snap/snap-store/518 loop5 7:5 0 65.1M 1 loop /snap/gtk-common-themes/1515 sda 8:0 0 20G 0 disk ├─sda1 8:1 0 1M 0 part ├─sda2 8:2 0 513M 0 part /boot/efi └─sda3 8:3 0 19.5G 0 part / sdb 8:16 0 20G 0 disk /mnt/data sr0 11:0 1 1024M 0 rom
$ sudo umount /dev/sdb [sudo] password for user:
Assess the disk’s S.M.A.R.T. (Self-Monitoring, Analysis, and Reporting Technology) health status using smartctl.
$ sudo smartctl -H /dev/sdb smartctl 7.2 2020-12-30 r5155 [x86_64-linux-5.11.0-16-generic] (local build) Copyright (C) 2002-20, Bruce Allen, Christian Franke, www.smartmontools.org === START OF READ SMART DATA SECTION === SMART Health Status: OK
$ sudo fsck /dev/sdb fsck from util-linux 2.36.1 e2fsck 1.45.7 (28-Jan-2021) /dev/sdb: clean, 11/1310720 files, 126322/5242880 block
$ sudo badblocks -v /dev/sdb Checking blocks 0 to 20971519 Checking for bad blocks (read-only test): done Pass completed, 0 bad blocks found. (0/0/0 errors)
Проверяем диск на битые секторы в Linux
Для хранения и обработки информации на рабочей станции используются носители HDD либо SSD. Владельцы записывают на них фото, видео, любимые книги, игры и т.д. Но что делать, если диск выдает ошибки или, хуже того, не читается операционной системой? Статья расскажет о том, как проверить жесткий диск на битые секторы в ОС семейства Linux. В качестве примера возьмем Ubuntu 18.04.3.
Что такое битый сектор?
Для начала разберёмся, что это за проблема – битый сектор. Сектор представляет собой микроэлемент на носителе, который отвечает за операции чтения/записи. Понятие «битый» применятся к элементу в том случае, если он перестал реагировать на запросы операционной системы.
Различают два типа повреждений: физическое и логическое. В первом случае подразумевается, что сектор вышел из строя из-за механических поломок или физических повреждений: например, его повредила головка носителя, жесткий упал на твердую поверхность, в него попала влага и т.д.
К логическим повреждениям относят сектора, которые ОС не читает. При обращении к ним возникает ошибка, поэтому они отмечаются как битые. Хорошая новость в том, что логические ошибки исправляются.
Зачем нужна проверка диска?
Проверка носителя в ряде случаев исправляет ошибки, что восстанавливает работоспособность рабочей станции до предыдущего состояния. Любая ОС имеет программный инструмент для определения состояния дисков, но сторонние производители предлагают более функциональные решения.
Программы для проверки диска
Расскажем про некоторые программы для Linux-систем.
Badblocks
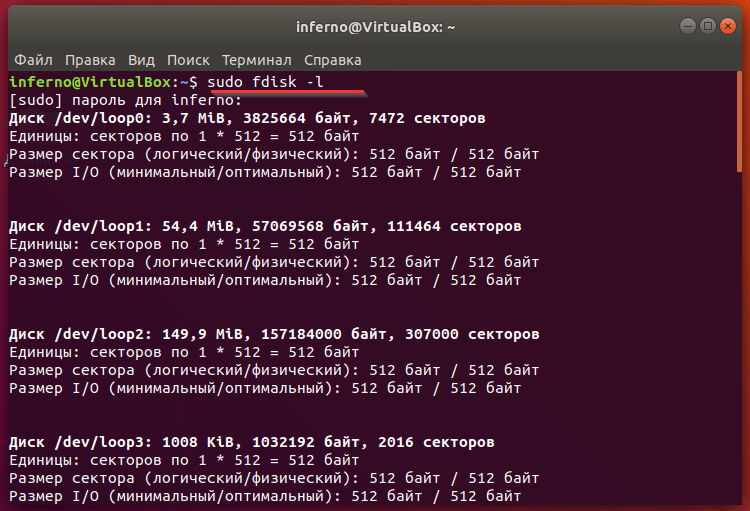
Битые сектора в английском языке называют badblocks, отсюда и название утилиты. Она интегрирована в любой релиз Linux. Перед ее запуском определимся с количеством HDD, доступных в ОС. Наберем в терминале:
sudo fdisk -l
Информация представлена в виде списка с подробным описанием каждого раздела.
Теперь запустим приложение для исправления ошибок.
sudo badblocks -v /dev/sda1 > badsectors.txt
Синтаксис расшифровывается следующим образом:
- Badblocks -v. Утилита после операции выдает подробную информацию.
- /dev/sda1 – раздел, приложение проверяет.
- badsectors.txt – файл, в который утилита отправляет результат проверки. Имя придумывается произвольное.
Если при проверке найдены битые сектора, то воспользуемся утилитой в зависимости от типа файловой системы. В большинстве случаев для домашней ОС семейства Linux использует файловую структуру Ext. Для нее подходит приложение e2fsck. Если же ОС использует другой тип, то воспользуемся альтернативой – fsck.
По умолчанию оба варианта интегрированы в ОС.
Вводим в терминале команду:
sudo e2fsck -l badsectors.txt /dev/sda1
sudo fsck -l badsectors.txt /dev/sda1
Ключ -I означает, что утилита собирает сведения о поврежденных секторах из файла badsectors.txt, а после пробует исправить их.
SMARTMONTOOLS
Второй способ проверки жесткого диска – приложение Smartmontools. Оно работает со встроенной микропрограммой на жестких дисках под названием S.M.A.R.T, которая во время старта компьютера автоматически проверяет носитель на наличие ошибок и проблем.
Программа не входит в состав стандартного программного обеспечения, поэтому проинсталлируем ее:
sudo apt-get install smartmontools
После инсталляции запускаем приложение с правами администратора:
sudo smartctl -H /dev/sda1
ПО возьмет результаты проверки из S.M.A.R.T и отобразит в терминале для пользователя.
Если необходимо использовать дополнительные функции программы, то используем ключ man:
man smartctl
Например, для отображения подробной информации о жестком диске используем ключ –a или –all.
Gparted
Третий метод проверки – программа для разбивки носителя под названием Gparted. Для ее инсталляции вводим:
sudo apt-get install gparted
Установка займет максимум две минуты.
Важно! Запускаем ПО с правами администратора для получения доступа к расширенному функционалу.
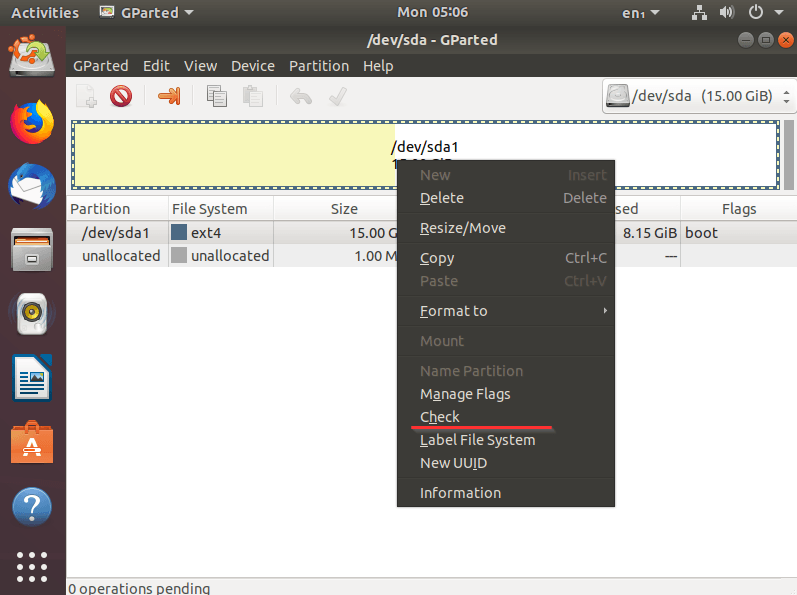
Проверка диска
Нажимаем правой кнопкой мыши на логическом томе, выбираем раздел «Проверка» (Check). В нижней строке появится информация о запланированной операции.
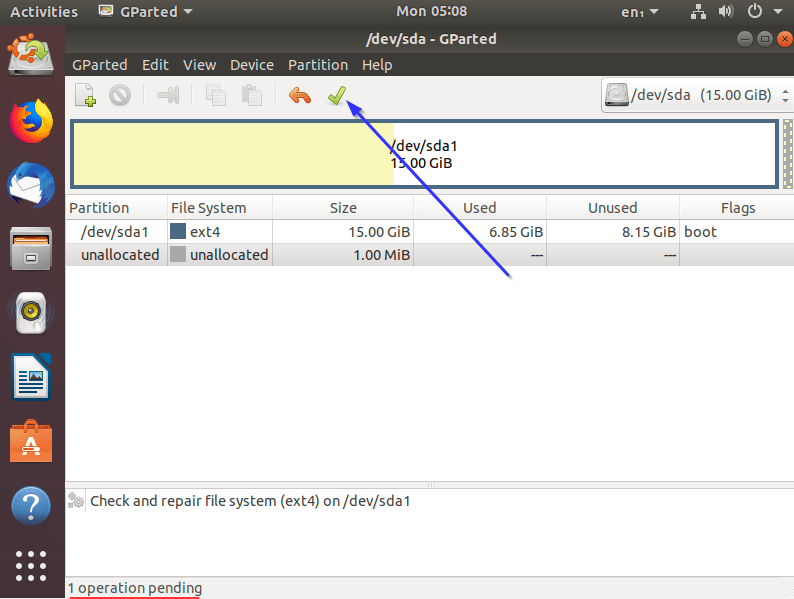
Выполнение операций в программе
Нажимаем иконку, которая отмечена синей стрелкой на изображении выше, чтобы выполнить проверку. Процесс может занять несколько часов.
Важно! Проверка и другие аналогичные действия выполняются только на неактивном логическом томе.
Если битые сектора возникают на системном диске, то используем загрузочную флэшку для запуска Live Ubuntu. В результате создается виртуальный жесткий диск с ОС Ubuntu.
Заключение
Публикация рассказала о том, как проверить жесткий диск в ОС семейства Linux на наличие поврежденных секторов. Предложены способы исправления.