- How can I quickly copy a GPT partition scheme from one hard drive to another?
- 5 Answers 5
- Properly backup and restore partition table in Linux [100% Working]
- Clone and Restore partition table using ‘sfdisk’ command
- Backup Partition Table
- Restore Partition Table
- Clone and Restore partition table using “dd” command
- Backup Partition Table
- Restore Partition Table
- 2 thoughts on “Properly backup and restore partition table in Linux [100% Working]”
- How to Clone and Restore Linux Partition Using dd Command
- dd Command
- How to List Linux Storage Device Info
- How to Install LSSCSI Tool in Linux
- How to Check Linux Disk Information
- How to Clone/Backup Partition in Linux
- How to Restore Clone Image in Linux
- How to Clone a Partition or Hard drive in Linux
- How to Clone Linux Partition
- How to Clone Linux Hard Drive
- How to Backup MBR in Linux
How can I quickly copy a GPT partition scheme from one hard drive to another?
On a non GPT partition table I can do sfdisk -d /dev/sda | sfdisk /dev/sdb . But sfdisk doesn’t support GPT partition tables. What can I use instead? I’m looking for a one or two command solution, not just using GNU parted to output the partition sizes and then manually making them again.
The util-linux partitioning tools (including sfdisk ) were rewritten to include GPT support for util-linux 2.26. sfdisk differs from gdisk in that it doesn’t support putting a small boot partition before 1MiB, though, so it choked on my config. (bug reported upstream already.)
When I clone a MBR disk to a smaller disk, in addition to sfdisk -d I also edit the dump and modify start/end sectors. How do I do this with sgdisk for GPT disks? -R clones without intermediary backup file and -b creates a binary backup, not human readable/editable like sfdisk does!
update on this: sfdisk now accepts whatever you give it when used this way, including a small boot partition following the GPT, ending at 1MB. unix.stackexchange.com/a/12988/79808
5 Answers 5
Install gdisk which is available in the Ubuntu Universe repositories.
Then use the sgdisk command (man page here) to replicate the partition table:
sgdisk /dev/sdX -R /dev/sdY sgdisk -G /dev/sdY The first command copies the partition table of sdX to sdY (be careful not to mix these up). The second command randomizes the GUID on the disk and all the partitions. This is only necessary if the disks are to be used in the same machine, otherwise it’s unnecessary.
Properly backup and restore partition table in Linux [100% Working]
In my last article I gave you an overview on Public key Infrastructure (PKI) and shared the steps to generate a self signed certificate using openssl in Linux. Next let me show you the steps to clone partition table from one disk to another to repair or backup and restore partition table in Linux. The steps from this article to backup and restore partition table are performed on centOS 7 and can also be executed on RHEL 7 Linux node.

Clone and Restore partition table using ‘sfdisk’ command
Backup Partition Table
Run the command below to backup the partition table on device /dev/sda to /root/partition-sda.img :
[root@node2 ~]# sfdisk -d /dev/sda > /root/partition-sda.img
[root@node2 ~]# ls -l /root/partition-sda.img -rw-r--r-- 1 root root 259 Apr 18 14:52 /root/partition-sda.img
As you can see the output is a ASCII type text file.
[root@node2 ~]# file /root/partition-sda.img /root/partition-sda.img: ASCII text
[root@node2 ~]# cat /root/partition-sda.img # partition table of /dev/sda unit: sectors /dev/sda1 : start= 2048, size= 1048576, bootable /dev/sda2 : start= 1050624, size= 57688064, : start= 0, size= 0, : start= 0, size= 0, >
Restore Partition Table
You should then copy /root/partition-sda.img to some other storage, for example a portable USB disk.
If the partition is damaged and needs to be restored from backup, please connect your USB disk to the server and boot the server with installation media and enter rescue mode.
Do not mount the root partition at this time — select «Skip» when the system asks if you want to mount the root partition on /mnt/sysimage.
Create a temporary directory, for example /mnt/temp and mount the filesystem of your USB device which contains your backup.
# mkdir /mnt/temp # mount /dev/sdb1 /mnt/temp/ # cd /mnt/temp/
where /dev/sdb1 is the file system of the USB disk. After that, run:
To verify that the partition table has been restored, run:
Clone and Restore partition table using “dd” command
The MBR (Master Boot Record) occupies the first 446 bytes of the disk while the partition table occupies the next 64 bytes. We can use » dd » to dump the range from 447 — 510 bytes in the first sector.
Backup Partition Table
For example, if the harddisk is /dev/sda , then run the command below:
# dd if=/dev/sda of=/root/partition-sda.img bs=1 count=64 skip=446
Restore Partition Table
You should then copy /root/partition-sda.img to some other storage, for example a portable USB disk.
If the partition is damaged and needs to be restored from backup, please connect your USB disk to the server and boot the server with installation media and enter rescue mode.
Do not mount the root partition at this time — select «Skip» when the system asks if you want to mount the root partition on /mnt/sysimage .
Create a temporary directory, for example /mnt/temp and mount the filesystem of your USB device which contains your backup.
# mkdir /mnt/temp # mount /dev/sdb1 /mnt/temp/ # cd /mnt/temp/
where /dev/sdb1 is the file system of the USB disk. After that, run:
# dd if=/mnt/temp/partition-sda.img of=/dev/sda bs=1 count=64 seek=446
To verify that the partition table has been restored, run:
The methods above assume that the hard drive has no bad blocks or any type of physical problems. The two methods only support MS-DOS partition tables, not GPT partition tables.
Lastly I hope the steps from the article to backup and restore partition table using sfdisk and dd command on Linux was helpful. So, let me know your suggestions and feedback using the comment section.
Related keywords: linux clone partition table, linux repair partition table, sfdisk
Didn’t find what you were looking for? Perform a quick search across GoLinuxCloud
If my articles on GoLinuxCloud has helped you, kindly consider buying me a coffee as a token of appreciation.

For any other feedbacks or questions you can either use the comments section or contact me form.
Thank You for your support!!
2 thoughts on “Properly backup and restore partition table in Linux [100% Working]”
“On GPT partitions you cannot perform such backup and restore of partition table.” My understanding is the gdisk does precisely this. And that sfdisk, the current version, also supports this. So why use fdisk? Reply
Thank you for highlighting this, let me verify and may be I can either update this article or add another one for GPT partitions as well Reply
How to Clone and Restore Linux Partition Using dd Command
The legacy and standards that drive the Linux operating system make it impeccable and unique among other operating system distributions in terms of achieving certain user-critical functionalities.
Most of these functionalities like backing up, restoring, and wiping out system files and user data might require the download, installation, and configuration, of certain application packages.
On the other hand, achieving these same user and system objectives only requires the mastery of certain OS-bound commands. The advantage of referencing such commands is that they often apply to all Linux distributions so that you do not have to worry about finding a package or command configuration that is compatible with your current Linux distribution.
dd Command
The dd command helps Linux users to clone, backup, and restore system hard disks and their associated data. This command also extends to other user and system-critical functionalities but this article seeks to explore its applicability in creating and restoring system hard disk images.
How to List Linux Storage Device Info
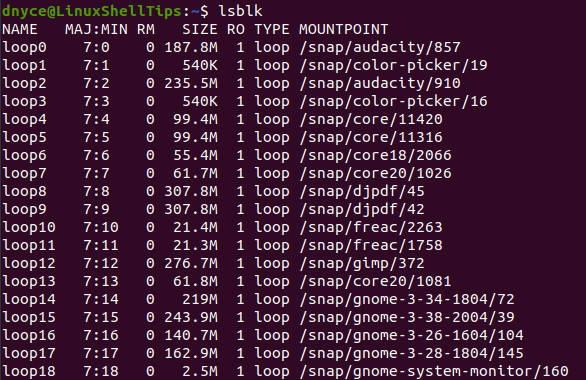
We need the lsscsi utility installed to flexibly help us list all viable storage devices on our Linux system. We could resort to other internal commands like:

Another alternative OS-bound command to consider is the lsblk command.
How to Install LSSCSI Tool in Linux
Now let us install the lsscsi utility and note the difference in using it instead of fdisk and lsblk to list the storage devices attached to our Linux system.
$ sudo apt-get install lsscsi [On Debian/Ubuntu & Mint] $ sudo dnf install lsscsi [On CentOS/RHEL/Fedora and Rocky Linux/AlmaLinux] $ pacman -S lsscsi [On Arch Linux] $ emerge sys-apps/lsscsi [On Gentoo] $ sudo dnf install lsscsi [On Fedora] $ sudo zypper install lsscsi [On openSUSE]
Now try using this lsscsi utility to list active storage devices on your Linux system.

As you can see, this utility produces a more organized output compared to the latter system-bound device-listing utilities.
How to Check Linux Disk Information
From the above lsscsi output, the disk drive we will be cloning is “/dev/sdb” . The OS-bound fdisk command should give us more detailed information regarding this flash disk drive. You will need Sudo privileges to execute this command.
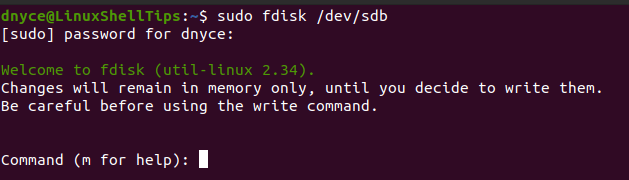
Key in «p» to retrieve this disk’s detailed information.
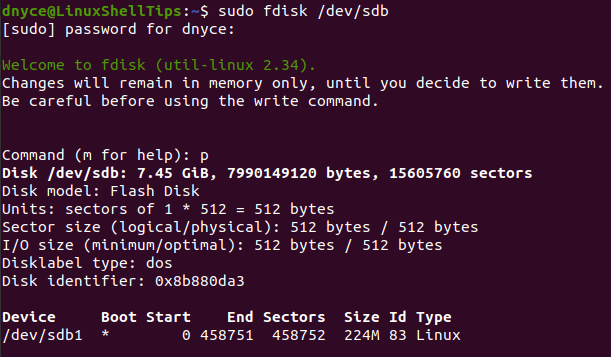
We now know everything we need to know regarding our targeted disk drive. Exit the fdisk window by keying in «q» .
How to Clone/Backup Partition in Linux
It is from this point that we will witness the power of the OS-bound dd command. The above-listed and detailed “/dev/sdb” flash disk has one partition (/dev/sdb1) .
We are going to image or clone this single partition (sdb1) using the following dd imaging/cloning command:
$ sudo dd if=/dev/sdb1 of=/home/dnyce/LinuxShellTips/sdb1.img bs=1k conv=noerror

- if – points to the targeted device for cloning.
- of – points to the destination storage location and assigned file name for the created device clone/image.
- bs – depicts the needed block size configuration.
- conv=noerror – ensures that the original data for cloning is preserved.
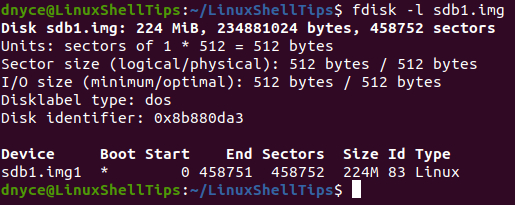
We can confirm the creation of our image/clone (sdb1.img) by navigating to its “of” location as per the dd command specifications.
$ cd /home/dnyce/LinuxShellTips && ls

A more detailed output can be achieved through the fdisk utility.
How to Restore Clone Image in Linux
We will also make use of the dd command, as we used earlier to imaging/cloning but this time swipes the input path (if) and the output path (of) entries.
$ sudo dd if=/home/dnyce/LinuxShellTips/sdb1.img of=/dev/sdb1 bs=1k conv=noerror

With the above output, we have achieved complete restoration of backup files to their original destination.
Final Note
You should now embrace this image creation and cloning skill set to make sure you never lose any data on your machine. The dd command is very effective and easy to master. With a one-line command, you have an image backup of your data and with another one-line command, you have successfully retrieved that same data.
How to Clone a Partition or Hard drive in Linux
There are many reasons why you may want to clone a Linux partition or even hard drive, most of which are related to creating backups of your data. There are multiple ways you can achieve this in Linux by using some external tools such as partimage or Clonezilla.
However in this tutorial we are going to review Linux disk cloning with tool called dd, which is most commonly used to convert or copy files and it comes pre-installed in most Linux distributions.
How to Clone Linux Partition
With dd command you can copy entire hard drive or just a Linux partition. Lets start with cloning one of our partitions. In my case I have the following drives: /dev/sdb, /dev/sdc.. I will clone /dev/sdb1/ to /dev/sdc1.
First list the these partitions using the fdisk command as shown.
Now clone a partition /dev/sdb1/ to /dev/sdc1 using the following dd command.
The above command tells dd to use /dev/sdb1 as input file and write it to output file /dev/sdc1.

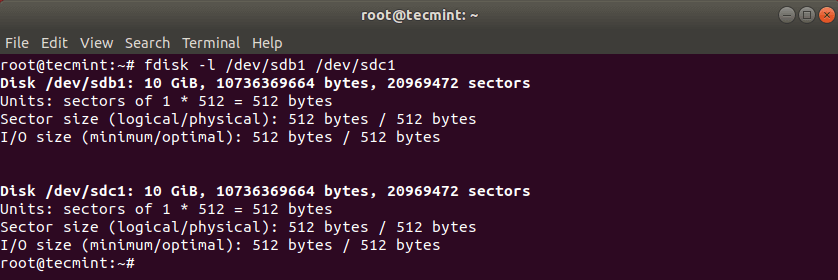
After cloning Linux partition, you can then check both partitions with:
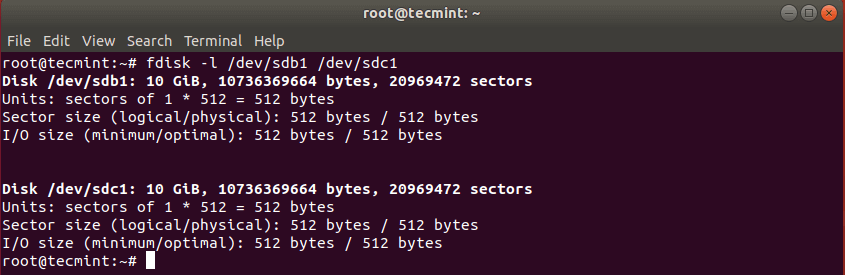
How to Clone Linux Hard Drive
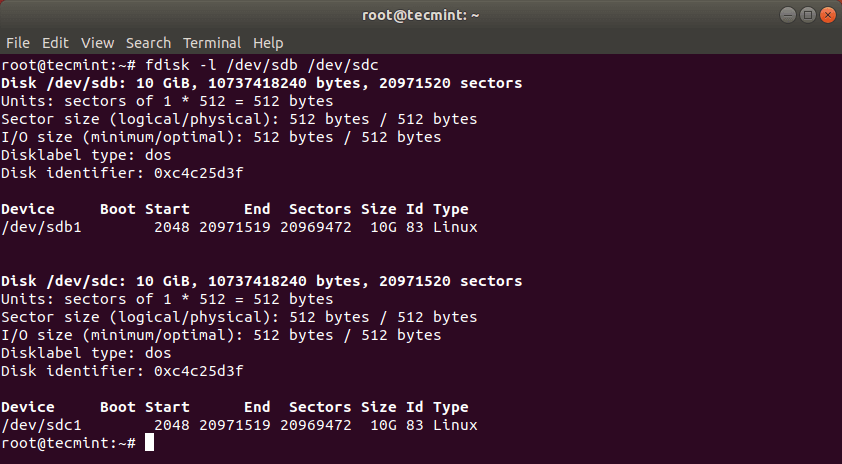
Cloning a Linux hard drive is similar to cloning a partition. However, instead of specifying the partition, you just use the entire drive. Note that in this case it is recommended that the hard drive is same in size (or bigger) than the source drive.

This should have copied the drive /dev/sdb with its partitions on the target hard drive /dev/sdc. You can verify the changes by listing both drives with fdisk command.
How to Backup MBR in Linux
dd command can also be used to backup your MBR, which is located at the first sector of the device, before the first partition. So if you want to create backup of your MBR, simply run:
# dd if=/dev/sda of=/backup/mbr.img bs=512 count=1.
The above command tells dd to copy /dev/sda to /backup/mbr.img with step of 512 bytes and the count option tells to copy only 1 block. In other words you tell dd to copy the first 512 bytes from /dev/sda to the file you have provided.

That’s all! dd command is a powerful Linux tool that should be used with caution when copying or cloning Linux partitions or drives.