- Which Linux command can I use to test my speakers for current talk radio output?
- 2 Answers 2
- speaker-test(1) — Linux man page
- Options
- Usage Examples
- See Also
- Author
- The Speaker-Test Command in Linux
- How to Use the speaker-test Command
- Conclusion
- About the author
- Denis Kariuki
- Linux console sound test
- NAME
- SYNOPSIS
- DESCRIPTION
- OPTIONS
- USAGE EXAMPLES
- SEE ALSO
- AUTHOR
Which Linux command can I use to test my speakers for current talk radio output?
Which bash command will indicate the sound output speaker(output or no output), so I can reset my web radio when it crashes?
It sounds like this question does not want to test that the speakers work, he wants to find out if the OS is currently playing any sound through them. Thus he doesn’t want to play sound but to find out if any sound is currently playing.
2 Answers 2
This is a really good command testing out all speakers.
Remarks on usage
There is no loud noise heard when running this command, except a voice saying «front left, front center, front right. «. This command will continue to repeat the testing, until the user had pressed Ctrl + Z keys to stop the testing.
+1 because tested working in Xubuntu 14.04. This works well and there is no loud noise when running this command.
With -l, you can actually specify the loop count if you want it to stop after so many iterations, as in -l2.
+1 as this allows to interactively stop playback with Ctrl+Z and it worked on OpenMediaVault 5.5.12-1 out of the box when I connected via SSH for playback on an Odroid Home Cloud 2 single board computer which has USB and an USB digital audio speaker attached.
CTRL+Z stop and paced the job(speaker-test) in the bg (background). You can list the jobs stopped with jobs command. Actually you need to kill the job with, CTRL+C , It take many seconds.
speaker-test(1) — Linux man page
speaker-test generates a tone that can be used to test the speakers of a computer.
speaker-test by default will test the default device. If you want to test another sound device you will have first to get a list of all of the sound cards in your system and the devices associated with those cards. Notice that there might be for example, one device for analog sound, one for digital sound and one for HDMI sound. To get the list of available cards and devices you can run aplay -L.
$ aplay -L null Discard all samples (playback) or generate zero samples (capture) default:CARD=ICH5 Intel ICH5, Intel ICH5 Default Audio Device front:CARD=ICH5,DEV=0 Intel ICH5, Intel ICH5 Front speakers surround40:CARD=ICH5,DEV=0 Intel ICH5, Intel ICH5 4.0 Surround output to Front and Rear speakers (. )
in the above example, there are four devices listed: null, default, front and surround40. So, if you want to test the last device you can run speaker-test -Dsurround40:ICH5 -c 6. The -c option will indicate that the six audio channels in the device have to be tested.
Options
-c | —channels NUM NUM channels in stream -D | —device NAME PCM device name NAME -f | —frequency FREQ sine wave of FREQ Hz —help
Print usage help -b | —buffer TIME Use buffer size of TIME microseconds. When 0 is given, use the maximal buffer size. The default value is 0. -p | —period TIME Use period size of TIME microseconds. When 0 is given, the periods given by -P option is used. The default value is 0. -P | —nperiods ERIODS Use number of periods. The default value is 4. -r | —rate RATE stream of RATE Hz -t | —test pink|sine|wav -t pink means use pink noise (default).
Pink noise is perceptually uniform noise — that is, it sounds like every frequency at once. If you can hear any tone it may indicate resonances in your speaker system or room.
-t sine means to use sine wave.
-t wav means to play WAV files, either pre-defined files or given via -w option.
You can pass the number from 1 to 3 as a backward compatibility. -l | —nloops COUNT Specifies the number of loops. Zero means to run infinitely.
When -s option below with a valid channel is given, speaker-test will perform always a single-shot without looping. -s | —speaker CHANNEL Do a single-shot speaker test for the given channel. The channel number starts from 1. The channel number corresponds to left, right, rear-left, rear-right, center, LFE, side-left, side-right, and so on.
For example, when 1 is passed, it tests the left channel only once rather than both channels with looping. -w | —wavfile Use the given WAV file for the playback instead of pre-defined WAV files. -W | —wavdir Specify the directory containing WAV files for playback. The default path is /usr/share/sounds/alsa.
Usage Examples
Produce stereo sound from one stereo jack:
speaker-test -Dplug:front -c2
speaker-test -Dplug:surround40 -c4
speaker-test -Dplug:surround51 -c6
speaker-test -Dplug:surround51 -c6 -s1 -f75
speaker-test -Dplug:spdif -c2
See Also
Author
The speaker-test program was written by James Courtier-Dutton. Pink noise support was added by Nathan Hurst. Further extensions by Takashi Iwai.
The Speaker-Test Command in Linux
![]()
The speaker- test is a Linux command for testing the speakers connected to your computer. When run with no arguments, the command tests the default device, in this case, the default sound card of your computer. The speaker-test command acts as a tone generator for ALSA, and if you want to test any sound card you are using on your computer, the command is your best option.
This guide introduces you to the speaker-test command by offering examples of how to use it.
How to Use the speaker-test Command
The first usage of the speaker-test command is to test if your sound card is muted. For this, you only need to run the command with no arguments, and you should a hear pink noise confirming that your sound cards are okay and are not muted.
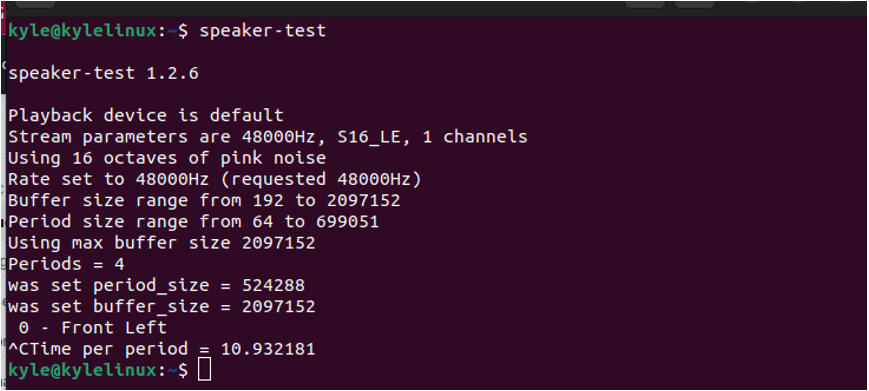
You can cancel the pink noise by pressing the CTRL + C keyboard combination.
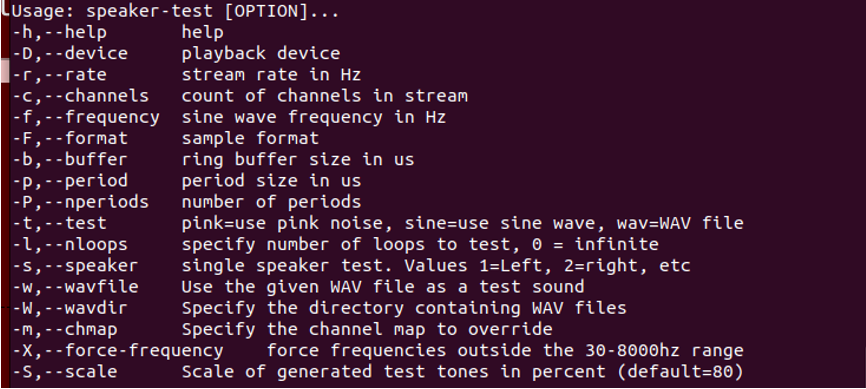
Below is a snippet of what the man page for the speaker-test command offers to highlight the various options that we can use.
However, we first need to list the available sound cards using the below command to know which cards we want to test.
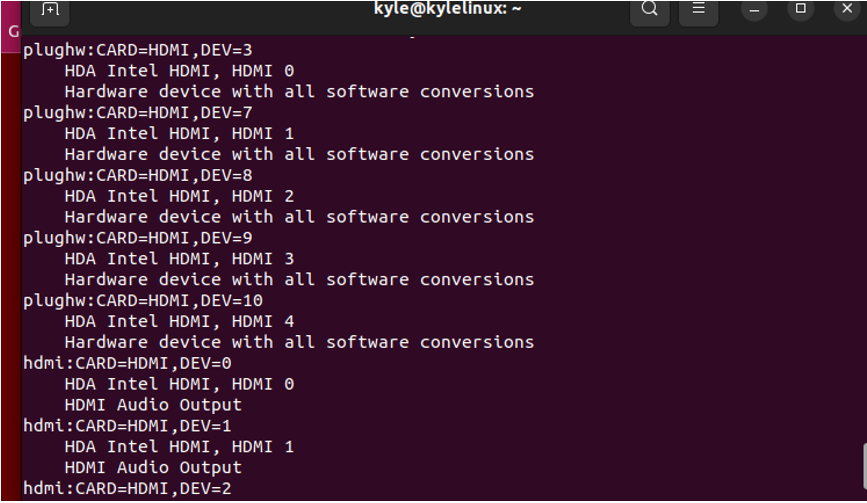
You will see the various sound cards configured on your system in the output you get. Besides, you will note others with various outputs for HDMI and analog output.
Now that you can see the various sound cards on your system, you can go ahead and test them using the different speaker-test command options.
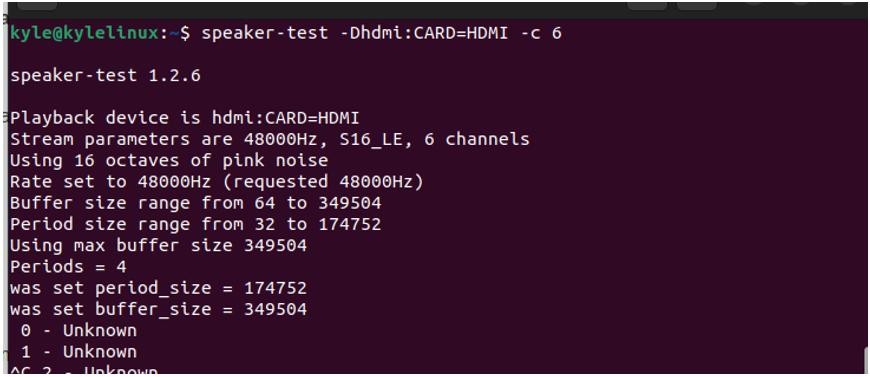
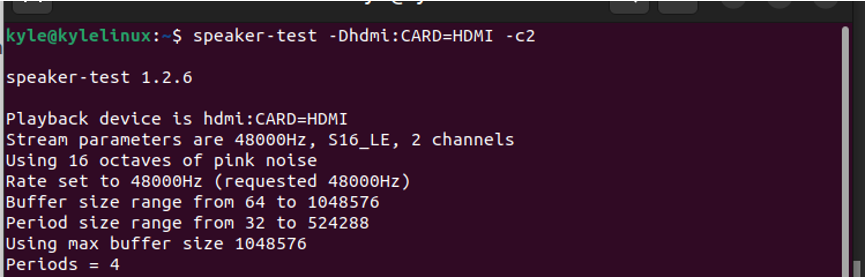
In the above example, we are specifying to test the hdmi:CARD=HDMI using the -D option for specifying the sound card and the -c for specifying that we want to test all the specified channels.
You could run the command below if you needed to produce four speaker sounds using two stereo jacks.
If you want to test a given sound frequency on your speaker, specify the frequency using the -f option and the speaker channel using the -s. For instance, specifying s1 indicates that you want to test the left channel only. Below is an example of such a command.
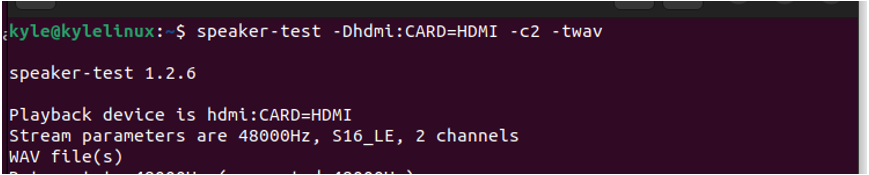
Also, note that the default sound when testing the sound cards is pink noise. You can use the sine wave or the WAV files. To specify the sound, use the -t. In the example below, we are using the wav.
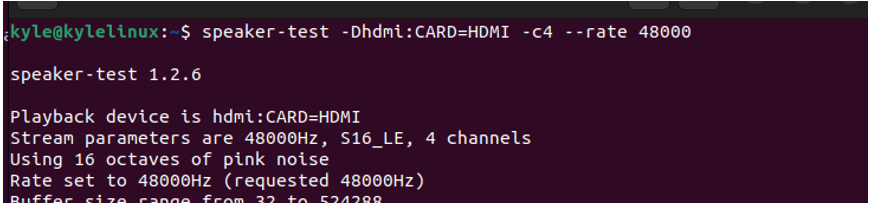
You can also set the stream rate in Hz using the –rate or -r option for the specific sound card, like in the example below.
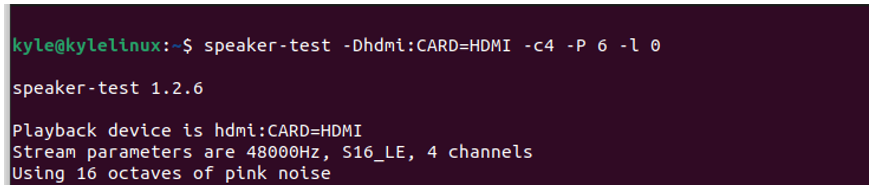
You can note that for each speaker test, the default period is set to 4 periods. You can change that and set any period using the –P option. For instance, let’s try setting our period to 6 using the command below.
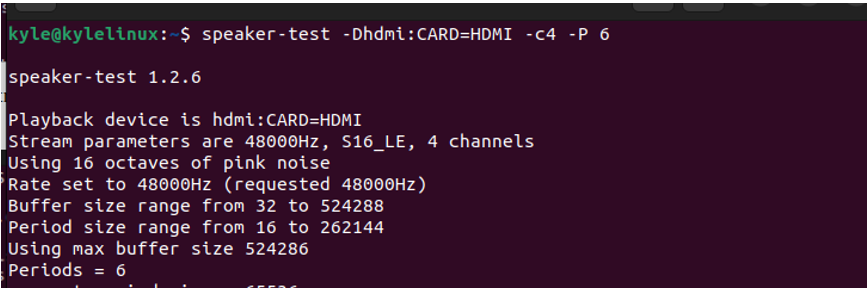
From the output, we confirm that we changed our periods to 6.
While performing the speed test, the maximum buffer size gets used and is specified by setting the buffer value to 0, meaning it’s maximum. You can change the buffer to your preference.
With -l, you can specify the number of loops the speed test should run. If you want it to execute infinitely, set the loop count to zero, as in the example below.
Conclusion
The speed-test command generates tones that help test your computer’s speaker. You can use various options with the command, and it all depends on what you want to get as output. This guide covers the different options you can use, giving examples to help you understand and use the speed-test command.
About the author
Denis Kariuki
Denis is a Computer Scientist with a passion for Networking and Cyber Security. I love the terminal, and using Linux is a hobby. I am passionate about sharing tips and ideas about Linux and computing.
Linux console sound test
NAME
speaker-test - command-line speaker test tone generator for ALSA
SYNOPSIS
speaker-test [-options]
DESCRIPTION
speaker-test generates a tone that can be used to test the speakers of a computer. speaker-test by default will test the default device. If you want to test another sound device you will have first to get a list of all of the sound cards in your system and the devices associated with those cards. Notice that there might be for example, one device for analog sound, one for digital sound and one for HDMI sound. To get the list of available cards and devices you can run aplay -L. $ aplay -L null Discard all samples (playback) or generate zero samples (capture) default:CARD=ICH5 Intel ICH5, Intel ICH5 Default Audio Device front:CARD=ICH5,DEV=0 Intel ICH5, Intel ICH5 Front speakers surround40:CARD=ICH5,DEV=0 Intel ICH5, Intel ICH5 4.0 Surround output to Front and Rear speakers (. ) in the above example, there are four devices listed: null, default, front and surround40. So, if you want to test the last device you can run speaker-test -Dsurround40:ICH5 -c 6. The -c option will indicate that the six audio channels in the device have to be tested.
OPTIONS
-c | --channels NUM NUM channels in stream -D | --device NAME PCM device name NAME -f | --frequency FREQ sine wave of FREQ Hz --help Print usage help -b | --buffer TIME Use buffer size of TIME microseconds. When 0 is given, use the maximal buffer size. The default value is 0. -p | --period TIME Use period size of TIME microseconds. When 0 is given, the periods given by -P option is used. The default value is 0. -P | --nperiods PERIODS Use number of periods. The default value is 4. -r | --rate RATE stream of RATE Hz -t | --test pink|sine|wav -t pink means use pink noise (default). Pink noise is perceptually uniform noise -- that is, it sounds like every frequency at once. If you can hear any tone it may indicate resonances in your speaker system or room. -t sine means to use sine wave. -t wav means to play WAV files, either pre-defined files or given via -w option. You can pass the number from 1 to 3 as a backward compatibility. -l | --nloops COUNT Specifies the number of loops. Zero means to run infinitely. When -s option below with a valid channel is given, speaker-test will perform always a single-shot without looping. -s | --speaker CHANNEL Do a single-shot speaker test for the given channel. The channel number starts from 1. The channel number corresponds to left, right, rear-left, rear-right, center, LFE, side-left, side-right, and so on. For example, when 1 is passed, it tests the left channel only once rather than both channels with looping. -w | --wavfile Use the given WAV file for the playback instead of pre-defined WAV files. -W | --wavdir Specify the directory containing WAV files for playback. The default path is /usr/share/sounds/alsa. -m | --chmap Pass the channel map to override. If the playback in a specific channel order or channel positions is required, pass the channel position strings to this option.
USAGE EXAMPLES
Produce stereo sound from one stereo jack: speaker-test -Dplug:front -c2 Produce 4 speaker sound from two stereo jacks: speaker-test -Dplug:surround40 -c4 Produce 5.1 speaker sound from three stereo jacks: speaker-test -Dplug:surround51 -c6 To send a nice low 75Hz tone to the Woofer and then exit without touching any other speakers: speaker-test -Dplug:surround51 -c6 -s1 -f75 To do a 2-speaker test using the spdif (coax or optical) output: speaker-test -Dplug:spdif -c2 Play in the order of front-right and front-left from the front PCM speaker-test -Dplug:front -c2 -mFR,FL
SEE ALSO
AUTHOR
The speaker-test program was written by James Courtier-Dutton. Pink noise support was added by Nathan Hurst. Further extensions by Takashi Iwai.
© 2019 Canonical Ltd. Ubuntu and Canonical are registered trademarks of Canonical Ltd.