- How to convert .mkv file into .mp4 file losslessly?
- 7 Answers 7
- Get needed software
- Extract video and audio from matroska file
- Mux audio and video into mp4 containter
- How to Convert MKV to MP4 in Ubuntu Using FFmpeg
- Installing FFmpeg on Ubuntu
- Installing FFmpeg from the Default Package Repo
- Installing FFmpeg from Snapcraft
- Using FFmpeg to Convert MKV to MP4
- Influencing Content Quality
- Final Thoughts
- About the author
- Sidratul Muntaha
How to convert .mkv file into .mp4 file losslessly?
I need to convert a video file from Matroska container into mp4 container. Matroska file contains one h.264 video track and one AC3 sound track. It should be possible to do this losslessly, but how to do it with native Ubuntu tools? Transcoding is not an option.
this is especially a solution for converting Matroska files that won’t play in a Samsung TV, to files that are compatible with it
Over the years I’ve found this very useful as Chromecast supports H.264 with AAC or MP3 in an MP4 container. It is very easy to stream videos from your computer to Chromecast if you have Chrome with the Google cast extension. Just drag and drop an MP4 with correct stream encodings to a browser window and start streaming.
7 Answers 7
Perhaps the easiest tool for that is ffmpeg , or avconv from the libav-tools package. Libav is a fork of FFmpeg, which Ubuntu switched to for a few years until Ubuntu 15.04. It is one of the backends for many of the GUI tools mentioned in other answers.
Changing container without re-enconding content could not be simpler:
ffmpeg -i input.mkv -codec copy output.mp4 - It auto-detects a Matroska to MP4 container conversion based on input/output filenames.
- -codec copy stream copies, or «re-muxes», the streams from the input to the output without re-encoding. Think of it like a copy and paste.
- Default stream selection behavior is to select only one stream per stream type. For example, if your input has two video streams and one audio stream then only the video stream with the largest frame size will be selected. Add -map 0 if you want to select all streams from the input.
- Some containers may not support some formats. So check if your chosen container format, be it mkv , mp4 or even avi has support for all the content in your files (video, audio, subtitles, data, etc). For example, mp4 does not support SubRip subtitles ( .srt files).
To transcode the audio to AAC, leaving the video as AVC: avconv -i input.mkv -c:v copy -c:a libfaac output.mp4 (I used ffmpeg, I assume avconv has the same command line args here)
If you want to transfer both the video and audio (both losslessly) and for it not to choke on subtitles then: avconv -i input.mkv -c:v copy -c:a copy -sn output.mp4 . MP4 supports the most of the common audio formats used in MKVs including MP3 and AAC.
@AquariusPower: just be aware that the OP does not want to remap the streams: he wants to convert the container only and keep all streams.
@AquariusPower: have you tried simply with -map 0 to get both audio streams? As I said in the answer: «Default stream selection behavior is to select only one stream per stream type»
@camh: FFmpeg removed libfaac support in 2016, instead using native, built-in FFmpeg AAC encoder. «ffmpeg -i input.mkv -c:v copy -c:a aac output.mp4»
Get needed software
sudo apt-get install gpac mkvtoolnix Extract video and audio from matroska file
First you need to check what tracks the matroska file contains with
mkvmerge —identify video.mkv
File 'video.mkv': container: Matroska Track ID 1: video (V_MPEG4/ISO/AVC) Track ID 2: audio (A_AC3) Then extract video and audio according to their tracks with:
mkvextract tracks video.mkv 1:video.h264 2:audio.ac3
Extracting track 1 with the CodecID 'V_MPEG4/ISO/AVC' to the file 'video.h264'. Container format: AVC/h.264 elementary stream Extracting track 2 with the CodecID 'A_AC3' to the file 'audio.ac3'. Container format: Dolby Digital (AC3) Progress: 100% Mux audio and video into mp4 containter
MP4Box -fps 24 -add video.h264 -add audio.ac3 video.mp4
AVC-H264 import - frame size 1280 x 720 at 24.000 FPS Import results: 31671 samples - Slices: 5672 I 125048 P 122648 B - 32288 SEI - 4936 IDR AC3 import - sample rate 48000 - 6 channels Saving to video.mp4: 0.500 secs Interleaving I had to add -fps 24 option because MP4Box didn’t detect video fps correctly. Depending on usage AC3 audio track should be re-encoded into something else before muxing.
Now you have remuxed streams from matroska container into mp4 container without losing any quality.
EDIT: MP4 doesn’t officially support AC3 audio so the audio track should be converted into a supported format (eg. AAC, MP3) if you want the file to be playable with something else than VLC.
How to Convert MKV to MP4 in Ubuntu Using FFmpeg
![]()
FFmpeg is a powerful multimedia framework that can be used to decode, encode, transcode, mux, demux, stream, filter, and play almost any media files you come across. This program supports even the most obscure and ancient file formats, up to the most cutting-edge file formats. FFmpeg is a cross-platform tool available for Linux, macOS, Windows, BSD, Solaris, and more. This article shows you how to convert MKV to MP4 in Ubuntu using FFmpeg.
Installing FFmpeg on Ubuntu
FFmpeg is free and open-source software. Due to its popularity, FFmpeg is available directly from the official package repository for most Linux distros, including Ubuntu.
FFmpeg is also available from the Snapcraft store as a snap package. The benefit of using the snap package is that the snap always supplies the latest version of the software.
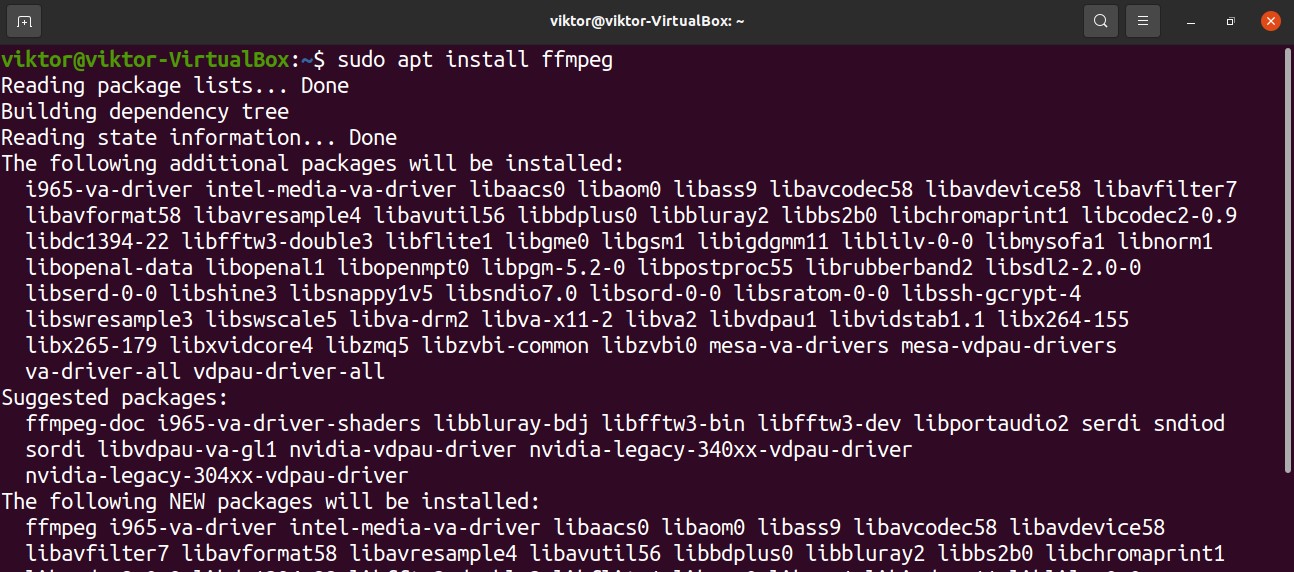
Installing FFmpeg from the Default Package Repo
Launch the terminal and update the APT cache by entering the following.

Next, install the “ffmpeg” package. APT will automatically download and install all the necessary dependencies.
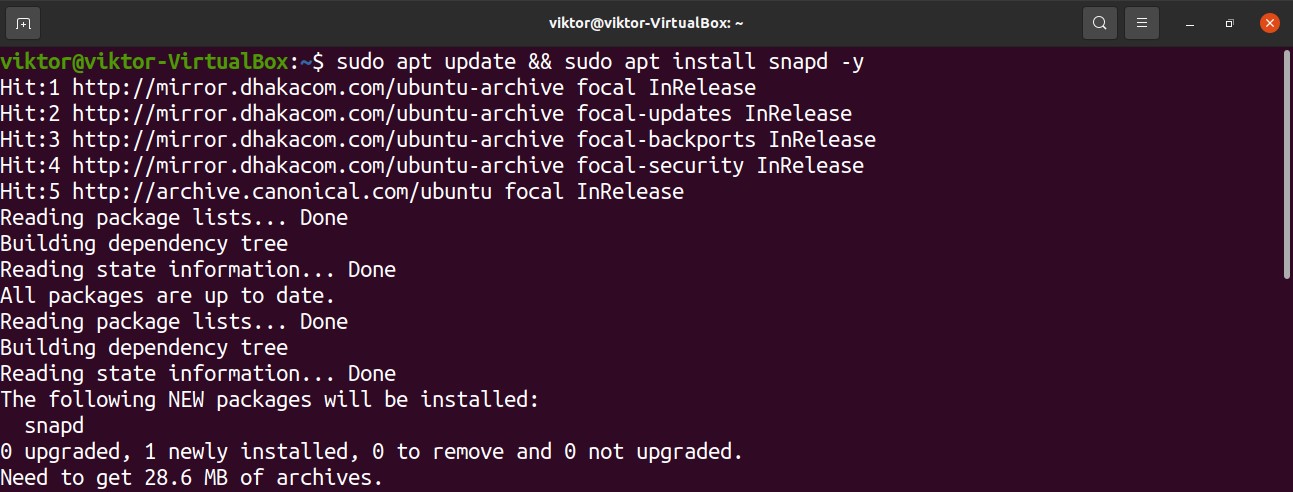
Installing FFmpeg from Snapcraft
This is the recommended method of installing FFmpeg. Installing the snap package requires snappy (the snap package manager) to be installed beforehand.
The latest Ubuntu release will have the snap package manager configured by default. However, if this is not the case, then you can configure the package manager right away.
The system is now ready to grab and install snap packages. By default, the Snapcraft store is the source of snap packages. Check out FFmpeg in the Snapcraft store.

Using FFmpeg to Convert MKV to MP4
Basic Conversion
FFmpeg is a complex tool that supports tons of options. Any FFmpeg command will have the following structure.
Here, the “-i” flag signifies the input file.
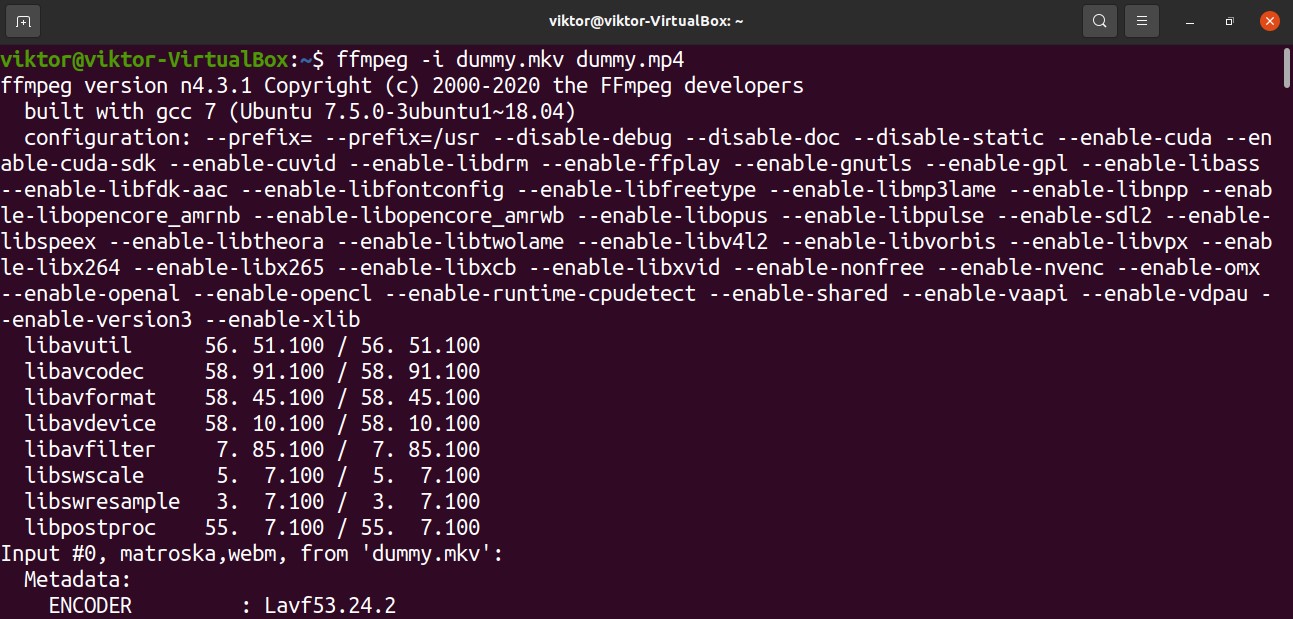
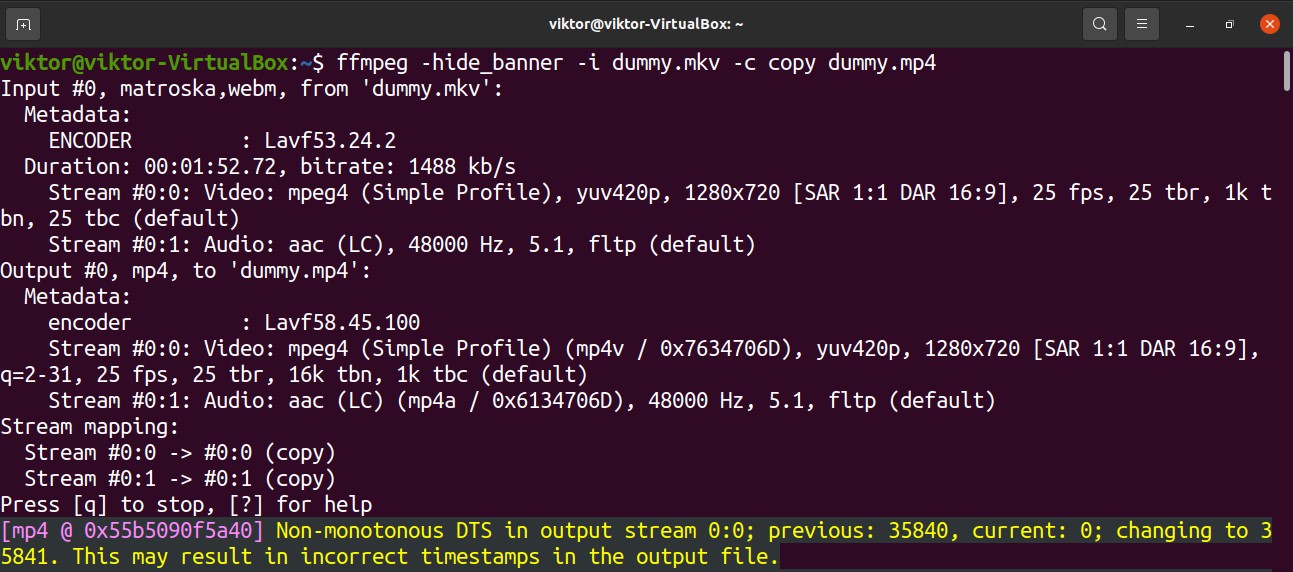
The following command structure is used to simply convert a media file into a different format. In this case, the file will be converted from the “dummy.mkv” format to the “dummy.mp4” format. FFmpeg will automatically determine all the necessary options for the conversion.
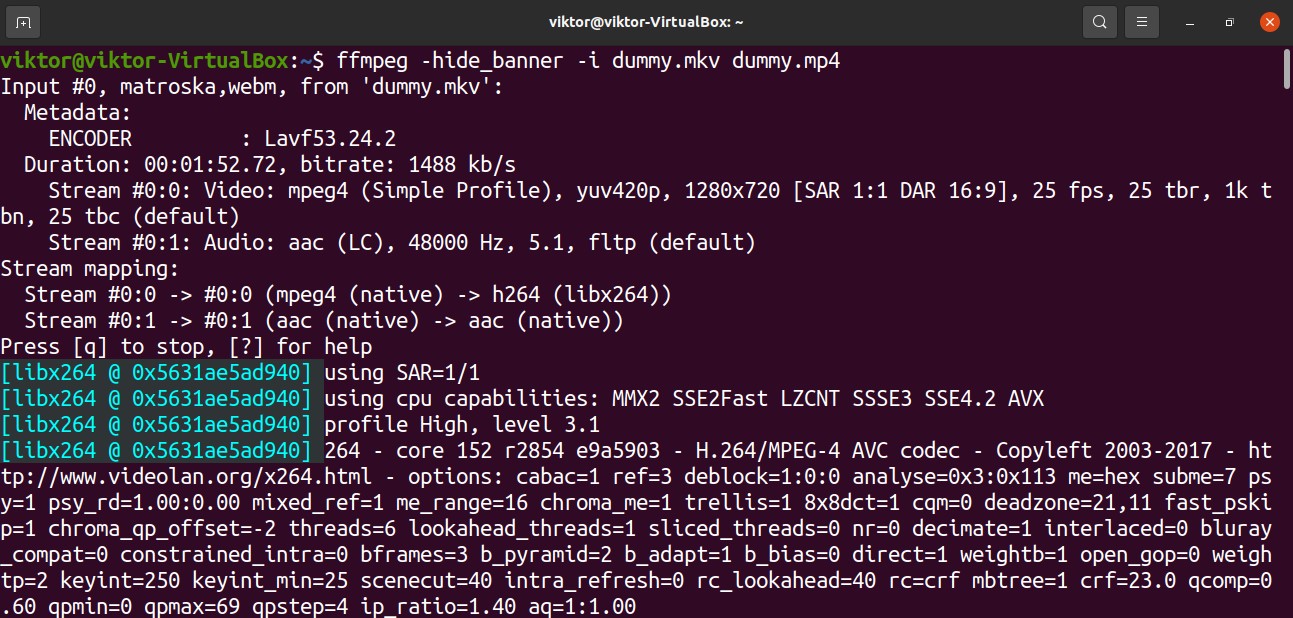
To disable the redundant outputs (copyright notices, libraries, etc.), add the “-hide_banner” flag.
Codec Specification
It is also possible to manually determine the codecs that FFmpeg will use to perform the actions. Check out the official FFmpeg documentation on supported codecs here. If you are not sure, then using “copy” as the codec is probably the best option. This tells FFmpeg to copy the audio and video stream directly into the new file format without performing any actual conversion. For most file conversions, this is the recommended method.
Here, the “-c” flag is the short form for “-codec,” signifying which codec to use.
FFmpeg also provides full control over individual streams (audio, video, subtitle, etc.). For example, it is possible to select audio or video files specifically to be subject to a certain codec.
Here, the flag“-c:v” signifies the codec for the video stream, and the flag “-c:a” signifies the audio stream.
Note that for the “copy” function to work, FFmpeg must support muxing the targeted stream into the output container. Otherwise, it will not work.
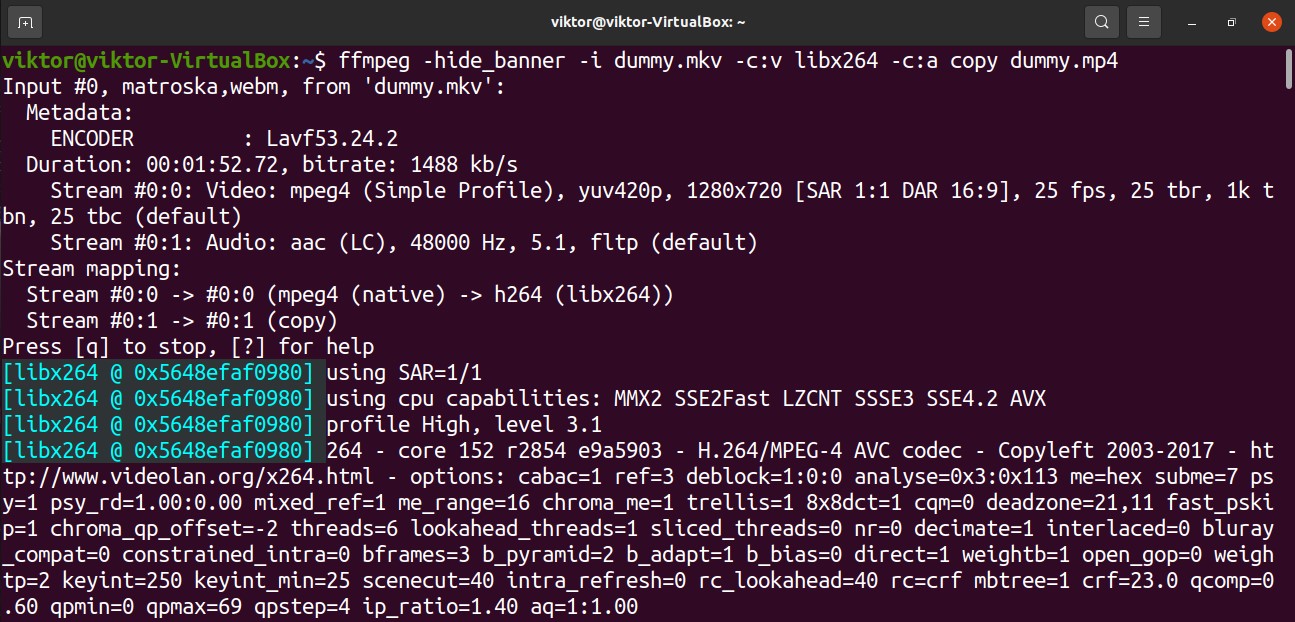
The following is another quick example of using this feature but using a real codec, instead. We will convert the MKV file into MP4 using the libx264 codec. Note that libx264 is only applicable for video streaming.

Influencing Content Quality
Besides basic conversion, FFmpeg also allows users to manipulate content quality (bitrate, frame rate, video width/height, etc.). All these features influence the quality of media content. Note that changing any of these properties of the media file will impact how the viewer sees and listens to the media contained in the file. Of course, a human’s ability to see and hear is not straightforward. Sometimes, small changes can make a dramatic difference in quality.
We will start with the bitrate. To change the bitrate of the source video, use the following command structure.
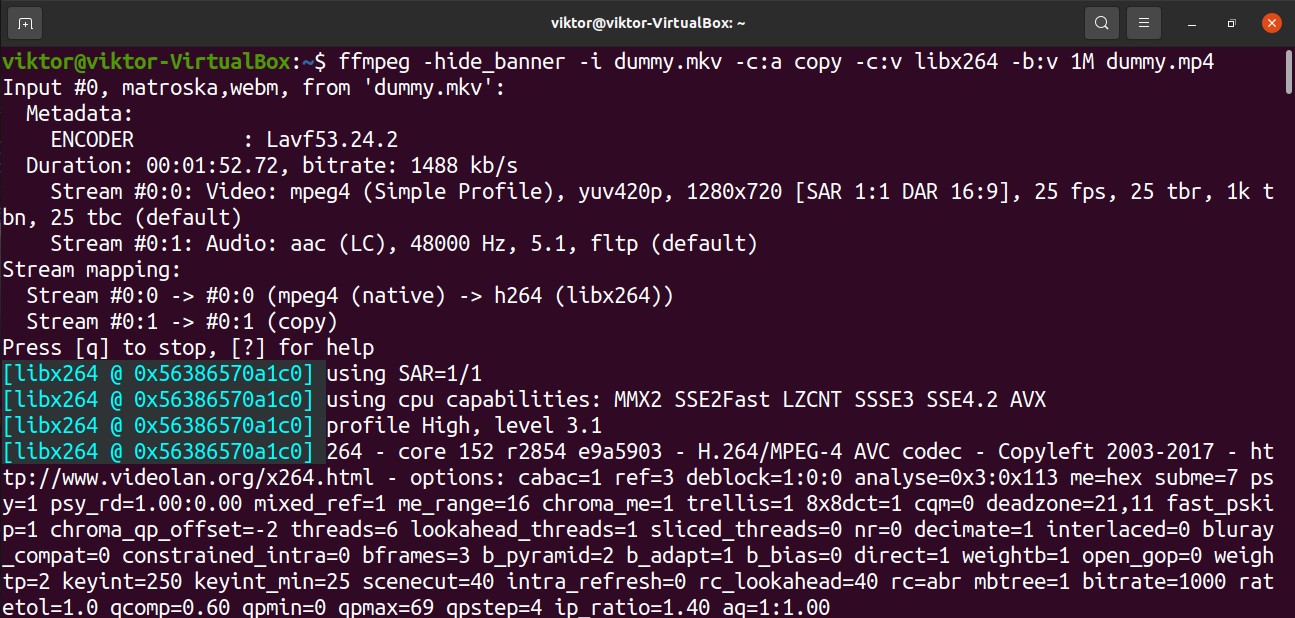
Here, the flag “-b:v” stands for video bitrate.
Frame rate is another important factor in determining content quality. To change the frame rate of an MKV file, we will use the following command structure.

Here, the flag “-r” signifies the desired frame rate.
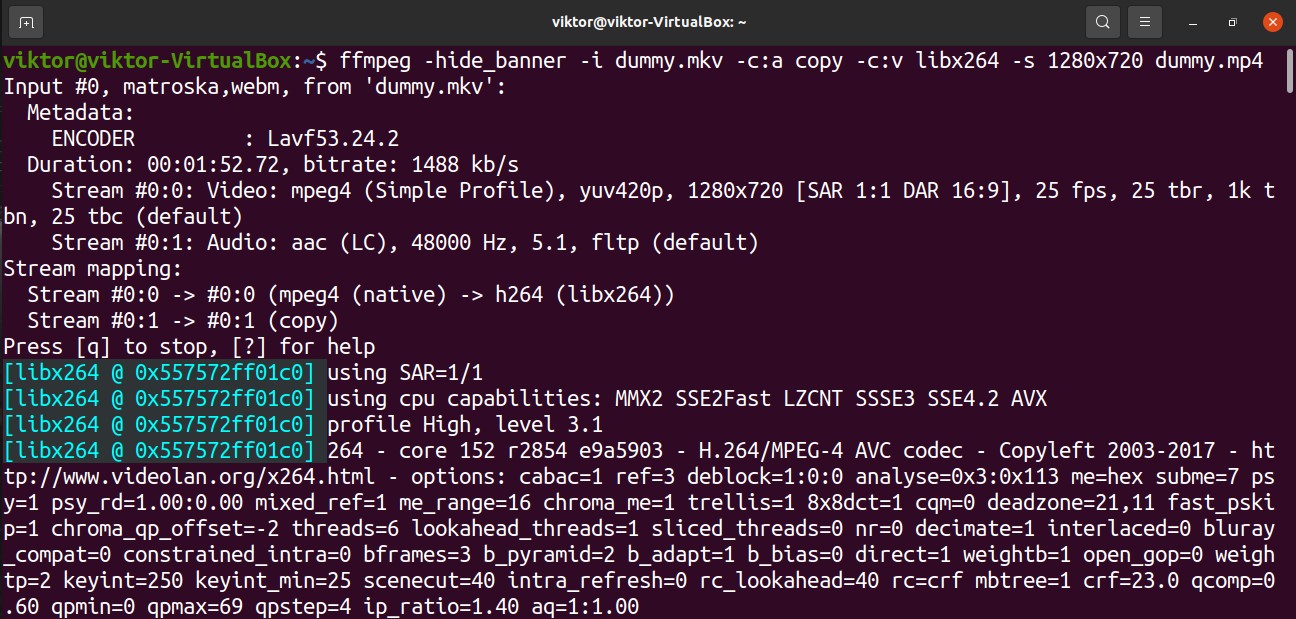
Besides the visual changes, changing the video dimension will also impact the output file size. To change the video dimension to 1280x720p, we will use the following command structure.
Final Thoughts
FFmpeg is a powerful tool for working with media files. This guide demonstrates how to use FFmpeg for converting MKV files to MP4.
Besides normal usage, FFmpeg can also be quite fun to use. Check out the following guide that shows you how to use FFmpeg to create a video from images.
About the author
Sidratul Muntaha
Student of CSE. I love Linux and playing with tech and gadgets. I use both Ubuntu and Linux Mint.