- How to add a second local loop_back address?
- 4 Answers 4
- How to Use Linux Network Namespace
- Adding a Linux network namespace:
- Creating loopback interface for the namespace:
- Adding network interfaces to your namespace:
- Removing a Linux Network Namespace:
- Conclusion:
- About the author
- David Adams
- How can I create Logical Loopback on Ubuntu? [closed]
- 1 Answer 1
How to add a second local loop_back address?
I already have a loopback address at 127.0.0.1, which corresponds to a host in the local loopback network 127.0.0.0/8. How could I create a second local loopback host with an address of 127.0.0.2? Does anyone knows the exact command?
It will already respond to everything in the network 127/8, so it would already respond to 127.0.0.2 without any additional configuration
4 Answers 4
1) Can add it temporary using below command
ifconfig lo:40 192.168.40.1 netmask 255.255.255.0 up 2) Add them permanently to /etc/network/interfaces
auto lo lo:10 lo:20 iface lo inet loopback iface lo:10 inet static address 192.168.10.1 netmask 255.255.255.0 network 192.168.10.0 iface lo:20 inet static address 192.168.20.1 netmask 255.255.255.0 network 192.168.20.0 The OP has since added they are using Linux, but either way, please don’t post link only answers. The site is to be used as a knowledge base, so by all means credit the link, but also be sure post the details relevant to resolving the users question as the link could change or disappear at any time 🙂
So, what about the loopback? Is not possible to add 127.0.0.2 ? Also, could you explain lo:10 and lo:20
It was an example, you can configure it with any loopback IP. lo:10 is a subinterface name. You can put any number there instead of 10
Be careful with the netmask on loopback, it will actually respond to an address in the network on it, so in your example lo would also respond to 192.168.40.2, 192.168.40.3, . better to use /32 netmasks for loopback most of the time
Though it’s probably not actually leaving us soon, ifconfig is the «old» way of doing things, and is being replaced with the ip command. The way to do this with ip is:
ip addr add 192.168.40.1/32 dev lo There’s no need for virtual interfaces any more (i.e., the lo:10 and so forth Mukesh used), but you can still have them if you want like
ip addr add 192.168.40.1/32 dev lo label lo:40 note that I’m using /32 netmasks because lo is special in that it will answer for an address belonging to a network configured on it. So if you add 192.168.40.1/24 it will actually respond to any 192.168.40.* address, not just .1
To that end, for your original example of 127.0.0.2 , it will actually already respond to that, because it falls in 127.0.0.0/8 so you don’t have to do anything at all to get that particular address.
Also, be careful with addresses on loopback, because the kernel will know that address is on the host and will reply to requests for that address on physical interfaces as well.
How to Use Linux Network Namespace
![]()
Linux network namespaces are a Linux kernel feature allowing us to isolate network environments through virtualization. For example, using network namespaces, you can create separate network interfaces and routing tables that are isolated from the rest of the system and operate independently.
To understand namespaces easily, it is worth saying Linux namespaces are the basis of container technologies like Docker or Kubernetes.
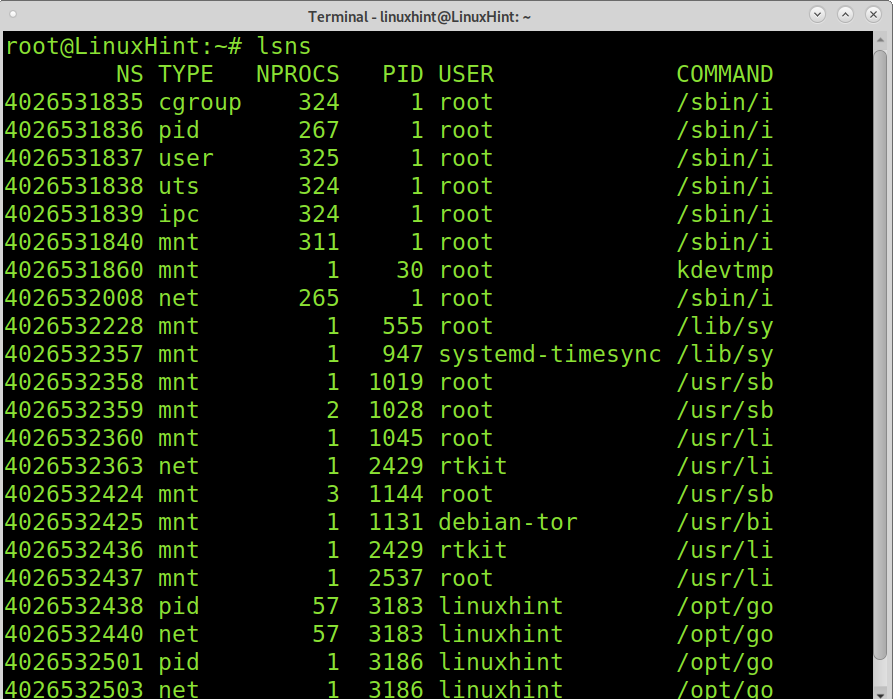
For now, Linux includes 6 types of namespaces: pid, net, uts, mnt, ipc, and user. This tutorial focuses on Linux network namespaces.
If you command lsns, it will display all existing namespaces in your system, as shown in the image below.
Note: The namespace used for this tutorial is named linuxhint; replace it with your namespace name.
Adding a Linux network namespace:
Managing network namespaces is done using the ip netns command followed by the proper options.
To create a network namespace in Linux, you need to execute the ip command followed by the netns (network namespace) option, the add option, and the new namespace name, as shown in the following screenshot. Then, the ip netns command can be run to show the existing network namespaces only. Remember to replace linuxhint with the name of your namespace.
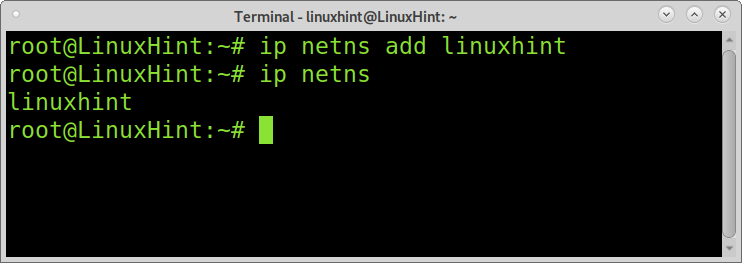
As you can see, a new namespace was created named linuxhint.
Network namespaces have their own interfaces, routing tables, loopback interface, iptables rules, etc. You need to create these resources for your namespace.
Creating loopback interface for the namespace:
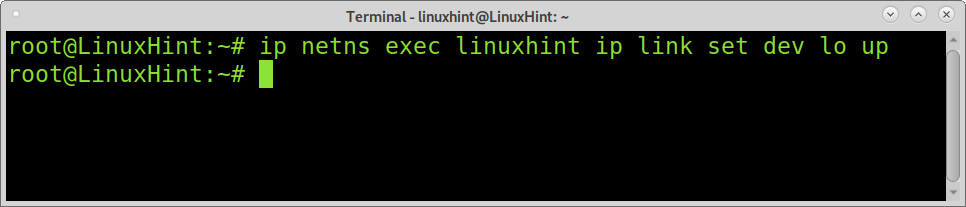
To run commands within a network namespace, the syntax is the following.
By default, the loopback interface is down. You need to execute the following command; as explained previously, the command below executes the ip link set dev lo up within the chosen namespace.
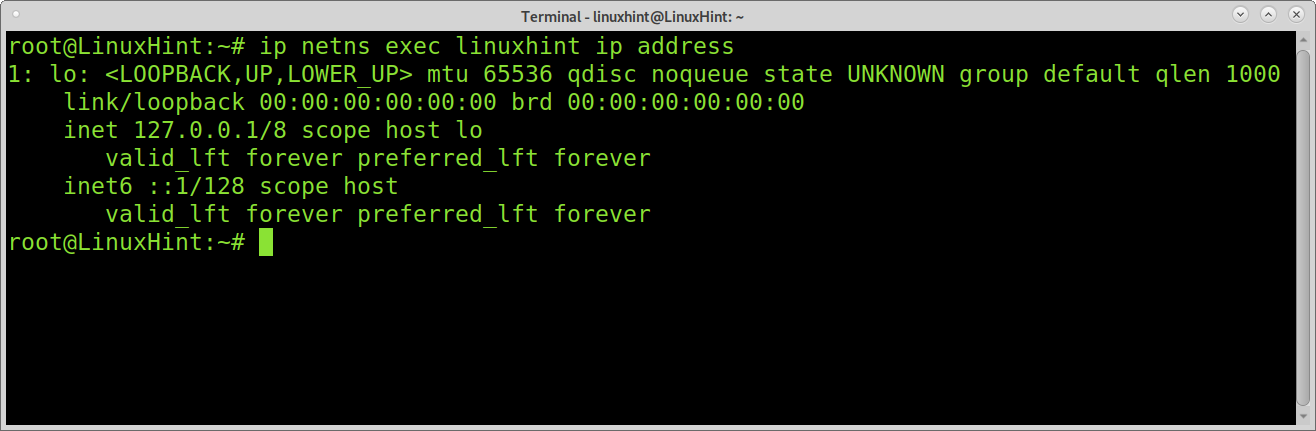
You can check if your loopback interface was added properly by running the following command:
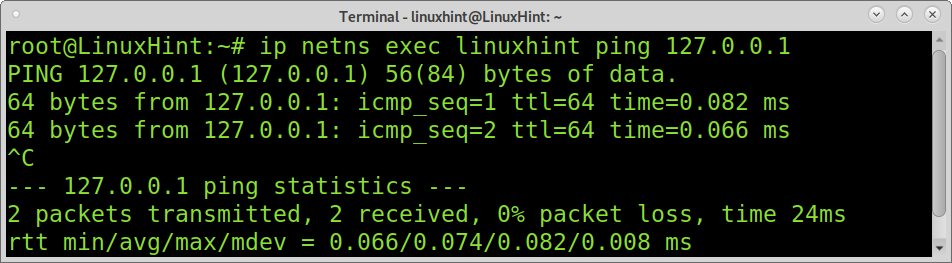
You also can ping your namespace loopback interface to test it, as shown below.
Adding network interfaces to your namespace:
You can associate a hardware network card to your namespace, or you can add virtual network devices. By adding virtual network interfaces, you can allow connectivity between different namespaces. Virtual network devices are named veth (Virtual Ethernet Device).
To create a virtual network ethernet device, run the following command, where enp2s0 is the for the new device and v-peer1 its arbitrary name, replace it with yours.

Now assign the virtual device to your namespace by running the command below.

Assign an ip address to the new network device as shown below.

By default, the network device is down; you need to set it up. To set your virtual network device up, run the following command.

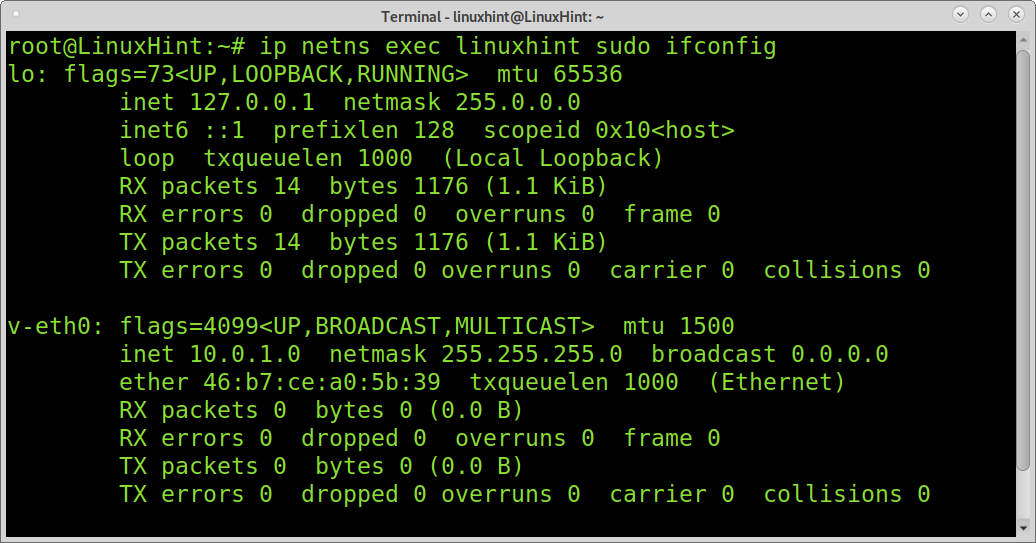
As you can see in the screenshot below, the virtual device was added properly.
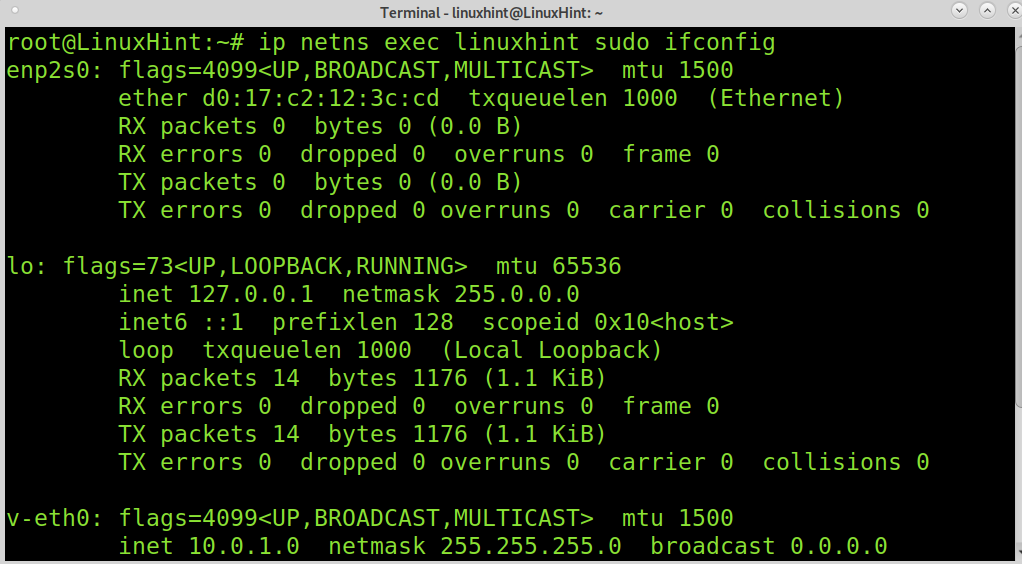
The example below shows how to assign a physical network card to your network namespace. In this case, the physical network card is the enp2s0.

As you can see by running the example below, the network card was added properly. You can assign an IP address using the same commands explained previously.
As explained previously, each namespace has its own route table, IP, and more, including its own firewall rules. Adding firewall rules to your namespace is simple; just run the commands after ip netns exec linuxhint, as shown below. The example below will list iptables policies if existing.

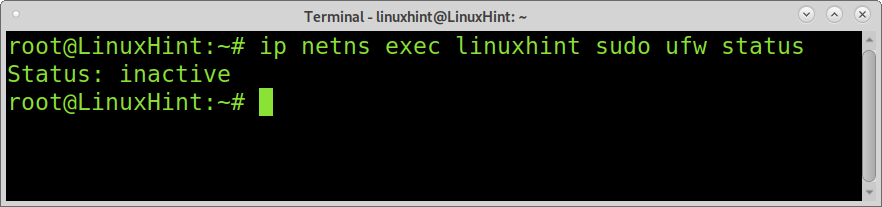
The following example shows the same but using UFW (Uncomplicated Firewall) instead of iptables. In this case, the firewall is reported as disabled.
Removing a Linux Network Namespace:
Removing network namespaces is pretty simple, like when adding them.
To remove a namespace, run the command below, replace linuxhint with your namespace.
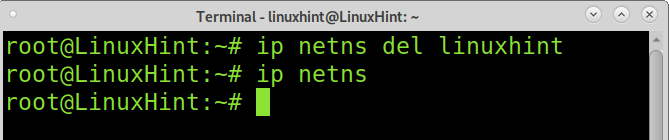
As you can see, after running ip netns, no network namespace was shown; it was successfully removed.
Conclusion:
Linux namespaces are a formidable method to isolate processes, filesystems, networks, and more. This functionality allows us to execute instances independently. This is extremely useful for security purposes. Namespaces are containers whose contents are fully isolated from the rest of the system, including from other namespaces. In this way, we can run different services in different containers. If a namespace gets compromised under an attack, the rest of the system remains safe. Using Linux namespaces, you can offer multiple clients their environment; this feature is also great for testing purposes or to run software whose origin is suspicious; in case of executing a malicious code, only your namespace will be affected, leaving your device safe.
I hope this tutorial on Linux namespaces was useful. Keep following Linux Hint for more Linux tips and tutorials.
About the author
David Adams
David Adams is a System Admin and writer that is focused on open source technologies, security software, and computer systems.
How can I create Logical Loopback on Ubuntu? [closed]
This question is specific to an end of life Ubuntu release. These are no longer supported and are therefore off-topic here. To upgrade, see: How to install software or upgrade from old unsupported release?
How can I create a logical local loopback like the procedure here for a Juniper router. (Not talking about 127.0.0.1)
- In configuration mode, go to the following hierarchy level: [edit] user@host# edit interfaces interface-name (fastether-options | gigether-options)
- Configure the local loopback: [edit interfaces interface-name (fastether-options | gigether-options)] user@host# set loopback
You’re talking about configuring a logical loopback, aren’t you? that’s a pretty big difference to just using a physical or local 127.0.0.1 loopback. I would definitely mention that in the title. Could you also add an ifconfig to your question as that will definitely help(reading the article and trying to figure out what you’re really trying to do. )
This is the AskUbuntu Forum. You’re trying to do a logical loopback on a Juniper Switch. 🙁 Sorry for the downvote.
@Fabby There is written how can I do Local Loopback (not localhost) on JUNOS (Juniper operating system) by using edit interface util, but want to know how can I do the same on Ubuntu OS by using ifconfig util?
@Fabby Uses Hardware Loopback testing (with Loopback Plug) as in article, is a simple and high-grade test of network card on the server without any switches and any connections. Uses Logical Loopback testing (without Loopback Plug), test the testing script before using Hardware Loopback testing.
1 Answer 1
Dead easy (if you know how)
sudo ifdown eth0 gksudo gedit /etc/network/interfaces Add the following to the end:
auto eth0 allow-hotplug eth0 iface eth0 inet loopback iface eth0 inet static address 192.168.200.200 netmask 255.255.255.0 Presto: an eth0 loopback in software!
ping 192.168.200.200 PING 192.168.200.200 (192.168.200.200) 56(84) bytes of data. 64 bytes from 192.168.200.200: icmp_seq=1 ttl=64 time=0.073 ms 64 bytes from 192.168.200.200: icmp_seq=2 ttl=64 time=0.042 ms 64 bytes from 192.168.200.200: icmp_seq=3 ttl=64 time=0.069 ms 64 bytes from 192.168.200.200: icmp_seq=4 ttl=64 time=0.044 ms ^C --- 192.168.200.200 ping statistics --- 4 packets transmitted, 4 received, 0% packet loss, time 2997ms rtt min/avg/max/mdev = 0.042/0.057/0.073/0.014 ms