- About This Guide
- Procedures
- Source
- Как сделать общую сетевую папку в Linux (настройка SMB в Linux)
- How to Share a Folder on the Local Network With Ubuntu
- Method to Share a Folder on the Local Network With Ubuntu 20.04 Linux System
- Conclusion
- About the author
- Kalsoom Bibi
- How to Create a Shared Directory for All Users in Linux?
- Step 1 − Create the folder to be shared
- Step 2 − Create a user group
- Step 3 − Create a user group
- Step 4 − Give permissions
- Step 5 − Add users to the group
About This Guide
In this text, I teach how to create a network share via Samba using the CLI (Command-line interface/Linux Terminal) in an uncomplicated, simple and brief way targeting Windows users.
Procedures
sudo apt-get update sudo apt-get install samba
Note: Samba uses a separate set of passwords than the standard Linux system accounts (stored in /etc/samba/smbpasswd), so you'll need to create a Samba password for yourself. This tutorial implies that you will use your own user and it does not cover situations involving other users passwords, groups, etc.
Tip1: Use the password for your own user to facilitate.
Tip2: Remember that your user must have permission to write and edit the folder you want to share. Eg.: sudo chown /var/opt/blah/blahblah sudo chown : /var/opt/blah/blahblah
Tip3: If you're using another user than your own, it needs to exist in your system beforehand, you can create it without a shell access using the following command : sudo useradd USERNAME --shell /bin/false You can also hide the user on the login screen by adjusting lightdm's configuration, in /etc/lightdm/users.conf add the newly created user to the line : hidden-users=
sudo nano /etc/samba/smb.conf
Once "smb.conf" has loaded, add this to the very end of the file: [] path = /home// valid users = read only = no
Tip: There Should be in the spaces between the lines, and note que also there should be a single space both before and after each of the equal signs.
sudo service smbd restart
sudo apt-get install smbclient # List all shares: smbclient -L /// -U # connect: smbclient /// -U
Note: The default user group of samba is "WORKGROUP".
Source
How to Create a Network Share Via Samba Via CLI (Command-line interface/Linux Terminal) — Uncomplicated, Simple and Brief Way! (последним исправлял пользователь 97e64b0f 2015-10-06 20:46:34)
The material on this wiki is available under a free license, see Copyright / License for details
You can contribute to this wiki, see Wiki Guide for details
Как сделать общую сетевую папку в Linux (настройка SMB в Linux)
Начните с установки пакетов samba и smbclient.
В Debian, Linux Mint, Ubuntu, Kali Linux и их производных для установки samba выполните команду:
sudo apt install samba smbclient
В Arch Linux, BlackArch и их производных выполните команду:
sudo pacman -S samba smbclient
Следующая команда не сработает, если отсутствует файл /etc/samba/smb.conf. Если у вас тоже нет этого файла, то создаёте его заглушку — к настройке самого файла smb.conf мы вернёмся позже:
sudo touch /etc/samba/smb.conf
Теперь нужно добавить пароль для пользователя Samba. Действует следующее правило: имя пользователя должно быть таким же, как у вашего текущего пользователя, а пароль можно установить иной, отличный от вашего системного пароля.
Для установки пароля Samba, выполните следующую команду:
Если вы хотите, чтобы у пользователя не было пароля, то укажите опцию -n.
Создайте папку, которая станет совместно используемой:
Узнаем абсолютный путь до папки ~/linuxshare:
Откройте для редактирования файл /etc/samba/smb.conf:
sudo gedit /etc/samba/smb.conf
Добавьте туда строки вида:
[ИМЯ_ПАПКИ] comment = Samba на Linux path = /home/ИМЯ_ПОЛЬЗОВАТЕЛЯ/ИМЯ_ПАПКИ valid users = ИМЯ_ПОЛЬЗОВАТЕЛЯ read only = no browsable = yes
Обратите внимание, что все пробелы в строках выше являются обязательными.
Для моих данных это строки:
[linuxshare] comment = Samba на Linux path = /home/mial/linuxshare valid users = mial read only = no browsable = yes
Теперь запустим службу SMB:
sudo systemctl start smb.service
Для добавления службы в автозагрузку выполните:
sudo systemctl enable smb.service
Для подключения к этой общей сетевой папке на Linux нужно использовать IP адреса компьютера Linux.
Создадим файл, чтобы сетевая папка не была пустой:
echo "Документ на Linux" > ~/linuxshare/document.txt
Посмотрите локальный IP адрес компьютера, на котором запущена Linux:
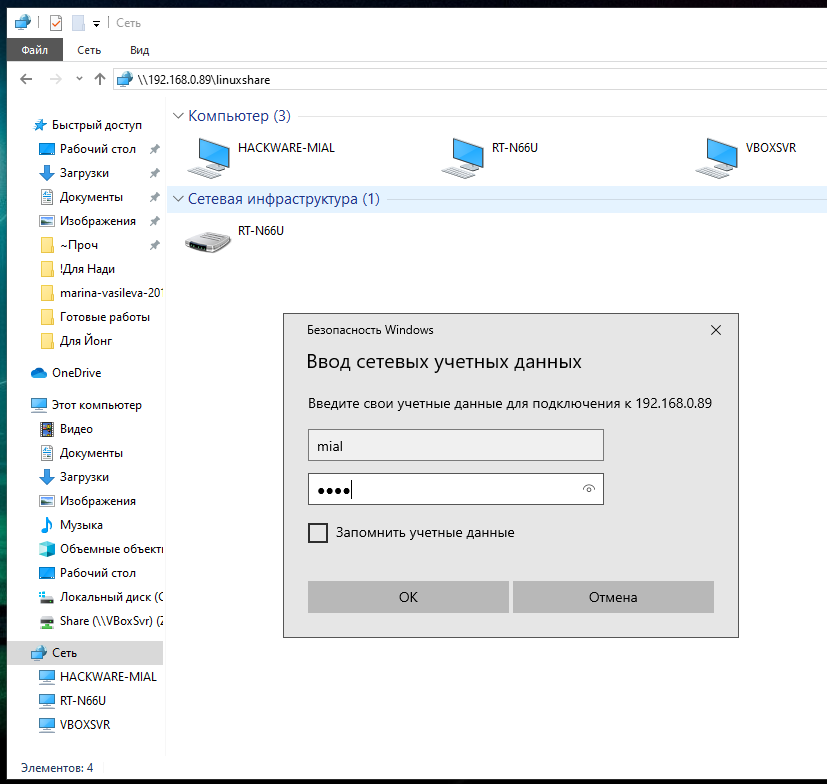
У меня этим IP является 192.168.0.89, а папку, как мы помним, я создал с именем linuxshare, тогда в Windows я перехожу в проводнике во вкладку «Сеть» и подключаюсь к этой папке следующим образом:
Вводим учётные данные (которые мы установили командой smbpasswd):
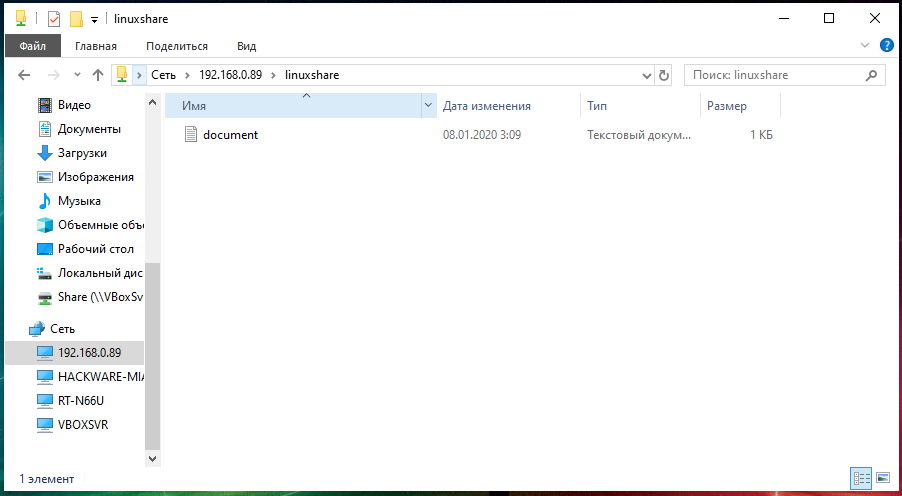
Видим содержимое совместно используемой папки, размещённой на Linux с помощью SMB:
Для подключения к сетевой папке из консоли Linux, запустите команду вида:
sudo smbclient //IP_АДРЕС/Папка -U ПОЛЬЗОВАТЕЛЬ
sudo smbclient //192.168.0.89/linuxshare -U mial
После ввода пароля нам становится доступным содержимое сетевой папки.
How to Share a Folder on the Local Network With Ubuntu
![]()
It is not difficult to share a folder in Ubuntu 20.04 Linux system and access it over the network in other operating systems, such as Windows. The necessary packages are not enabled by default in Ubuntu 20.04 Linux system. However, you can use the Install Wizard to get the necessary software installed automatically to share a folder. For network sharing, Ubuntu 20.04 Linux system needs a network connection. Verify that your Ubuntu 20.04 Linux system is linked to the router and that it can communicate with other computers on the network. Other computers won’t be able to view or interact with the network shares you establish on Ubuntu if you don’t have a network connection.
Method to Share a Folder on the Local Network With Ubuntu 20.04 Linux System
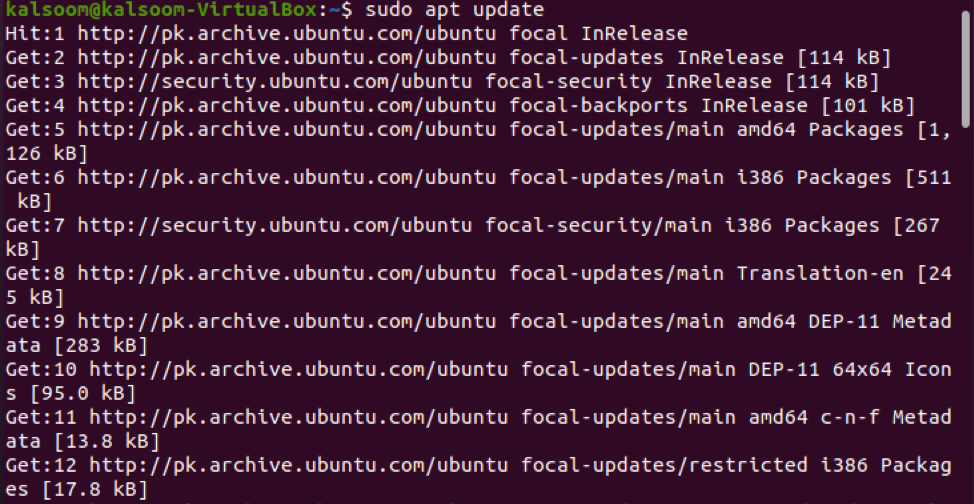
To share a folder on the local network with Ubuntu 20.04 Linux system, first, you have to install Samba on your system. You have to launch the command line shell in the Ubuntu 20.04 Linux system. Before downloading any new package or software, you need to update your system’s apt packages repository. To upgrade the apt repository, use the following affixed command:
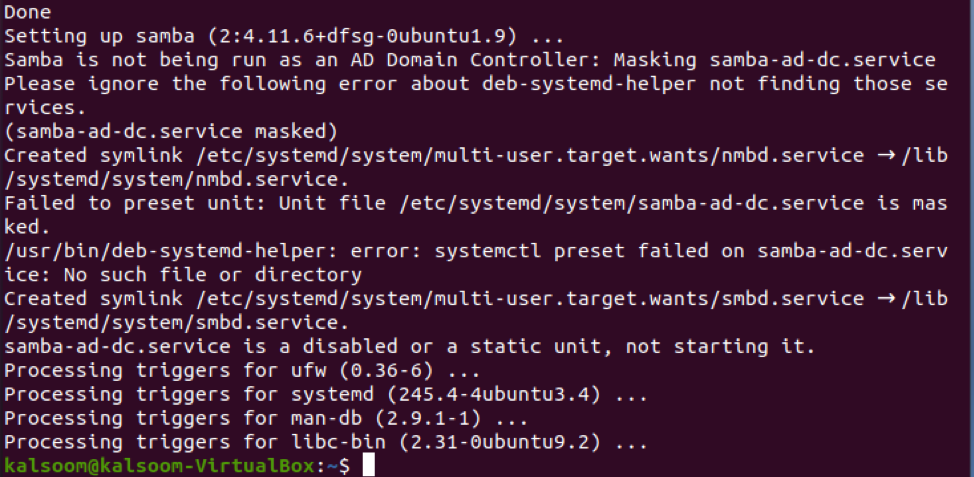
After the update, install Samba by running the following affixed command shown in the screenshot below:

Tap “y” and afterward hit “Enter” to continue with the installation process. The installation of Samba on your machine will take some time.
Once it is installed, type the following cited command to check the status of the Samba operating service:
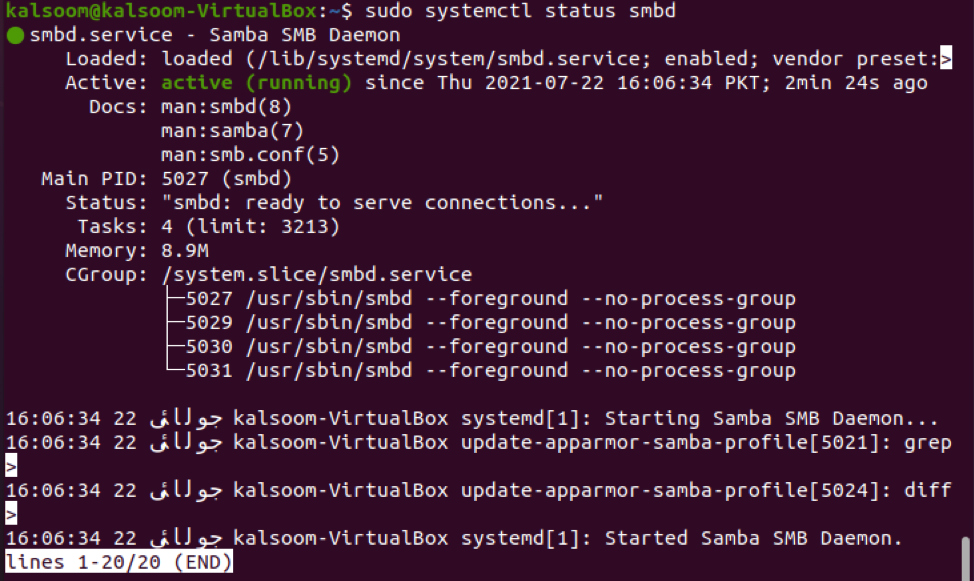
The output display indicates it is in “Active” (running) status. Now, we will change the firewall access guidelines to permit the “Samba” profile.

Rules will be updated after the execution of the command displayed above.
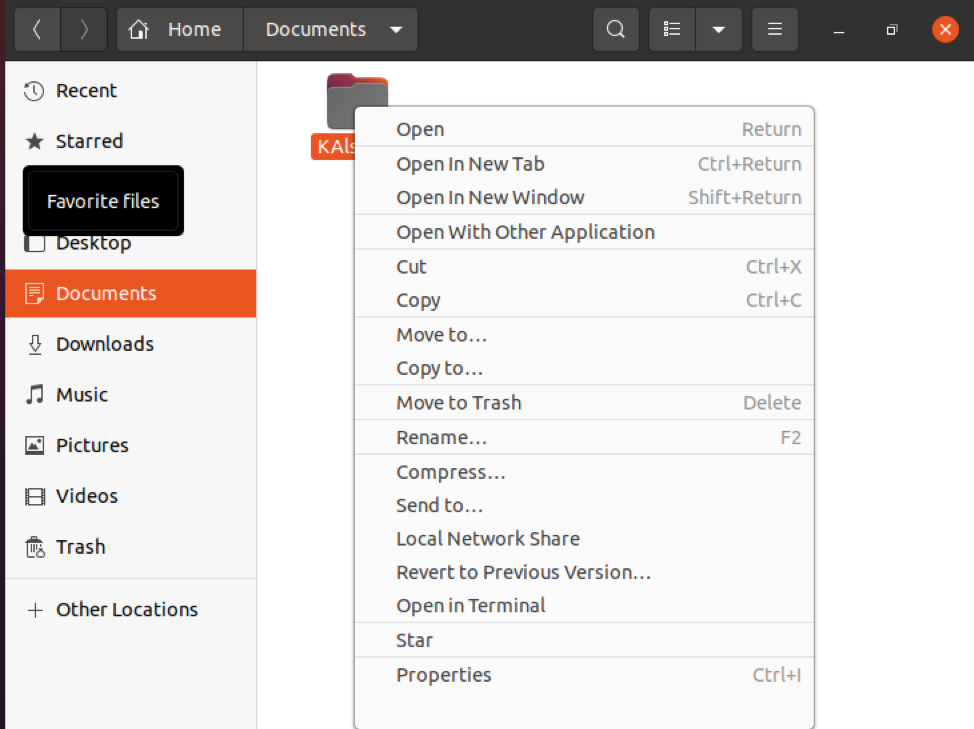
After installing Samba, we can now use the default Ubuntu file management application “Nautilus” to exchange folders or directories. Let’s take a look at how to use the Nautilus file manager to exchange directories. We have created a folder titled “kalsoom”. We will share this folder and use it in our complete guide. Navigate to the file manager and select a folder to share over your local network. Next, choose the “Local Network Share” selection from the displayed list items:
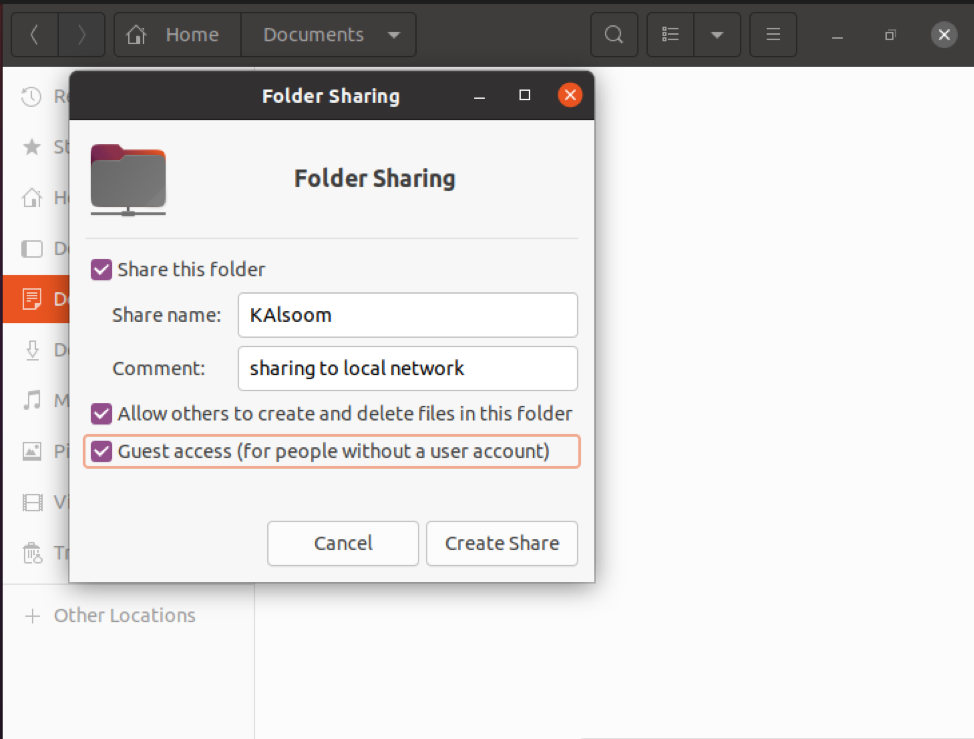
The screen shall show the following folder sharing dialogue. To share the folder, you must check the boxes displayed in the following attached screenshot and then click on the “Create Share” button:
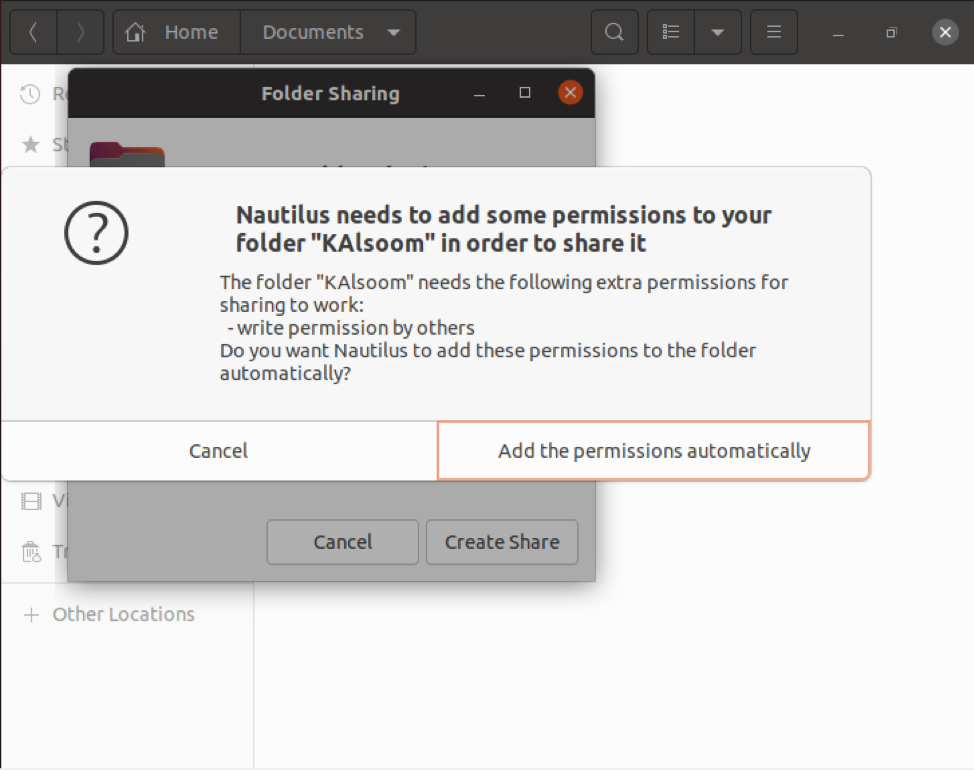
The following dialogue will appear on your system. After, tap the “Add the permissions automatically” button.
If you are a guest user, no user account authentication is required to access Samba shared folders. Everybody on the network can access the sharing folder by using guest shares. However, to grant permitted access to Samba shares, you will need a Samba user account. We have created a user titled “kalsoom”, as shown in the screenshot.
Tap “Enter” after entering a new password for a user. Rewrite the new password and press the “Enter” key once more. The new Samba user has been established successfully, and a new password has been set for the freshly created user, as shown in the attached image:

Now, it is time to access the Samba folder share on the Ubuntu 20.04 Linux system. In the other location section, type the address of Samba shares as seen in the following screenshot:
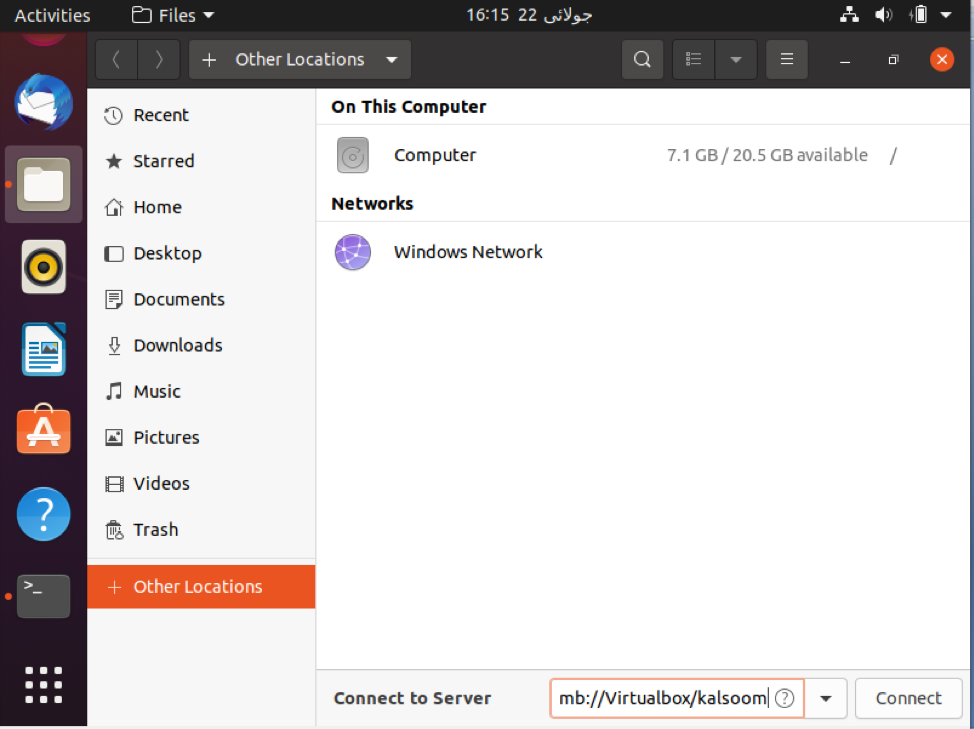
On your system, the following dialogue will appear, which is displayed in the screenshot below. You have the option of connecting as an “Anonymous” user or even as a “Registered user” in the image below. Type all the required fields, and tap on the “Connect” button.
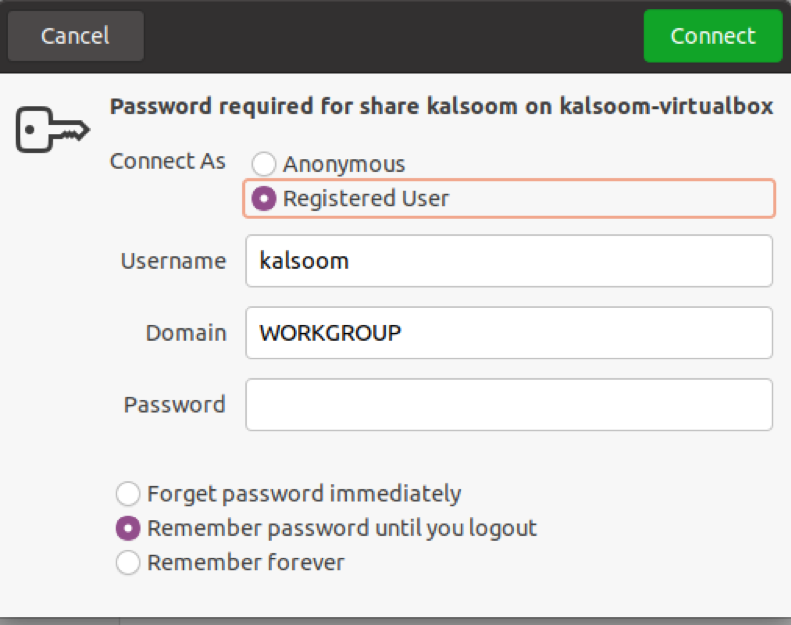
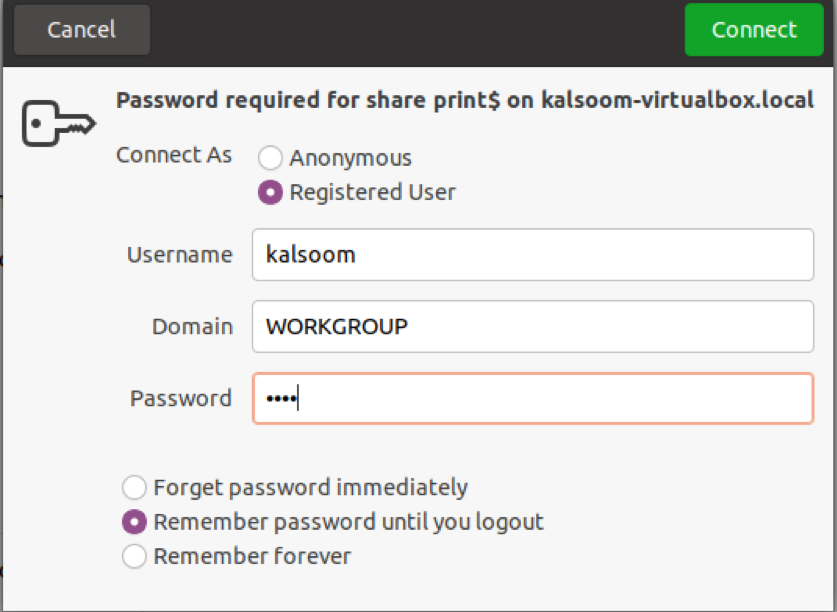
Tap on the hostname or server. Again, you will be required to enter the following details displayed in the attached screenshot:
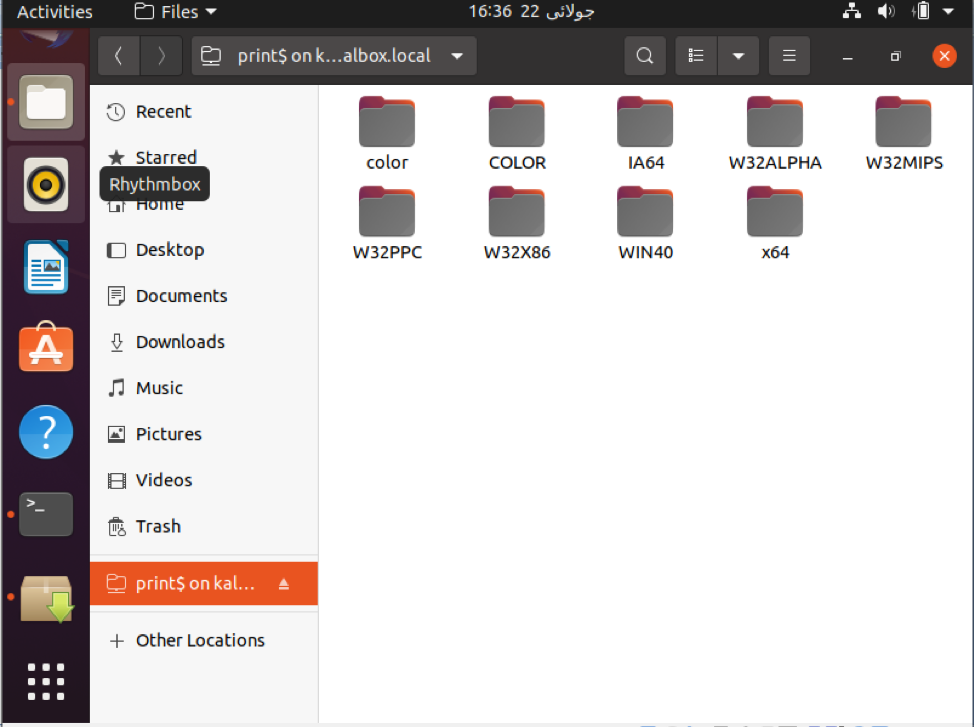
You could see that all of Samba’s folders are shared here in the attached screenshot:
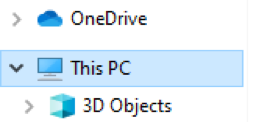
The basic method can be utilized by Windows users to connect to Samba shares. Right-click on the “This PC” option in the File Explorer and pick the “Add a Network Location” option from your Windows 10 system.
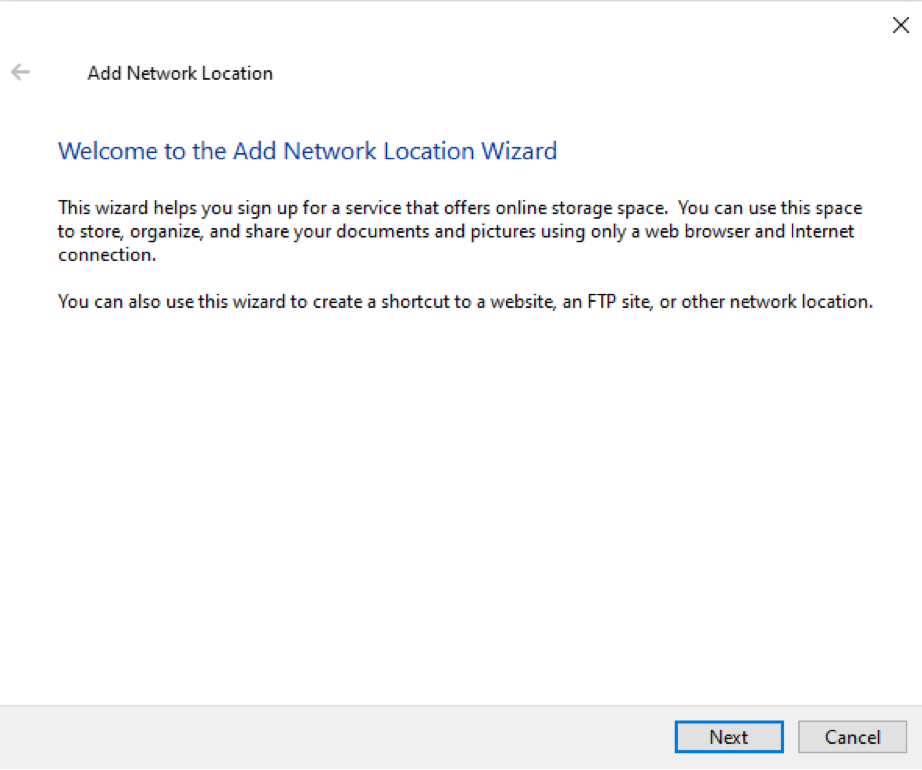
On the Windows 10 system, the following wizard will pop up. Hit the “Next” button to proceed further.
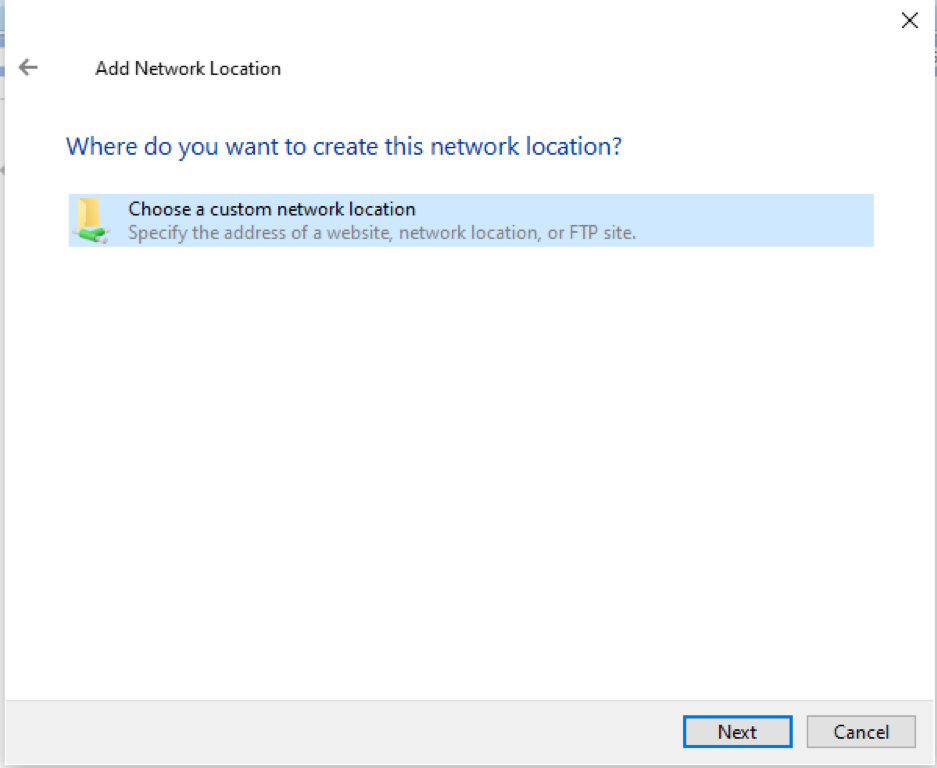
After that, another new window will pop up on Windows 10 system. Simply select the “Choose a custom network location” option.
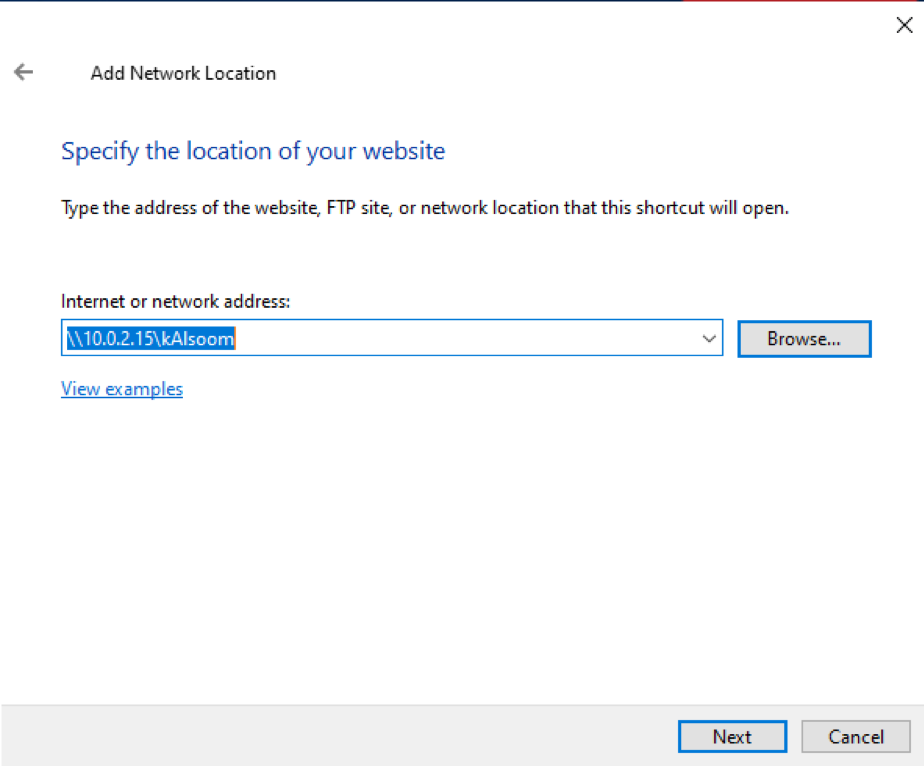
Now, you have to write the IP and the user-created for Samba shares in the same pattern shown in the following image. That’s how you can view all shared folders.
Now, in Ubuntu 20.04 Linux system, you can also enable a user by executing the following affixed command displayed in the attached screenshot:

The user will be activated.
Conclusion
We learned how to install Samba on an Ubuntu 20.04 Linux system in this article. We have demonstrated how to use Samba shares to share folders over a local network. I hope you have gained insights from this article to assist in your relevant work.
About the author
Kalsoom Bibi
Hello, I am a freelance writer and usually write for Linux and other technology related content
How to Create a Shared Directory for All Users in Linux?
When multiple users need access to the same set of directories of files then we need to create shared folders to be used by the users. In Linux there is concept of users and groups which can be given certain level of permissions that will enable them to share the data. Below are the steps how to create the shared folders where users can and update the files individually.
Step 1 − Create the folder to be shared
Assuming we are setting up the shared folder from scratch, lets create the folder. The -p will create the directory and would ignore any errors if the directory already exists.
sudo mkdir -p /bigproject/sharedFolder
Step 2 − Create a user group
Next, we create a user group that will be used by users requiring access to this folder.
sudo groupadd SharedUsres
Step 3 − Create a user group
Next we create a user group which will be used by users requiring access to this folder.
sudo groupadd SharedUsres
Step 4 − Give permissions
Now we assign the new group to become owner of the shared folder and give them appropriate permissions which can also be inherited by the subdirectories.
sudo chgrp -R SharedUsers /bigproject/sharedFolder sudo chmod -R 2775 /bigproject/sharedFolder
Step 5 − Add users to the group
Now we add usernames to this group show that they can use the shared folder.
useradd -D -g SharedFolder user1 useradd -D -g SharedFolder user2