- How to Create a Password Protected Zip File in Linux
- Create password protect zip file in Linux command line
- Create a password protected zip file in Linux using GUI
- How to Create a Zip with Password in Linux
- Create a Zip file with Password in Linux (Using Terminal)
- Create a Password-protected zip in Linux (Using GUI)
- Can I Password Protect an existing Zip file
- How to create a password protected zip file on Linux
- How to create a password protected zip file using CLI
- How to create a password protected zip file using GUI
- Conclusion
How to Create a Password Protected Zip File in Linux
This simple tutorial shows you how to create a password protected zip file in Linux both in command line and graphical way.
- Create password protected zip file in Linux command line
- Create password protected zip file using Nautilus file manager [GUI method]
There are several ways you can encrypt zip file in Linux. There are dedicated command line tools for this task, but I am not going to talk about those. I will show you how to password protect a zip file without installing a dedicated tool.
Create password protect zip file in Linux command line
First thing first, make sure that you have zip support enabled in your Linux system. Use your distribution’s package manager and try to install it. If its not installed already, it will be installed.
In Debian/Ubuntu, you can use this command:
sudo apt install zip unzipNow, let’s see how to password protect a zip file in Linux. The method is almost the same as creating zip folder in Linux. The only difference is the use of option -e for encryption.
zip -re output_file.zip file1 folder1The -r option is used to recursively look into directories. The -e option is for encryption.
You’ll be asked to enter and verify the password. You won’t see the password being typed on the screen, that’s normal. Just type the password and press enter both times.
Here’s what the process looks like on the screen:
zip -re my_zip_folder.zip agatha.txt cpluplus.cpp test_dir Enter password: Verify password: adding: agatha.txt (deflated 41%) adding: cpluplus.cpp (deflated 4%) adding: test_dir/ (stored 0%) adding: test_dir/myzip1.zip (stored 0%) adding: test_dir/myzip2.zip (stored 0%) adding: test_dir/c.xyz (stored 0%)Do note that if someone tries to unzip this file, he/she can see the content of the folder such as which files are there in the zipped file. But the files cannot be read.
Create a password protected zip file in Linux using GUI
I have created a password-protected zip file in Ubuntu 18.04 here but you can use the same steps on any Linux distribution with GNOME desktop environment.
Search for Archive Manager and open it.

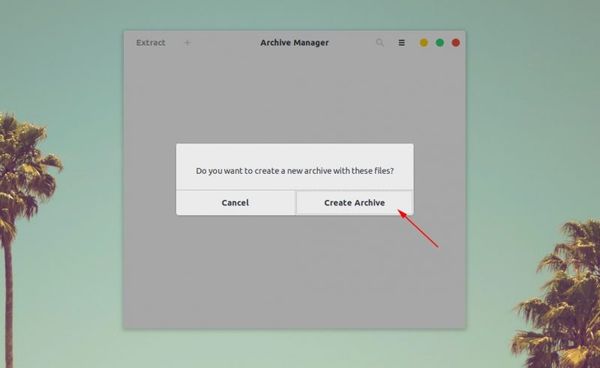
Drag and drop the file(s) you want to compress into a zip file. Select Create Archive option here.
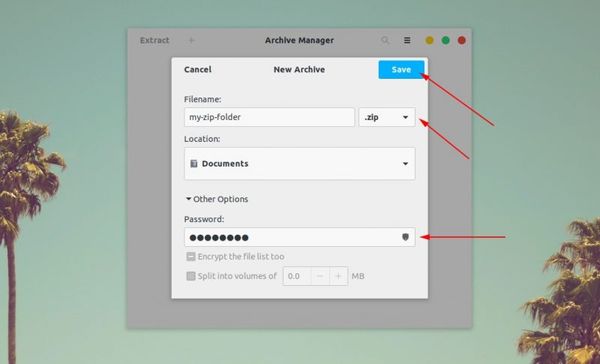
In here, choose the type of compressed file. It will be .zip in my case. You’ll see the “Other Options”, click on it and you’ll see the password field. Enter the password you want and click on the Save button.
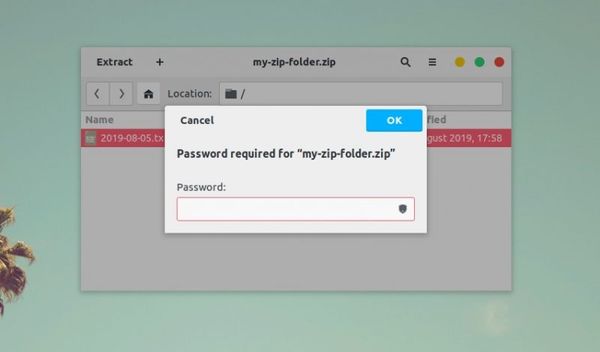
That’s it. You have successfully created a password protected zip file in Ubuntu Linux graphically. The next time you want to extract it, it will ask for a password.
As you can see, no one (in normal ways) can extract this file without the password. Congratulations, you just learned how to encrypt zip files in Ubuntu Linux.
Just for your information, double-clicking on the password-protected directory might give the impression that you may access the encrypted directory without a password, but you cannot actually read those files.
There are other ways to password protect folders in Linux. This tutorial shows how to do that.
I hope this quick tutorial helped you to create password-protected zip files in Linux.
How to Create a Zip with Password in Linux
A zip archive is a file format which is used to store compressed data. A zip file can store files and folders in multiple level of compressions, making it easier to archive, transport & manage a large number of files/folders.
In Linux zip files can be accessed or created using packages called zip & unzip. Both of these packages will either come pre-installed with your Linux system or you will need to fetch them from the repositories.
Here in this short tutorial I am going to show you how you can create a zip archive in Linux with password protection.
There are two ways to do it. You can either use the command line interface in Linux (often called terminal or console) OR if you are using a Desktop Environment such as Gnome, KDE, Xfce, etc, you can use GUI applications such as Ark, File Roller, and Engrampa.
Create a Zip file with Password in Linux (Using Terminal)
1. First step is to make sure that you have the correct utilities installed. If you are not already in the command-line interface (CLI), open the terminal and navigate to the location where the file that you need to add to zip archive are. You can do this easily with the cd command.
(Note: sudo is only needed if you are installing from a non-root account.)
2. Now type the following command (for Debian and Ubuntu based systems) :
sudo apt install zip unzipFor CentOS you will need to type:
sudo yum install zip unzipAnd for Arch-based system, type:
3. With this done, verify that you are in the correct location and type ls in the terminal to verify that all of your files are there too.
4. Now type this is terminal.
zip -P password_here -r output_file_name.zip file1_to_add_to_archive file_2 folder_15. Hit enter.
The command may look confusing at first but let me explain with an example.
If I want to create a zip archive with ‘file1, file2, folder8, folder and file with space‘ in it with the password [email protected] and a file name archive.zip the command would look like this:
zip -P [email protected] -r archive.zip file1 file2 folder8 'folder and file with space'After the command finishes executing, you can run the ls command to verify that your archive is there. To unzip the file, simply type this on your terminal:
It should now ask for the password & once you do the same, the content of the zip archive should be extracted.
Create a Password-protected zip in Linux (Using GUI)
There are many GUI programs that you can use to create zip files with passwords. But for this tutorial, I am going to use Ark. This main reason for this is the fact that Ark is Available in main repo’s of CentOS, Ubuntu, Debian, & as well as Arch Linux; Also it is very easy to use.
1. First install Ark from the app store that your Linux distribution provides. You can also use the terminal to do so, here are the commands:
For Ubuntu/Debian based Systems:
For Arch based Systems the command is:
2. After the installation is successful, open a file manager and navigate to folder where the data that you want to zip is.
3. Select the files and folders that you want to archive as a password-protected zip, right-click, click on “Compress” and select “Compress to”.
4. Enter the file name, and set the type to application/zip. After that, click on Password Protection menu and set a password for your zip file.
5. Click ok, let it process and you should now have a password-protected zip file with your stuff in it.
6. If for some reason you don’t get the right-click menu entry for Compress, here is an alternate way to do it.
7. Open Ark either from your app drawer or terminal, click on Archive on the top menu and select New.
8. Again, enter a file name, set type as application/zip and set a password using the Password Protection menu.
9. Now simply drag and drop your files into the Ark window to add them to your zip archive.
Can I Password Protect an existing Zip file
No it is not possible to add a password to an existing zip file. But what you can do instead is unzip the contents of the zip file and create a new archive with the methods above.
If you are looking for other ways to secure your data, checkout this post on how to encrypt a drive (or partition) in Linux. An encrypted drive is better than a zip because you can add more file to it later on and also access and change the content without any hassle.
How to create a password protected zip file on Linux
![]()
In the computing era, the data must be secure enough as it has to revolve around multiple machines around the globe. Password protection is the primary aspect to ensure the secure transmission of files or data.
The zip is a file format that compresses the file, and this file format serves various purposes, such as combining multiple files into a single file to make it easy to transfer.
Like most of the tasks on Linux can be carried out using CLI and GUI, similarly, a password protected zip file can also be created using both ways. This article provides the command line and graphical method to create an encrypted zip file on linux.
How to create a password protected zip file using CLI
The following steps would lead you to creating a password protected zip file on Linux.
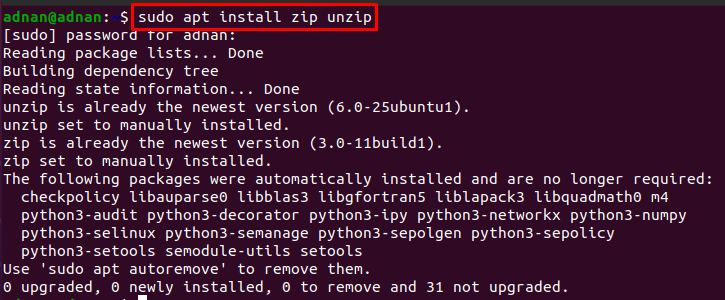
Step 1: First open the terminal and write the following command to install the zip, and unzip command line tools (if not installed).
Step 2: The “-e and –encrypt” parameters would assist you to set a password for your zip file. For instance, the command provided below will create a zip file named linuxhint that contains two files (linux.txt and debian.txt).

Note: The command in step 2 would create a password protected zip file in the current working directory and the files contained by it also lie inside the present directory.
To include the files from other than the current directory, you have to give the complete path of the files as we did in the following command.
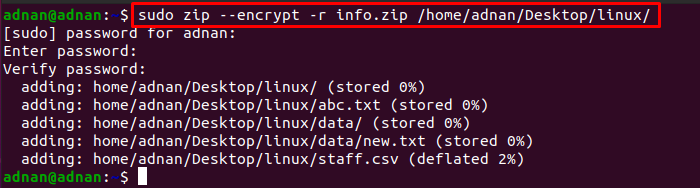
Note that all the files and directories from the specified target folder are added to the zip file named info.zip.
Step 3 (Optional): You can unzip the .zip files as we did in the below-mentioned command.
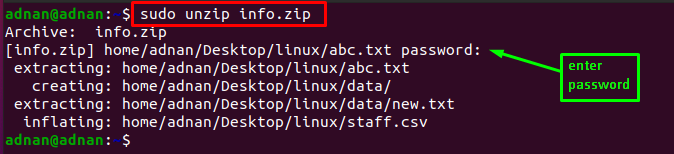
The output shows that the zipped file was protected, and the extraction is performed after entering the password set for that file.
Note: If in case you have entered the wrong password, you would not be able to extract files as can be seen in the following image.

How to create a password protected zip file using GUI
To create the password encrypted zip file using a graphical interface, the following steps are recommended to follow.
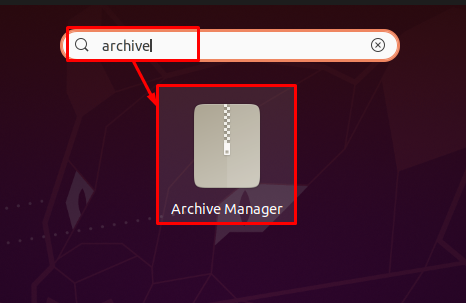
Step 1: Click on the “Show Applications” icon placed on the dock or press “Super Key + A” to open the applications menu.

Step 2: Search here for “Archive Manager” and click on it to open:
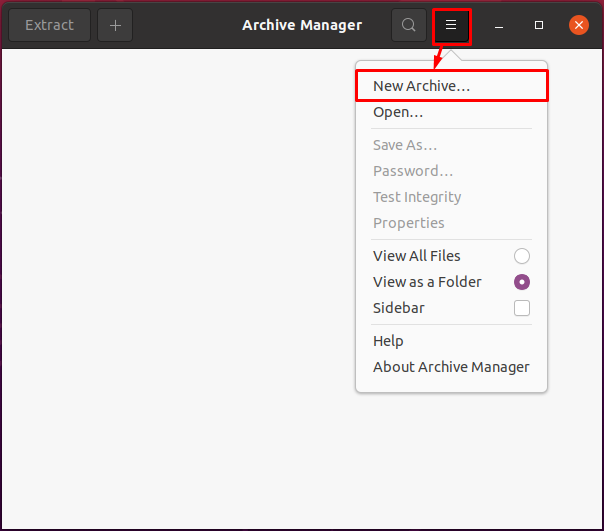
Step 3: Click on the three lines placed on the menu bar of the “Archive Manager” and click on “New Archive…“.
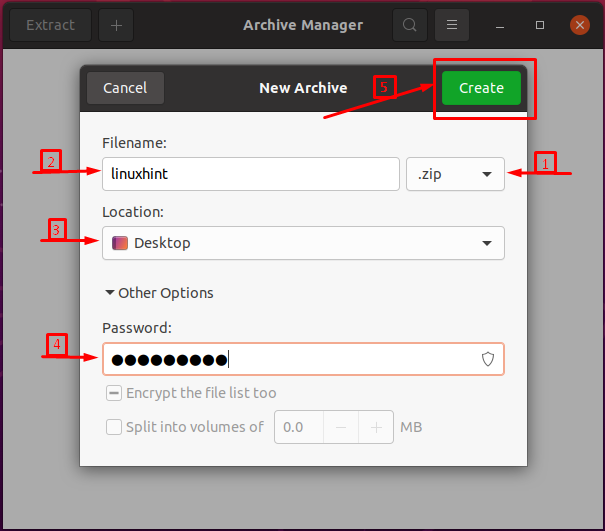
After doing so, the following box will appear, where you have to ensure the following content.
– extension must be set to “.zip”
– set a Filename, Location and Password for that zip file
At the end, click on “Create” to accomplish the process.
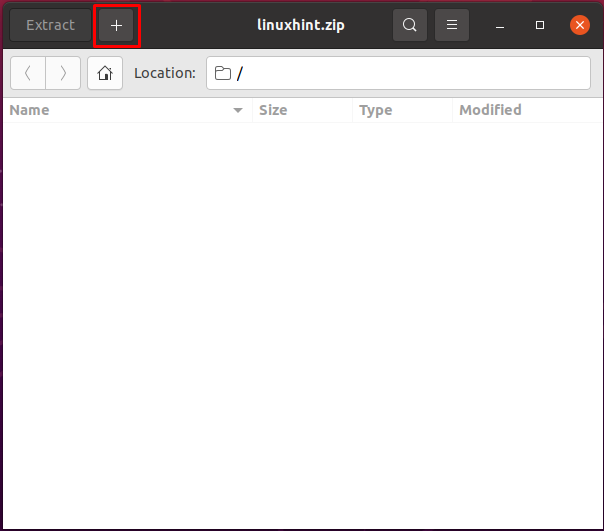
Step 4: Once the file is created, click on the “+” icon to add files in the zip file.
After adding files, click on the “Extract” button placed on the menu bar.
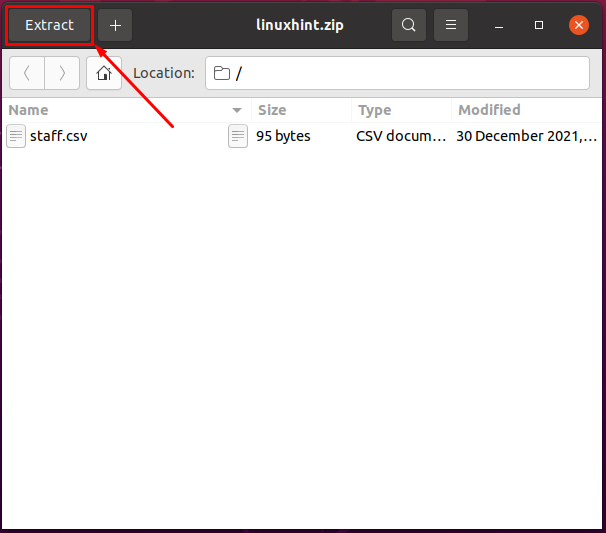
The time you click on the “Extract” button, you have to choose the extraction location. After doing so, a dialogue box will appear which requires a password for completing the extraction process as shown in the following image.
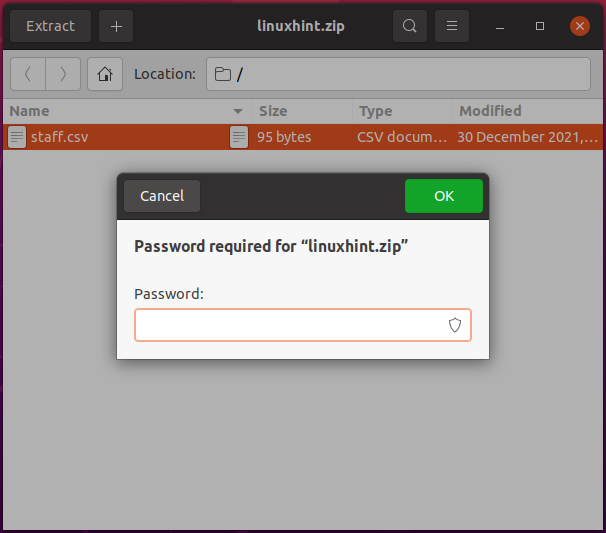
As shown in the output, the password dialogue shows that the file is now protected with some password.
Conclusion
The password protected zip file can be created using the zip and unzip command line tool. Moreover, the graphical interface of Linux can also be exercised to create a password protected zip file. This guide outlines the methods and steps that are recommended for the creation of a password protected zip file. A terminal enthusiast may prefer the CLI method over GUI as it is fast and easy to adopt. However, a novel Linux user may adopt a GUI method to do the same process.