Linux debian install lxde
LXDE in Debian
Installation
The minimum set of elements:
A complete set of elements:
A complete Debian LXDE desktop environment (starting from Debian 7.0 «Wheezy»):
# apt install task-lxde-desktop
Running LXDE
GDM / KDM / LightDM
No extra configuration needed for GDM / KDM / LightDM: just simply select the LXDE option at the login screen menu.
XDM
For XDM, you will need to have the ~/.xsession file in your home folder. If you do not have one, create it. XDM reads this file as a script. See the XDM documentation for more information. The final line in your ~/.xsession file should read:
If you are starting X with startx, the same line would go in your ~/.xinitrc file.
An alternate way you can change the default session manager system-wide is by updating the link Debian holds in /etc/alternatives/:
# update-alternatives --config x-session-manager
You will be given a list of options. Select startlxde to select LXDE as your default session manager system-wide.
Keyboard layout switching
First of all, you need to add the necessary keyboard layouts into the /etc/default/keyboard config file (see also: Keyboard in Debian Wiki).
Here is an example with 5 layouts (US English, Ukrainian, Russian, German and French) and + as a layout changer key combination:
# KEYBOARD CONFIGURATION FILE # Consult the keyboard(5) manual page. XKBMODEL="pc105" XKBLAYOUT="us,ua,ru,de,fr" XKBVARIANT="" XKBOPTIONS="grp:alt_shift_toggle" BACKSPACE="guess"
For the changes to take affect, you need to execute the following command:
# udevadm trigger --subsystem-match=input --action=change
After that, you can add a «Keyboard Layout Switcher» applet onto the LXPanel and finally test it.
External links
Install LXDE GUI In Debian 11 Bullseye
![]()
This tutorial explains how to install LXDE on an existing Debian 11 Bullseye installation and make a new Debian installation with LXDE.
All instructions in this article are also useful for other Debian versions and other Debian based operating systems like Ubuntu.
After reading this tutorial, you will be able to switch your current desktop manager to LXDE.
All steps described below include screenshots, making it easy for any Linux user to follow them.
Note: For instructions to install a fresh Debian installation, including LXDE, start reading from here.
How to install LXDE on Debian 11 Bullseye:
To begin installing LXDE on Debian 11, the first step is to update your package’s repositories. To do it, execute the command shown below.
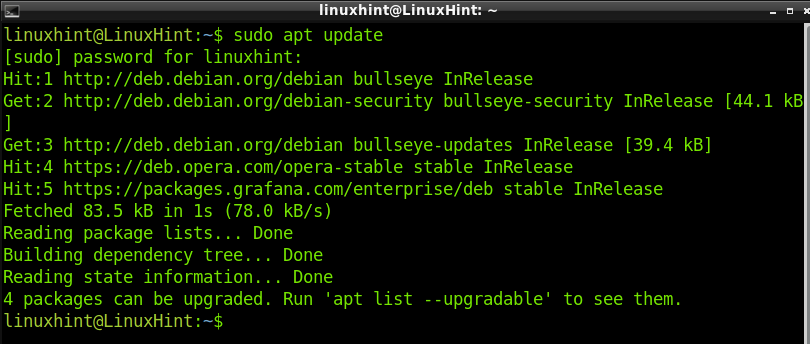
Once repositories are updated, you can install LXDE on Debian by running the following command.

During the installation process, you will be required to configure Lightdm; press OK when required, as shown below. If this configuration request does not show up, continue reading from here.
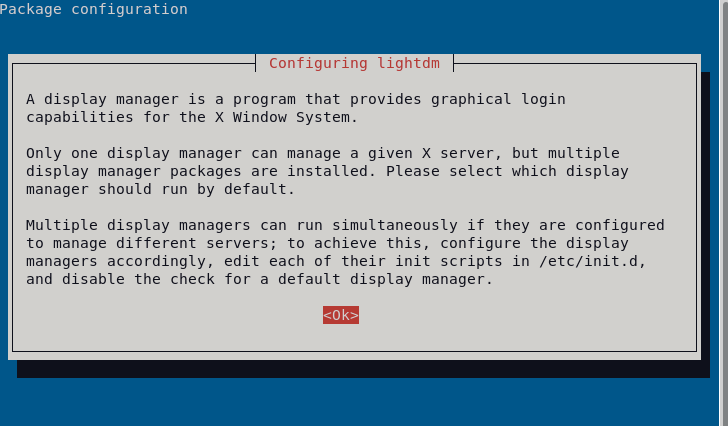
In the next screen shown below, select lightdm and press ENTER.

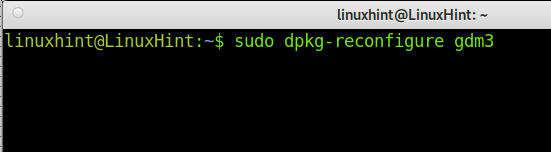
If the previous configuration didn’t prompt, or if you want to change to Lightdm after LXDE is installed, you can launch the configuration screen by running the following command.
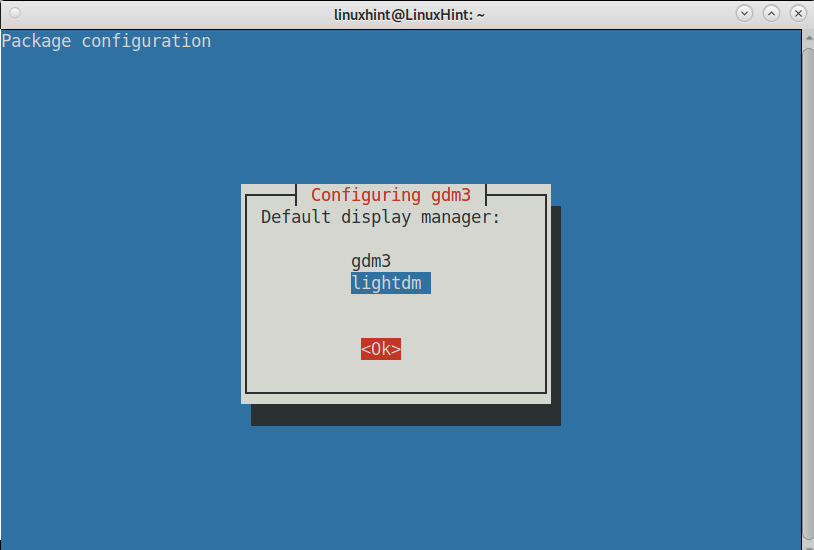
On the configuration screen, press OK.

On the next screen, select Lightdm and press ENTER.
After installing LXDE and selecting Lightdm, logout or switch user.
To use LXDE, press the spanner icon on the login screen and select LXDE, as shown in the following screenshot.
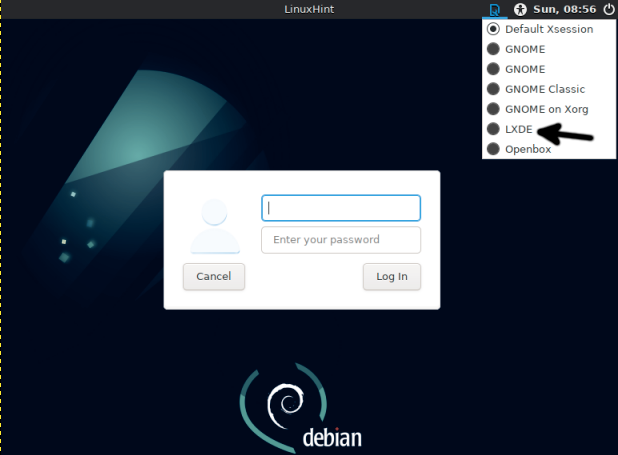
That’s how you will access your LXDE environment.
How to install LXDE during Debian installation:
If you don’t have Debian installed yet and wonder how LXDE can be installed during the Debian installation process, this section explains that.
Basically, the installation process is the same as with Gnome; the only difference is in the packages selection step. So let’s begin.
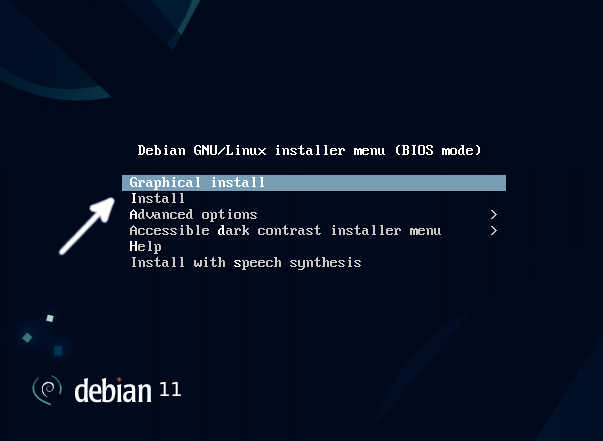
Insert your media (DVD, USB) installer and boot it. Select the Graphical Install option when the installation menu shows up, as shown in the screenshot below.
The first question is your lange; choose your language and press the Continue button.

Select your country and press the ENTER key or the Continue button in the second step.

Then select your language dialect and Continue.

The installer will load the necessary components; this process may take a few seconds to a few minutes.

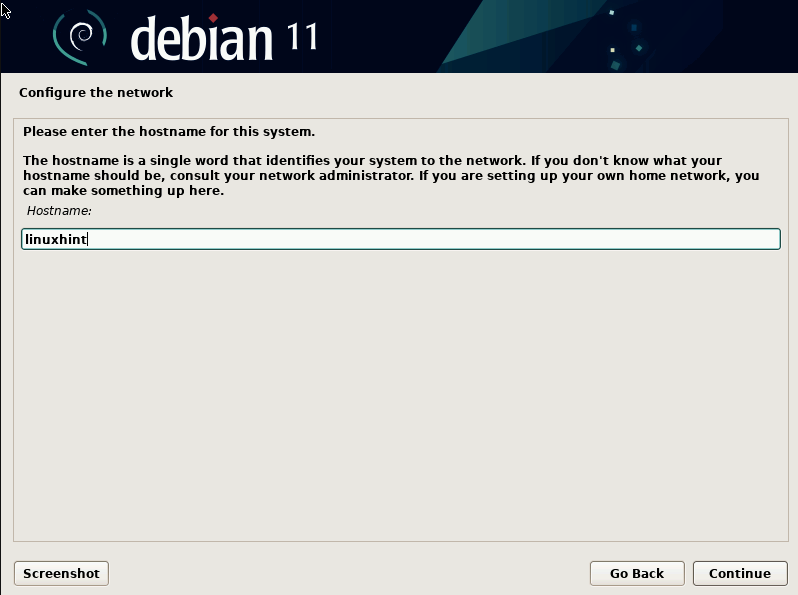
In the next step, you need to select your system hostname; this is what appears after your username, e.g. username@hostname. If you are a Windows user, you can consider the hostname as the computer name. This is an arbitrary choice. Then press Continue.
The following field asks for your domain name, another arbitrary field; you can leave it empty if you want, then press Continue.

Now you need to set a password for the root user. If you are a Windows user, you can consider the root user as the Administrator user. Fill in the password and press Continue.

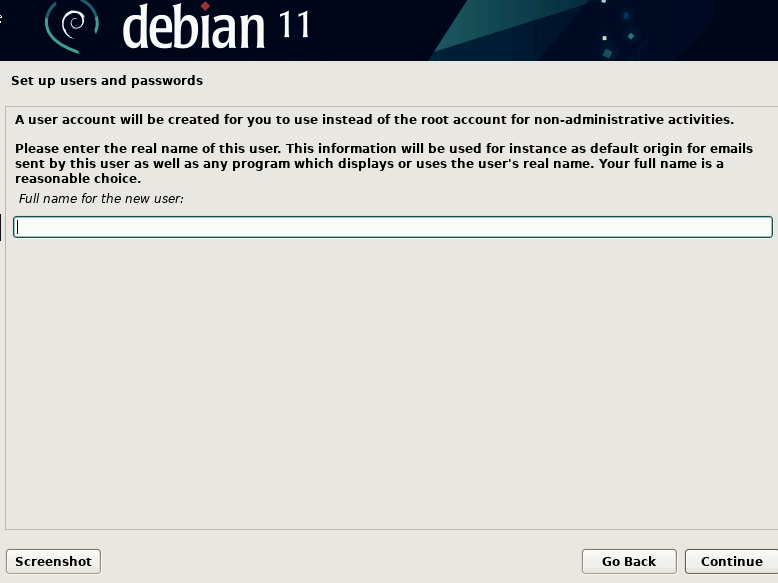
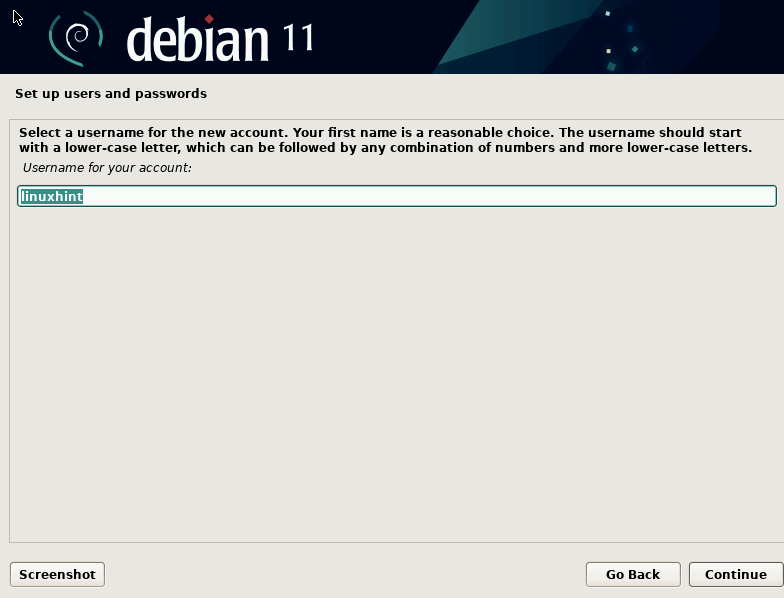
You need to type your non-privileged user’s real name, another arbitrary field; you can type any name you want (This is not the username). Then, press Continue.
Now type the non-privileged username and press Continue.
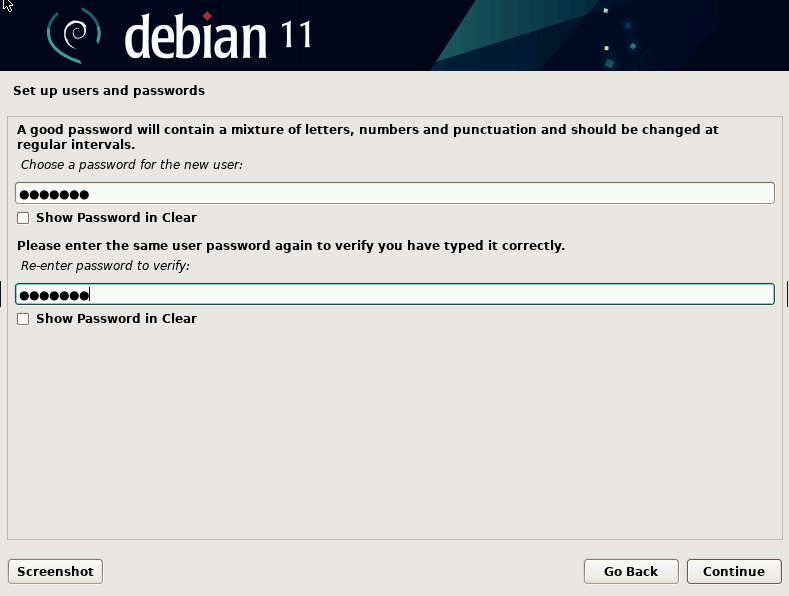
Define a new password for the non-privileged user created in the previous step and press Continue.
Select your time zone; this is important for your computer clock to work properly; when you select a time zone, more options will be displayed, then press the Continue button.

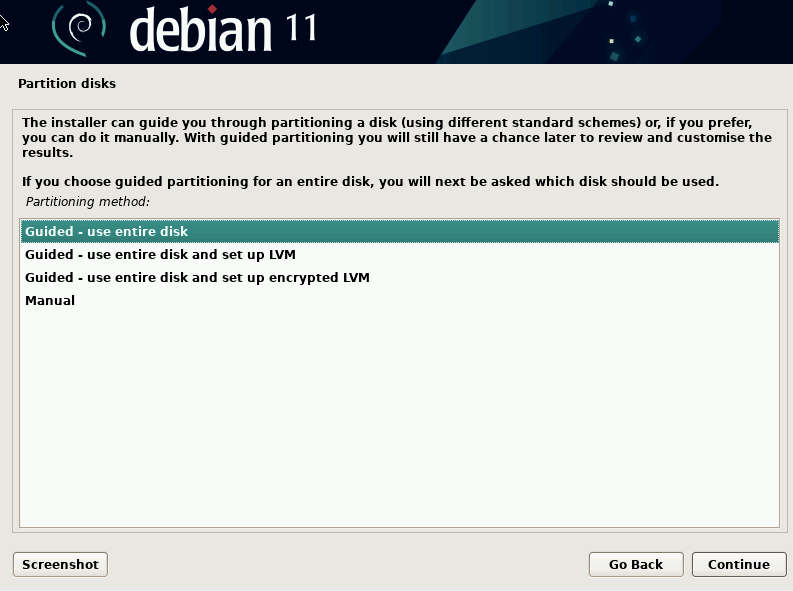
Now you need to define the space or partition of your disk for the new Debian installation. For new users, it is recommended to use the free available space. The option is “Guided – use the entire disk”. If you are familiar with Linux partitions, you can proceed as you wish. Otherwise, select the guided option and press Continue.
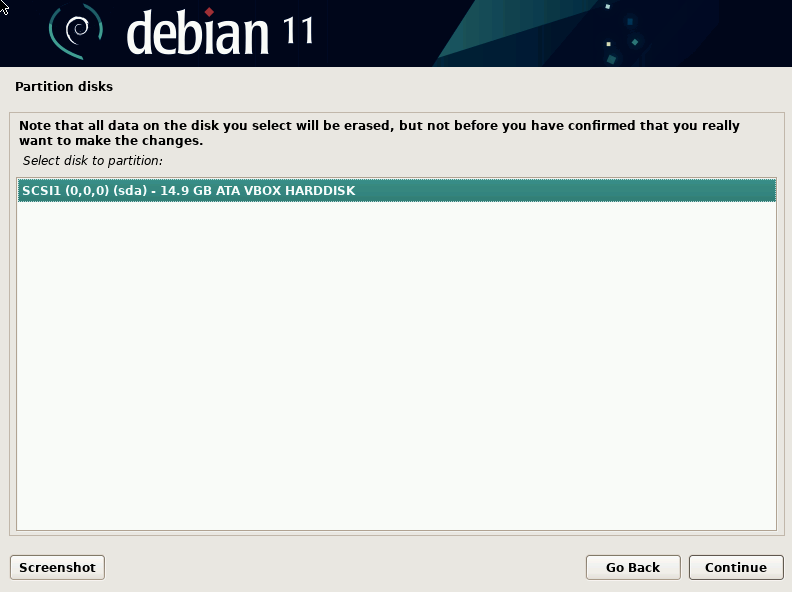
You need to select your disk device where you want Debian to be installed; if you have a unique disk, then no problem; otherwise, select the correct disk and press Continue.
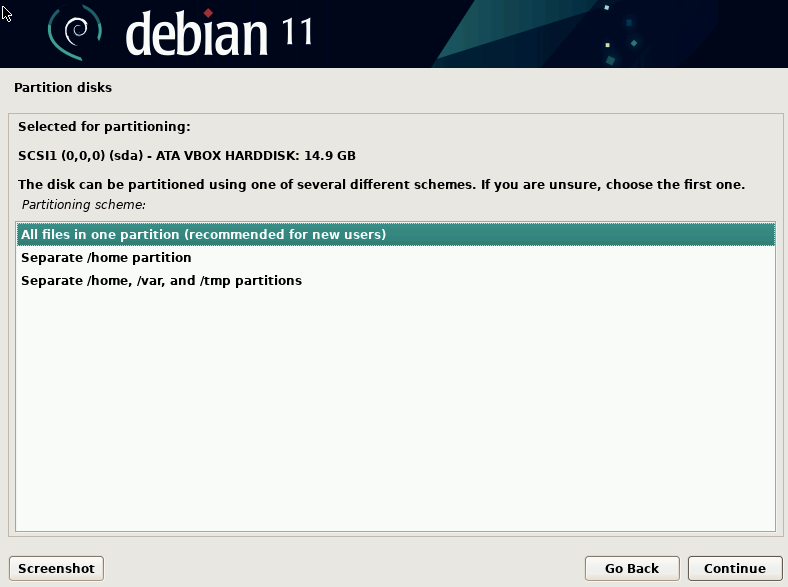
Now you need to choose where your files will be installed. In this case, we will opt for all files to be installed in a unique partition, the recommended option for new users; if you are an advanced user, feel free to partition your disk as you want. After selecting your options, press Continue.
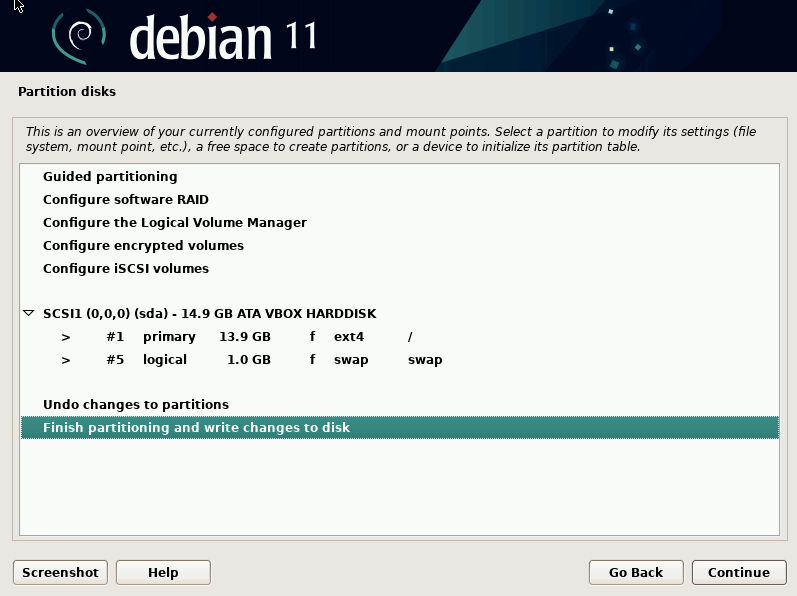
After your previous selection, make sure everything is ok, select “Finish partitioning and write changes to disk”, and press Continue.
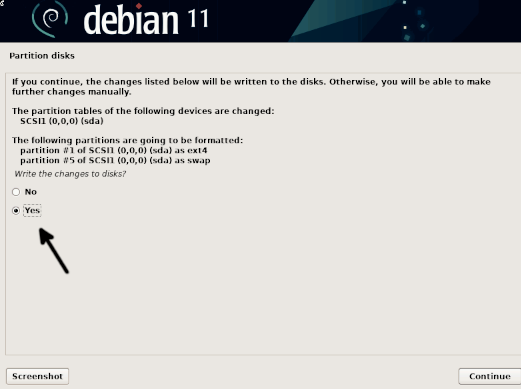
Confirm again by selecting “Yes”, and press Continue.
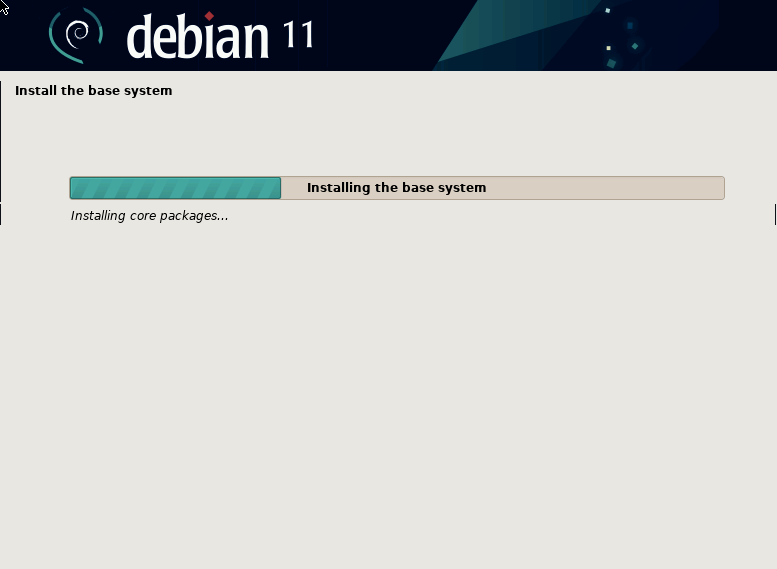
The process will continue to install the base system files; this may last a few minutes.
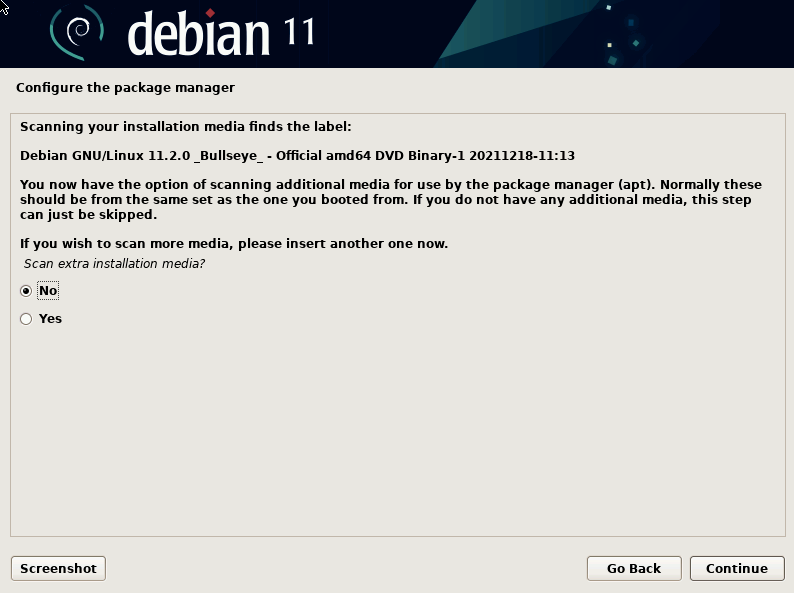
The installer will ask you if you have additional media; normally, the option is “No” tick it and press Continue.
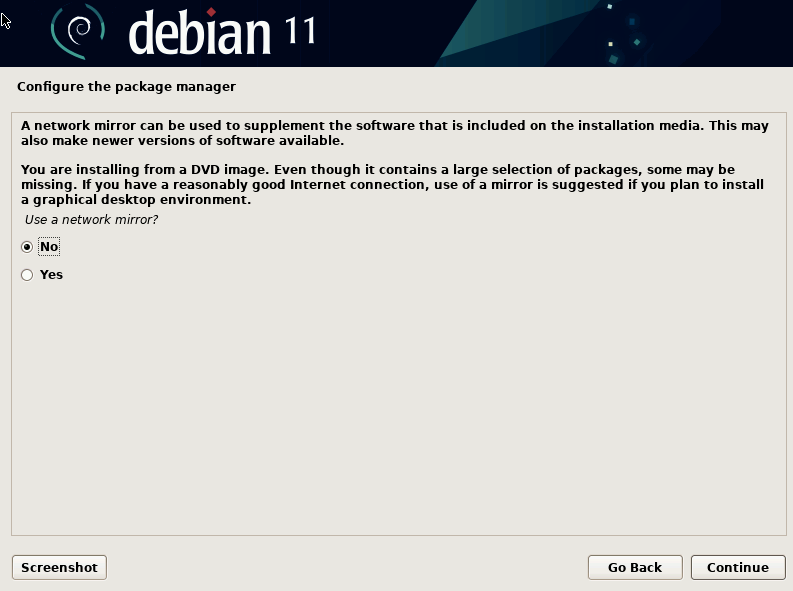
The installer will ask if you want to use a mirror to install up to date packages, you can select “Yes” and then choose a mirror, or you can proceed by selecting “No” and update packages later using the apt upgrade command. Select the option you prefer, and press Continue.
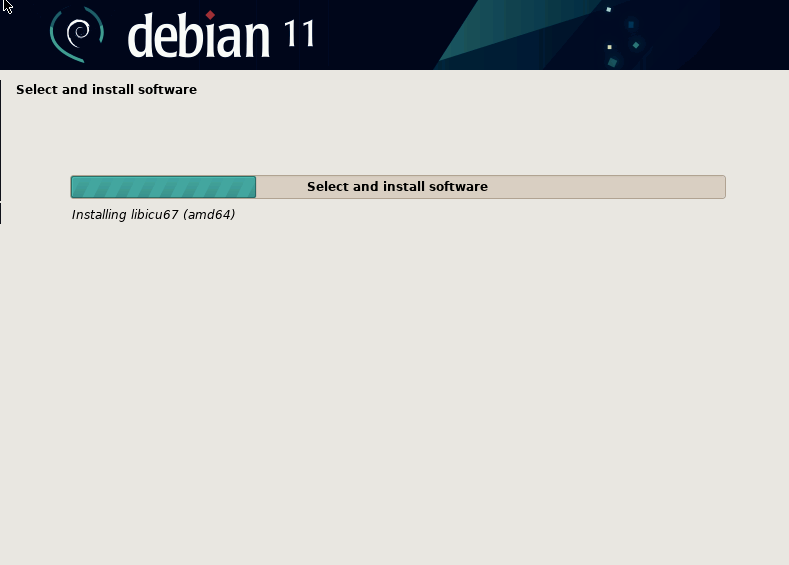
Packages will start being installed; you will be required to interact with the packages selection during this process.

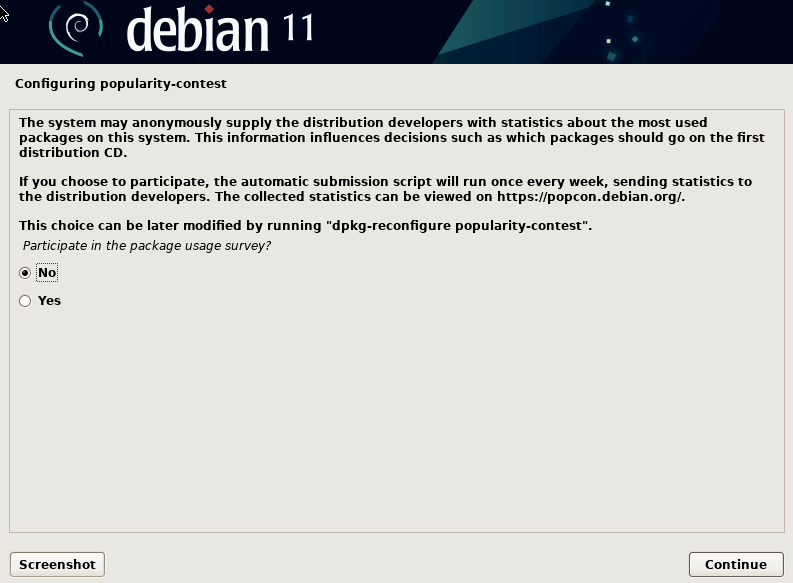
When asked “Participate in the package usage survey?” select the option you want, and press Continue.
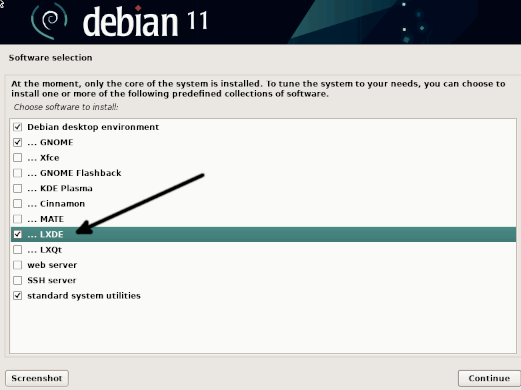
Now is when you add LXDE to your new Debian installation. Just tick the LXDE package and press Continue.
The software installation process will continue; this will take some minutes to finish.

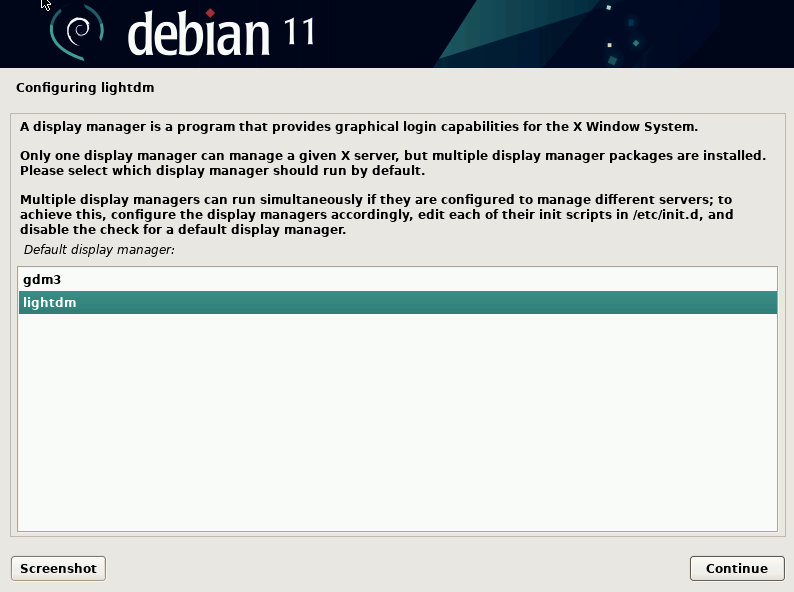
You will be asked to configure Lightdm. Select Lightdm and press Continue.
The software installation process will continue for a few more minutes.
When the software installation ends, you will be asked if you want to install the GRUB bootloader; tick the “Yes” option and press Continue.
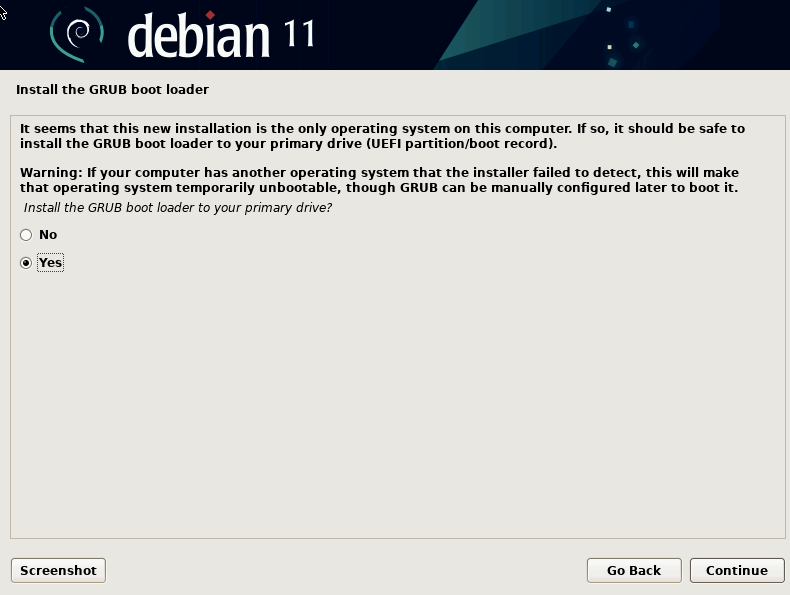
Select the drive device in which Debian is being installed, and press Continue.

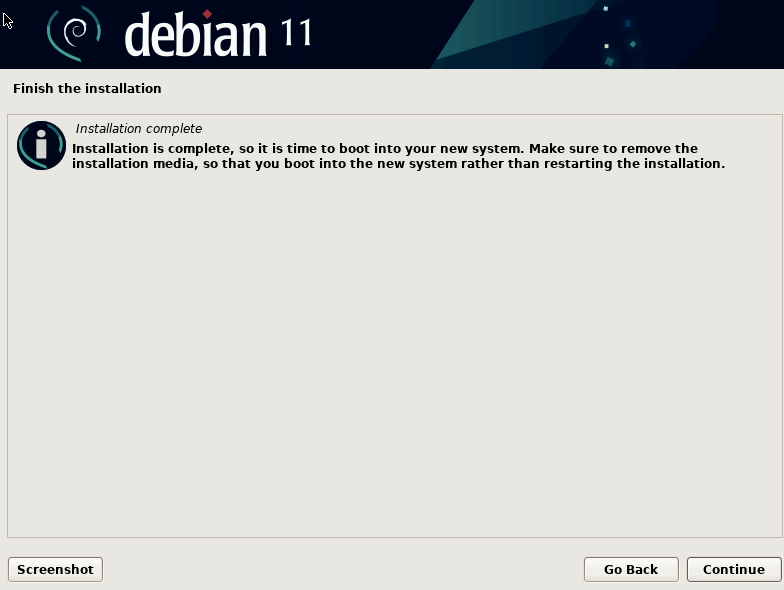
At this step, the installation is ending. Just wait from a few seconds to a few minutes.

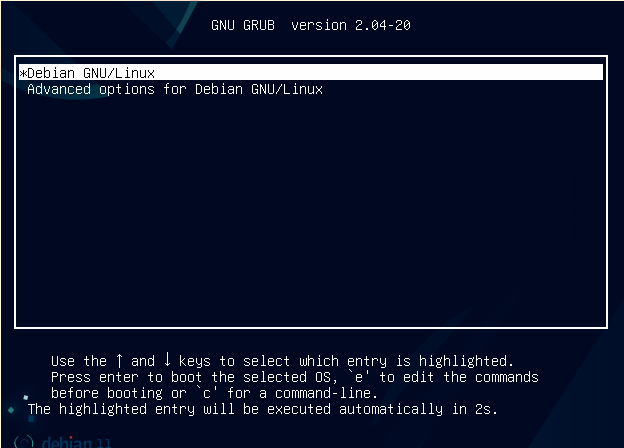
You only need to press the Continue button to boot your Debian system with LXDE.
And as you can see, now you can boot your new system.
By following the instructions explained above, you will be able to get Debian with LXDE.
Conclusion:
As you can see, installing LXDE on Debian 11 Bullseye, previous Debian versions or Debian based systems like Ubuntu is a very simple task. Also, as shown in the second section of this tutorial, installing your system from the beginning with LXDE is as simple as installing it without LXDE; the only difference is you need to select the package in the packages selection step. LXDE is a lightweight desktop environment that will result in better hardware performance; many users are looking to integrate it into their systems.
Remember, when using LXDE, it is better to use Lightdm despite the workarounds allowing you to use it with GDM. Any user can get LXDE on Debian by following the few steps described above.
Thank you for reading this article explaining how to install LXDE GUI in Debian 11 and Debian based operating systems. Keep reading our blog for more Linux professional content.
About the author
David Adams
David Adams is a System Admin and writer that is focused on open source technologies, security software, and computer systems.