- Debian User Forums
- Additional Options.
- Adding Software at build time.
- This post for a custom setup.
- How to save & maintain stuff on your USB stick.
- How to use Debian 11 live USB
- Prerequisites
- How to make Debian 11 live USB using Rufus on Windows
- How to make Debian 11 live USB on Linux
- How to use live Debian 11 live USB
- Conclusion
Debian User Forums
This how to is a spin-off of MeanDean’s HowTo: create, customize, and install a debian live image and will cover how I create a debian live image for booting from a usb stick, add software, customize, and hopefully save & maintain stuff on said usb stick.
REQUIRED SOFTWARE
live-helper — in debian main repo
squashfs-tools* — in debian main repo
genisoimage* — in debian main repo
squashfs-modules* — in debian main repo
* — I do not believe that these are needed, but I already have them installed so I’m not sure.
Sort out your own root permission.
0 — GET STARTED
#open a terminal
#create a directory to hold all your work
mkdir usblive
#change to our work directory
cd usblive
1 — CREATE A BASE CONFIGURATION
#From within usblive use lh_helper to create a basic configuration for a minimal Sid system.
lh_config -d sid -b usb-hdd
#Now start the actual build process. It might take a while.
lh_build
2 — Put the image to the USB device
#You should already know where your usb stick is mounted, but just in case do the following to sort it out.
ls -a /dev/disk/by-id/usb*
#Note: you need the dev file for the whole stick (i.e. «/dev/sdb»), not only for one partition on it.
#Unmount your usb stick and then put the image to your usb stick.
umount /dev/sdb
dd if=binary.img of=/dev/sdb bs=1M
3 — Now have at it
#There are several ways to test out your image before rebooting and dean covers at least one of them as does the DebianLive/Howto/USB. I just reboot with the usb stick in place. If all goes to plan you should get the nice Debian Live Bootsplash.
Cheers
Additional Options.
#2 Post by Bro.Tiag » 2008-10-25 02:33
In the OP, I set up a Live Image for just a minimal Sid install. One is not limited to just that.
0 — etch, lenny, Sid, oh my
#To make live Images of different distributions (default is etch) use the -d flag with lh_config:
lh_config -d lenny
#or
lh_config -d sid
1 — Oh what desktop environment to use
#To use a kde desktop image:
lh_config -p kde-desktop
#To make a gnome desktop image:
lh_config -p gnome-desktop
#To make an Xfce desktop image:
lh_config -p xfce-desktop
#Then build your Image.
lh_build
2 — Some Examples
#So for example, if you want etch with Xfce you would use;
lh_config -p xfce-desktop -b usb-hdd && lh_build
#Or for lenny & gnome use;
lh_config -d lenny -p gnome-desktop
Adding Software at build time.
#3 Post by Bro.Tiag » 2008-10-25 02:33
So you want to add some specific applications from the get go. Well you can, and there are several ways to do so. This is the easiest way.
Since I’ve only done a minimal Sid install that is what I’ll use for my example.
#Include screen, mc, moc, alsa and elinks.
lh_config -d sid -b usb-hdd —packages screen mc moc alsa-base elinks && lh_build
Then dd the binary image to your usb stick same as above.
This post for a custom setup.
#4 Post by Bro.Tiag » 2008-10-25 02:33
Right, so you have done your stock install with a few must have applications and wrote it to a usb stick and all goes to plan. Now you have decided that well the background is not to your liking as well as a few other configurations not to mention you forgot that one killer app that you just mush have. What to do. Well you could start all over again, or you could just do some custom work & rebuild the binary image.
0 — Hacking your chroot file system
This assumes your bootstrap stage is still intact from previous calls to lh_bootstrap (or lh_build)
#From with in your working directory clean up the old binary build.
lh_clean —binary
#Change what you need in the chroot directory or chroot into chroot and do the hacks there.
chroot chroot
#Once you are finished, exit and then build a new binary.
lh_binary
Then dd the binary image to your usb stick same as above.
How to save & maintain stuff on your USB stick.
#5 Post by Bro.Tiag » 2008-10-25 02:34
Well I haven’t gotten exactly what I wanted to do accomplished, but it’s a start. Using DebianLive HOWTO Custom Install as a place to start. I’ve managed to set up my DebianLive usb stick so that it will retain my user settings and such.
This is what I did, you may need to edit to suite.
0 — BOOT DEBIANLIVE IMAGE & ADD PARTITIONS
#After writing the image to my usb stick I reboot to the usb stick.
#Next I partition the remaining space on the usb stick. First I need to add gparted.
apt-get update
apt-get install gparted
#Now with gparted I added two new partitions.
# 1 as ext3 and
# 1 as fat32
# I also added a Label, home-rw for the ext3 partition which is to be used as my ~/user partition. Besure to add the label, it is what persistent uses to mount the partition.
1 — SET UP THE ~/HOME PARTITION
#I used the linux partition as my ~/home directory. So I needed to copy everything from it to the new partition.
#mount the linux partition
mount /dev/sdb2 /mnt
#copy ~/home to the new partition
cp -a /home/* /mnt/
2 — ADD THE DATA PARTITION
#The data partition has to be mounted after the Live system is up & running.
#So I used a bash script to mount the data partition and added the script to my window managers autostart function.
#I run e17, so you’ll have to sort out how to auto start apps on your own.
#!/bin/bash # shared-disc.sh # partition /home PART=`mount | grep /home | awk '' | sed 's/2/3/'` [ -z "$PART" ] && exit 1 [ -d "$HOME/Documents" ] || mkdir $HOME/Documents sudo mount $PART $HOME/Documents \ -o rw,noexec,nosuid,nodev,noatime,uid=999,utf8,shortname=lower3 — USE PERSISTENT TO BOOT DEBIANLIVE
#persistent needs to be added to the boot perimeter. This can be done at boot time by hand, or you can edit the syslinux/menu.cfg file and make it permanent. I’ve been trying this for the last couple of days so I forget exactly how I did such. Regardless, it can be done from windows or linux w/ a text editor. Just add persistent to the end of the kernel line & save.
LABEL live MENU LABEL Start Debian Live 686 kernel /live/vmlinuz2 append initrd=/live/initrd2.img boot=live union=aufs vga=791 persistent 4 — FOR THE FUTURE
#it says in DebianLive HOWTO Custom Install that one should also be able to mount the whole «/», using casper-rw (live-rw for lenny & sid) in place of home-rw, and then be able to add software and have other configurations saved as well. I was unable to get this to work, yet. It may have to do with how I set up my partitions or it might have something to do with the uses of » -b usb-hdd » in the original DebianLive build. I’ve yet to test those theories.
[Edit]Right, I did some experimenting and have determined that it is in fact an issue with the use of » -b usb-hdd » in the original DebianLive build. I followed the instructions @ DebianLive HOWTO Custom Install this time using a stock Debian Live Sid cd and all went to plan. I added a few apps, did some simple configurations, rebooted and everything was just as I left it. So as not to clutter this forum with yet another custom debian live how to, here’s a link to where I did, Instructions for setting up a DebianLive Operating System on a USB stick.[/Edit]
How to use Debian 11 live USB
![]()
You may require more than one operating system at once while keeping your device on a single parent OS. You can do so by using a third-party tool to install the other operating system virtually and can be used: for example, VirtualBox is being widely used to get the Linux-based OS on your host operating system. Most of the users keep Windows as their primary OS and install the other operating system on virtual machines. Contrary to these virtual machines access, you can make a live USB of the secondary OS that helps to use that operating system without affecting the functionality of the primary OS. In this descriptive post, we have demonstrated the ways to make live USB of Debian 11 and then using the live USB to run Debian 11:
Before getting into the core part of this writing; there are some prerequisites that must be available to proceed the
Prerequisites
Debian 11 live ISO image: As discussed above we are making a USB bootable to run the OS live; therefore, the live ISO image of Debian 11 is required; you can click on the link below to get the latest ISO file.
ISO live image of Debian 11: The time you will navigate to the above given link; you will observe live ISO images of Debian 11 with support of different desktop environments. Download Debian 11 live ISO image
USB : A pen drive of minimum 4GB space is required but it would be good to have up to 8GB space.
Tool to make USB bootable : You must have a tool to enable the live version of Debian 11 on USB drive: In this post, we have demonstrated how to make live USB of Debian 11 on Windows and Linux OS as well. And we have used two tools in this regard:
For Windows: Download Rufus
Once the prerequisites section is completed; you can proceed to the next step:
Firstly, we will make the USB bootable with live ISO image and then will guide to use Debian 11 from live USB:
How to make Debian 11 live USB using Rufus on Windows
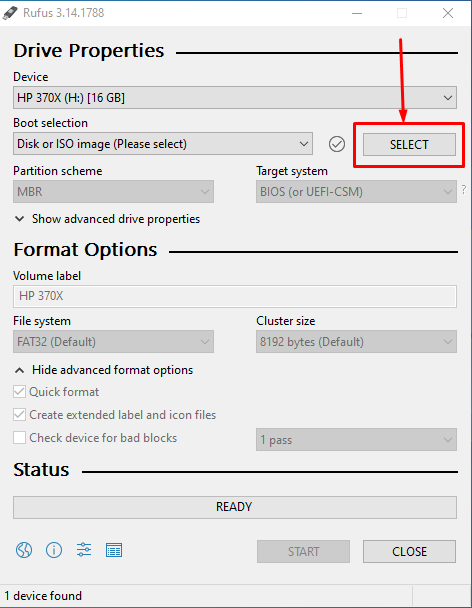
We are using Rufus software to make USB bootable:
Firstly, open Rufus and click on “SELECT” to choose the Debian 11 live ISO image from your windows computer:
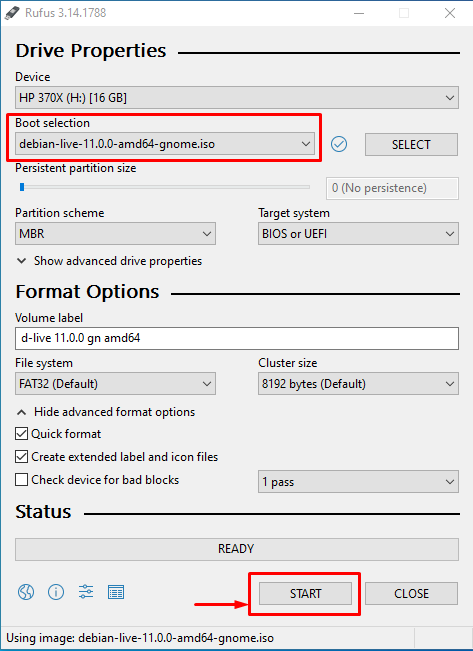
Once you have selected the image; Rufus will allow you to start the process:
So, click on “START” to continue the bootable process:
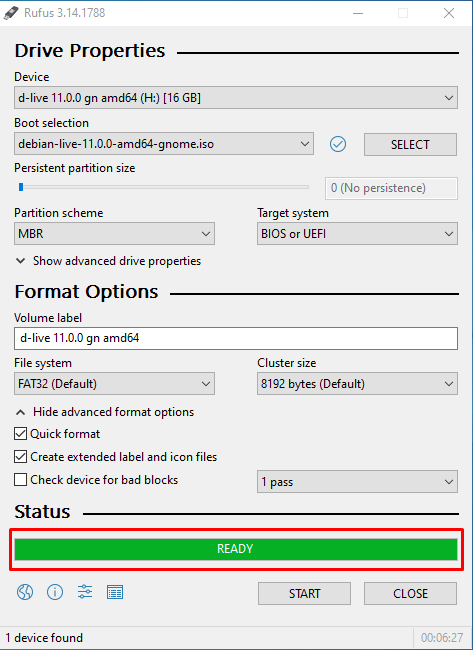
This process will take some time; as soon the ISO files are copied, Rufus will show the “Ready” status as shown in the image below:
How to make Debian 11 live USB on Linux
This method provides a step-by-step process to make Debian 11 live USB on a Linux based OS:
For this, we have used balenaEtcher tool that can be downloaded by using the link given in the “Prerequisites” section.
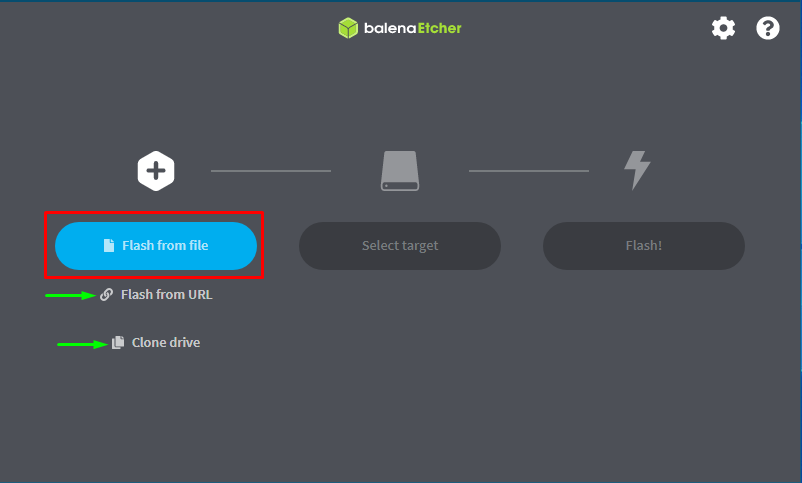
Open the Etcher and click on “Flash from file” to select the Debian 11 live ISO image from your system:
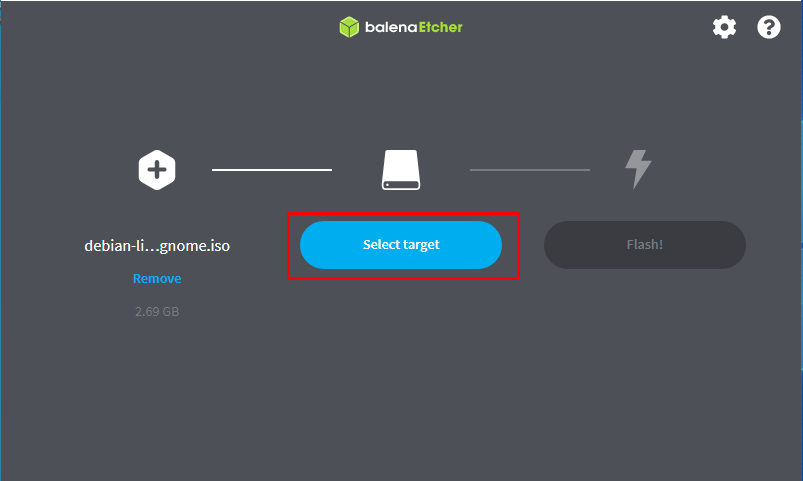
Once the file is selected; the next option “Select target” will be activated:
Click on it to select the USB drive in which you want to copy the ISO files:
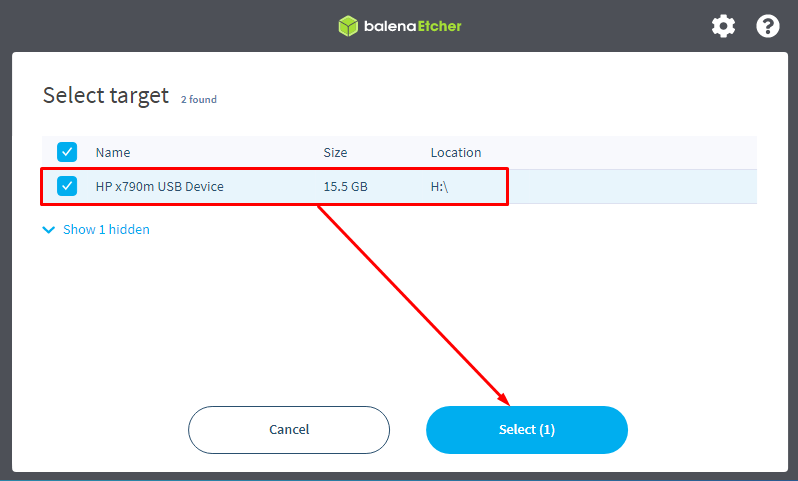
Once you clicked on it; you will get the interface as shown below:
Choose the USB from given options and click on “Select” to continue:
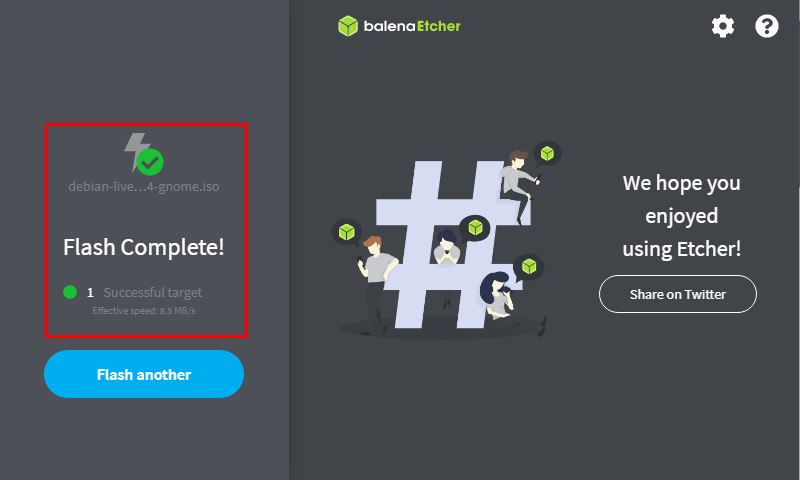
After selecting the ISO image and USB; Click on “Flash” to start making the Debian 11 live USB:
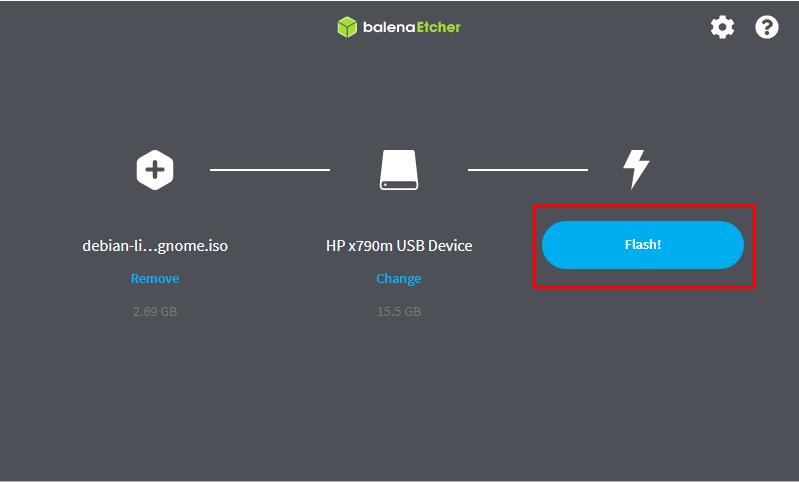
The USB will be ready in few minutes:
How to use live Debian 11 live USB
The time you have completed the bootable process; you are ready to go for using the Debian 11 using USB:
So, attach the Debian 11 live USB and reboot your system:
While restarting, open the boot options on your system and choose the USB to boot from, as we have selected:
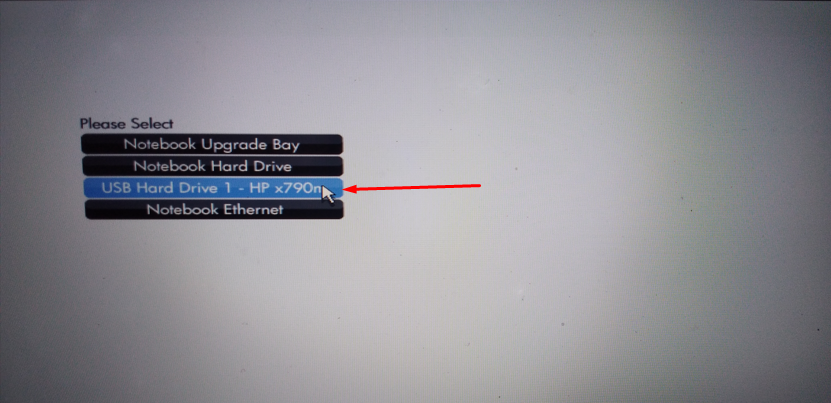
Once you have selected the correct USB; a “Main Menu” will be displayed that contains several options:
- Debian GNU/Linux Live
- Debian installer with multiple options, i.e., Graphical assistance, Speech Synthesis
As we are going for live Debian 11; so, hit enter after navigating to “Debian GNU/Linux Live”

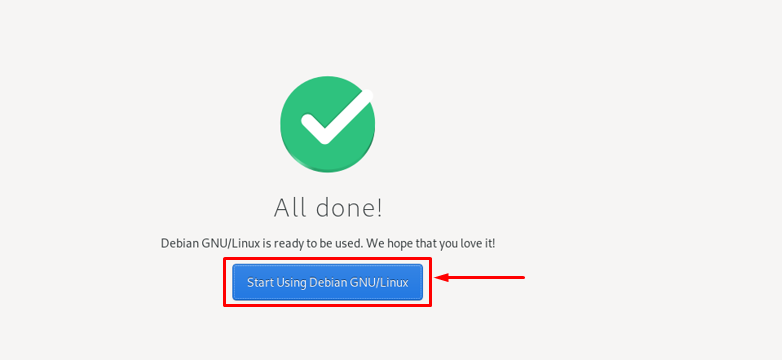
Once you have selected this option; a Debian 11 live OS will be started. After few seconds, you will find a basic setting window where you have to configure the initial settings:

Once the setting is completed, a startup button will be displayed; Click on it to start you live Debian 11 session:
After that desktop interface of Debian 11 live will be shown, and it is same as an installed version of Debian:
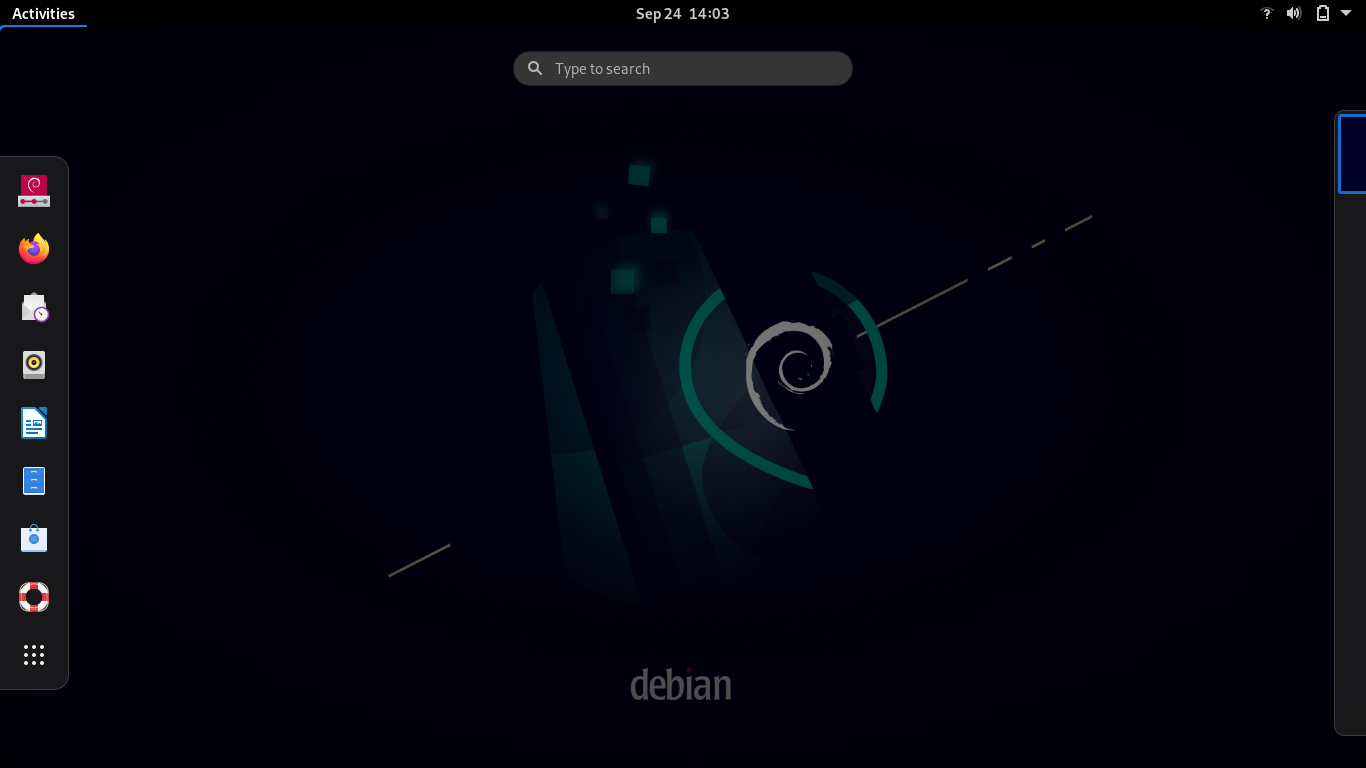
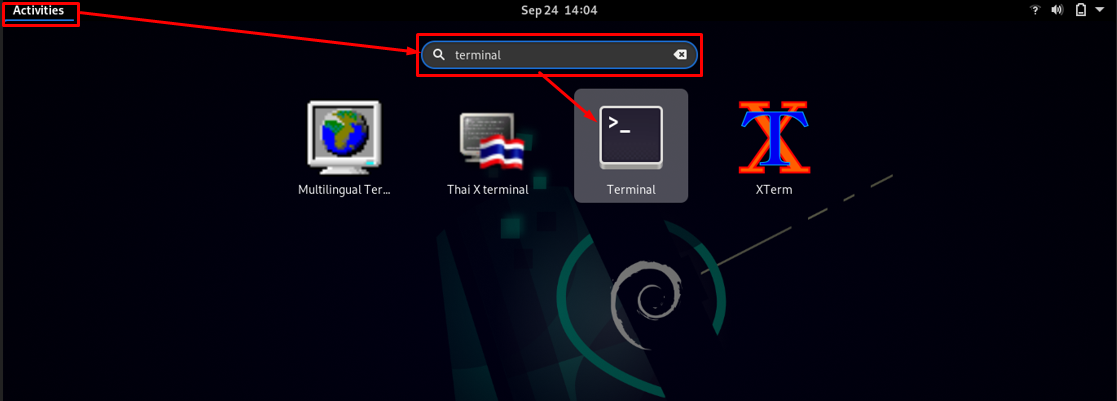
You can perform every task the same way as they are done in installed version of Debian 11; for instance, to look for terminal; click on “Activities” and then type “terminal” in the search bar:
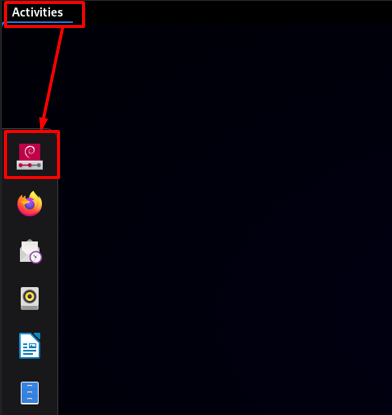
You can also install Debian 11 while running its live version:
To do so, Open “Activities” and then click to install icon placed on shortcut bar to start the installation:
After that, the setup window will be started, and you can install Debian 11 on your system; the initial window of installation setup is shown in the image below:
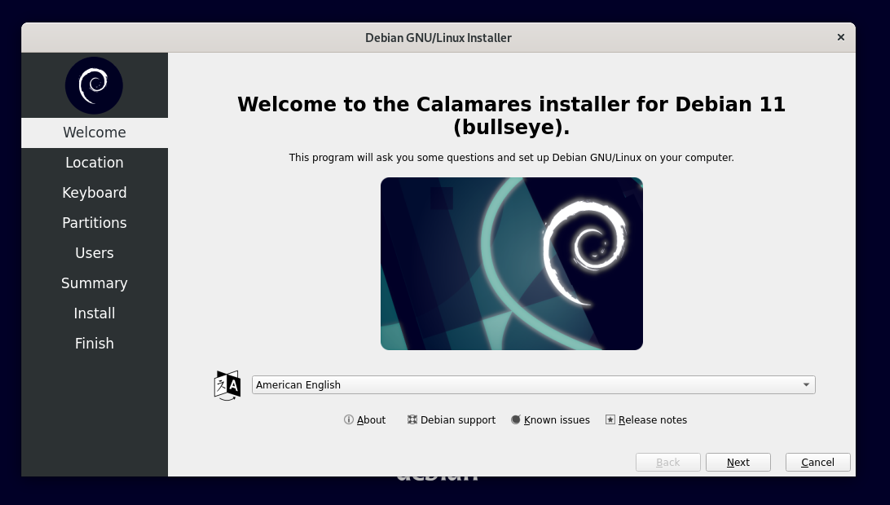
Hence, you can also install Debian 11 OS using Debian 11 live bootable USB:
Conclusion
Debian is a Linux-based distribution being widely used because of its extensive features for novice as well as professional users. Primarily an operating system can be installed using a bootable USB or an optical disk and if you want to install it as a secondary OS then you can use virtual box or you can access Debian 11 by making a live USB. In this post, we have demonstrated the ways to use Debian 11 on a USB. For this, we have provided a guide to make Debian 11 live USB bootable for Windows, Linux OS and also displayed the use of Debian 11 from USB directly. However, it is to be noted that you can run Debian 11 for a single session using this method, that means everything will be wiped out after reboot. Moreover, Debian 11 live bootable USB enables you to install Debian 11 on your system also.