- Запуск KVM на Debian 11
- Похожие посты:
- Install KVM on Debian 12
- Table of Contents
- Install KVM on Debian 12
- Verify Hardware Virtualization Support on your System
- Install KVM on Debian 12
- Start libvirt management daemon (libvirtd)
- Launching KVM Virtual Machine Manager
- Other Tutorials
- SUPPORT US VIA A VIRTUAL CUP OF COFFEE
Запуск KVM на Debian 11
Краткое руководство по установке и первоначальной настройке гипервизора KVM (Kernel-based Virtual Machine) на ОС Debian GNU/Linux 11.6.
Для того, чтобы выяснить, поддерживает ли процессор виртуализацию, необходимо выполнить команду
# egrep '(vmx|svm)' --color /proc/cpuinfo
В ответе красным цветом должно подсветиться vmx или svm. Если это произошло — нам повезло, идём дальше…
Установим Network Manager и утилиты для сетевого моста
# apt install network-manager bridge-utils
Затем остановим запущенные сетевые интерфейсы.
# systemctl stop networking
Если после инсталляции Debian не был настроен сетевой интерфейс, необходимо открыть файл настроек /etc/network/interfaces, закомментировать строчки:
# allow-hotplug ens33 # iface ens33 inet dhcp
а также прописать настройки сетевого интерфейса в соответствии с требованиями локальной сети. Подробнее об этом можно почитать здесь: https://dondub.com/2021/02/nastroyka-seti-v-debian-10-8-i-ubuntu-server-20-10/
Затем запустим службу NetworkManager и внесём её в автозагрузку
# systemctl start NetworkManager # systemctl enable NetworkManager
Откроем файл /etc/NetworkManager/NetworkManager.conf и в секции ifupdown исправим параметр managed на значение true:
Далее перезапустим службу NetworkManager
# systemctl restart NetworkManager
После этого запустим псевдографическую утилиту nmtui
Жмём Изменить соединение, выбираем нужный сетевой интерфейс и применим изменения.
Затем остановим и запустим сетевой интерфейс
Вообще после этих манипуляций не помешает перезагрузка
Проверим, соответствуют ли настройки сетевого интерфейса тем, которые мы задали
Теперь устанавливаем необходимые пакеты для запуска KVM
# apt install qemu-kvm libvirt-clients libvirt-daemon-system virtinst libvirt-daemon virt-manager
Далее проверим состояние виртуальной сети
ответ будет примерно таким:
Имя Состояние Автозапуск Постоянный ------------------------------------------------- default не активен no yes
Это значит, что наша виртуальная сеть default не активна, и нам необходимо её запустить
# virsh net-autostart default
Добавлена метка автоматического запуска сети default
Имя Состояние Автозапуск Постоянный ------------------------------------------------ default активен yes yes
После этого установим пакеты для управления через веб-интерфейс
# apt install cockpit cockpit-machines
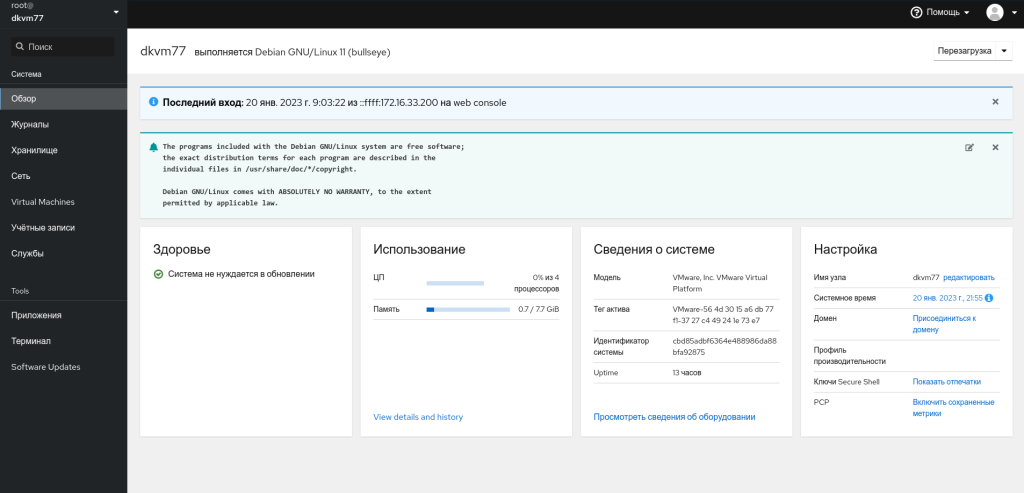
После установки открываем браузер на другой машине в сети и в адресной строке вводим: https://IP-адрес-сервера входим под рутом и попадаем в панель управления.
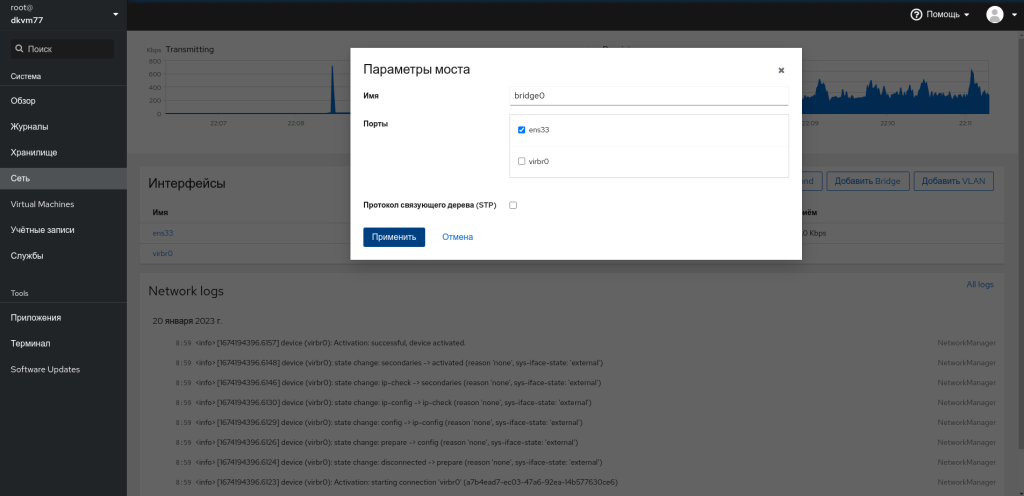
Затем переходим в раздел Сеть и жмём кнопку Добавить Bridge. Здесь выбираем наш сетевой интерфейс и жмём Применить
После этого переходим в раздел Хранилище и в правой панели будет список дисков, установленных на сервере. Их необходимо отформатировать и смонтировать. При необходимости их можно также объединить в RAID.
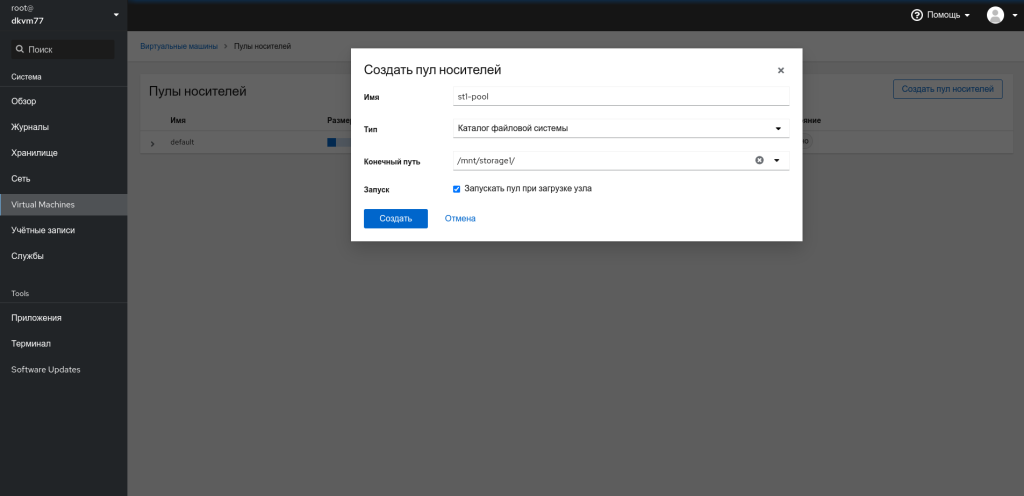
Далее переходим в раздел Виртуальные машины и сверху будет блок 1 Storage pool. Кликаем на него и попадаем в пулы носителей. Создадим пул носителей
Переходим на пул, включаем его и создаём на нём тома хранилища
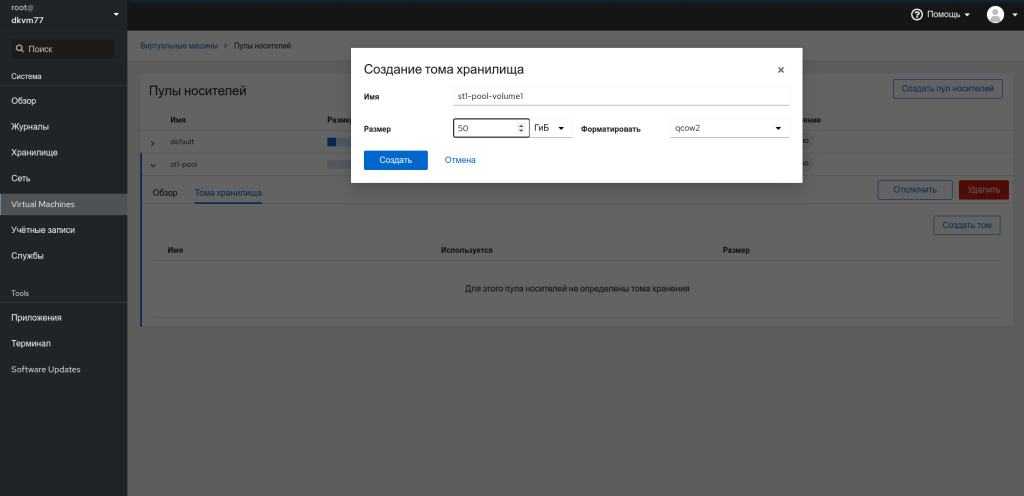
Теперь на этих томах можно размещать виртуальные машины.
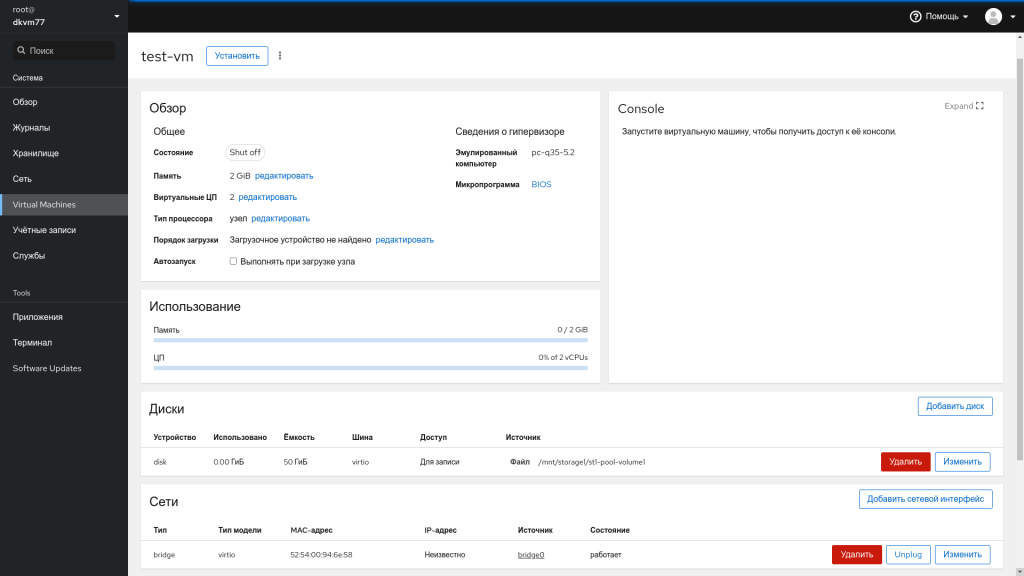
Создаём виртуальную машину

После создания виртуальной машины видим, что в Дисках присутствует выделенное место, которое было указано в томе, а также в Сетях работает интерфейс bridge, который позволит нам увидеть виртуальную машину в локальной сети
Похожие посты:
Install KVM on Debian 12

In this tutorial, you will learn how to install KVM on Debian 12. KVM, an acronym for Kernel-based Virtual Machine, is an opensource, full virtualization too for Linux systems with Intel-VT or AMD-V based-processors hardware virtualization extensions.
Table of Contents
Install KVM on Debian 12
Before you can proceed to install KVM on Debian 12;
Verify Hardware Virtualization Support on your System
KVM can only be used on systems with Intel or AMD processors. Thus, before you can install KVM on Debian 12, verify the support by executing the command below. The command looks for the CPU flags; Intel vmx (Virtual Machine Extension) or AMD svm (Secure virtual Machine).
grep --color -iE 'vmx|svm' /proc/cpuinfoflags : fpu vme de pse tsc msr pae mce cx8 apic sep mtrr pge mca cmov pat pse36 clflush mmx fxsr sse sse2 ht syscall nx rdtscp lm constant_tsc rep_good nopl xtopology nonstop_tsc cpuid tsc_known_freq pni pclmulqdq vmx ssse3 cx16 pcid sse4_1 sse4_2 x2apic movbe popcnt aes xsave avx rdrand hypervisor lahf_lm abm 3dnowprefetch invpcid_single pti tpr_shadow vnmi flexpriority ept vpid fsgsbase bmi1 avx2 bmi2 invpcid rdseed clflushopt md_clear flush_l1d arch_capabilities vmx flags : vnmi invvpid ept_x_only flexpriority tsc_offset vtpr vapic ept vpid unrestricted_guest pleIf the output has vmx/svm , then you good to go.
If not, then find out how to enable virtualization on your respective machine BIOS.
Similarly, you can use the command below to check Virtualization support.
lscpu | grep VirtualizationVirtualization: VT-x Virtualization type: fullInstall KVM on Debian 12
Once you confirm the virtualization support, proceed to install KVM on Debian 12 by executing the command below. In this tutorial, we are using Debian 12 desktop version.
sudo apt install virt-manager qemu-system libvirt-daemon-system qemu-utils Reading package lists. Done Building dependency tree. Done Reading state information. Done The following additional packages will be installed: dmeventd gir1.2-ayatanaappindicator3-0.1 gir1.2-gtk-vnc-2.0 gir1.2-libosinfo-1.0 gir1.2-libvirt-glib-1.0 gir1.2-spiceclientglib-2.0 gir1.2-spiceclientgtk-3.0 gir1.2-vte-2.91 gnutls-bin ibverbs-providers iptables ipxe-qemu libaio1 libcacard0 libcapstone4 libdaxctl1 libdevmapper-event1.02.1 libexecs0 libfdt1 libfmt9 libgfapi0 libgfrpc0 libgfxdr0 libglusterfs0 libgnutls-dane0 libgtk-vnc-2.0-0 libgvnc-1.0-0 libibverbs1 libip6tc2 libiscsi7 libisoburn1 liblvm2cmd2.03 libndctl6 libnss-mymachines libphodav-3.0-0 libphodav-3.0-common libpmem1 librados2 librbd1 librdmacm1 libslirp0 libspice-client-glib-2.0-8 libspice-client-gtk-3.0-5 libspice-server1 libssh-4 libtpms0 libunbound8 liburing2 libusbredirhost1 libusbredirparser1 libvdeplug2 libvirglrenderer1 libvirt-clients libvirt-daemon libvirt-daemon-config-network libvirt-daemon-config-nwfilter libvirt-daemon-driver-lxc libvirt-daemon-driver-qemu libvirt-daemon-driver-vbox libvirt-daemon-driver-xen libvirt-daemon-system-systemd libvirt-glib-1.0-0 libvirt-glib-1.0-data libvirt-l10n libvirt0 libxencall1 libxendevicemodel1 libxenevtchn1 libxenforeignmemory1 libxengnttab1 libxenhypfs1 libxenmisc4.17 libxenstore4 libxentoolcore1 libxentoollog1 libxml2-utils lvm2 mdevctl netcat-openbsd ovmf python3-libvirt python3-libxml2 qemu-block-extra qemu-efi-aarch64 qemu-efi-arm qemu-system-arm qemu-system-common qemu-system-data qemu-system-gui qemu-system-mips qemu-system-misc qemu-system-ppc qemu-system-sparc qemu-system-x86 qemu-utils seabios spice-client-glib-usb-acl-helper swtpm swtpm-libs swtpm-tools systemd-container thin-provisioning-tools virt-viewer virtinst xorriso Suggested packages: firewalld libvirt-clients-qemu libvirt-login-shell libvirt-daemon-driver-storage-gluster libvirt-daemon-driver-storage-iscsi-direct libvirt-daemon-driver-storage-rbd libvirt-daemon-driver-storage-zfs numad auditd nfs-common open-iscsi pm-utils systemtap zfsutils samba vde2 trousers python3-guestfs ssh-askpass python3-argcomplete xorriso-tcltk jigit cdck The following NEW packages will be installed: dmeventd gir1.2-ayatanaappindicator3-0.1 gir1.2-gtk-vnc-2.0 gir1.2-libosinfo-1.0 gir1.2-libvirt-glib-1.0 gir1.2-spiceclientglib-2.0 gir1.2-spiceclientgtk-3.0 gir1.2-vte-2.91 gnutls-bin ibverbs-providers iptables ipxe-qemu libaio1 libcacard0 libcapstone4 libdaxctl1 libdevmapper-event1.02.1 libexecs0 libfdt1 libfmt9 libgfapi0 libgfrpc0 libgfxdr0 libglusterfs0 libgnutls-dane0 libgtk-vnc-2.0-0 libgvnc-1.0-0 libibverbs1 libip6tc2 libiscsi7 libisoburn1 liblvm2cmd2.03 libndctl6 libnss-mymachines libphodav-3.0-0 libphodav-3.0-common libpmem1 librados2 librbd1 librdmacm1 libslirp0 libspice-client-glib-2.0-8 libspice-client-gtk-3.0-5 libspice-server1 libssh-4 libtpms0 libunbound8 liburing2 libusbredirhost1 libusbredirparser1 libvdeplug2 libvirglrenderer1 libvirt-clients libvirt-daemon libvirt-daemon-config-network libvirt-daemon-config-nwfilter libvirt-daemon-driver-lxc libvirt-daemon-driver-qemu libvirt-daemon-driver-vbox libvirt-daemon-driver-xen libvirt-daemon-system libvirt-daemon-system-systemd libvirt-glib-1.0-0 libvirt-glib-1.0-data libvirt-l10n libvirt0 libxencall1 libxendevicemodel1 libxenevtchn1 libxenforeignmemory1 libxengnttab1 libxenhypfs1 libxenmisc4.17 libxenstore4 libxentoolcore1 libxentoollog1 libxml2-utils lvm2 mdevctl netcat-openbsd ovmf python3-libvirt python3-libxml2 qemu-block-extra qemu-efi-aarch64 qemu-efi-arm qemu-system qemu-system-arm qemu-system-common qemu-system-data qemu-system-gui qemu-system-mips qemu-system-misc qemu-system-ppc qemu-system-sparc qemu-system-x86 qemu-utils seabios spice-client-glib-usb-acl-helper swtpm swtpm-libs swtpm-tools systemd-container thin-provisioning-tools virt-manager virt-viewer virtinst xorriso 0 upgraded, 108 newly installed, 0 to remove and 11 not upgraded. Need to get 147 MB of archives. After this operation, 987 MB of additional disk space will be used. Do you want to continue? [Y/n] y - virt-manager : Virt-Manager is a graphical user interface (GUI) tool for managing virtual machines through libvirt-daemon.
- qemu-system is an open source virtualizer that provides hardware emulation for the KVM hypervisor. It acts as a virtual machine monitor together with the KVM kernel modules, and emulates the hardware for a full system such as a PC and its associated peripherals.
- libvirt-daemon-system provides API libraries that enables GUI apps such as virt-manager to communicate with libvirtd daemon, a system service libvirtd , and a virsh CLI tool.
If you are running an headless server with no GUI, then it suffices to just run the command below;
sudo apt install qemu-system libvirt-daemon-system virtinst qemu-utilsOnce the installation is done, check if KVM modules are loaded;
kvm_intel 380928 0 kvm 1142784 1 kvm_intel irqbypass 16384 1 kvmStart libvirt management daemon (libvirtd)
According to man pages, the libvirtd program is the server side daemon component of the libvirt virtualization management system. This daemon runs on host servers and performs required management tasks for virtualized guests. This includes activities such as starting, stopping and migrating guests between host servers, configuring and manipulating networking, and managing storage for use by guests. The libvirt client libraries and utilities connect to this daemon to issue tasks and collect information about the configuration and resources of the host system and guests.
Thus, start and enable this service to run on system boot;
sudo systemctl enable --now libvirtdsystemctl status libvirtd ● libvirtd.service - Virtualization daemon Loaded: loaded (/lib/systemd/system/libvirtd.service; enabled; preset: enabled) Active: active (running) since Sun 2023-06-18 01:00:04 EAT; 11s ago TriggeredBy: ● libvirtd-ro.socket ● libvirtd-admin.socket ● libvirtd.socket Docs: man:libvirtd(8) https://libvirt.org Main PID: 11619 (libvirtd) Tasks: 19 (limit: 32768) Memory: 27.1M CPU: 149ms CGroup: /system.slice/libvirtd.service └─11619 /usr/sbin/libvirtd --timeout 120 Jun 18 01:00:02 bookwork systemd[1]: Starting libvirtd.service - Virtualization daemon. Jun 18 01:00:04 bookwork systemd[1]: Started libvirtd.service - Virtualization daemon. By default, the libvirtd daemon listens for requests on a local Unix domain socket. Using the -l | —listen command line option, the libvirtd daemon can be instructed to additionally listen on a TCP/IP socket. The TCP/IP socket to use is defined in the libvirtd configuration file.
Launching KVM Virtual Machine Manager
If you are running a desktop system, then you can launch the Virtual Machine manager from your applications or command line;

To launch it from command line;

If you are launching Virt-manager as standard user, you may be prompted to enter your administrator password to run it, “system policy prevents management of local virtualized systems”.
To fix this, add the standard user to libvirt and kvm group (Replace USERNAME with your user account).
sudo usermod -aG libvirt,kvm USERNAMEAnd that concludes our simple guide on how to install KVM on Debian 12.
You can now start creating virtual machines and run them over KVM!
Other Tutorials
SUPPORT US VIA A VIRTUAL CUP OF COFFEE
We’re passionate about sharing our knowledge and experiences with you through our blog. If you appreciate our efforts, consider buying us a virtual coffee. Your support keeps us motivated and enables us to continually improve, ensuring that we can provide you with the best content possible. Thank you for being a coffee-fueled champion of our work!