- HowTo: Grant Root Access to User – Root Privileges – Linux
- Grant Root Privileges To New User
- Grant Root Privileges To Existent User
- Add User To Root Group
- Delete User With Root Privileges
- 46 Replies to “HowTo: Grant Root Access to User – Root Privileges – Linux”
- Linux superuser access, explained
- Lock root at installation
- Disable root
- Training & certification
- Delegate administration
- Sudo aliases
- Protect your admin privileges
- How To Enable SSH Root Access & SUDO Privileges on AWS EC2 Instance
- 1. Login to SSH as AWS-EC2 user with the private key you generated earlier
- 2. Execute the following command to gain root privileges
- 3. Create Root Password
- 4. Edit SSHD Config File
- 5. Restart SSHD Daemon
- 6. Copy SSH Key
- 7. Modify cloud.cfg File
- 8. Restart SSH Server
- Conclusion
HowTo: Grant Root Access to User – Root Privileges – Linux
From this article you’ll learn how to create a user in Linux and grant root access to him or how to grant root privileges to already existent user.
This can be easily done by changing UID (user id) and GID (group id) in /etc/passwd file.
Also you will learn how to just add user to root group and i will explain how to delete user with root privileges.
Actually it is not a good idea to give all the privileges of root to a non-root user and outside the test environment i would not recommend to have multiply superusers.
Warning: Giving a non-root user all the permissions of root is very dangerous, because the non-root user will be able to do literally anything that could cause a big trouble if account is hijacked.
Check SSH Server Settings: If you have disabled root access in SSH server settings, by setting PermitRootLogin no in /etc/ssh/sshd_config – you won’t be able to login if your user has UID 0 .
Warning: Before moving forward, read the comments below and DON’T FOLLOW THE STEPS FROM THIS ARTICLE if you don’t understand of what you are doing and what impact this may have!
Grant Root Privileges To New User
To create a user with exactly the same privileges as root user, we have to assign him the same user ID as the root user has ( UID 0 ) and the same group ID ( GID 0 ).
Use the following commands to create a user john , grand him the same privileges as root and set him a password:
$ sudo useradd -ou 0 -g 0 john $ sudo passwd john
Grant Root Privileges To Existent User
Cool Tip: Dot the i’s and cross the t’s on file and folder permissions in Linux! Make it more clear! Read more →
Perhaps you already have a user john and you want to grant him root privileges (make him a second root user):
$ grep john /etc/passwd john:x:1001:1001::/home/alice:/bin/sh
For this, it is required to edit the file /etc/passwd and just change UID and GID to 0 :
$ grep john /etc/passwd john:x:0:0::/home/john:/bin/sh
Add User To Root Group
If you just want to add john to root group, without granting him all root privileges, run the following command:
$ sudo usermod -a -G root john
Delete User With Root Privileges
Cool Tip: Log in to a remote Linux server without entering password! Set up password-less SSH login! Read more →
You won’t be able to delete a user with UID 0 using userdel command:
$ sudo userdel john userdel: user john is currently used by process 1
To delete him, firstly open the /etc/passwd file and change his UID .
For example, change the line:
After this, you’ll be able to delete user john with userdel command:
46 Replies to “HowTo: Grant Root Access to User – Root Privileges – Linux”
“For this, it is required to edit the file /etc/passwd and just change UID and GID to 0”
WRONG.
Baaaad idea. Much regret. Undo, undo.
ntfs@brix:~$ ssh 192.168.88.16 -l pi
pi@192.168.88.16‘s password:
Permission denied, please try again.
pi@192.168.88.16‘s password:
Permission denied, please try again.
– – –
Nice explanation?)
Since noone elaborate how to undo this broken way of adding users, I will. The only way is to successful login to the linux machine, if you login via ssh or tty.
If you add a user with uid 0 to group uid 0, and you set in sshd_config AllowRootLogin NO, you`re access will be denied. So you will have to login to the linux machine via tty (this is the only way if you don`t have a correctly added backup user on the linux machine). Via tty you can login with any of the users, even root.
The correct way to add a user with root privileges is adding the user the normal way, useradd -m user, and then add privileges with visudo to the user.
So if you have a backup user that haves root privileges in visudo. you will be able to login to the linux machine via ssh, and you will be able to change the uid and group to the “broken” user.
I think this article explains more likely how to add a user with root privileges “the hacker way (which is a broken way)”, and repair the broken way after.
Also if you don`t have access to a tty console, and you want to test the commands of this article and be sure you did not broke something, STAY LOGGED in current session and open another one and test if all things are OK. If you can`t login in the new session, you still have opened the previous session and you can repair what have you broken.
Hope it helps to repair further mistakes.
Linux superuser access, explained
Here’s how to configure Linux superuser access so that it’s available to those who need it—yet well out of the way of people who don’t need it.

On Linux, everything starts at «root.» The hard drive has a root partition ( / ), and the default initial user (at least traditionally) is root (often referred to as the «superuser»). Historically, you used the root account to log in, create secondary «normal» users, and then mostly forget about it.

These days, though, the root user is redundant to requirements. The Anaconda installer can create an initial user for you, and then you can perform «superuser» tasks with the sudo command. A computer’s admin must understand how to configure superuser access so that it’s well out of the way of people who don’t need it and available to those who require it.
Lock root at installation
An attacker with enough knowledge to attempt a break-in also knows that every Unix and Linux system once had a user called root . That’s one less guess an attacker must make when attempting unauthorized entry into a system. Locking down the root account is a significant foil to uninvited guests.
During installation, you have the option to lock the root account.
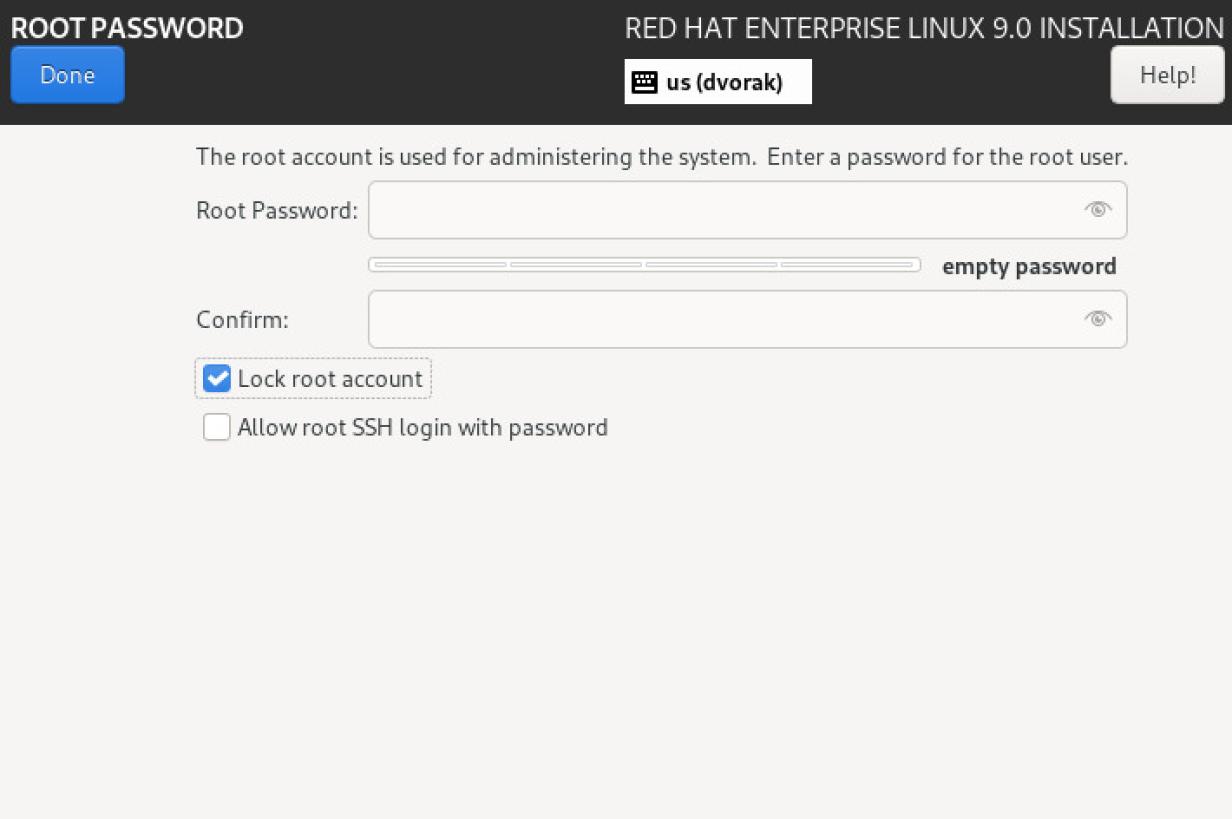
Locking the root account prevents you from logging in as the root user. If you do that, grant the user you create administrative privileges during user creation.

Making the user an admin adds that user to the special wheel group. By default, members of wheel can run any command with sudo with, essentially, root privilege. It seems nearly the same as using su to switch to the superuser account, but there are safeguards and advantages to sudo .
Disable root
If you didn’t lock the root account during installation, or if you’re unsure, then you can disable the root account later, as long as you have administrative privileges. If you don’t, then use the root account to add your user to the sudoers file and then use sudo to disable root.
To disable root, set the root shell to /sbin/nologin :
$ sudo sed -i 's_root:/bin/bash_root:/sbin/nologin_' /etc/passwdTest your change by attempting to switch to the superuser account with su :
$ sudo su - [sudo] password for tux: This account is currently not available.Training & certification
Delegate administration
The su command uses an all-or-nothing model. If you have the password for root, you get all the power. If you don’t have the password, you have no admin power. The problem with this approach is that a sysadmin must choose between handing over the master key to the system and withholding the key and all control of the system. That’s not always what you want. Sometimes you want to delegate.
Suppose you want to grant a user permission to run a specific application, such as the groupadd command, that usually requires administrative permissions. You don’t want to give this user permission to do any administrative task. You just want to allow them to create new groups.
To grant selective privileges to a single command or a group of commands, edit /etc/sudoers with the visudo command. The visudo command assumes you want to edit text with vi but also allows you to override that default by setting the variable EDITOR :
Find the section of the sudoers file defining command permissions, and add the user and command you want to allow. For instance, to permit the user shadowman to run the groupadd command:
## Next comes the main part: which users can run what software on ## which machines (the sudoers file can be shared between multiple ## systems). ## Syntax: ## ## user MACHINE=COMMANDS ## ## The COMMANDS section may have other options added to it. ## ## Allow root to run any commands anywhere # root ALL=(ALL) ALL shadowman ALL=/sbin/groupaddTest it out by switching to that user’s account and running the command:
$ su - shadowman Password: $ sudo groupadd qa [sudo] password for shadowman: $ sudo ls Sorry, user bogan is not allowed to execute '/bin/ls' as root on darkstar.sysadmin.local.Sudo aliases
You can create aliases in the sudoers file to group hosts, commands, and users together. You could have, for instance, an admin group that could use commands such as useradd , groupadd , and usermod , and a software group that could use commands like dnf and rpm .
The sudoers file provides example syntax, but here’s an example of allowing all users in the Unix group softadmins to run all commands in the sudoer alias SOFTWARE :
## Installation and management of software Cmnd_Alias SOFTWARE = /usr/bin/dnf, /usr/bin/rpm softadmins ALL=SOFTWARE Protect your admin privileges
Everything from mission-critical machines to computers with customer data, and even your own humble personal laptop, are too important to casually lend the keys out to anyone who needs an escalation of privilege. Disable the root account to avoid broad permission escalation, and use the sudo command and a well-tended sudoers file to manage who can manage your computers.
How To Enable SSH Root Access & SUDO Privileges on AWS EC2 Instance
One of the most popular cloud compute services besides Google Cloud Platform (GCP) is of course Amazon Web Service (AWS) with their best selling product service, “AWS EC2 Instance”.
Well, today we are going to teach you step by step on how to gain ROOT Access or SUDO Privileges from an AWS EC2 instance. This should be done on your side after deploying a fresh virtual machine from Amazon Web Service (AWS).
Without root access and sudo privileges you will find it difficult to manage your virtual machine. With root access we can do whatever we want in a Linux-based virtual machine, whether it’s installing, removing or modifying certain packages and software.
However, be sure to meet the following requirements in order to obtain SSH Root Access and SUDO Privileges from an AWS EC2 instance (Amazon Elastic Compute).
Pre-requisites:
- VPS, Cloud, Bare Metal or Physical Servers
- Running under Debian/Ubuntu or RHEL-based distros
- Superuser Privileges or Root Access
- Must Be Familiar with Linux Command Line (CLI-Based Only)
- gNome Terminal for Linux Desktop
- PuTTy SSH Client for Windows and MacOS
- PowerShell for Windows 10/11
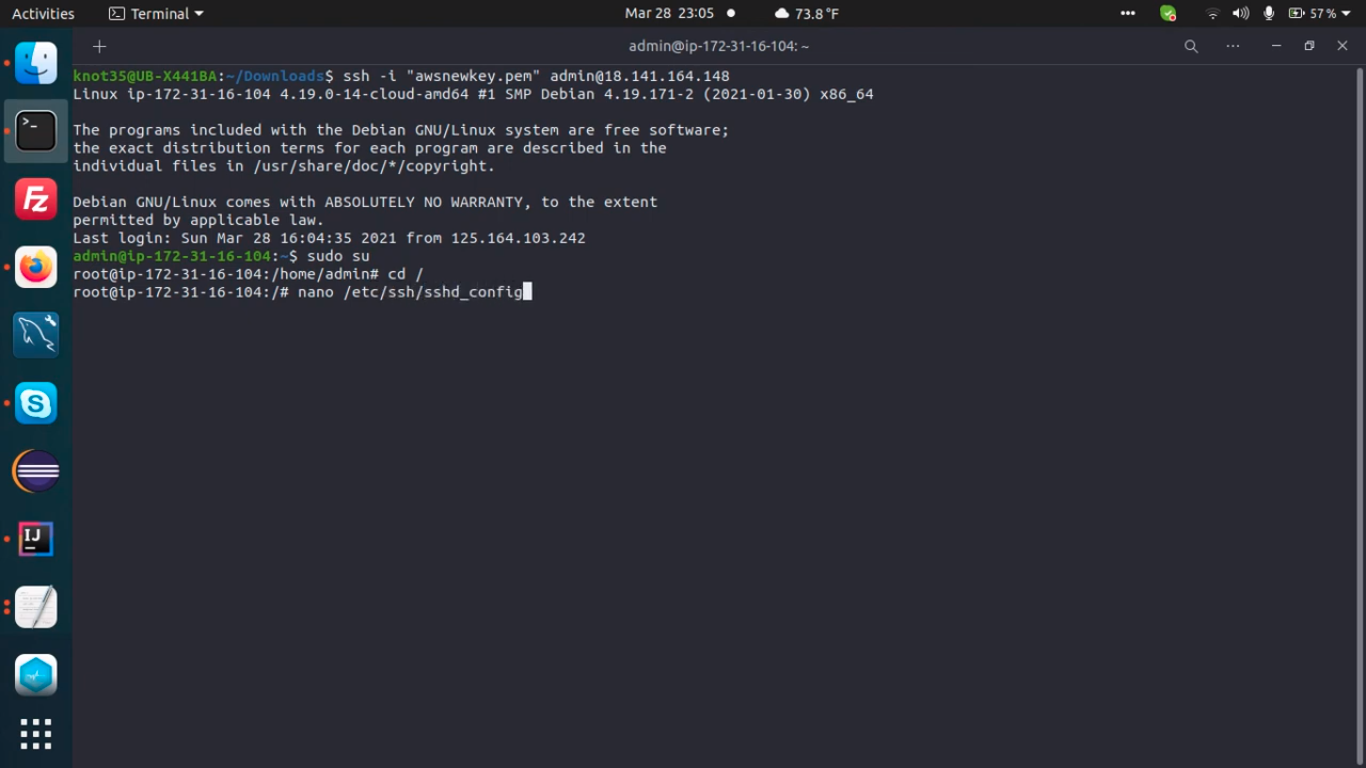
1. Login to SSH as AWS-EC2 user with the private key you generated earlier
Please note:
- 239.113.164.22 is an example of Server IPv4 Address.
- You can replace “ec2-user” with another common users like admin, debian, centos, ami, or ubuntu (It’s mandatory on Ubuntu 14.04 LTS +, including 16.04, 18.04, 20.04 and 22.04 LTS).
2. Execute the following command to gain root privileges
3. Create Root Password
Simply execute the following command to create a root password for your Linux machine under AWS EC2 instance.
4. Edit SSHD Config File
Let’s modify sshd_config file with the following variable, and then save it.
$ nano /etc/ssh/sshd_config PermitRootLogin yes StrictModes yes PasswordAuthentication yes
Or simply run the following command.
$ sudo sed -i 's/prohibit-password/yes/' /etc/ssh/sshd_config
5. Restart SSHD Daemon
Restart SSHD Daemon or SSH Service using the following commands.
For Debian/Ubuntu:
For RHEL-based distros, like CentOS and Amazon Linux AMI:
$ service sshd restart (centOS)6. Copy SSH Key
Next, simply copy SSH key from AWS-EC2 user directory to the root user directory
$ cp ~ec2-user/.ssh/authorized_keys ~root/.ssh/authorized_keys
For some distros:
cp ~ubuntu/.ssh/authorized_keys ~root/.ssh/authorized_keys cp ~centos/.ssh/authorized_keys ~root/.ssh/authorized_keys cp ~admin/.ssh/authorized_keys ~root/.ssh/authorized_keys cp ~ami/.ssh/authorized_keys ~root/.ssh/authorized_keys
7. Modify cloud.cfg File
After that you need to edit or modify a file of /etc/cloud/cloud.cfg and change the following entry to this value:
For Debian/Ubuntu:
For RHEL-based distros, including Fedora, CentOS, Amazon Linux AMI, Rocky Linux and AlmaLinux:
$ disable_root: 0 $ ssh_pwauth: 0
8. Restart SSH Server
Then you can restart your SSH service using the following commands.
$ service ssh restart (Debiah/Ubuntu) $ service sshd restart (RHEL/CentOS)
Conclusion
Now you know that gaining root access or sudo privileges from an Amazon EC2 instance is very easy to do. Just follow some of the steps above, then you’ve got full access of the machine you just deployed in AWS.
Please note that if there are errors in writing this documentation, we may modify this article at a later time.