- How to configure the Ubuntu DHCP client
- DHCP client configuration on Ubuntu
- Configure DHCP through netplan
- Configure DHCP client through Ubuntu desktop environment
- Conclusion
- About the author
- Samreena Aslam
- How to Configure DHCP Client on Ubuntu 22.04
- How to Configure DHCP Client on Ubuntu 22.04
- Настройка DHCP клиента
- 1. Настройка DHCP клиента в RedHat/CentOS/Fedora.
- 2. Настройка DHCP клиента в Debian/Ubuntu/Linux Mint.
- Добавить комментарий Отменить ответ
- Рубрики
- соц сети
- Архив новостей
- Свежие записи
- Свежие комментарии
How to configure the Ubuntu DHCP client
![]()
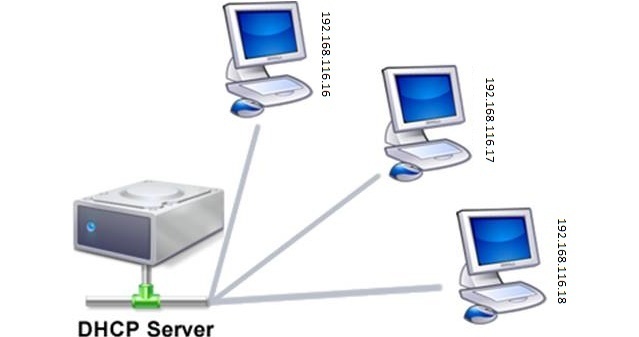
Dynamic Host Configuration Protocol, abbreviated as DHCP, is a client-server protocol that enables a DHCP server to assign an IP address and other related configuration parameters such as default gateway and subnet mask to a DHCP client on a network.
The DHCP protocol is necessary because it prevents network or system administrators from manually configuring IP addresses for new machines added to the network or computer system that are moved from one subnet to another.
Through the ’lease’, the DHCP server allocates the IP addresses to the DHCP clients. The lease time depends on how long the client system requires the connection or DHCP configuration.
We will talk about the configuration of a DHCP client on Ubuntu Linux distribution in this article. We have assumed in this article that the DHCP server is already set up on your other machine, or you can also install it from this URL.
DHCP client configuration on Ubuntu
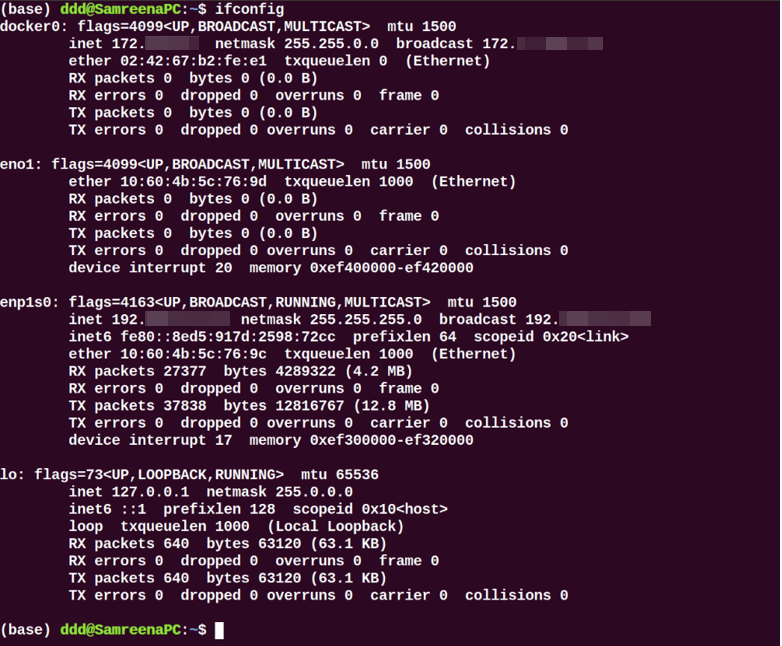
To set up the DHCP client on your Ubuntu system, first, check the network interface name by running the following command:
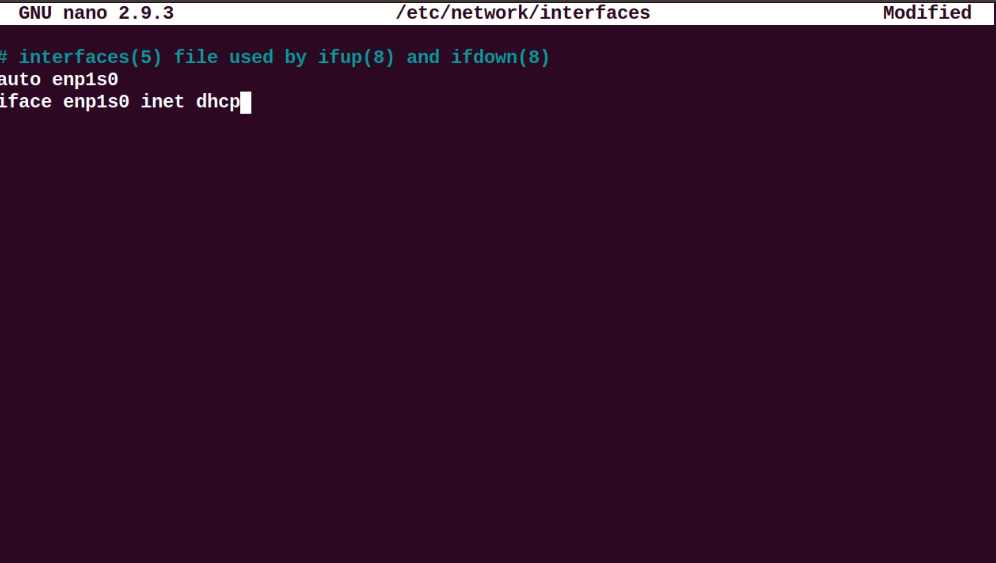
Once the network interface name is identified, you need to make some changes to the network interfaces file for DHCP client configuration. So, open the ‘/etc/network/interfaces’ file in your favorite text editor by using the following command:
Now, use the following syntax to configure the dhcp client:
Here, the network interface name is ‘enp1s0’; we have changed the above lines into the following format:
Save and close the above configuration file. Now, restart the network manager services by running the following command:

Verify the NetworkManager service running status by executing the following command:
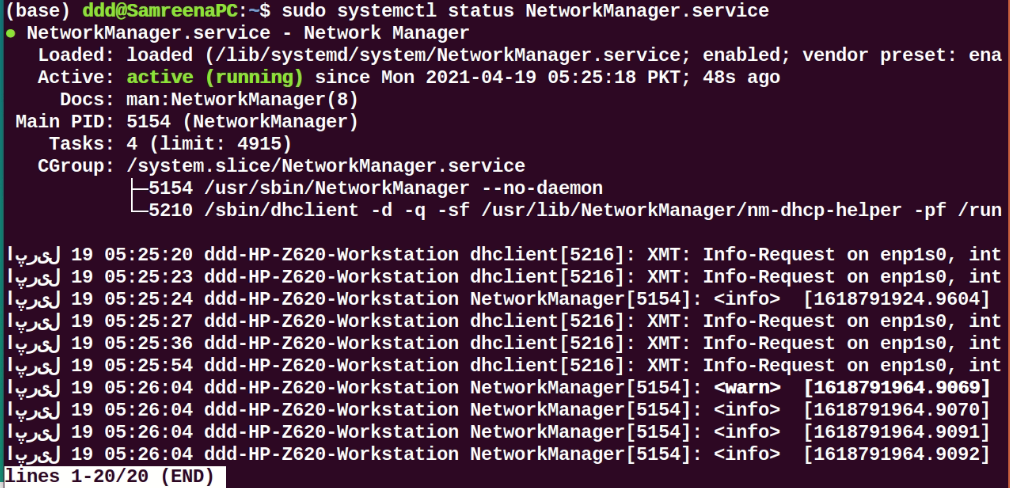
When during the booting process, this system should request network parameters from the DHCP server.
To manually execute the DHCP process, the dhclient command can be used. If the DHCP server assigns no IP to the DHCP client, then use the following command renew or release the IP address. Wait for a while; the DHCP server will automatically assign IP addresses to the client machine.
Using the ‘ifconfig’ command can view the interface name.
Configure DHCP through netplan
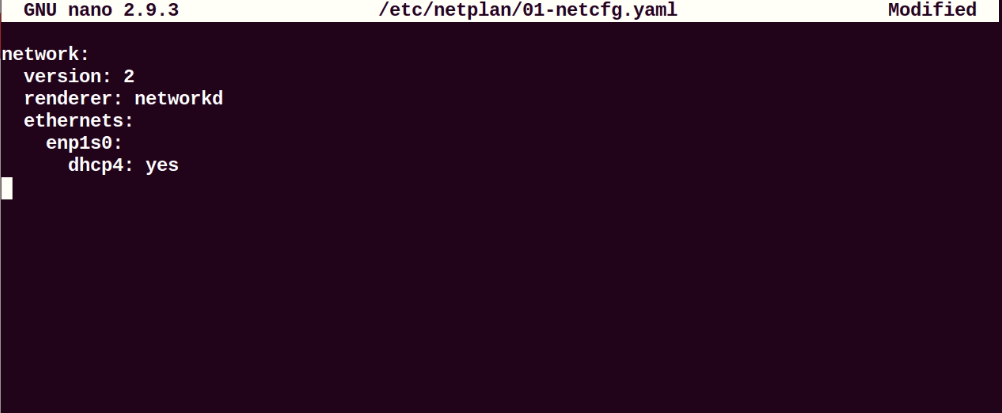
In most Ubuntu distribution, networking is controlled or managed through the netplan program. Therefore, in this situation, you need to edit the netplan configuration files. To edit the appropriate file configuration, navigate into the ‘/etc/netplan’ directory and open that file.

Add the following lines in this file:
Save the above configuration by using ‘Ctrl+O’ in this file and exit from this window by pressing ‘Ctrl+x’.
Now, run the below-mentioned command to apply changes:
Configure DHCP client through Ubuntu desktop environment
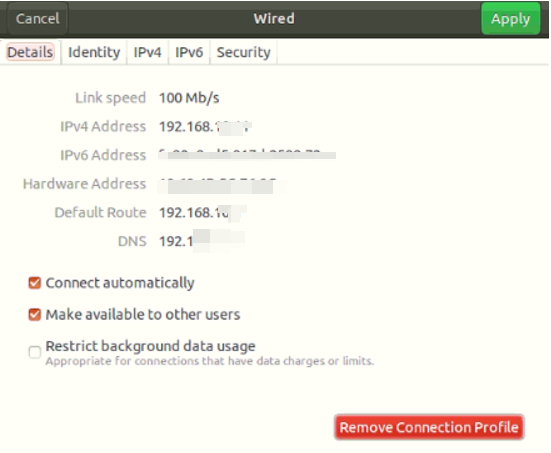
You can also use another virtual machine with Ubuntu 20.04 Desktop as a DHCP client. In Ubuntu, the default configuration method is set as DHCP. If it does not take an IP director from the DHCP server, change the IPV4 setting of your network. Click go into the ‘Setting’ and move into the network wired or wireless settings. The following window should display on your system:

Set your entire IPV4 configuration similar to the above-displayed screenshot.
Now, show the network details by clicking on the ‘Detail’ tab as follows:
Verify the configuration by running the following command:
You will see that the IP is allocated to the network interface.
You can also use the host machine on your system as a DHCP client. However, to get IP, do not reboot your host machine because, in this case, Virtualbox will be powered down, so there is no DHCP running on the system.
It is important to note that if you are using mobile devices or host machines as a DHCP client, most of the chances are that they have already been connected to this network. However, they will request the same IP to the DHCP server that was allocated before. However, if the IP does not fall in your defined range then, a request will be sent to the router.
Conclusion
We have seen in this article how to configure a DHCP client using different ways on Ubuntu distribution. All commands we have implemented on the Ubuntu 20.04 environment. DHCP client configuration is very simple. So that, in just a few minutes, you can easily set up a DHCP client on your system using the above-mentioned steps.
About the author
Samreena Aslam
Samreena Aslam holds a master’s degree in Software Engineering. Currently, she’s working as a Freelancer & Technical writer. She’s a Linux enthusiast and has written various articles on Computer programming, different Linux flavors including Ubuntu, Debian, CentOS, and Mint.
How to Configure DHCP Client on Ubuntu 22.04

In this tutorial, you will learn how to how to configure DHCP client on Ubuntu 22.04. Assuming you want to assign the IP addresses to your Ubuntu 22.04, you would simply configure DHCP client to automatically help obtain and assign the IP addresses from the DHCP server.
How to Configure DHCP Client on Ubuntu 22.04
DHCP operates in client-server architecture. Thus, for you to be able to configure DHCP client and obtain the IP address automatically, you need to be having a running DHCP server.
So, how can you configure DHCP client on Ubuntu 22.04?
You realize that by default, Linux systems ship with The Internet Systems Consortium DHCP Client , dhclient , by default.
So how does dhclient operates? The operation of dhclient has been extensively explained on the dhclient manual page;
The DHCP protocol allows a host to contact a central server which maintains a list of IP addresses which may be assigned on one or more subnets. A DHCP client may request an address from this pool, and then use it on a temporary basis for communication on network. The DHCP protocol also provides a mechanism whereby a client can learn important details about the network to which it is attached, such as the location of a default router, the location of a name server, and so on.
There are two versions of the DHCP protocol DHCPv4 and DHCPv6. At startup the client may be started for one or the other via the -4 or -6 options.
On startup, dhclient reads the dhclient.conf for configuration instructions. It then gets a list of all the network interfaces that are configured in the current system. For each interface, it attempts to configure the interface using the DHCP protocol.
In order to keep track of leases across system reboots and server restarts, dhclient keeps a list of leases it has been assigned in the dhclient.leases file.
On startup, after reading the dhclient.conf file, dhclient reads the dhclient.leases file to refresh its memory about what leases it has been assigned.When a new lease is acquired, it is appended to the end of the dhclient.leases file. In order to prevent the file from becoming arbitrarily large, from time to time dhclient creates a new dhclient.leases file from its in-core lease database. The old version of the dhclient.leases file is retained under the name dhclient.leases~ until the next time dhclient rewrites the database.
Old leases are kept around in case the DHCP server is unavailable when dhclient is first invoked (generally during the initial system boot process). In that event, old leases from the dhclient.leases file which have not yet expired are tested, and if they are determined to be valid, they are used until either they expire or the DHCP server becomes available.
A mobile host which may sometimes need to access a network on which no DHCP server exists may be preloaded with a lease for a fixed address on that network. When all attempts to contact a DHCP server have failed, dhclient will try to validate the static lease, and if it succeeds, will use that lease until it is restarted.
A mobile host may also travel to some networks on which DHCP is not available but BOOTP is. In that case, it may be advantageous to arrange with the network administrator for an entry on the BOOTP database, so that the host can boot quickly on that network rather than cycling through the list of old leases.
Настройка DHCP клиента
В статье расскажу как можно произвести настройку DHCP клиента в RedHat/CentOS/Fedora и Debian/Ubuntu/Linux Mint.
1. Настройка DHCP клиента в RedHat/CentOS/Fedora.
Откроем конфиг и пропишем в него кое что для этого:
# vim /etc/sysconfig/network-scripts/ifcfg-eth0
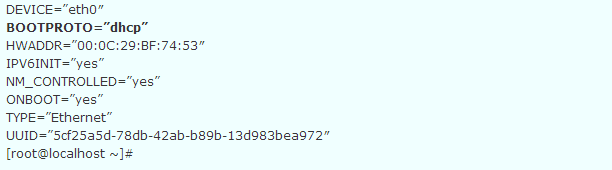
настройка DHCP клиента на RedHat, CentOS, Fedora
Так же можно вызвать графический интерфейс и ввести в него всю необходимую информацию, чтобы вызвать его выполните команду:
2. Настройка DHCP клиента в Debian/Ubuntu/Linux Mint.
Поправим (добавим) конфигурационный файл и внесем в него кое что
[. ] auto eth0 iface eth0 inet dhcp [. ]
После чего нужно ребутнуть чтобы обновились интерфейсы:
# /etc/init.d/networking restart
На этом настройка DHCP клиента завершена. Можете использовать!
Добавить комментарий Отменить ответ
Этот сайт использует Akismet для борьбы со спамом. Узнайте, как обрабатываются ваши данные комментариев.
Рубрики
- Arch Linux (167)
- Commands (36)
- Debian’s (635)
- Administration tools Ubuntu (37)
- Backups Debian’s (7)
- Database в Ubuntu (58)
- Games (игры) (1)
- Monitoring в Debian и Ubuntu (49)
- Virtualization в Ubuntu / Debian/ Linux Mint (41)
- Docker (22)
- Kubernetes (6)
- KVM (4)
- OpenVZ (3)
- Vagrant (5)
- VirtualBox (6)
- ArgoCD (1)
- Concourse (1)
- Gitlab (1)
- Jenkinks (4)
- Spinnaker (1)
- Apache (32)
- Cherokee (1)
- FTP-services (5)
- Lighttpd (1)
- Nginx (26)
- PHP (27)
- Proxy для Debian’s (2)
- Tomcat (4)
- Панели управления в Ubuntu/Debian/Mint (24)
- Установка и настройка почты на Ubuntu/Debian (12)
- Хранилища (clouds) (2)
- Administration tools freeBSD (19)
- Database во FreeBSD (52)
- Monitoring во freeBSD (37)
- Virtualization во FreeBSD (22)
- VoIP (1)
- Установка Web сервисов (91)
- Установка и настройка почты (6)
- Установка из ports (пакетов) (19)
- Установка из sorce code (исходников) (23)
- Непрерывная интеграция (CI) (27)
- Database в MacOS (36)
- Monitoring в Mac OS (31)
- Security (безопасность) (12)
- Virtualization в Mac OS (30)
- Docker (19)
- Kubernetes (6)
- Vagrant (5)
- VirtualBox (5)
- ArgoCD (1)
- CircleCI (1)
- Concourse (1)
- Gitlab (1)
- Jenkinks (4)
- Spinnaker (1)
- Administration tools CentOS (49)
- Backups RPM’s (4)
- Database в CentOS (68)
- Monitoring в CentOS (67)
- Virtualization в CentOS/ Red Hat/ Fedora (42)
- Docker (23)
- Kubernetes (6)
- KVM (5)
- OpenVZ (2)
- Vagrant (5)
- VirtualBox (6)
- VMWare (3)
- ArgoCD (1)
- Concourse (1)
- Gitlab (1)
- Jenkinks (4)
- Spinnaker (1)
- Apache (35)
- Cherokee (1)
- DNS (3)
- FTP (10)
- Nginx (33)
- PHP (34)
- Proxy для RedHat’s (2)
- Tomcat (2)
- Voice (2)
- Панели управления в CentOS/Red Hat/Fedora (27)
- Прокси сервер на CentOS/RHEL/Fedora (4)
- Установка и настройка почты на CentOS/RHEL/Fedora (14)
- Хранилища (clouds) (1)
соц сети

Архив новостей
Свежие записи
Свежие комментарии
- Глеб к записи Установка Adobe Flash Player в Debian/Ubuntu/Mint
- Максим к записи Заблокировать User Agents используя Nginx
- Денис к записи Как включить EPEL репозиторий на CentOS
- Гость к записи Закомментировать/Раскомментировать строки vi/vim в Unix/Linux
- Sergey к записи Установка и настройка OpenVPN сервера на Debian/Ubuntu/Linux Mint