- Downloads
- Download Links
- Управление дисками
- KDE Partition Manager
- Duc
- Gnome Disk Utility
- GdMap
- Disk Usage Analyzer (Baobab)
- GParted
- Top graphical disk and partition managers in Ubuntu
- What is Gparted
- How to install GParted on Ubuntu
- What is GNOME Disk
- How to install GNOME Disk on Ubuntu
- What is KDE partition manager
- How to install KDE partition manager on Ubuntu
- Conclusion
- About the author
- Sharqa Hameed
- 5 Free Partition Managers for Linux
- 5 Tools To Manage Disk Partitions in Linux
- GParted
- GNOME Disks
- KDE Partition Manager
- Fdisk [Command Line]
- GNU Parted [Command Line]
Downloads
GParted is a free partition manager that enables you to resize, copy, and move partitions without data loss.
The best way to access all of the features of the GParted application is by using the GParted Live bootable image. GParted Live enables you to use GParted on GNU/Linux as well as other operating systems, such as Windows or Mac OS X.
CAUTION: Editing partitions has the potential to cause LOSS of DATA.
You are advised to BACKUP your DATA before using gparted.
Download Links
If you use GParted and it helps you with your task, then please consider making a donation to help us make GParted better.
NOTE: GParted Live is available in three different architectures
| Architecture | Description |
| amd64 | 64-bit version runs on x86-64 based computers, with ability to access more than 4 gigabytes of memory, and supports use of multiple processor cores. Works with UEFI secure boot. |
| i686 | 32-bit version runs on x86 and x86-64 based computers, limited to physical address space of 4 gigabytes, and uses one processor only. |
| i686-PAE | 32-bit version runs on x86 (i686 and higher) and x86-64 based computers, with Physical Address Extension to access more than 4 gigabytes of memory, and supports use of multiple processor cores. |
TIP: Problems booting GParted Live image? See Tips on Booting GParted Live.
sudo apt-get install gparted
sudo zypper install gparted
sudo apt-get install gparted
* NOTE: Distribution packages might not contain the most recent versions of GParted.
Управление дисками
Программы для управления дисками в Linux. Создание, изменение разделов дисков в Linux. Программы для форматирования, разметки дисков.
KDE Partition Manager
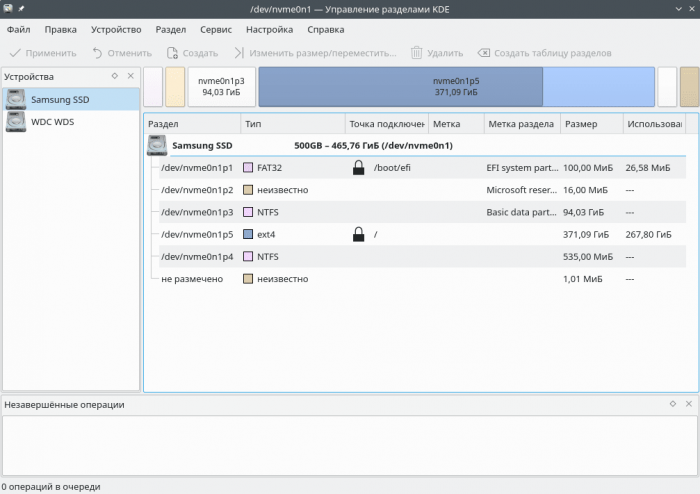
KDE Partition Manager — программа для работы с дисковыми разделами (создание, форматирование разделов и так далее).
Duc
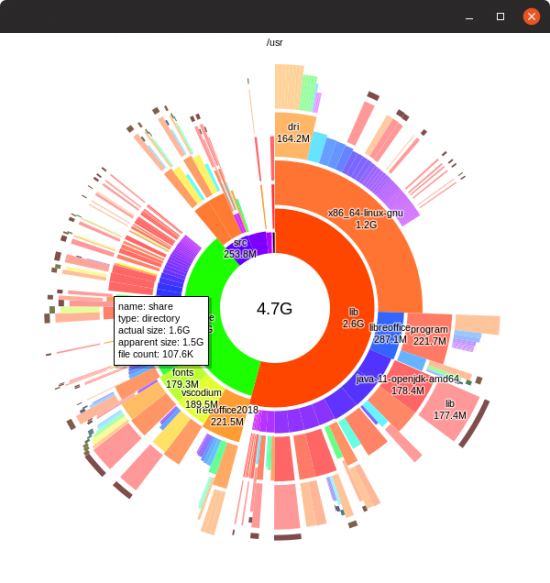
Duc — утилита для вывода информации об использовании дисков в Linux. Выводит информацию о размерах директорий и файлов.
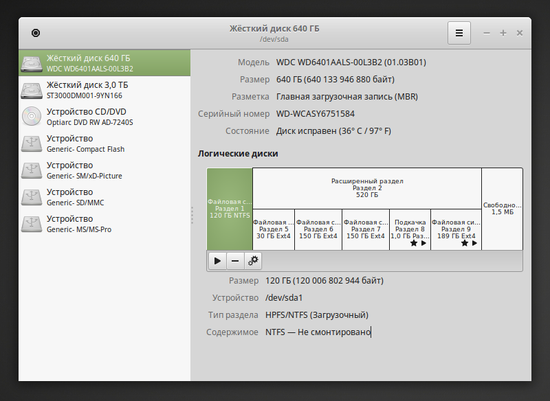
Gnome Disk Utility
GdMap
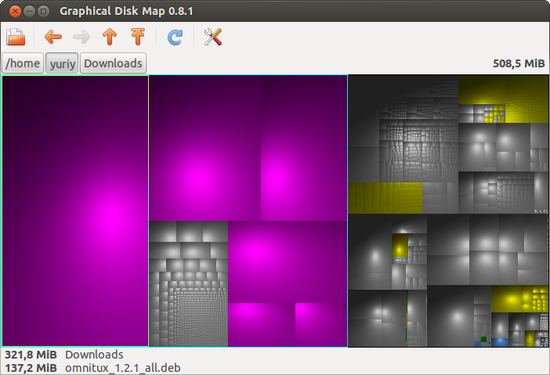
GdMap — Graphical Disk Map (Графическая карта диска) — программа для наглядного отображения занятого на диске пространства. Позволяет быстро определить директории и файлы, которые занимают больше всего места.
Disk Usage Analyzer (Baobab)
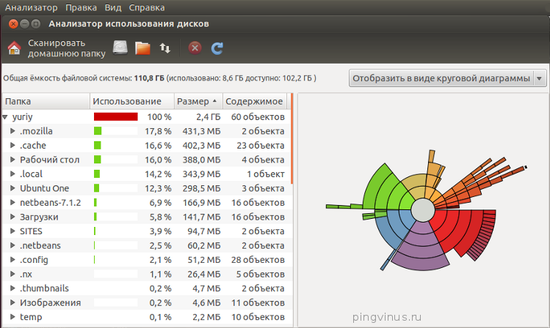
Disk Usage Analyzer (Baobab) — программа под Linux для анализа использования дисков. Выводит наглядную графическую диаграмму использования диска (директории), отображает объем директорий и количество файлов в них.
GParted
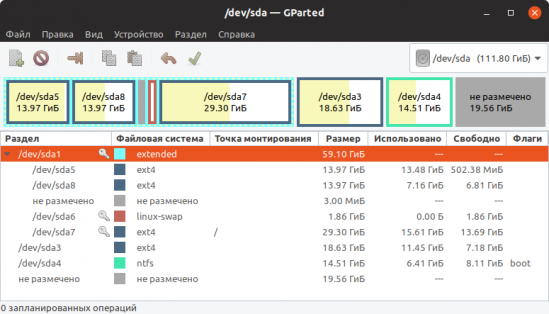
GParted — программа для управления дисками в Linux. Позволяет выполнять все необходимые операции над разделами дисков.
Top graphical disk and partition managers in Ubuntu
![]()
We have different tools to manage our hard drives and partitions in Linux-based systems like Ubuntu, each with something that distinguishes it from the others. The disk and partition managers having a user interface (GUI) are easy to use, while other tools are more complicated because they are handled from the terminal.
Do you want to manage your Ubuntu partitions using GUI-based tools? In this post, we will look at some best tools for partitioning and managing drives on Ubuntu. So let’s start!
What is Gparted
The first option is to use Gparted as a partition manager to organize your hard drive in a better way. GParted is an acronym for “GNOME Partition Editor”. It is a cross-platform tool and can be used on both x86 and x86-64 architectures, independent of the operating system you are using. This partition manager application is available for Linux, macOS, and Windows users. You can even utilize a live USB/CD to execute it without installing it on your system. ext2, ext3, and ext4, btrfs, NTFS, FAT32, and other file systems supported by GParted. You can use this program to create a clone and migrate that partition without losing data.
This tool is one of GNOME’s official partition-editing utilities and can be found in the software repositories of most Linux distributions, including Ubuntu. You can utilize this disk manager to copy, resize, check, delete, label, or move your drive partitions. It also provides the facility to shrink or expand the root partitions and free up the space for the new operating system. GParted also assists you in recovering data from the lost partitions. Its source code is also accessible on the GNOME Git repository.
How to install GParted on Ubuntu
If you want to install GParted on your Ubuntu system, then open up your terminal by pressing “CTRL+ALT+T” and write out the below-given command in it:
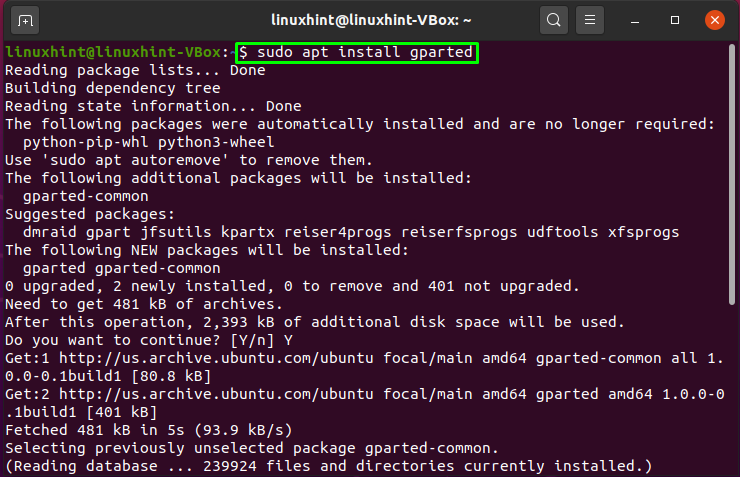
The error-free output declares that GParted is successfully installed on your system. Now to use GParted, open it by searching manually in the Applications search bar:

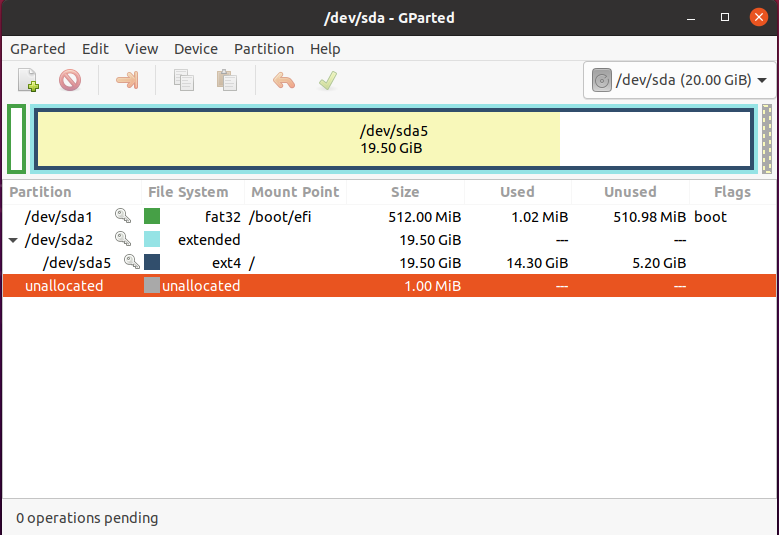
Now, use GParted for efficient management of your system partitions:
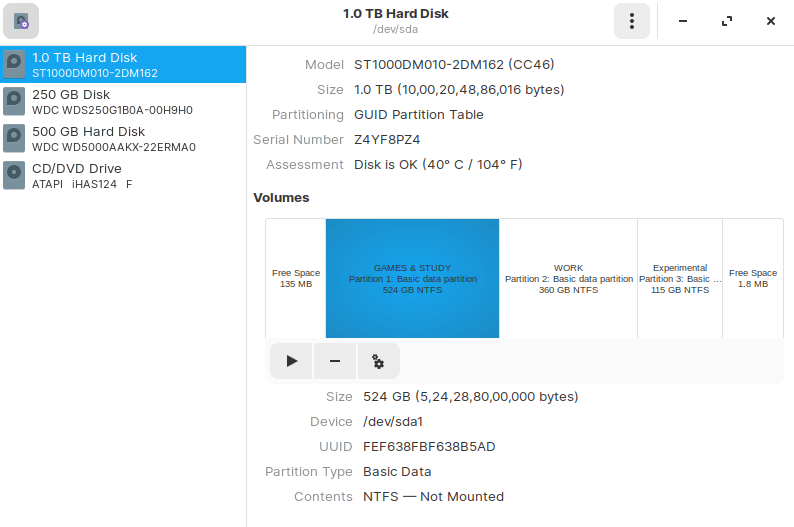
What is GNOME Disk
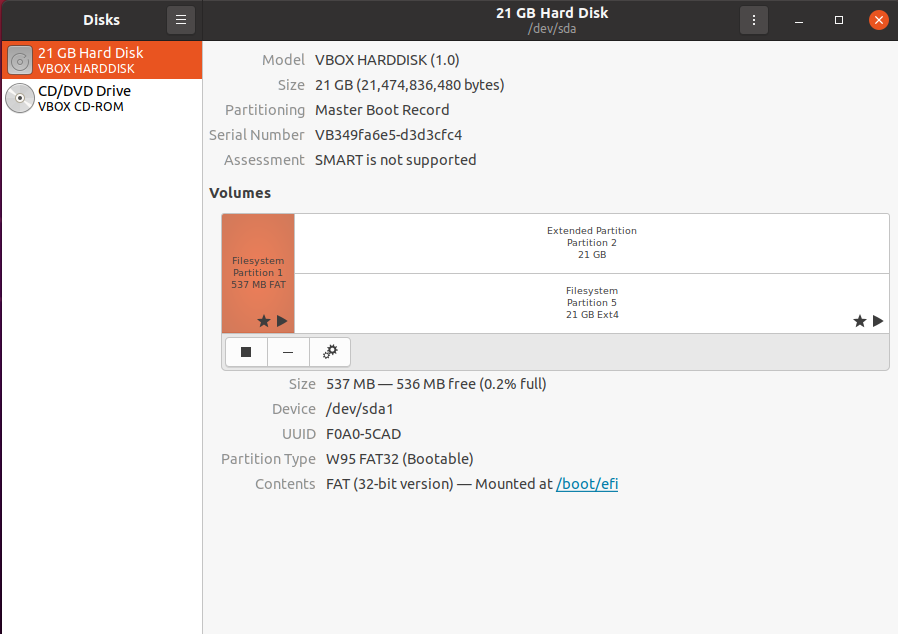
Apart from GParted, Disk or GNOME Disk is another official GNOME partition manager program. GNOME Disk comes pre-installed in most Linux distributions, including Ubuntu, Debian, Linux Mint, and Fedora. Benchmarking, partition management, smart monitoring are all possible with this utility. It is utilized to create and format partitions on hard drives and mount and unmount them. The most recent version includes a new capability to resize, add, check, and repair file systems. One of the most intriguing aspects of GNOME Disk is that even if you close the Disk utility, it still runs in the system background. This tool’s source code is also accessible on the GNOME Git repository.
If your system does not have the “Disk” utility, you can follow the article’s next section to install it!
How to install GNOME Disk on Ubuntu
Open up your Ubuntu terminal by pressing “CTRL+ALT+T“. After doing so, type the below-given command in your terminal and execute it:

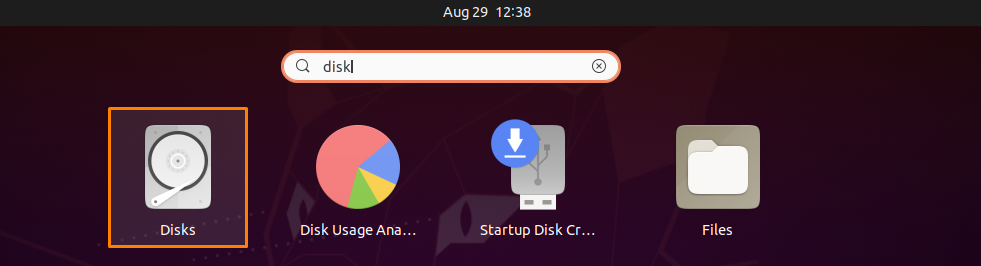
The error-free output signifies that now you have “Disk” installed on your system. For using “Disk”, search it out manually in the Application’s search bar:
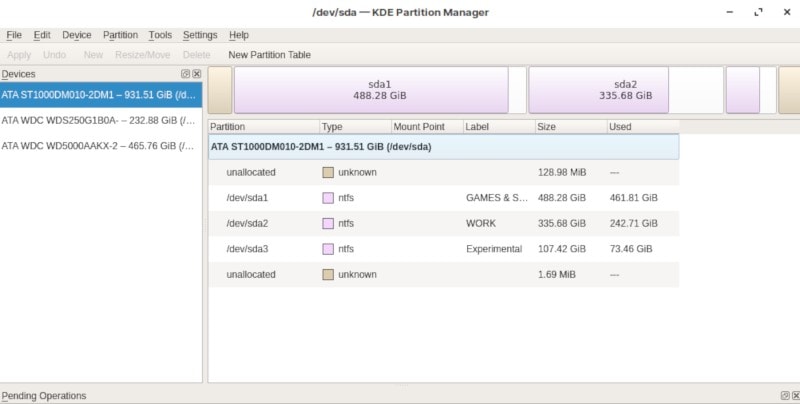
What is KDE partition manager
For K Desktop Environment or KDE KDE Partition Manager is an official partition manager. The characteristics and capabilities of this utility are similar to those of GParted. It also permits you to create, move, copy, remove, and resize your hard drive without the fear of losing any data. “Volker Lanz” originally built this tool, which is presently managed by “Andrius Tikonas”. NTFS, FAT16/32, ext2, ext3, and ext4, XFS, JFS, and other file systems are all supported by KDE Partition Manager.
This tool is the ideal solution for anyone looking for a basic Linux partition manager. As the KDE partition manager has a GUI, you will view the disk partition information in detail. Furthermore, the KDE partition manager is compatible with several extensions. KDE Partition Manager is exclusively available for Linux-based systems. This tool source code is also accessible on GitHub.
How to install KDE partition manager on Ubuntu
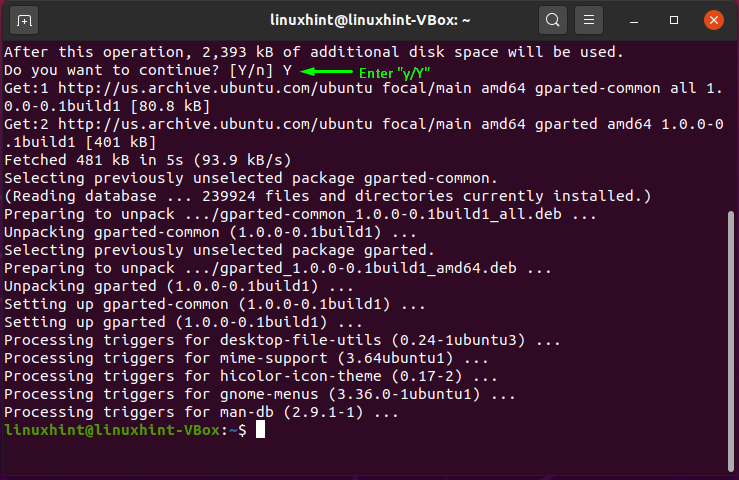
Execute the below-given command in your Ubuntu terminal to install KDE partition manager:
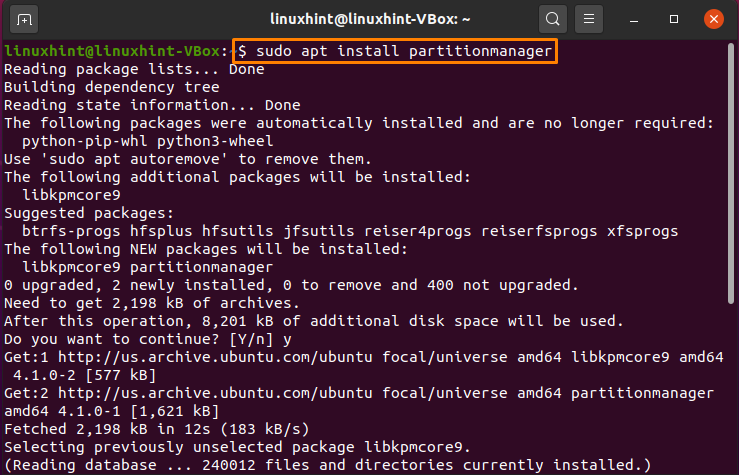
Enter “y/Y” to permit the installation process to continue:
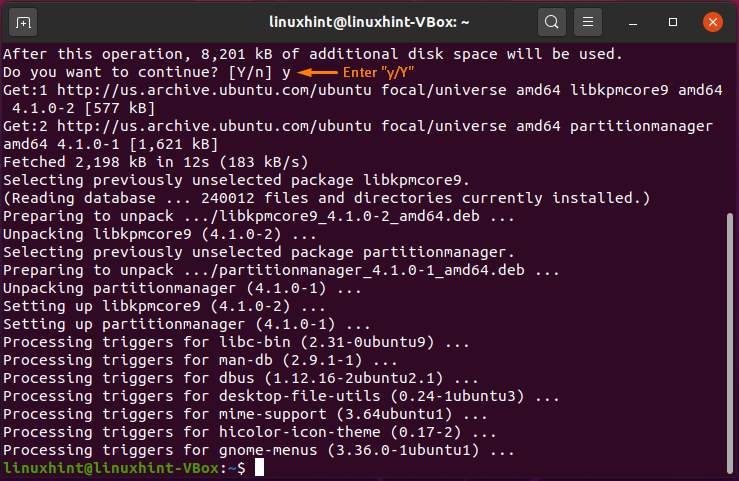
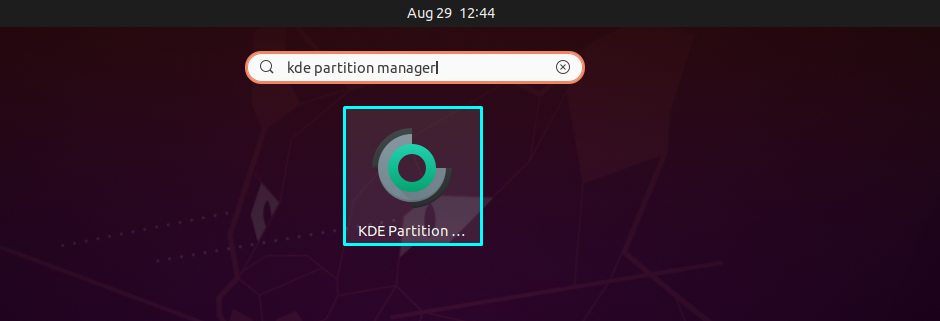
The error-free output declares that the KDE partition manager is successfully installed on your system. To use this tool, open it up by using “KDE partition manager” in the Application’s search bar:

Conclusion
If you are a Ubuntu user, you will need to utilize a Disk and Partition Manager to keep your system running smoothly. However, if you are a newbie, you may sometimes find operating the Linux partition too difficultl. There are a variety of open source partition software options. In this post, we have talked about some of the useful graphical disk and partition managers in Ubuntu. Moreover, the installation procedure for each of the discussed tools is also provided.
About the author
Sharqa Hameed
I am a Linux enthusiast, I love to read Every Linux blog on the internet. I hold masters degree in computer science and am passionate about learning and teaching.
5 Free Partition Managers for Linux
Usually, you decide the disk partitions while installing the OS. But, what if you need to modify the partitions sometime after the installation. You just can’t go back to the setup screen in any way. So, that is where partition managers (or accurately disk partition managers) come in handy.
In most of the cases, you do not need to separately install the partition manager because it comes pre-installed. Also, it is worth noting that you can either opt for a command-line based partition manager or something with a GUI.
Playing with disk partitioning is a risky task. Don’t do it unless it’s absolutely necessary.
If you are using a command line based partitioning tool, you need to learn the commands to get the job done. Or else, you might just end up wiping the entire disk.
5 Tools To Manage Disk Partitions in Linux
The list below is in no particular order of ranking. Most of these partitioning tools should be available in your Linux distribution’s repository.
GParted
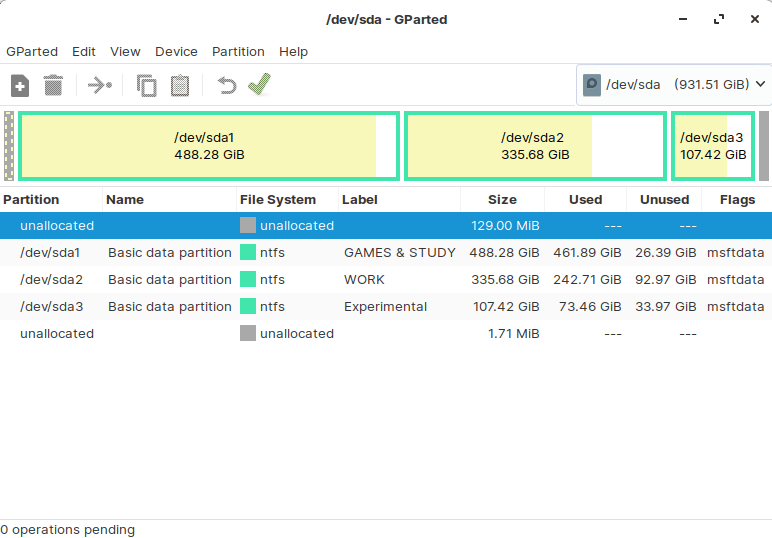
GParted could perhaps be the most popular GUI-based partition manager available for Linux distributions. You might have it pre-installed in some distributions. If you don’t, simply search for it in the software center to get it installed.
It directly prompts you to authenticate as the root user when you launch it. So, you don’t have to utilize the terminal here – at all. After authentication, it analyzes the devices and then lets you tweak the disk partitions. You will also find an option to “Attempt Data Rescue” in case of data loss or accidental deletion of files.
GNOME Disks
A GUI-based partition manager that comes baked in with Ubuntu or any Ubuntu-based distros like Zorin OS.
It lets you delete, add, resize and tweak the partition. It even helps you in formatting the USB in Ubuntu if there is any problem.
You can even attempt to repair a partition with the help of this tool. The options also include editing filesystem, creating a partition image, restoring the image, and benchmarking the partition.
KDE Partition Manager
KDE Partition Manager should probably come pre-installed on KDE-based Linux distros. But, if it isn’t there – you can search for it on the software center to easily get it installed.
If you didn’t have it pre-installed, you might get the notice that you do not have administrative privileges when you try launching it. Without admin privileges, you cannot do anything. So, in that case, type in the following command to get started:
It will scan your devices and then you will be able to create, move, copy, delete, and resize partitions. You can also import/export partition tables along with a lot of other options available to tweak.
Fdisk [Command Line]

Fdisk is a command line utility that comes baked in with every unix-like OS. Fret not, even though it requires you to launch a terminal and enter commands – it isn’t very difficult. However, if you are too confused while using a text-based utility, you should stick to the GUI applications mentioned above. They all do the same thing.
To launch fdisk, you will have to be the root user and specify the device to manage partitions. Here’s an example for the command to start with:
You can refer to The Linux Documentation Project’s wiki page for the list of commands and more details on how it works.
GNU Parted [Command Line]
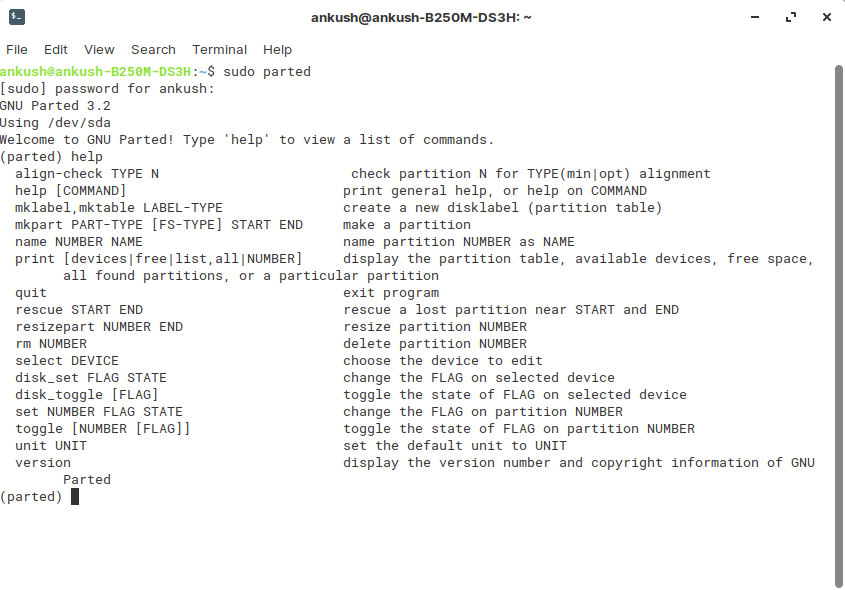
Yet another command-line utility that you can find pre-installed on your Linux distro. You just need to enter the following command to get started:
Wrapping Up
I wouldn’t forget to mention QtParted as one of the alternatives to the list of partition managers. However, it has not been maintained for years now – so I do not recommend using it.
What do you think about the partition managers mentioned here? Did I miss any of your favorites? Let me know and I’ll update this list of partition manager for Linux with your suggestion.