- How Do I Display the Contents of a Linux File?
- 5 Commands to View the Content of a File in Linux Command Line
- 5 commands to view files in Linux
- 2. nl
- 3. Less
- 4. Head
- 5. Tail
- Bonus: Strings command
- Conclusion
- 8 Stat Command Examples in Linux
- Linux stat command
- 1) Stat command with no arguments
- 2) View information about multiple files
- 3) Display file system status
- 4) Display information in terse form
- 5) Enable following of symbolic links
- 6) Format sequencing
- 7) Getting help with stat command
- 8) Checking the version of stat
How Do I Display the Contents of a Linux File?
You know how to get a list of files. But what if you want to take a peek at a file’s contents? Several commands, including cat, more, and less, can be used to display files. Let’s see how they work in this example: $ cat pig_info
Pigs make great pets, but they are not dogs or cats. Maybe
somewhere in between. I tend to believe that they have more
personality. They do require significant amounts of attention,
love, and scratches. But they aren’t always snuggly in return.
The cat command (short for concatenate) shown in this example is like the DOS type command. In response to the command cat pig_info, the system simply splatters the file on the screen. If there is more data in the file than will fit on one screen, the contents whiz by before you can see it. The more command solves this problem by displaying the file screen by screen:
$ more dog_info
Affectionately known as the «Toller,» the Nova Scotian Duck
Tolling Retriever was once called the Little River Duck Dog,
since it was developed in the Little River district of Yarmouth
County, Nova Scotia. This engaging dog is a specialist with
waterfowl. Tolling, or luring, is the practice of tricking ducks
into gunshot range. Hunters had long observed this behavior
—More—(01%)
The more command pauses when the screen fills up and waits for you to press the spacebar before it rolls out another screenful of text. A legend at the bottom of the screen tells you what percentage of the file has been displayed so far.
The less command works like more except that it lets you move both forward and backward in the file while the command is running—use the B key on your keyboard to back up one screen and the spacebar to move forward and show the next screen.
You can press Q to quit the more or less command.
Although all of these commands will let you view the contents of a file in different ways, none allow you to change the data in the file. If you want to view and update a file, use one of the text editors discussed in the «Text Editors» section.
For more information on the cat command, see the cat manual. (If you’re not interested in cats, see the dog manual.)
5 Commands to View the Content of a File in Linux Command Line
Here are five commands that let you view the content of a file in Linux terminal.
If you are new to Linux and you are confined to a terminal, you might wonder how to view a file in the command line.
Reading a file in Linux terminal is not the same as opening file in Notepad. Since you are in the command line mode, you should use commands to read file in Linux.
Don’t worry. It’s not at all complicated to display a file in Linux. It’s easy as well essential that you learn how to read files in the line.
Here are five commands that let you view the content of a file in Linux terminal.
5 commands to view files in Linux
Before you how to view a file in Unix like systems, let me clarify that when I am referring to text files here. There are different tools and commands if you want to read binary files.
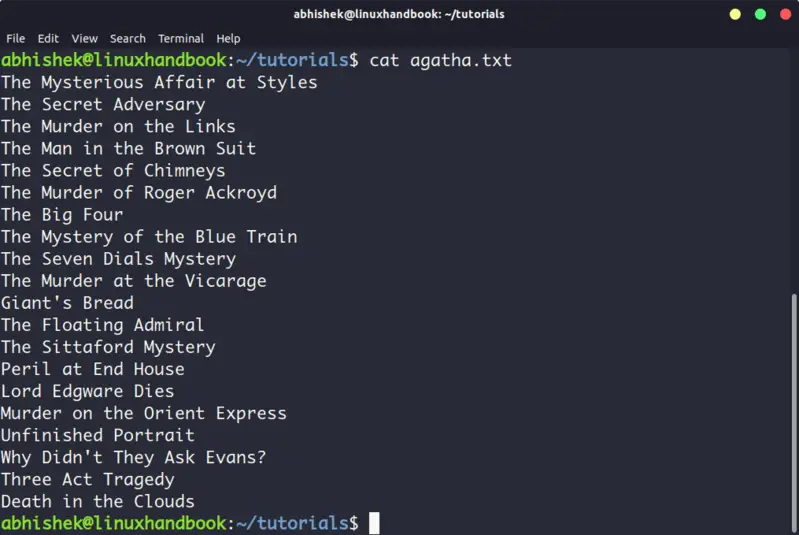
Cat becomes a powerful command when used with its options. I recommend reading this detailed tutorial on using cat command.
The problem with cat command is that it displays the text on the screen. Imagine if you use cat command with a file that has 2000 lines. Your entire screen will be flooded with the 200 lines and that’s not the ideal situation.
So, what do you do in such a case? Use less command in Linux (explained later).
2. nl
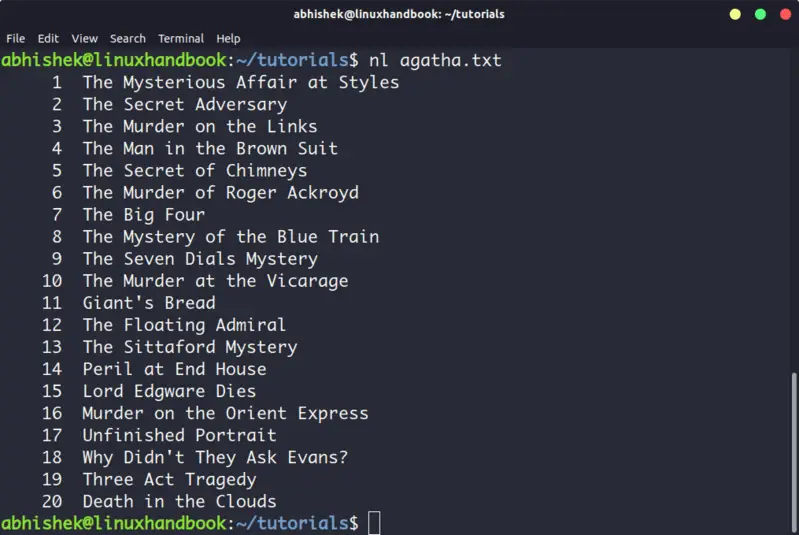
The nl command is almost like the cat command. The only difference is that it prepends line numbers while displaying the text in the terminal.
There are a few options with nl command that allows you to control the numbering. You can check its man page for more details.
3. Less
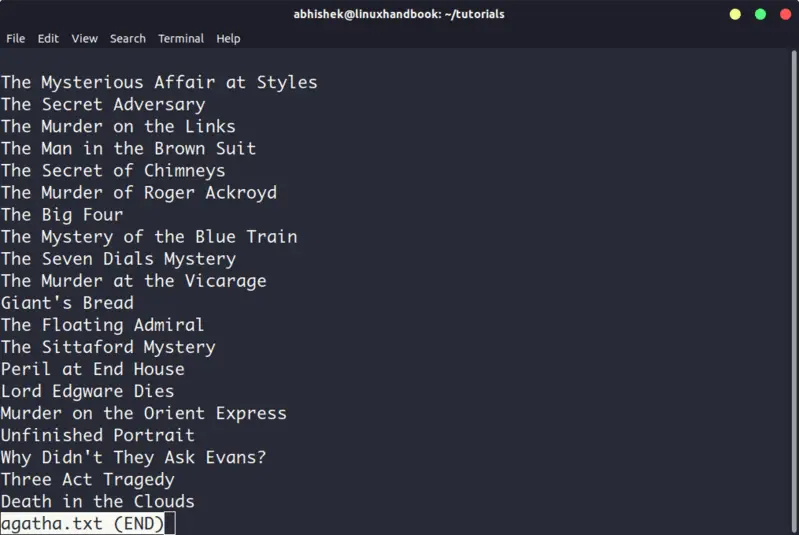
Less command views the file one page at a time. The best thing is that you exit less (by pressing q), there are no lines displayed on the screen. Your terminal remains clean and pristine.
I strongly recommend learning a few options of the Less command so that you can use it more effectively.
There is also more command which was used in olden days but less command has more friendly features. This is why you might come across the humorous term ‘less is more’.
4. Head
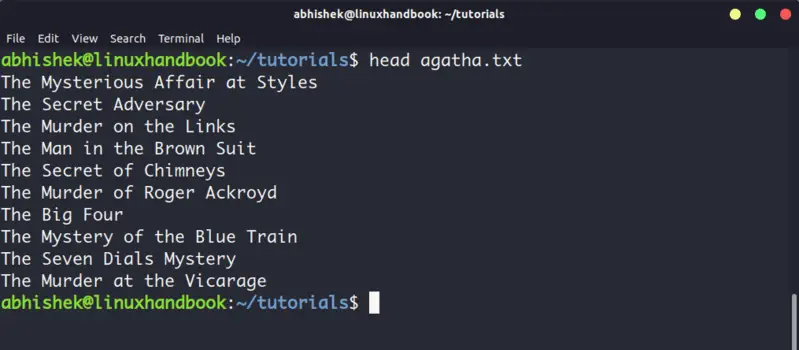
Head command is another way of viewing text file but with a slight difference. The head command displays the first 10 lines of a text file by default.
You can change this behavior by using options with head command but the fundamental principle remains the same: head command starts operating from the head (beginning) of the file.
5. Tail
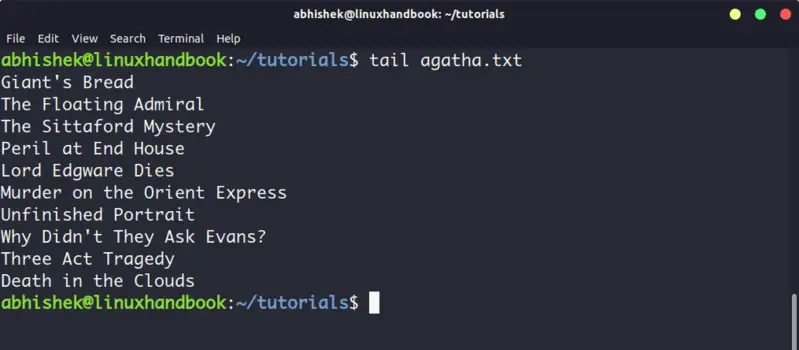
Tail command in Linux is similar and yet opposite to the head command. While head command displays file from the beginning, the tail command displays file from the end.
By default, tail command displays the last 10 lines of a file.
Head and Tail commands can be combined to display selected lines from a file. You can also use tail command to see the changes made to a file in real time.
Bonus: Strings command
Okay! I promised to show only the commands for viewing text files. And this one deals with both text and binary files.
The Strings command displays the readable text from a binary file.
No, it doesn’t convert binary files into text files. If the binary file consists of actual readable text, the strings command displays those text on your screen. You can use the file command to find the type of a file in Linux.
Conclusion
Some Linux users use Vim to view the text file. Of course, you can easily move from the beginning to the end of the lines and edit the file but it’s overkill for just reading a file. My favorite command to open a file in Linux is the less command. It leaves the screen clear and has several options that makes viewing text file a lot easier.
Since you now know ways to view files, maybe you would be interested in knowing how to edit text files in Linux. Cut and Paste are two such commands that you can use for editing text in Linux terminal. You may also read about creating files in Linux command line.
Which command do you prefer?
8 Stat Command Examples in Linux
In Linux, there always seems to be an ingenious way of getting things done. For any task, there’s always more than one command-line utility to execute it in a better way. The Linux stat command is a command-line tool used to display detailed information about a file. In this guide, we highlight 8 stat command usages in Linux. This works across all Linux distributions.
Linux stat command
Think of stat command as a better version of the ls -l command . While the -l flag provides more details about files such as file ownership and permissions, The stat command goes deeper under the hood and provides a wealth of information about a file.
The syntax for Linux stat command is as shown:
1) Stat command with no arguments
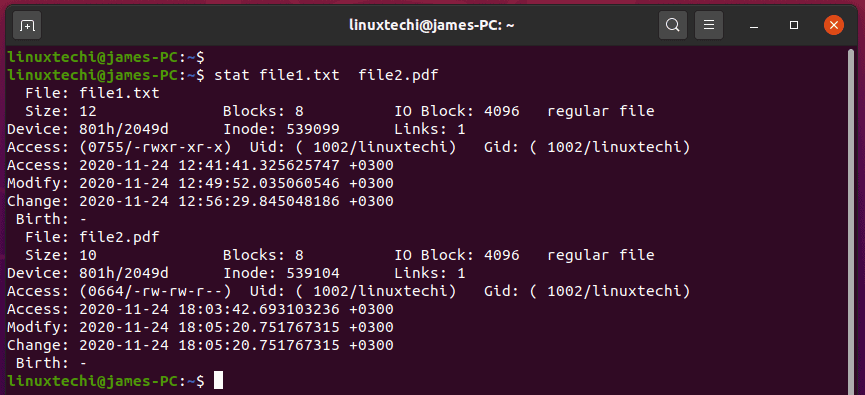
In its simplest form – without any parameters – the stat command displays the default output. This includes file size and type, device type, inode number, UID, GID, number of links and access/modification dates of the file.
For example, to view the file details of a file residing in the current home directory, execute:
Let’s flesh out the output:
- File : This shows the name of the file.
- Size : Size of the file in bytes.
- Block : Number of blocks allocated to the file.
- IO Block : This is the byte size of every block.
- Device : The device number in hexadecimal or decimal format.
- Inode : This is the inode number of the file.
- Links : Number of hard links associated with the file.
- Access : File permissions either in symbolic or numeric format.
- Uid : User ID & name of the owner.
- Gid : Group ID & name of the owner.
- Context : SeLinux security context
- File type : Shows what type the file is (Whether a regular file, symbolic link etc).
- Access : Shows the last time the file was accessed.
- Modify : Shows the last time the contents of the file were changed.
- Change : Shows the last time a file’s metadata e.g permissions & ownership was changed.
2) View information about multiple files
You can view a detailed report on multiple files by specifying the files on the command line one after the other as shown.
3) Display file system status
You can check the filesystem status where the file is sitting on by using the -f option as shown. This gives you the block size, total & available memory to mention just a few attributes.
4) Display information in terse form
The -t option is used to display information in a terse format as shown:
5) Enable following of symbolic links
Usually, if you run the stat command on a symbolic link, it will only give you information about the link, and not the file that the link points to. Take for example the /usr/share/zoneinfo/America/Cayman symbolic link.
$ stat /usr/share/zoneinfo/America/Cayman
In the example above, the symbolic link /usr/share/zoneinfo/America/Cayman points to ( ->) Panama . The symbolic link is only 6 bytes.
To get information on the file that the links points to, use the -L option also known as the dereference option.
$ stat -L /usr/share/zoneinfo/America/Cayman
This now displays information about the file and not the link, even though the output suggests it’s the link. This is because we passed it as an argument with the stat command.
6) Format sequencing
From previous examples, we have seen that stat command prints out a barrage of information on the terminal. If you want specific information, you can custom the output using a format sequence to provide exactly what you need and leave other details.
Popular expressions used to custom the output include –printf or –format option
For example, to display inode of a file only, use the %i format sequence as shown. The \n operand print a new line.
To display access rights and uid (User ID) use the %a and %u format sequences.
The –format option prints out a new line without requiring an additional operand.
Here’s a complete list of the format sequences that you can use:
- %a Displays the access rights in octal format.
- %A Displays the access rights in a human readable format.
- %b This is the number of blocks allocated (see %B).
- %B the size in bytes of each block reported by %b.
- %C Shows the SELinux security context string.
- %d Displays the device number in a decimal format.
- %D The device number in hexadecimal format.
- %f Displays the raw mode in hexadecimal.
- %F Displays the file type.
- %g Prints the group ID of owner.
- %G Prints the group name of owner.
- %h Displays the number of hard links.
- %i Prints out the inode number.
- %m Prints the mount point.
- %n Displays the file name of the file
- %N Shows quoted file name with dereference if symbolic link
- %o Prints the optimal I/O transfer size hint.
- %s total size, in bytes.
- %t major device type in hex, for character/block device special files
- %T minor device type in hex, for character/block device special files
- %u Shows the user ID of owner.
- %U Prints the username of owner.
- %w Reveals the time of file birth, human-readable; – if unknown.
- %W Prints the time of file birth, seconds since Epoch; 0 if unknown.
- %x The time of last access, human-readable.
- %X The time of last access, seconds since Epoch.
- %y Displays the last time of last modification, human-readable.
- %Y Prints the time of last modification, seconds since Epoch.
- %z This is the time of last change, human-readable.
- %Z The time of last change, seconds since Epoch.
7) Getting help with stat command
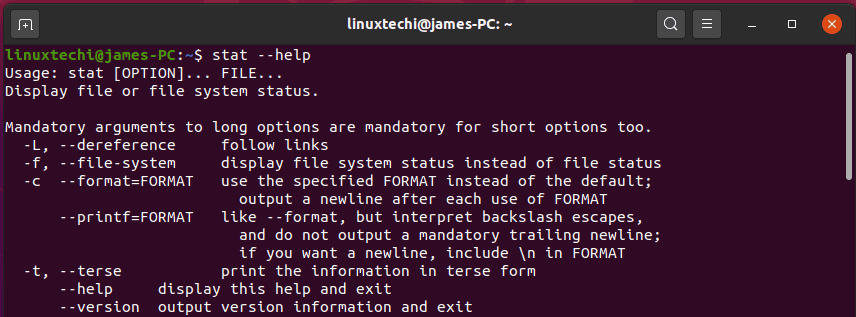
For more command options , use the –help option with stat command as shown.
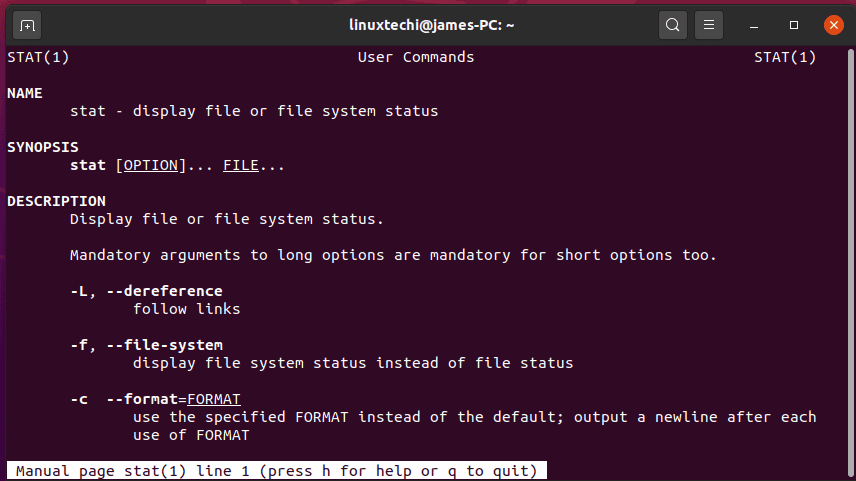
You can also visit the man pages of stat command, run
8) Checking the version of stat
Finally to check the version of stat command, run the command:
That’s what we had in store for you in this guide. As you can see, the stat command goes over and above what the ls command gives you and is ideal in gathering detailed information about a file or file system.
Also Read : 14 Useful ‘ls’ Command Examples in Linux
