- How do you see the OS DNS cache on linux?
- systemd-resolve
- Question
- How to read the local DNS cache contents?
- 4 Answers 4
- Prior to systemd , there was almost no OS-level DNS caching
- How to view DNS cache entries with the new systemd-resolved resolver
- Networking: Must-read coverage
- What you’ll need
- How to view the DNS cache
- Subscribe to the Developer Insider Newsletter
- Also See
- How to View the Contents of DNS Cache on Ubuntu and Windows
- How to check the contents of your DNS Cache on Ubuntu
- Viewing the file through the text editor
- Viewing the file through the terminal
- How to check the contents of your DNS Cache on Windows
- Through the command prompt
- Exporting the records
- Through the PowerShell
- Conclusion
How do you see the OS DNS cache on linux?
According to Cloudflare docs, the sequence of a DNS query from Chrome to the recursive resolver looks something like this:
Check browser DNS cache --miss--> Check OS DNS cache --miss--> Recursive resolver | | V V hit hit Chrome’s DNS cache chrome://net-internals/#dns and firefox’s DNS cache about:networking#dns lists entries in one or another, and the Windows DNS cache can be accessed with ipconfig /displaydns . The Windows version looks like this:
PS C:\> ipconfig /displaydns Windows IP Configuration chrome.cloudflare-dns.com ---------------------------------------- Record Name . . . . . : chrome.cloudflare-dns.com Record Type . . . . . : 1 Time To Live . . . . : 54 Data Length . . . . . : 4 Section . . . . . . . : Answer A (Host) Record . . . : 104.18.27.211 vortex.data.microsoft.com ---------------------------------------- Record Name . . . . . : vortex.data.microsoft.com Record Type . . . . . : 5 Time To Live . . . . : 6 Data Length . . . . . : 8 Section . . . . . . . : Answer CNAME Record . . . . : asimov.vortex.data.trafficmanager.net . systemd-resolve
rj@VPS:~$ systemd-resolve motel6.com motel6.com: 23.35.171.243 -- link: eth0 -- Information acquired via protocol DNS in 85.2ms. -- Data is authenticated: no rj@VPS:~$ systemd-resolve motel6.com motel6.com: 23.35.171.243 -- link: eth0 -- Information acquired via protocol DNS in 1.4ms. -- Data is authenticated: no I would assume on the second instance, it’s pulling from the OS DNS cache, but a DNS request to VPS’ DNS server could also be 1.4ms and now cached.
Question
How do you see all entries in the DNS cache for Linux? (Bonus points for macos as well, but I’m scoping this to Linux)
How to read the local DNS cache contents?
I know that on Windows I can issue ipconfig /displaydns and I see the local DNS’s cache content. How can I list the DNS’s cache content in Linux? I would like to get as much as cross-distro solution as possible.
As far as I am aware, there is no DNS cache maintained on the client in Linux (resolver) unless the system is using local caching only dns service on the client.
You always have the /etc/hosts file which may contain entries generated by DNS blacklisting services.
4 Answers 4
Prior to systemd , there was almost no OS-level DNS caching
Prior to systemd there was no OS-level DNS caching on Linux (and probably most Unix), unless nscd or dnsmasq was installed and running.
Even then, the DNS caching feature of nscd was disabled by default in Debian at least, simply because it is broken.
As for dnsmasq , the caching seems to occur in RAM by default.
A lot of systems these days use dnsmasq by default so unix.stackexchange.com/q/162973/79839 could be useful.
And these days, anything using systemd will likely have systemd-resolved running by default which does cache DNS results based on their TTL
nscd is the Name Service Caching Daemon. This is the utility that Linux, Solaris, and other use to cache name service lookups. Name Service in this case is a generic term, not strictly limited to host resolution, but also users, groups, etc.
I don’t know of a way to see the actual contents of the cache, though you can display statistics with /usr/sbin/nscd -g .
That can at least show you how efficient your cache is, though not exactly what it’s resolving.
You may have other options if you’re using an alternate caching tool, like DNSMASQ.
How to view DNS cache entries with the new systemd-resolved resolver

If your Linux servers or desktops are experiencing networking issues, you might want to view your DNS cache. Jack Wallen shows you how with a systemd-resolved-based distribution.
We may be compensated by vendors who appear on this page through methods such as affiliate links or sponsored partnerships. This may influence how and where their products appear on our site, but vendors cannot pay to influence the content of our reviews. For more info, visit our Terms of Use page.

Many recently released Linux distributions, such as Ubuntu 20.10 and Fedora 33, have made the switch to systemd-resolved for the handling of DNS, DNSSEC, DNS over TLS, mDNS, and LLMNR. Although this system has been around for some time, many distributions have been hesitant to make the change. That trepidation has been brushed aside in favor of the flexibility offered by systemd-resolved.
Networking: Must-read coverage
- 5G vs 6G: What’s the difference?
- 5G Open RAN gains momentum: Next steps and challenges
- Kubernetes is the key to cloud, but cost containment is critical
- Azure Monitor’s Change Analysis helps you troubleshoot problems quickly
For those new to this new system, it’s probably going to be a bit of a challenge to get up to speed on the finer points of working with the systemd-based resolver.
For instance, take the viewing of DNS cache entries. There is no built-in mechanism for this task, but there is a way to get around that. Although a bit of trickery shouldn’t be necessary, if you want to view DNS cache entries, there’s not much choice (that I know of) to make this happen.
You might be asking, “Why would I need to view DNS cache entries?” There are times when a DNS cache goes a bit awry. When this happens, any service that depends on DNS might not function properly. Although a regular flushing of the DNS cache can go a long way to prevent this, if the issue is happening often, you’ll want to view that cache to see if it offers any insight into why the problem is occurring in the first place.
In other words, viewing the DNS cache is one way to beef up your network troubleshooting efforts.
SEE: Linux service control commands (TechRepublic Premium)
What you’ll need
- A Linux distribution (either Server or Desktop) that uses systemd-resolved
- A user with sudo privileges
How to view the DNS cache
In order to make this happen, we have to send a kill signal to systemd-resolved. This doesn’t actually kill the service, but will instruct systemd-resolved to write the current cache entries (and a few other bits of information) to the system log.
The command to send that kill signal is:
sudo killall -USR1 systemd-resolved
You should get your command prompt back immediately. Once you do, you can then run the command to export the log message to a text file with the command:
sudo journalctl -u systemd-resolved > ~/dns-cache.txt
The above command will create the file dns-cache.txt in your home directory. Depending on how large your DNS cache file is, the command might take anywhere from two to 30 seconds.
You can then view the txt file with the command:
When viewing the file for my recently upgraded Pop!_OS distribution, I discovered the repeated error:
systemd-resolved[1839]: Server returned error NXDOMAIN, mitigating potential DNS violation DVE-2018-0001, retrying transaction with reduced feature level UDP.
It turns out the upgrade created an incorrect symlink. The file /etc/resolv.conf was incorrectly pointing to /run/systemd/resolve/stub-resolv.conf instead of /run/systemd/resolve/resolv.conf. To correct that, I had to first remove the current link with the command:
Next, I created the correct link with the command:
sudo ln -s /run/systemd/resolve/resolv.conf /etc/resolv.conf
The DNS error stopped filling up my cache and all was well.
And that’s all there is to viewing the DNS cache entries with a Linux distribution that uses systemd-resolved. It’s not all that hard, but it does require that you remember a couple of commands. That shouldn’t be a problem, given you’re a Linux systems administrator.
Subscribe to the Developer Insider Newsletter
From the hottest programming languages to commentary on the Linux OS, get the developer and open source news and tips you need to know.
Delivered Tuesdays and Thursdays
- Linux, Android, and More Open Source Tech: More must-read coverage (TechRepublic on Flipboard)
Also See
How to View the Contents of DNS Cache on Ubuntu and Windows

Have you ever thought about how your web browser works? When you type in a URL (or a domain name) into the address bar of your web browser, it takes the URL and sends it to the Domain Name System to decipher the IP address of the webserver. Once the browser has the details, it then connects with the webserver to load up your requested website. If you want to read in detail about what is a Domain Name System and how it works, you can read about it in our other post “What is a DNS Cache?”.
Now there might be times when you would run into network issues, for instance, you might be typing in the right URL but the website which loads could be different, or you might run into errors similar to the “DNS server not responding” errors. While running into these issues occasionally might not be such a huge hindrance, if you know that the error has something to do with your local DNS, knowing how to display the contents of your DNS cache can be a lifesaver.
How to check the contents of your DNS Cache on Ubuntu
Since Fedora 33 along with Ubuntu 20.10, many Linux distributions have switched to “system-resolved” for handling DNS along with many other necessary operations of the Internet. Though it has been around for longer than a while, many of the distros showed hesitation to make the switch.
Though systemd is more than capable of handling the requirements of running tasks related to the DNS, there is no straightforward way to view the entries of the DNS cache. To get started, we need to send a kill signal to the service. Don’t worry, it doesn’t kill the service altogether but it writes the current entries of the cache to the system log. The kill command is:
$sudo killall -USR2 systemd-resolved

As you see, you’ll need to remember the sudo password for your account. Once you input the password, you’re going to get an instantaneous response with the return of your prompt.
Now you need to export these commands from the system log into a text file. You can achieve this goal through this command:
$sudo journalctl -u system-resolved > ~/dns-cache.txt

The command shown above will create a file with the same name, i.e., “dns-cache.txt” in your home directory. You can keep the name of the file to anything you please. Depending on how many entries you have in your DNS Cache, this command can take anywhere from 2-30 seconds.
Viewing the file through the text editor
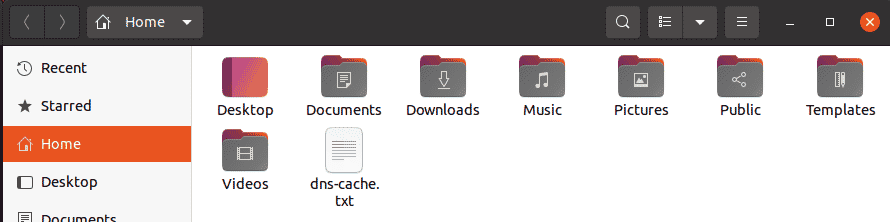
You can directly open up this text file to view the entries in your DNS cache, by double-clicking on the file.

You can view all the entries of your DNS cache and easily edit the file if you want to.
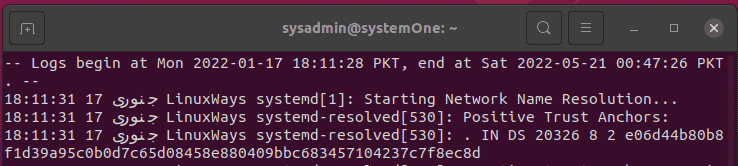
Viewing the file through the terminal
In your terminal, type the following to open up the file in the terminal.
$less ~/dns-cache.txt
How to check the contents of your DNS Cache on Windows
There are various ways you can check the contents of your local DNS cache on Windows. Let’s take a look at the top two ways you can easily employ:
Through the command prompt
This is fairly simple and easy to remember. Start by opening your command prompt and type:
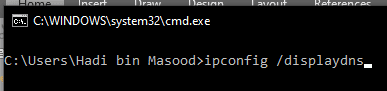
Upon pressing enter with this command, you’ll get results such as the following:
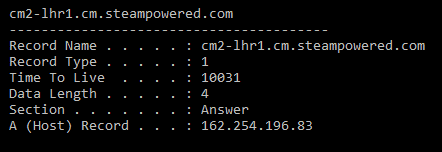
Let’s break down this output further. The “Record Name” is the name your browser uses to query the DNS server for and its records. The “Record Type” refers to the type of entry which corresponds with a DNS protocol. “Time to Live” or TTL describes how long an entry is valid for, displayed in seconds. Data Length describes the length of the entry in bytes, an IPv4 address is 4 bytes and IPv6 addresses are 16 bytes. The “Section” holds the answer to the query.
Last but not the least, “A (Host) Record” is the IP address corresponding to the URL in your browser.
Exporting the records
You can export the results of this query by typing “ipconfig /displaydns > dnscacheoutput.txt” in your command prompt.
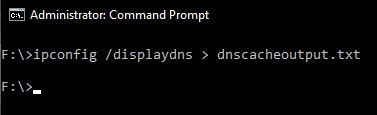
In this command, you can replace “dnscacheoutput” with any name of your choice.
Executing this command will create a file containing all of the contents of your DNS cache in your current directory.
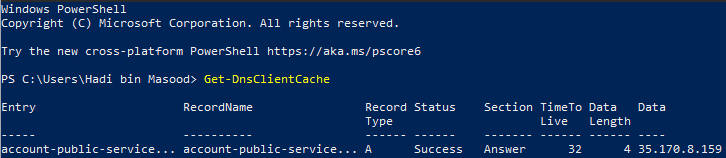
Through the PowerShell
As discussed, you can also view the contents of your local DNS cache using the Windows PowerShell. Open the Windows PowerShell with Admin privileges, and then type this “Get-DnsClientCache”. It will list all of the entries in a tabular form as such:
Conclusion
If you’ve followed through the tutorial step by step, you now know how to view the contents of your local DNS cache on Windows and Ubuntu 20.04. Though the process isn’t as easy on Ubuntu as compared to Windows, it requires you to understand the flow and execute 3 commands. If you run into any issues with these commands, or if you want to know more about the DNS cache and its entries, feel free to drop us a comment below and we’ll be glad to help.
Karim Buzdar holds a degree in telecommunication engineering and holds several sysadmin certifications including CCNA RS, SCP, and ACE. As an IT engineer and technical author, he writes for various websites.