- How can I flush the DNS on Ubuntu 17.04?
- 3 Answers 3
- How to refresh/obtain new DNS servers on Ubuntu Server 20.04?
- Flush DNS Cache on Ubuntu
- How DNS Works:
- DNS Caching:
- Problems with DNS Caching:
- Checking If DNS Caching is Enabled:
- Flushing DNS on Ubuntu 18.04 LTS:
- Flushing DNS Cache on Ubuntu 16.04:
- About the author
- Shahriar Shovon
How can I flush the DNS on Ubuntu 17.04?
How can I flush the DNS on Ubuntu 17.04? I seem to have a few DNS issues at the moment since upgrading to 17.04 from 16.10 and went to flush the DNS but I can’t find how to. Can anyone tell me please?
I have removed the solution part from the question. But you can find it here. Please post the solution part in the «Your Answer» field below. It’s completely okay to answer your own question and accept your answer. Also please don’t add «SOLVED» tag to title.
If you are using Chrome and are having cache issues, it’ll also help to clear Chrome’s dns cache chrome://net-internals/#hsts
3 Answers 3
You may use this command: sudo systemd-resolve —flush-caches
To verify that flush was sucessfull, use: sudo systemd-resolve —statistics
Cache Current Cache Size: 0 Cache Hits: 101 Cache Misses: 256 When I run sudo systemd-resolve —flush-caches , I get systemd-resolve: unrecognized option ‘—flush-caches’ .
This command should restart the local name service and flush the local DNS cache:
systemctl restart systemd-resolved.service There is probably a way of getting it to just flush the cache instead of restart, but restart suited my purposes.
This seems like the only way to clear everything to 0 when running —statistics immediately after. On Ubuntu 18
Maybe thats what youre looking for.
Installation
$ git clone git@github.com:dunderrrrrr/dnscache.git $ cd dnscache/ $ sudo cp dnscache /usr/local/bin/ $ sudo chmod +x /usr/local/bin/dnscache There are two arguments that can be passed to the script, clear or stats. Both of them should be self explanatory.
$ sudo dnscache clear DNS cache has been cleared! [. ] Cache Current Cache Size: 0 [. ] How to refresh/obtain new DNS servers on Ubuntu Server 20.04?
I work with a «virtual private server» in the cloud, which has Ubuntu 20.04 installed. I’ve noticed that — occasionally — when I reboot the server, I cannot ping anything:
$ ping yahoo.com ping: yahoo.com: Temporary failure in name resolution $ resolvectl query yahoo.com yahoo.com: resolve call failed: No appropriate name servers or networks for name found As far as I understand, since this is Ubuntu 20.04, /etc/resolv.conf is not really used anymore, and systemd overtakes handling of DNS. But, in any case, I would not want to manually specify DNS servers (as the old trick of putting Google’s 8.8.8.8 in /etc/resolv.conf ) — apparently, most of the time when DNS works: when the server boots, it somehow «obtains» a DNS server. So, I would like to repeat this process, except I have no idea how. (By analogy, if I wanted to refresh/obtain new IP address for a machine, I’m aware that the machine should ask the DHCP server for it — so eventually, it is easy to lookup, that in order to do that, I should do sudo dhclient -r eth0 for instance) Note also, that when DNS name resolution does not work, I do not have DNS Servers listed in this output:
$ systemd-resolve --status Global LLMNR setting: no MulticastDNS setting: no DNSOverTLS setting: no DNSSEC setting: no DNSSEC supported: no DNSSEC NTA: 10.in-addr.arpa 16.172.in-addr.arpa 168.192.in-addr.arpa 17.172.in-addr.arpa 18.172.in-addr.arpa 19.172.in-addr.arpa 20.172.in-addr.arpa 21.172.in-addr.arpa 22.172.in-addr.arpa 23.172.in-addr.arpa 24.172.in-addr.arpa 25.172.in-addr.arpa 26.172.in-addr.arpa 27.172.in-addr.arpa 28.172.in-addr.arpa 29.172.in-addr.arpa 30.172.in-addr.arpa 31.172.in-addr.arpa corp d.f.ip6.arpa home internal intranet lan local private test Link 2 (eth0) Current Scopes: none DefaultRoute setting: no LLMNR setting: yes MulticastDNS setting: no DNSOverTLS setting: no DNSSEC setting: no DNSSEC supported: no sudo /etc/init.d/networking restart . however, I’d rather not run this command, since I’m connected to the server over ssh , so I imagine that the restart of whole network, would also kill my ssh terminal session, and possibly have other unintended consequences. So, I am wondering: is there a command I could run in an ssh session, that would refresh or obtain new DNS servers for this machine — using a similar mechanism that is used upon boot, when DNS actually works on this machine?
Flush DNS Cache on Ubuntu
![]()
The full form of DNS is Domain Name System. It is used to translate domain names to IP addresses. It seems really simple, but without it the internet won’t be what it is today. Can you imagine memorizing thousands of IP addresses? Can you imagine a world without google.com or yourwebsite.com? DNS makes everything about the internet very easy for us.
This article is about flushing DNS on Ubuntu. But to understand why it is necessary, first you have to understand how DNS works and a little bit about DNS caching.
How DNS Works:
Simply, DNS can be thought of a table of domain names and IP addresses as given below:
| Domain Name | IP Address |
| linuxhint.com | 1.2.3.4 |
| support.linuxhint.com | 3.4.5.7 |
| google.com | 8.9.5.4 |
| www.google.com | 8.9.5.4 |
Please know that, none of the data in this table is real. It’s just for the purpose of demonstration. So let’s get back to our original topic.
When you visit, let’s say, linuxhint.com, the browser asks the DNS server (set on your computer) a few questions.
Your Computer: Hey, do you know linuxhint.com?
DNS Server: No, I do not. But the DNS server 4.4.4.4 may know about it.
Your Computer: Contacts the DNS server 4.4.4.4 and asks, “hey, do you know linuxhint.com?”
DNS Server 2: Yes, I do. What can I do for you?
Your Computer: I need the IP address of linuxhint.com. Can I have it?
DNS Server 2: No fear, that’s why I am here. Here is the IP address of linuxhint.com 1.2.3.4.
Your Computer: You’re a life saver. Thanks.
Now your computer connects to 1.2.3.4 and your favorite website linuxhint.com shows up. That was really hard, wasn’t it?
The next time you visit linuxhint.com, the same thing happens again.
DNS Caching:
In the earlier section, you saw how a domain name is resolved to IP addresses. This journey through the DNS servers takes a while and till it’s complete and a domain name can be resolved to IP addresses, you won’t be able to connect to any website or server on the internet.
To solve this issue, DNS caching is used. Here, when you try to resolve a domain name to IP addresses for the first time, it takes a little bit longer. But once the domain name is resolved, the IP addresses are stored in your own computer. So, the next time you need to resolve the same domain name, it won’t take as long as it did on the first time.
Problems with DNS Caching:
DNS caching is good. How come DNS caching is problematic? Well, the world of internet is so dynamic that the DNS information is changing constantly. It may have changed a few times even while I am writing this article.
So, what happens when the DNS information changes and we are using the DNS information that is cached on our own computer? Well, that’s where it gets problematic. In that case, we will be using the old DNS information. We may have connectivity issues, false redirection issues and many other issues.
To solve this problem, we have to delete the cache (also called DNS flushing) and rebuild it. This is the topic of this article.
Checking If DNS Caching is Enabled:
You can check whether DNS caching is enabled very easily on Ubuntu. You need to have the nslookup or dig utility installed on your computer for this to work.
nslookup or dig command may not be available by default on your Ubuntu machine. But you can easily install it from the official package repository of Ubuntu.
First, update the APT package repository cache with the following command:

The APT package repository cache should be updated.

Now install the nslookup and dig with the following command:

Now press y and then press to continue.
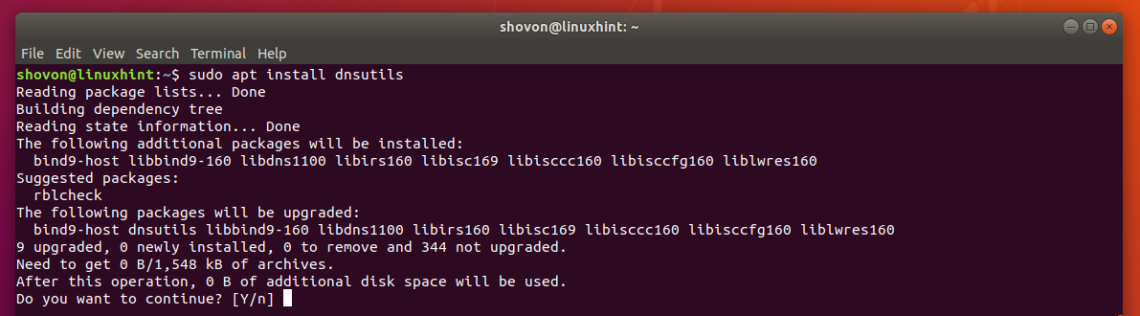
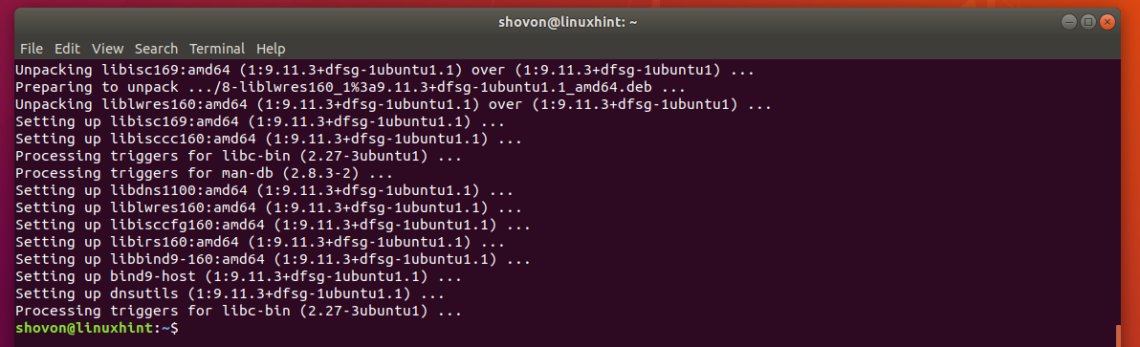
nslookup and dig commands should now be available.
Now to test whether caching is enabled, run the following command:
As you can see, the DNS server used to resolve the domain name is 127.0.0.53, which is a loopback IP address. So DNS caching is enabled. If you have it disabled, then the DNS server should be anything other than 127.0.0.X.

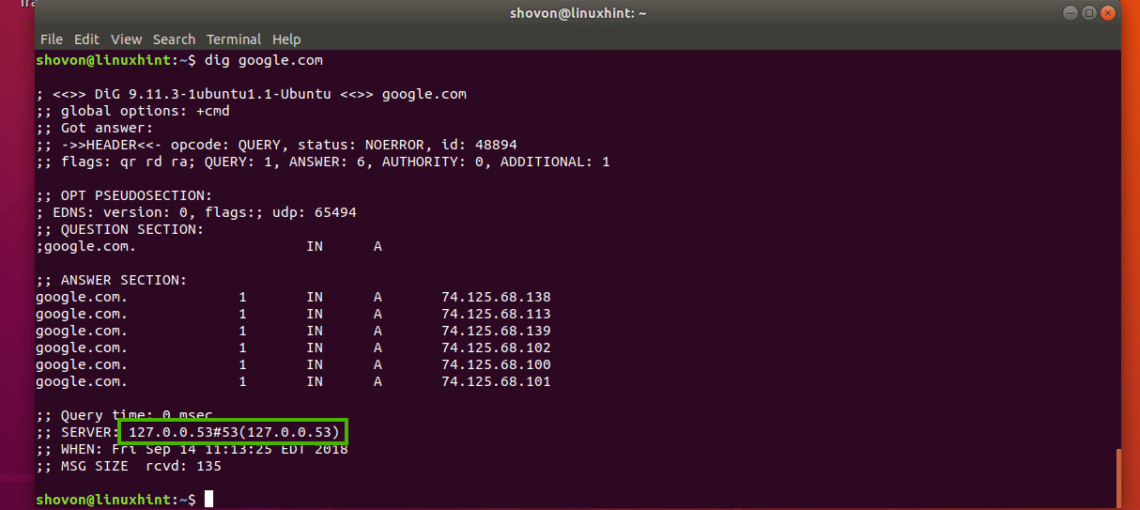
You can check the same thing with the dig command as well as follows:
As you can see, the loopback IP addresses is used as the DNS server addresses here as well. So, DNS caching is enabled.
Flushing DNS on Ubuntu 18.04 LTS:
Ubuntu 18.04 LTS uses a local DNS server and caches DNS queries by default. Ubuntu 18.04 LTS uses systemd for this purpose.
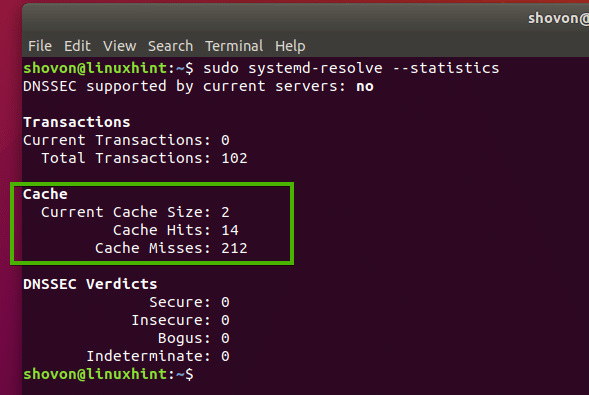
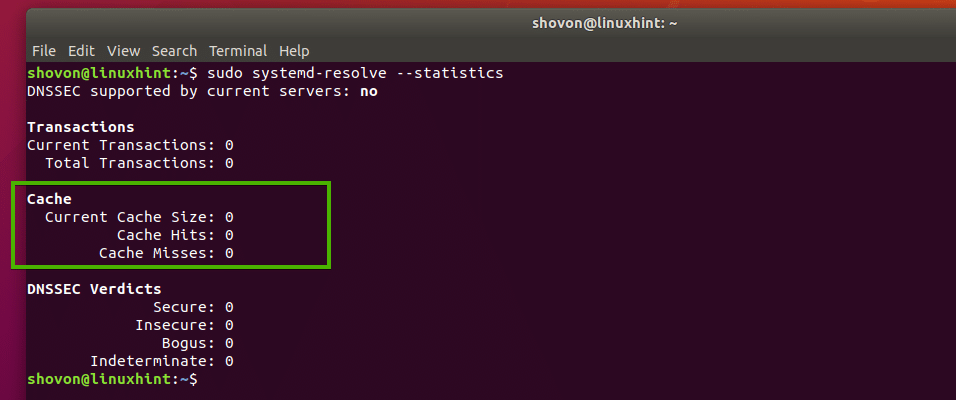
You can run the following command to check how many DNS entries are cached and many other information on Ubuntu 18.04 LTS:

As you can see, information about DNS cache is listed in the marked section of the screenshot below.
To flush the DNS cache on Ubuntu 18.04 LTS, run the following command:

You can also restart the systemd-resolved service to flush the DNS caches on Ubuntu 18.04 LTS.
To restart the systemd-resolved service, run the following command:

As you can see, the caches are cleared.
Flushing DNS Cache on Ubuntu 16.04:
On Ubuntu 16.04 LTS, DNS cache is not enabled by default. But some applications like bind, dnsmasq, nscd etc. may cache it.
If you’re using nscd for caching DNS queries, then you can flush the DNS cache by simply restarting the nscd service.
You can restart the nscd service on Ubuntu 16.04 LTS to flush DNS caches with the following command:
If you’re using dnsmasq for caching DNS, then restarting dnsmasq service with the following command should flush the DNS cache.
So, that’s how you flush DNS cache on Ubuntu 18.04 LTS and 16.04 LTS. Thanks for reading this article.
About the author
Shahriar Shovon
Freelancer & Linux System Administrator. Also loves Web API development with Node.js and JavaScript. I was born in Bangladesh. I am currently studying Electronics and Communication Engineering at Khulna University of Engineering & Technology (KUET), one of the demanding public engineering universities of Bangladesh.