How do I configure my static DNS in interfaces?
I am not sure if my interfaces refreshed. How do I properly configure my network with my static DNS addresses?
Reboot your computer. Do not run /etc/init.d/networking restart. The error is caused by the default route already existing. This setup looks correct to me.
As Matt H says, /etc/network/interfaces is picky about stuff already existing. You can have a perfect setup, but already have something there, and it will complain. If it is the default route it is complaining about, you can remove it by running ip route del default to get the computer into a state where you can hand over the management of this stuff to /etc/network/interfaces
13 Answers 13
As the questioner gives the contents of his /etc/network/interfaces I infer that he is using ifup to configure interfaces. But since he may actually be using NetworkManager, I will discuss that as well.
If you are using ifup then DNS settings go in /etc/network/interfaces . For each interface you add dns-* options appropriate for the nameserver(s) available over that interface. E.g., if a nameserver at address 1.2.3.4 is available over interface eth0, then add dns-nameservers 1.2.3.4 to the iface eth0 stanza.
If you are using NetworkManager then settings are entered in the Connection Editor (network indicator | Edit Connections. ) in the IPv4 Settings tab.
Doing /etc/init.d/networking restart to reconfigure interfaces is deprecated. If you are using ifup then first ifdown each active network interface, then ifup each interface. If you are using NetworkManager then, first, disable networking using the indicator (top of the desktop); then open a terminal and run
sudo /etc/init.d/network-manager restart and then enable networking using the indicator.
Regarding the fact that /etc/init.d/networking restart resulted in
RTNETLINK answers: File exists Failed to bring up eth0 This means that ifupdown thinks that eth0 is already up. Use ifdown —force eth0 to cause ifupdown to stop believing that it has already configured the interface.
Regarding the «deprecated» message, this message is no longer printed in Ubuntu 12.10 but you should still note that initscripts are «on their way out». To restart a service foo , use service foo restart or restart foo . Note also that if you want to reconfigure your interfaces it is better to ifdown them one by one than to rely on restarting «networking».
How do I configure my DNS settings in Ubuntu server?
According to this page it appears to be simple. However, /etc/bind does not exist on the default installation of Ubuntu 12.04.3 LTS server. So, without installing any further software, how can configure DNS and remove dnsmasq on ubuntu server? I am quite familiar with sudo & nano .
Also take a look at help.ubuntu.com/community/Dnsmasq. bind IS a nameserver. If you need nameserver functionality on your server, you must install a nameserver. It would help if you could describe what it is you are trying to achieve.
You were reading a manual to configure a DNS Server, not how to configure the DNS entries in the server. The manual you should have read are this
I don’t have the rep to post a comment on another answer, but in reply to Nullet’s answer on September 17th 2013, this worked for me. I was thinking that there was a problem with my router (a cheap, ISP provided one). I also think it worth mentioning that on the dns-nameservers line, you should use the IP of the public DNS. Don’t use the local address of the DNS, which is most likely on your router. I was connecting to the DNS on my router, which for some unknown reason wasn’t working with my server. Instead, I found out where the DNS on my router was getting its information from, and set dn
I think there is a better answer here unix.stackexchange.com/a/154538/82018 — basically you can override your dhcp settings to «prepend» a server in front of the ones you currently use. This is nice as you don’t have to rely solely on the new server, you just give it precedence for lookups.
Настройка DNS в Ubuntu
Сервера DNS используются системой для преобразования сложных для запоминания IP адресов в простые доменные имена. Это делается потому что людям сложно запоминать несколько никак не связанных цифр, но очень просто запомнить слово.
Когда компьютеру нужно узнать IP адрес какого-либо домена, он отправляет запрос известному ему DNS серверу. Эти сервера могут быть получены автоматически от роутера по DHCP или же заданы в ручную. В этой статье мы рассмотрим как выполняется настройка DNS Ubuntu 16.04 и более старых версиях.
Настройка DNS в Ubuntu через GUI
Раньше, для настройки DNS серверов, которые будут использоваться системой было достаточно внести адреса нужных серверов в файл /etc/resolv.conf. Но сейчас всей конфигурацией сети в Ubuntu управляет NetworkManager, а этот файл теперь представляет собой только ссылку на файл NetworkManager.
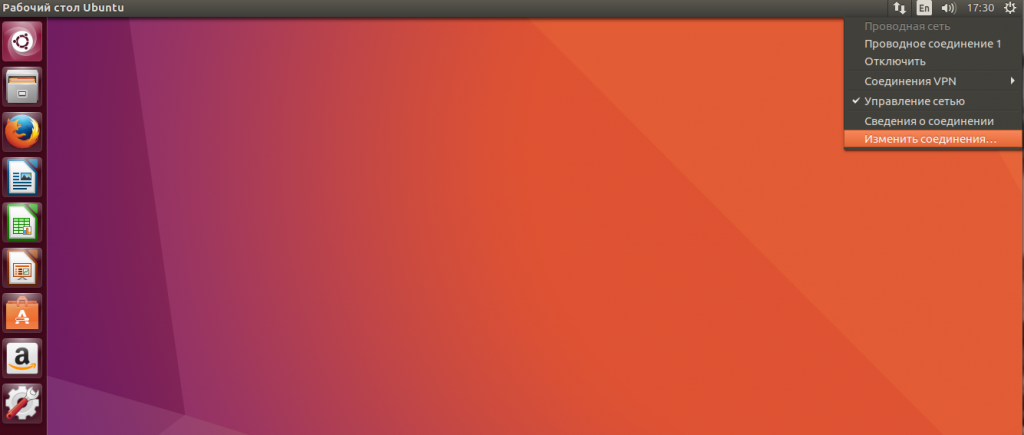
Этот способ до сих пор работает, но в нем вы можете настроить DNS на LiveCD, или до перезагрузки. После перезагрузки все настройки собьются и придется все делать заново. Поэтому, чтобы все сохранилось нужно выполнять все действия через интерфейс NetworkManager. Сначала откройте контекстное меню для значка сети на панели и выберите «Изменить подключения»:
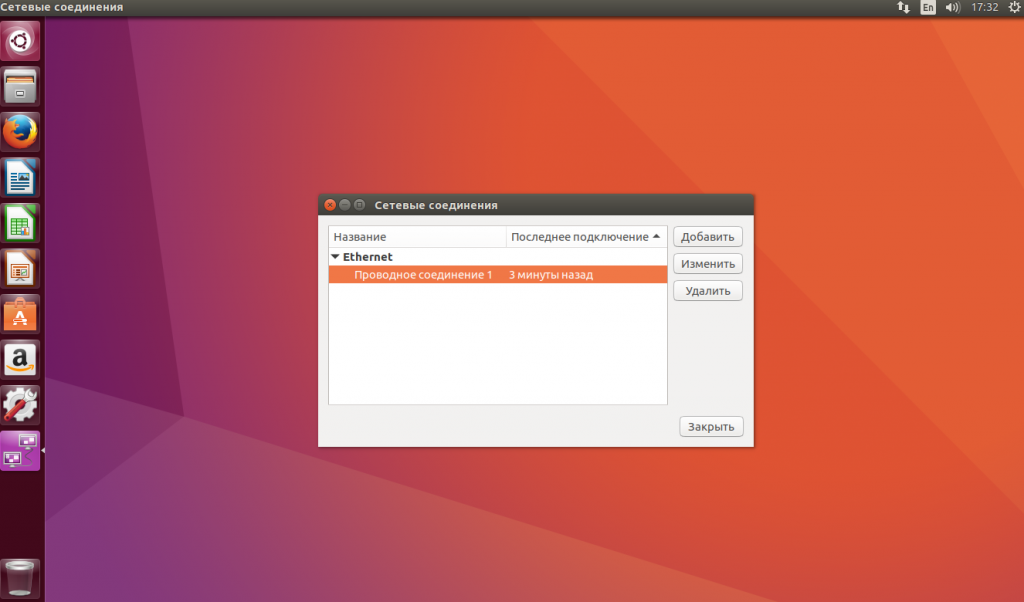
Выберите ваше подключение и нажмите «Изменить»:
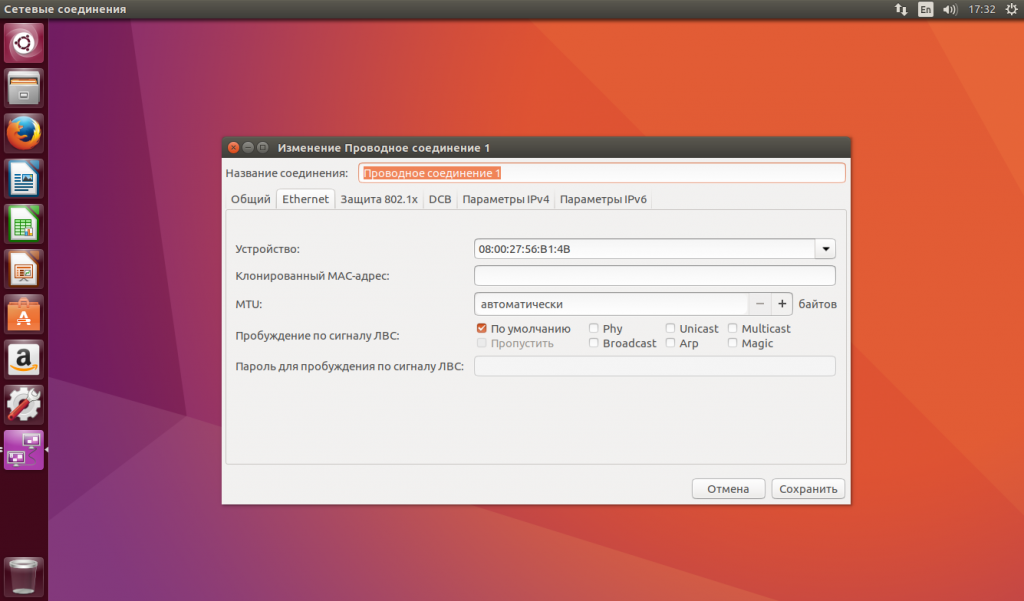
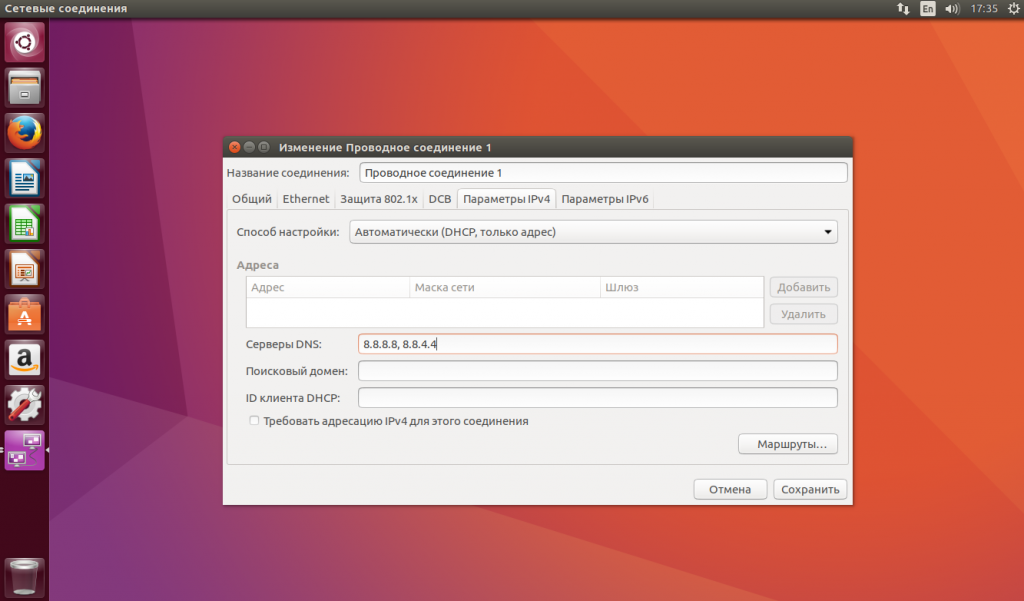
В открывшемся окне перейдите на вкладку «Параметры IPv4»:
Затем, в поле «Способ настройки» выберите «Автоматически (DHCP, только адрес)»:
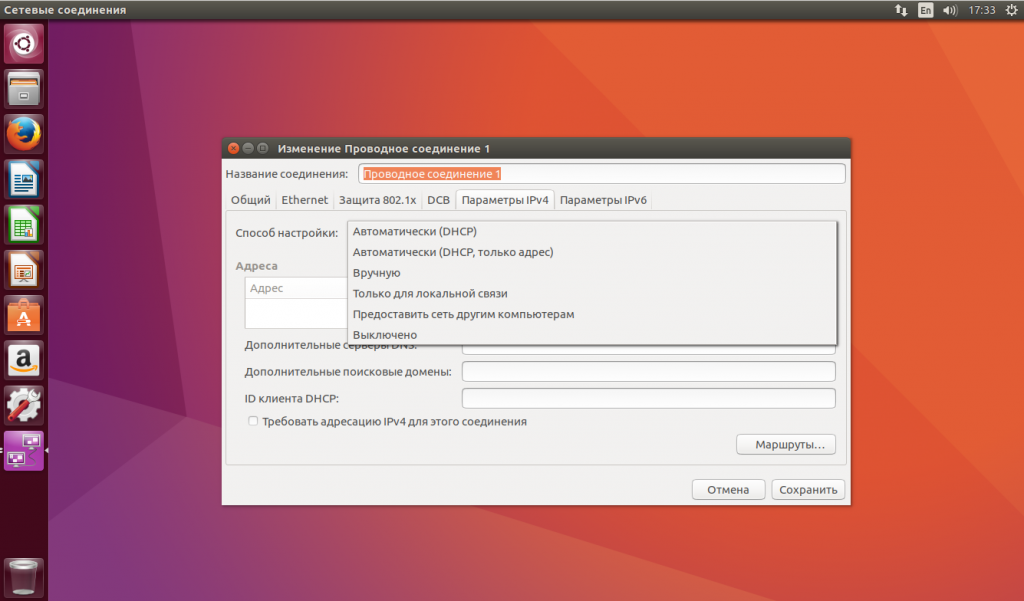
Теперь немного ниже появиться поле «Серверы DNS», где вам нужно прописать нужные серверы, можно несколько адресов через запятую. Например, можно указать сервера от Google:
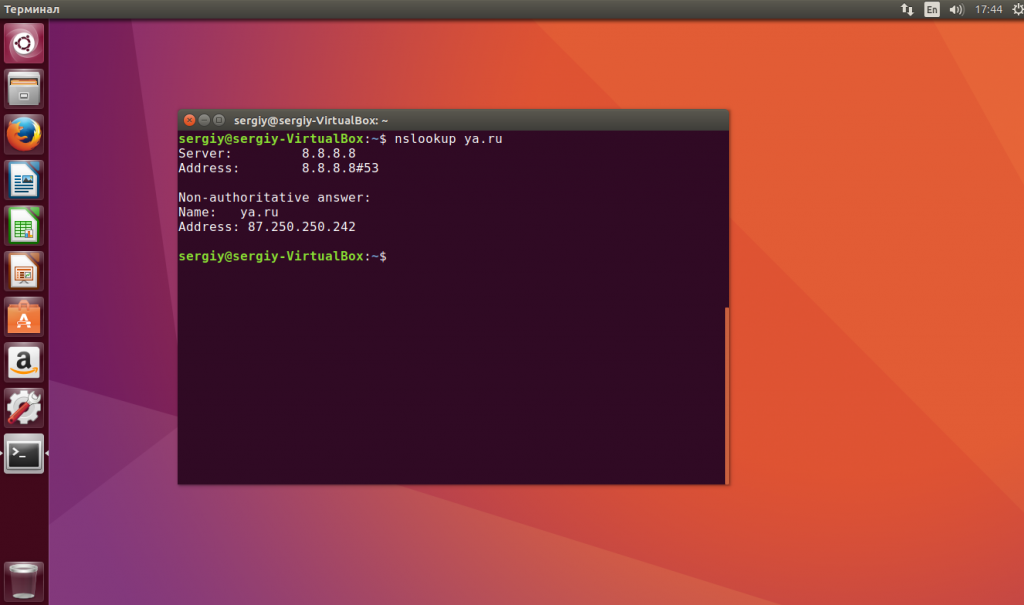
Поле этого нажмите «Сохранить» и «Закрыть». Теперь можете переподключитесь к этому соединению и можете проверять текущий DNS сервер:
Собственно, это все, но есть еще один способ настройки через консоль, если этот не сработал или вы предпочитаете работать из консоли.
Настройка DNS через терминал Ubuntu
В Ubuntu есть унифицированный интерфейс настройки сети, который настраивается через конфигурационный файл /etc/network/interfaces. Сначала смотрим список сетевых интерфейсов:
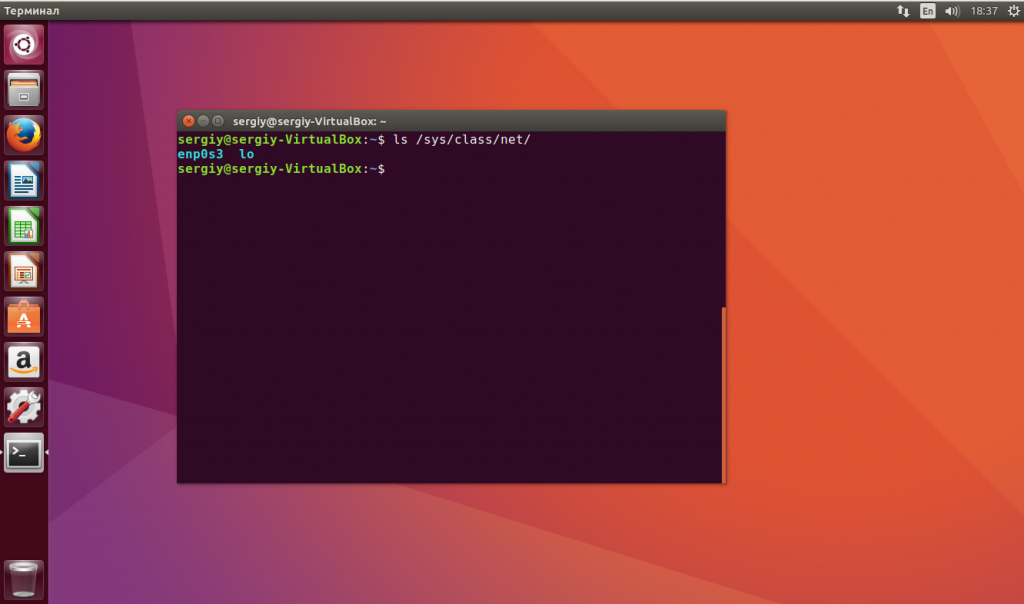
Откройте файл для редактирования и найдите в нем имя своего сетевого интерфейса, например, auto enp0s3, если такой секции нет, ее нужно добавить:
sudo vi /etc/network/interfaces
auto enp0s3
iface enp0s3 inet dhcp
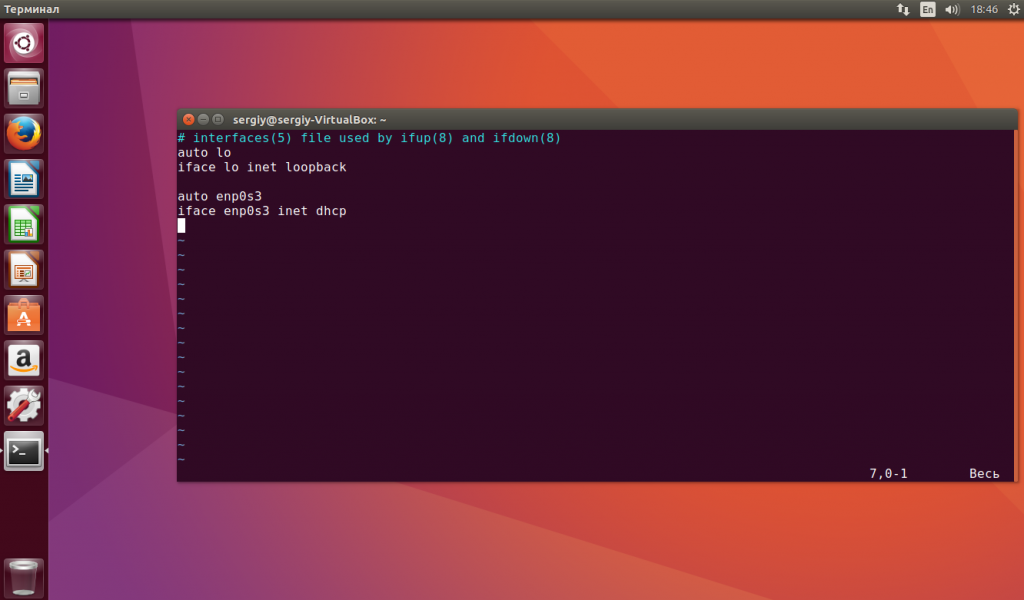
Затем, добавьте в эту секцию строчку:
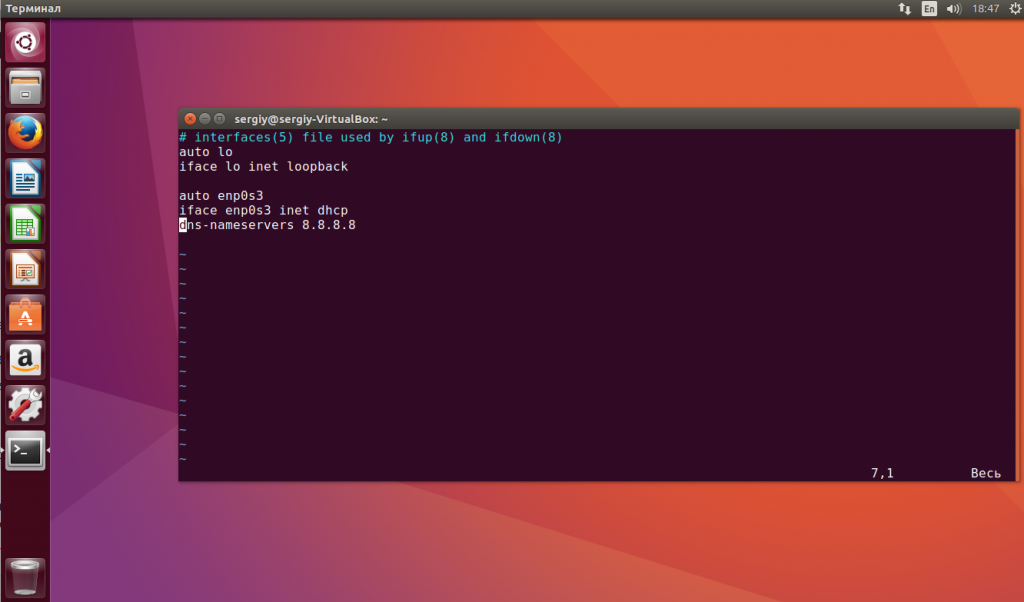
Здесь адрес 8.8.8.8 — это адрес вашего DNS сервера. Но эта настройка сработает, только если ваш DHCP клиент не пытается назначить адрес самостоятельно. Чтобы указать DNS адрес на уровне DHCP сервера нужно добавить такую строчку в конфигурационный файл /etc/dhcp/dhclient.conf:
sudo vi /etc/dhcp/dhclient.conf
supersede domain-name-servers 8.8.8.8

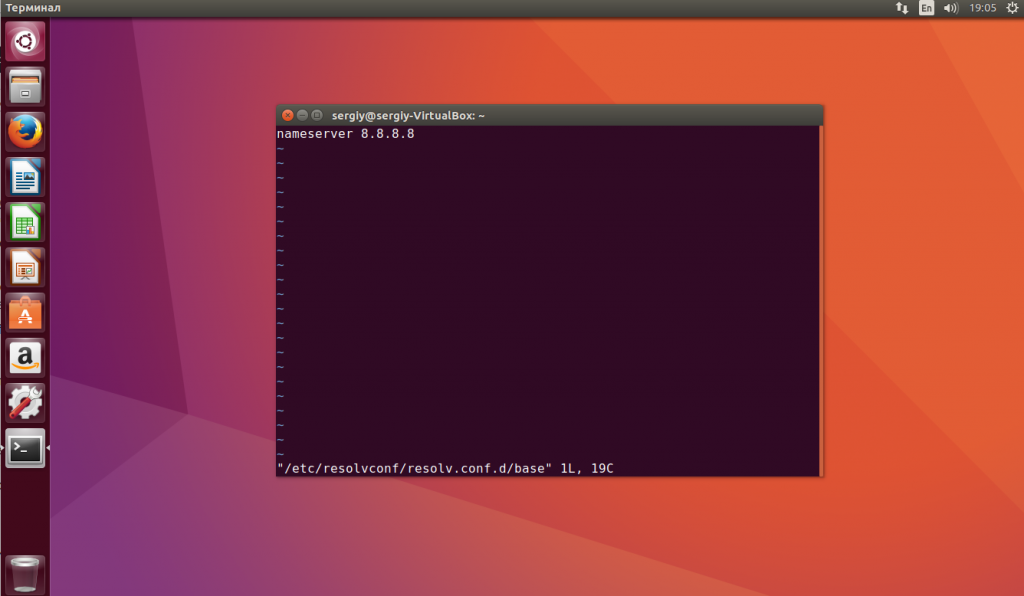
Здесь тоже адрес 8.8.8.8 означает адрес DNS сервера. Для верности, вы можете добавить свои адреса DNS серверов в файл /etc/resolvconf/resolv.conf.d/base:
sudo vi /etc/resolvconf/resolv.conf.d/base
Чтобы настройки вступили в силу необходимо перезапустить сеть:
sudo systemctl restart networking
Возможно, даже лучше будет если вы полностью перезагрузите компьютер. Теперь вы можете открыть /etc/resolv.conf и посмотреть применялся ли новый адрес DNS:
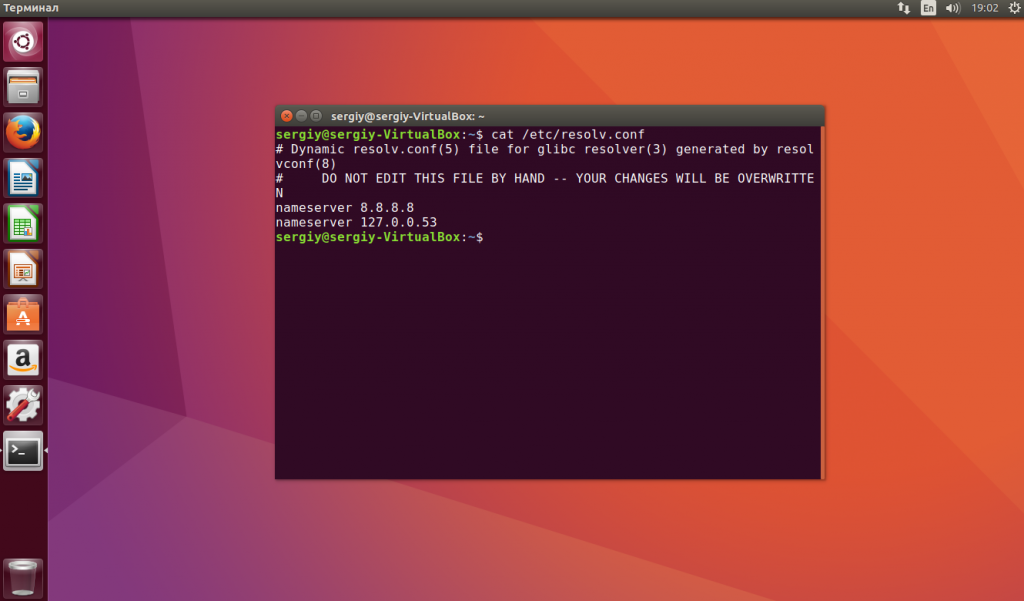
Как видите, в моем примере все заработало. Подобно этому выполняется настройка dns linux для любого дистрибутива.
Выводы
В этой небольшой статье мы рассмотрели как выполняется настройка DNS Ubuntu 16.04 через графический интерфейс или терминал. В Ubuntu автоматической настройкой DNS могут заниматься множество утилит и это создает некоторые проблемы при настройке, но со всем можно разобраться. Надеюсь, эта информация была полезной для вас.
Обнаружили ошибку в тексте? Сообщите мне об этом. Выделите текст с ошибкой и нажмите Ctrl+Enter.